Transcription
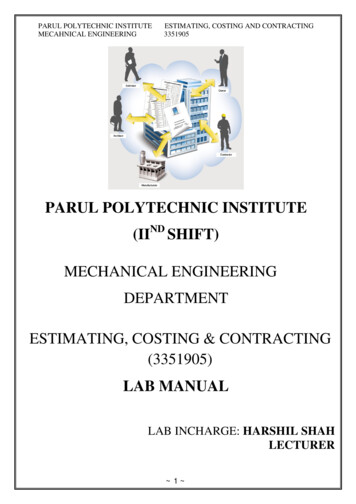
PARUL POLYTECHNIC INSTITUTEMECAHNICAL ENGINEERINGESTIMATING, COSTING AND CONTRACTING3351905PARUL POLYTECHNIC INSTITUTE(IIND SHIFT)MECHANICAL ENGINEERINGDEPARTMENTESTIMATING, COSTING & CONTRACTING(3351905)LAB MANUALLAB INCHARGE: HARSHIL SHAHLECTURER 1
PARUL POLYTECHNIC INSTITUTEMECAHNICAL ENGINEERINGESTIMATING, COSTING AND CONTRACTING3351905INDEXSr.No.Experiment Title1Preparatory Activity2Collection of Parts3Estimate welding cost4Calculate Pattern making andFoundry shop cost5Estimate forging cost6Estimate Machine Shop Cost7Estimation of Process cost8Mini project presentation910DatePrepare a list of elements ofcostJustify inclusion of overheadallocation or depreciation incost11Estimate Material cost12Construct Break Even Chart &Break Even Analysis13Cost reduction techniques 2 PageNo.SignRemark
PARUL POLYTECHNIC INSTITUTEMECAHNICAL ENGINEERINGESTIMATING, COSTING AND CONTRACTING3351905CERTIFICATEThis is to certify that student Mr./Ms.Enroll. No. of branchDivision of batch has satisfactorily completed thecourse in the subject “ESTIMATING COSTING AND CONTRACTING”;Subject code 3351905; Within the Laboratory Premises of the P.P.I.(2ND SHIFT), Limda during the academic year .Date of SubmissionSignature of the staff in ChargeName of the Staff in ChargeHead of the Department 3
PARUL POLYTECHNIC INSTITUTEMECAHNICAL ENGINEERINGESTIMATING, COSTING AND CONTRACTING3351905DATE:Experiment No. 1Title: Preparatory Activity.A. Write various equations to calculate area and volume of commonlyused shapes.B. List densities of commonly used materials.SR.NO.MATERIALDENSITYgm / ccSR.NO.1CAST IRON7.252ALUMINIUM AKWOODTINCOPPERDENSITYgm / cc7.870.657 - 0.8827.428.9C. Machining process parameters of various manufacturing processes forcommonly used materials.(1)-Specification of Drilling Machine:Capacity to drill holes in steelCapacity to drill holes in C.I.Morse taper in spindleDistance between spindle & columnSpindle transverseMinimum distance between table and spindleMinimum distance between base and spindleWorking surface tableTable diameterAvailability of speed variationFeed range per revolutionMotor speedRequired powerGross weightDimension of packing case 4 -50 mm ϕ62 mm ϕ5350 mm240 mm510 mm900 mm560 mm650 mm ϕ28 to 2000 R.P.M.0.2 to 0.5 mm1400 R.P.M.3 kW1200 kg750 x 450 x 2700 mm
PARUL POLYTECHNIC INSTITUTEMECAHNICAL ENGINEERING(2)-ESTIMATING, COSTING AND CONTRACTING3351905Specification for Milling Machine:Working surfaceNo. of Tee-slotsTop width of key slotAutomatic longitudinal transverseVertical motionLeft & right table swivelSpindle:No of spindleSpeed rangeDistance between top surface of table & spindlecentreDistance between bottom surface of table & spindlecentreDistance from spindle nose to bearingSpace between column sliding face and bearingFeed and rapid transverse:Longitudinal & cross feed per minuteRapid transverse per minuteGeneral:Power of spindle drive motorPower of table motorNett weight-1000 x 275 mm3225 mm590 mm494 mm45 -945 to 710 R.P.M.-495 mm-135 mm-460 mm565 mm-15 to 225 mm1750 mm-3 kW0.5 kW1500 kg(3)-Specification of Shaping Machine:Machine size (maximum stroke length)Stroke length (extreme)Table cross motionMinimum height between table and ramMaximum height between table and ramTravel of table sleeveSize of table topDepth of tableFeed changeRange of feed changeSpeed of ramStroke per minuteMotor horse powerNett weight-500 mm525 mm675 mm90 mm470 mm200 mm525 x 410 mm400 mm150.3 to 4 mm310 to 13352300 kg(4)-Specification of Planning Machine:Width of job workHeight of job work-1000 mm1000 mm 5
PARUL POLYTECHNIC INSTITUTEMECAHNICAL ENGINEERING-ESTIMATING, COSTING AND CONTRACTING3351905Length of job workWidth of tableDepth of bedMotor speedTotal heightVise - centreLength of bedDown feed of tool boxHorse powerCounter shaft pulleyCounter shaft speedNett weightGross weight(5)(i)(ii)-Specification of centre lathe:Capacity:Height of centreType of bedSwing on bedSwing on carriage wingSwing over cross slideSwing over gapDistance between two centresHead stock:Spindle nose boreSpindle socketTable (metric)Speed range:- Forward - 40 to 2000 RPM- Reverse - 60 to 2375 RPM(iii) Feed and thread:-2000 mm900 mm56 mm11002.5 meter600 mm4000 mm280 mm1338 x 14 cm400 RPM6000 kg7000 kg-260 mmStraight575 mm545 mm350 mm800 mm1500 mm-A-2/6-53 mm60/53 mm bore-16 steps8 steps-Longitudinal feed range--Cross feed range-(iv)-Lead screw pitchMetric threadInch threadModule threadCarriage:Cross slide travelTop slide travelTool side travel-60-0.04 to 2-24mm/rev.60-0.02 to 1-12mm/rev.6 mm40-05 to 28 mm60 to 56 to 1 Tpi40 - 0.25 to 14 mm-300 mm1500 mm24 mm x 25 mm 6
PARUL POLYTECHNIC INSTITUTEMECAHNICAL ENGINEERINGESTIMATING, COSTING AND CONTRACTING3351905(v)(vi)-Tail - stock:Sleeve diameterSleeve travelMotor ification of Cylindrical Grinding Machine:Capacity:Height of centreSwing over tableDistance between two centresMaximum grinding lengthGrinding wheel:Maximum diameterMinimum diameterWork head:Taper bore of spindleTail stock:CentreQuill movementTable head:Maximum table travelTable swill in both the directionWheel head:Cross travel of wheel headRotation of hand wheel or wheel feedWheel spindle speed (single)Speed steps for table transverseGeneral:Wheel head motorWork head motorTable drive motor-90 mm - morse taper200 mm-11 kW-150 mm300 mm450 mm400 mm-300 mm200 mm-MT2-MT225 mm-400 mm7 -150 mm1.27 mm225 mm4--Overall dimension of machine--Weight of machine-3 H.P., 1420 R.P.M.1 H.P., 920 R.P.M.1 H.P., 920 R.P.M.1525 x 1020 x 1320mm1450 kgSpecification of CNC high vertical lathe:Capacity:Table diameterMaximum swingMaximum turning dia.Maximum turning heightMaximum weight of job-1250 mm1600 mm1350 mm1140 mm5000 kg(7)(i)- 7
PARUL POLYTECHNIC INSTITUTEMECAHNICAL ENGINEERING(ii)(iii)(iv)(v)(vi)-ESTIMATING, COSTING AND CONTRACTING3351905Maximum cutting forceTable speed - rangeSpeed rage:LowHighCross rail:Maximum height of cross railMinimum height of cross railCross rail stepsTool head:Vertical travelTool sizeTool holder shank sizeHorizontal travel:Towards right of table centreFeedFeed rateTraverse rate:Rapid traverseElevating speed of cross rail-2500 kgf2 x stepless-284 RPM8350 RPM-1455 mm455 mm200 mm - 6 step-90 mm480 m32 mm x 32 mm-1170 mmstepless0.01 - 500 mm/rev.-10,000 mm/min.300 mm/minD. Various equations used to calculate different machining process timewith figure.1) Turning Operation:minTurning time, T Where L Length of cut in cm.F Feed cm / revolutionN Job revolution / min. - RPM2) Knurling Operation:Knurling time, T min 8
PARUL POLYTECHNIC INSTITUTEMECAHNICAL ENGINEERINGESTIMATING, COSTING AND CONTRACTING3351905Where L Knurling length - cmF Feed mm / rev.RPMN D Job diameter - cmS Knurling speed - m / min3) Facing Operation:minFacing time, T cmWhere L 4) Drilling Operation:minDrilling time, T Where L Depth of hole - cmF & N have same meaning as above5) Reaming Operation:minReaming time, T Where L Depth of bored hole - cmF & N have same meaning as above6) Threading Operation:min / cutThreading time, T Where Pitch for Single start threads 9
PARUL POLYTECHNIC INSTITUTEMECAHNICAL ENGINEERINGESTIMATING, COSTING AND CONTRACTING3351905for multi start threadsLead 7) Tapping Operation:min / cutTapping time, T Where L Length of cut in cmD / 2 Approach & over travel in cmP Thread pitch - cmN & S as per turning operation8) Chamfering Operation:Chamfering time, T minWhere L Length of chamfer- cm0.3 to 0.4 cmF & N as per turning operation 10
PARUL POLYTECHNIC INSTITUTEMECAHNICAL ENGINEERINGESTIMATING, COSTING AND CONTRACTING3351905DATE:Experiment No. 2Title: Collection of Parts.a. Collect the finished parts from industries/market/scrap merchantsconsisting:I.Welded parts.II.Casted parts.III.Forged parts.IV.Parts having five to six machining operations like cutting, turning,threading, grinding, milling, shaping, drilling, etc.b. Measure and prepare production drawings of all the parts using A4size paper (Manually). 11
PARUL POLYTECHNIC INSTITUTEMECAHNICAL ENGINEERINGESTIMATING, COSTING AND CONTRACTING3351905DATE:Experiment No. 3Title : Estimate welding cost.Introduction :Welding is very much important in the field of fabrication, reconditioning of wornparts, and has become the main joining process.WeldingWelding Technology is gaining importance in the field of fabrication, reconditioning of wornparts, and has become principal joining process of numerous metal products of different sizesand shapes. The welded joints give the strength equal to that of original metal. With theincrease in the importance of welding, estimation of welding cost has also become important,and therefore estimation of the welding cost is being discussed below.Welding is the process of joining two or more metal pieces by heating them up to the desiredtemperature with or without the application of pressure and with or without the use of fillermetal.Welding :Welding is defined as the process of joining two or more metal pieces by heating them up todesired temperature with or without the application of pressure and with or without use of fillermetal.Types of Welding :1. Pressure Welding :In this method, two metal pieces are heated up to plastic stage, pressure is applied andmetal bond is obtained.2. Fusion Welding ( Non Pressure Welding ) :In this method, two metal pieces are heated up to plastic stage ( fusion temperature )and cooled to room temperature. Filler metal is added as per requirement. In thismethod pressure is not applied. 12
PARUL POLYTECHNIC INSTITUTEMECAHNICAL ENGINEERINGESTIMATING, COSTING AND CONTRACTING3351905Types of Welding Joints :1. Butt Joint2. Corner Joint3. Tee Joint4. Edge Joint5. Lap JointEdge Preparation :Welding without edge preparation will not be strong enough because two metals may not behaving uniform contact throughout the depth. Therefore edge preparation is very important forgetting strong joint by welding. The surface should be cleaned so as so to make them free fromforeign material and should not be oily.Gas WeldingIn case of gas welding following two welding techniques are adopted in practice:(i) Leftward or Fore-hand welding.(ii) Rightward or Back-hand welding.Left-ward WeldingIn this type, welding is started from right hand side of the joint and proceeds towards the lefthand side. This method is suitable for welding plates up to 3 mm thickness without edgepreparation. 13
PARUL POLYTECHNIC INSTITUTEMECAHNICAL ENGINEERINGESTIMATING, COSTING AND CONTRACTING3351905Right-ward WeldingIn this type, welding is started from left hand side of the joint and proceeds towards the righthand side. This method is suitable steel plates which are of more than 5mm thickness. In platesup to 8mm thickness, edge preparation is not required beyond 8mm thickness plates should bebeveled to about 30 0.Gas welding can only be done on plates up to 25mm thickness.Estimation of Welding CostFor estimating the welding cost, following cost elements should be considered.a. Preparation Cost: It includes the cost of edge preparation, proper fit up and other elementsbefore actual starting of welding.b. Actual welding Cost: This includes two costs.(i) Cost of material used in welding process like O2H2C2 filer rod, and flux etc.(ii) Labor Cost. It will be obtained from wages sheets.(iii) Welding Finishing Cost. This includes, the expenditure made for finishing the weldingjoint after welding. Post welding treatment (such as heat treatment) cost can also be taken in toaccount.(iv) On-cost. All the other overheads on the equipment and other facilities considered under oncost heading.Welding Techniques :1. Left ward Welding :The welding is started from right hand side of the joint and proceeds towards theleft hand side. This method is suitable for welding plates up to 3mm thickness withoutedge preparation and up to 5 mm thickness with edge preparation. 14
PARUL POLYTECHNIC INSTITUTEMECAHNICAL ENGINEERINGESTIMATING, COSTING AND CONTRACTING33519052. Right ward welding:The welding is started from left hand side of the joint and proceeds towards the rightside. This method is suitable for welding the plates of thickness more than 5 mm. Andedge, preparation is required beyond 8 mm thickness plates.Estimation of Welding cost :For estimation of the welding cost, following cost elements should be considered.A. Preparation Cost: It includes the cost of edge preparation, proper fit up and otherelements before actual starting of welding.B. Actual welding cost: This includes two costsi.Material Cost: Following are the examples of material cost :a.b.c.d.e.ii.The cost of raw material e.g. sheet, plate stock, casting, etcFiller metal and electrodeSpare parts like nut bolt, rivet, hinge, etcScrape and primary packaging costOxygen, Acetylene gas etc.Labour Cost: Following are the examples of labour cost:a. Labour cost for edge preparation, welding, cleaning etcb. Labour cost for stress removal processc. Painting, brushing, burnishing, anodizing etc labour charges.C. Overhead Cost : This cost includes following :i.ii.iii.iv.v.vi.vii.inspection and quality control costpacking and transportation costtooling costadministration costfactory overheadsells and distribution costenergy cost ( e.g. electricity bill )D. Welding Finishing Cost : This includes, the expenditure made for finishing thewelding joint after welding. Post welding treatment (e.g. heat treatment) cost isincluded.E. Factors affecting the welding cost :Following are the factors affecting the cost of different welding:a.Gas Welding :i.ii.iii.iv.Cleaning time of welding plate.Time for fitting work piece plates in fixturesCost of base plateConsumption of oxygen and acetylene gases. 15
PARUL POLYTECHNIC INSTITUTEMECAHNICAL ENGINEERINGv.vi.vii.viii.ix.x.ESTIMATING, COSTING AND CONTRACTING3351905Filler rod and flux consumptionLabour costFatigue and personal allowancesWaste material etc.Direct expensesTime of weldingArc ng time of welding plateCost of base plateTime for fitting work piece plates in fixtures.Consumption of electrodeTime of weldingLabour costPower consumptionFatigue and personnel allowancesCost of post welding processes like heat treatment etcWastage of material, electrode etcEfficiency of the machineProcedure to find out the cost of welding :a.Gas welding :i.Cost of Oxygen:a. Consumption of Oxygen Consumption rate of O₂ x Welding Timeb. Cost of Oxygen Consumption of 0₂ x Cost of 0₂ (Rs / m3 )ii.Cost of Acetylene:a. Consumption of Acetylene Consumption rate of C₂H₂ x Welding Timeb. Cost of C₂H₂ Consumption of C₂H₂ X Cost of C₂H₂ ( Rs. / m3 )iii.Cost of Filler Rod :a. Filler rod ( length of filler rod ) consumed Welding Length xconsumption rate of rod per meter length of welding (m/meter ofwelding )b. Filler rod mass Length of filler rod X c/s area of rod x densityc. Cost of filler rod Mass of filler rod X rate of filler rod (Rs. / kg )iv.Total welding material cost Cost of 02 Cost of C2H2 Cost of filler rodb.Arc welding :i.Welding consumable costa. Consumption of electrode Consumption rate of electrode per meterlength x total welding lengthb. Electrode cost consumption of electrode x rate of electrode ( Rs. /electrode length ) 16
PARUL POLYTECHNIC INSTITUTEMECAHNICAL ENGINEERINGii.Labour cost :a. Welding timeESTIMATING, COSTING AND CONTRACTING3351905 Totallength of welding inWelding speed (in m / min)If operating factor is considered thenActual Welding time Examples:Total length of welding in meterWelding speed (in m / min) X operating factor(Examples will be given by concerned lecturer) 17 meter
PARUL POLYTECHNIC INSTITUTEMECAHNICAL ENGINEERINGESTIMATING, COSTING AND CONTRACTING3351905DATE :Experiment No. 4Title : Calculate Pattern making and Foundry shop cost.Introduction :Casting is done to produce intricate shaped terms, which are otherwise difficult and very costlyif produced by any other methods. In casting, molten metal is poured into a cavity ( mould ) ofthe desired shaped form and allowed to solidify.Mould is prepared by pattern. Metal contracts on solidification so the size of the castingwill be slightly smaller than the size of cavity or pattern. So to overcome this problem,allowances are considered while making the pattern.Pattern :Pattern is a model of the product to be casted. The dimension of the pattern includes theallowances i. e. shrinkage allowances, draft allowance and machining allowances.Pattern Material :Wood, Metals, Plaster of Paris, Plastic, etc. and precision work wax is used as a patternmaterial.Pattern Allowances :Following pattern allowances are added in the size of the work piece to be casted.1. Shrinkage ( Contraction ) Allowances : As the temperature of the metal reduces itcontracts. So when metal is poured in to the cavity ( mould ) then it contracts due toreduction in temperature. So it’s size reduces. This allowance is considered from therate of contraction of the material. the rate of contraction is different for differentmaterials.2. Machining Allowances :After casting, machining is required to be done forachieving the finished shape and size of the work piece. This allowances depends on thenature and quality of the work.3. Draft Allowances : This allowance is provided to facilitate the withdrawal of thepattern from the mould. For this purpose a slight taper is provided in the pattern. 18
PARUL POLYTECHNIC INSTITUTEMECAHNICAL ENGINEERINGESTIMATING, COSTING AND CONTRACTING33519054. Distortion Allowances : This allowance is given for intricate shaped work piece likeU or V shape. When possibility of distortion is more in any particular direction, thistype of allowances are provided to overcome the distortion.5. Shake Allowances : Before pattern is taken out from the cavity, hammering isdone with wooden hammer so that it can be easily taken out. Therefore the sizeof mold cavity increases slightly. So negative allowance is provided to overcomethis problem, which is known as shake allowances.Estimation of Pattern Cost :The pattern cost can be divided in to the following :1. Direct Material Cost : The sum of expenditure made on material required for patternmaking is known as direct material cost. Volume of material required for patternmaking is calculated and different allowances are added.Size of raw material Size of finished job – pattern allowances finishing andcutting allowancesRaw material required ( weight ) Volume of raw material x densityCost of pattern material Direct material cost x cost of pattern material per kg2. Direct Labour Cost : This cost is calculated from labour rate of pattern makers.3. Overheads : The expenditure other than direct material and direct labour is includedin overhead.Examples :(Examples will be given by concerned lecturer) 19
PARUL POLYTECHNIC INSTITUTEMECAHNICAL ENGINEERINGESTIMATING, COSTING AND CONTRACTING3351905DATE:Experiment No. 5Title : Estimate forging cost.Introduction :ForgingForging is the process in which metal is heated at sufficiently high temperature to bring it to theplastic state. During this plastic state desired shape is given by applying sufficient force eitherby hand (manually) or by machine.The shop in which forging is done is known as 'Forging shop'.Type of forginga. Hand forging.b. Machine forging.Hand ForgingWhen forging is done by hand, the process is known as hand forging. In case of heavy jobs,smith is assisted by a hammer-man. Important hand forging operations are drawing down,upsetting, bending, punching, swaging and shearing etc.Machine ForgingThe processes, in which forging is done by machines are known as Machine Forging. Machineforging is useful for heavy and complicated jobs requiring large forces.(i) Smith forging: In this process metal is heated in suitable forges and then shaping of themetal is carried out by power or steam hammers and hand tools. In this method accuracydepends upon the experience and skill of the smith.With this method, similar pieces cannot be obtained and process requires too much time.This method is used for large and simple types of products.(ii) Drop forging: It is a process of hammering the metal during plastic state in impressiondies. Die is used in two parts, one die is allowed to drop on the other, the hot metal in theplastic state is thus squeezed between the two dies and thus form the desired shaped of theforged product. Steam or power hammer can be used, instead of allowing the upper die to dropon the lower die from certain height. This process takes less time.This is generally used, wherelarge numbers of identical shapes of good quality forgings are to be produced. 20
PARUL POLYTECHNIC INSTITUTEMECAHNICAL ENGINEERINGESTIMATING, COSTING AND CONTRACTING3351905(iii) Press Forging: Very heavy forgings are given proper shapes by the presses. This press caneither be hydraulically operated or mechanically operated. Press forging method employssqueezing of plastic metal or metal in plastic condition and gives the required shape in the dies.Pressure is applied continuously and gradually. By applying gradual pressure excessivevibration can be avoided, which may otherwise disturb the machine alignment by rapid blowsof hammer.Forging OperationsThe shape of material can be transformed by forging with the aid of the following operations:1. Drawing Down: It is also known as Drawing Out. This operation is performed to increasethe length of the workpiece in forging by decreasing the cross-sectional area.This process is performed by hammering the hot workpiece lengthwise to reduce cross-section.2. Up Setting: This is the reverse of Drawing Down operation. In this operation, the crosssection of workpiece is increased at the expense of length.This process is performed by hammering one end of hot workpiece while other end issupported against the anvil.3. Bending: Bending is done by holding the workpiece between two fixtures and desired bendcan be given by striking the workpiece with the help of hammer. This operation can also becarried out on the anvil break.4. Punching and Drafting: Punching operation is performed by a tool called punch, forproducing holes in the workpiece, when it is in the hot state; and drafting is an operation carriedon by a special tool known as draft to enlarge the hole.Forging Estimation ProcedureEstimation procedure varies from shop to shop and person to person but for a generalprocedure, following factors may be considered:Estimation of Net WeightFor estimation of net weight of the forged component, following procedure is adopted:a. Break up the job drawing into suitable geometrical section, whose volumes can easily becalculated by using mensuration.b. Next, find the value of each section, neglecting rounded corners and taking suitableassumptions.c. Now, find total volume of material required by subtracting volume of the hollow spaces.d. Lastly, calculate the weight of the component by multiplying the total volume with itsdensity. 21
PARUL POLYTECHNIC INSTITUTEMECAHNICAL ENGINEERINGESTIMATING, COSTING AND CONTRACTING3351905Estimation of LossesCertain amount of material is lost during different forging operations. The exact estimation oflosses is very difficult, but by practical experience, the losses can be calculated during forgingas accurate as possible. Various losses in forging are:(i) Tong Loss: While performing forging operations, some length of stock is required forholding the job in tong. This length is an extra length, which is removed after completion of thejob. For estimation purposes, the weight of the extra length is also considered and is known asTong loss. 2 to 3 cm of the stock length.(ii) Scale Loss: The outer surface of the hot metal is generally oxidized, and when hammeringis done oxidized film is broken and falls down in the form of scale. It reduces the dimensions ofthe job, and therefore, this loss must be considered for estimation purposes. Generally, it istaken as 6% of the net weight.(iii) Flash Loss: It is the surplus metal, which comes out between the two meeting surfaces ofthe dies. For getting finished product, this surplus metal is required to be trimmed off.This loss may be calculated by assuming it to be 20mm wide and 3mm thick all around theperiphery of the dies.Thus, volume of flash loss periphery x 20x 3 cu mm nearly.(iv) Shear Loss: The required sizes of workpiece for forging operations are obtained from longbars by sawing or shearing. In sawing operation, some material is always lost. If last piece ofbar is not to be required length, it is rejected. This loss of material is taken as 5% of the netweight.(v) Sprue Loss: The portion of metal between the length held in the tong and the material inthe die is called sprue. This is also a metal loss and can be taken as 7% of the weight.Thus we can see that nearly 15-20% of the net weight of metal is lost during forging.Therefore, in estimation their consideration is very essential and total weight will be net weightof job plus sum of the weight of different losses occurred during forging. Thus this gives theamount of weight of material required for forging.Forging is the process, in which the heated at sufficiently high temperature to bring it to theplastic state desired shape is given by applying sufficient force either by hand ( manually ) orby machine.Types of Forging :1. Hand Forging : When forging is done by hand ( manually ), the process is known asHand Forging. In case of heavy jobs smith is assisted by a hammer man. Drawingdown, upsetting, bending, punching, swaging and shearing are important hand forgingoperation. 22
PARUL POLYTECHNIC INSTITUTEMECAHNICAL ENGINEERINGESTIMATING, COSTING AND CONTRACTING33519052. Machine Forging : The processes, in which forging is done by machines are knownas Machine Forging. Machine forging is useful for heavy and complicated jobsrequiring large forces.Machine forging can be classified as :I.II.Smith Forging :In this process metal is heated in suitable forges and thenshaping of the metal is carried out by power or steam hammers and hand tools.In this method accuracy depends upon the experience and skill of the smith.With this method, similar pieces cannot be obtained and process requiretoomuch time. This method is used for large and simple types of products.Drop Forging : It is the process of hammering the metal during plastic statein impression dies. Die is used in two parts; one die is allowed to drop on theother. The hot metal in the plastic state is thus squeezed between the two diesand thus forms the desired shape of the forged product. Steam or power hammercan be used, instead of allowing the upper die to drop on the lower die formcertain height. This process takes less time.This is generally used, where large number of identical shapes of goodquality forgings are to be produced.III.Press forging : Very heavy forgings are given proper shape by thepresses. These presses can either be hydraulically operated or bemechanically operated. Press forging method employs squeezing ofplastic metal or metal in plastic condition and gives the required shape indies. Pressure excessive vibrations can be avoided, which may otherwisedisturb the machine alignment by rapid blows of hammer.Forging Operations :The shape of material can be transformed by forging with the aid of the following operations :1. Drawing Down : It is also known as Drawing Out. This operation is performed toincrease the length of the work piece in forging by decreasing the cross-sectional area.This process is performed by hammering the hot work piece lengthwise toreducecross-section.2. Up Setting : This is the reverse of Drawing Down operation. In this operation, thecross-section of the work piece is increased at the expense of length.This process is performed by hammering one end of hot work piece while other end issupported against the anvil.3. Bending : Bending is done by holding the work piece between two fixtures anddesired bend can be given by striking the work piece with the help of hammer. Thisoperation can also be carried out on the anvil beak. 23
PARUL POLYTECHNIC INSTITUTEMECAHNICAL ENGINEERINGESTIMATING, COSTING AND CONTRACTING33519054. Punching and Drafting: Punching operation is performed by a tool called punch, forproducing holes in the work piece, when it is the hot state; and drafting is an operationcarried on by a special tool known as draft to enlarge the hole.5. Squeezing : The hot metal is hold between two dies and pressure is applied so theshape of the material will change as per the internal shape of the die.6. Setting Down : It is the process of providing the neck to some portion of the workpiece by reducing the cross sectional area.7. Swaging : Swage is used for shaping the metal in the required shape.Examples :(Examples will be given by concerned lecturer) 24
PARUL POLYTECHNIC INSTITUTEMECAHNICAL ENGINEERINGESTIMATING, COSTING AND CONTRACTING3351905DATE:Experiment No. 6Title : Estimate Machine Shop Cost.Introduction :Machining is done to shape the product as per requirement There are certainmachining operations and there are some methods to calculate the cost of machiningcostTerms :1. Speed (N) : It is the speed at which job is rotating about in the chuck Unit is rpm( Revolution per minute)2. Cutting Speed (S) : The distance traveled by the tool along the material to be cut inunit time is known as Cutting Speed (S) . Unit is m/min.S πDN100m / minN Rotational speed of work piece in RPMD Diameter of the work piece in cm.3. Feed ( F ) : The distance through which the tool advances in to the work pieceduring one revolution of the work piece or the tool or cutter. Unit is mm/rev.F LNxTF Feed in mm per revolutionN Rotational speed of work piece in RPMT Time in minL Cutting length. in mm4.
parul polytechnic institute estimating, costing and contracting mecahnical engineering 3351905 1 parul polytechnic institute (iind shift) mechanical engineering department estimating, costing & contracting (3351905) lab
