Transcription
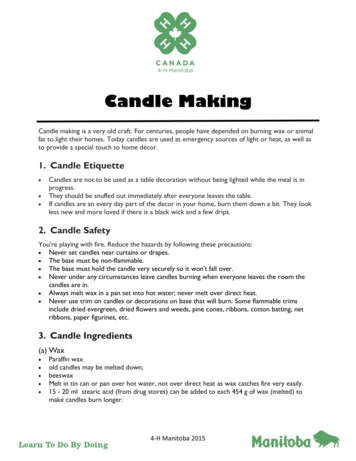
Candle MakingCandle making is a very old craft. For centuries, people have depended on burning wax or animalfat to light their homes. Today candles are used as emergency sources of light or heat, as well asto provide a special touch to home décor.1. Candle EtiquetteCandles are not to be used as a table decoration without being lighted while the meal is inprogress. They should be snuffed out immediately after everyone leaves the table. If candles are an every day part of the decor in your home, burn them down a bit. They lookless new and more loved if there is a black wick and a few drips. 2. Candle SafetyYou're playing with fire. Reduce the hazards by following these precautions: Never set candles near curtains or drapes. The base must be non-flammable. The base must hold the candle very securely so it won't fall over. Never under any circumstances leave candles burning when everyone leaves the room thecandles are in. Always melt wax in a pan set into hot water; never melt over direct heat. Never use trim on candles or decorations on base that will burn. Some flammable trimsinclude dried evergreen, dried flowers and weeds, pine cones, ribbons, cotton batting, netribbons, paper figurines, etc.3. Candle Ingredients(a) Wax Paraffin waxold candles may be melted down;beeswaxMelt in tin can or pan over hot water, not over direct heat as wax catches fire very easily.15 - 20 ml stearic acid (from drug stores) can be added to each 454 g of wax (melted) tomake candles burn longer.4‐H Manitoba 2015
(b) Wick Old wicks may be removed from used candles.Wicks can be purchased at craft stores and online.Kitchen string can be braided together (using three or more strands) and soaked 24 hours ormore in a mixture of 15 ml Borax, 15 ml salt, and 1.25 litres of water, then dried.(c) ColoringThe following coloring materials will work: old crayons (takes a lot to get bright colors) special candle dyes bright colors can be obtained by using just a bit. artist's oil paints or pastels old lipstickFood coloring won't work very well. It's fun to experiment with other colorings to see whichones work -just melt a little wax and add color. Be sure to notice if they dissolve completely(unless you like speckled candles).4. Basic Methods for Poured or Molded Candlesa) Square or rectangular shape:Bars of paraffin may be "glued" to each other by slightly softening theedges in a heated pan or by quickly dipping into melted wax, thenpressing two blocks together. Place the wick between the middle two bars before gluing themtogether. b) Molding Use any shape of container or you want. Chose a container that willnot melt when the hot wax is added - metal, is ideal. Be sure it isclean.Before pouring melted wax into the container, punch a hole in thecentre of the bottom of the can.Insert the wick through this, tying a large knot on the bottomoutside.Cover the knot and hole with masking tape or duct tape to preventwax leakage.Wind the other end of the wick around a pencil laid across the top ofthe can. This keeps the wick straight up the middle.Pour in melted wax (can be colored or clear) and let set.If a depression appears in the centre after the candle is cool, fill with more wax until it isnearly flat across the top.Cut the knot off the bottom and remove from container.If a tin can was use, remove the bottom of the tin can with a can opener and push the candleout the top. Then cut off the knot.It may be necessary to dip mold into hot water for a few seconds to get the candle out.Polish surface of candle by buffing with a soft cloth.5. InspirationsAn almost unlimited variety of shapes and sizes, colorsand textures are possible when making2
your own candles. The following ideas may inspire you to dream upsomething all your very own.(a) Frosted Candles Start with a basic shape candle.Melt paraffin; for frosting add color if desired.Let cool till mixture begins to harden.Whip to a froth with a fork or beater.Apply to candle with a fork or turn candle in frosting until it is coated.The whole candle does not necessarily have to be covered -bare spots addvariety and interest by the contrast in texture.(b) Ice Cube Candles Break ice cubes fairly fine. Uneven sizes make different size holes, but awhole cube makes too big a hole for the candle to support itself.Stand a wick up the centre of a mold. (a milk or cream carton works verywell for this type of candle).Pack ice cubes around wick to as high as the candle will be.Slowly pour melted paraffin into mold, shaking mold as you pour. When waxreaches top of ice cubes, set mold down and let it stand until wax is hard andis melted.Remove from mold and drain out water.ice(c) Aluminum Foil Candles Make a bunch of balls in varying sizes from squashed-up aluminum foil.Place wick in mold.Fill with aluminum balls and proceed as in ice cube candles.Balls are not removed from the candles.(d) Stackerations Make several molded candles (with no wicks) using tart shells, cookie cutters,jelly molds etc. as molds. Make sure the tops are very flat!Vary the colors in the molds if desired. Be sure the colors are attractive witheach other.Remove from molds and stack on top of each other -right side up or upsidedown or both whatever looks nicest.When you have stacked them up the way you want them, "glue" togetherwith hot melted paraffin.Let set.To add wick, poke a hot knitting needle-down the centre of the candle stack, and follow itwith the wick.(e) Floating CandlesChoose VERY SMALL jelly molds, tart shells or cookie cutters to use as molds. 3 to 4 cm isideal. If cookie cutter or mold has bottom or top, lay it flat on wax paper.Pourin a thin layer of wax and let set. When the wax "bottom" is hard,finishpouring in wax. If there is a handle and hole on one side, cover holecompletely with several layers of masking tape. Insert wick before pouring or after candle begins to set. Float candles on water in the most beautiful dish you can find.Water can be colored with food coloring to match or contrast with.3
f) Striped CandlesAdd a different color to separate batches of melted wax.Pour alternately into candle mold with wick, letting wax harden after eachaddition. Remove mold. (g) Marbelized CandlePlace' a thin candle or a wick in the centre of a mold.Melt two bars of wax separately and color each.Pour into separate shallow pans and let harden.Break hardened wax into pieces and dump in around the candle or wick,alternating colors. Melt two bars of wax and add a very small amount of one color usedpreviously (or leave white). Pour this all around chipped wax and let it harden. Remove mold. (h) Glow CandleMake frosting as in “a) Frosted Candle.”Blow up a thick-skinned balloon (regular ones will break).Frost the balloon completely except for space about two inches indiameter. Frosting must be fairly thick. When the frosting is hard, let the air out of the balloon and removefrom the candle. Soften the wax on the end opposite to the hole and press down onto base so the candle will sit flat. Drip a bit of wax inside the bottom of the candle and stand a thincandle upright. The thin candle is lit -the outside doesn't melt much,but produces a lovely diffused glow. Beeswax Sheet Candles:An alternate way of making candles is to use sheets of beeswax.Here are two methods:(a) Rolled Beeswax CandleMaterials: Sheets of beeswax (approximately 16 x 8 inches) Wick Hair dryerInstructionsIf the beeswax you are working with is rolled, gently unroll it. If it’s stiff, or cracks whileunrolling, soften it by warming it with a hair dryer set on low. Lay a piece of wick along one of the short edges of the beeswax sheet. Roll it up 4
(b) Cookie Cutter Candles To make this project, lay sheets of beeswax individually on acutting board. Using a cookie cutter, cut six shapes (or more if a thicker candleis desired) from beeswax. For nonsymmetrical shapes, turn the wax over if it has a "right"side, to cut half of the shapes. Sandwich the wick in the center of the wax layers, leaving 1/2 inch at the top of the candle.Press the wax shapes together. Note: If they don't stick together well enough, heat slightly with a hair dryer.)To burn the candles, secure them on another small piece of beeswax or on a nonflammablesurface.6. Cleaning UpProtect work surface from drips by working on thick newspapers covered with a layer of waxpaper. All pots, pans, etc. should be cleaned thoroughly while they are still hot. Use somethingdisposable like paper towels or old news papers to wipe off wax. To dissolve the final thin coating of wax that is likely to remain on the kitchen utensils, wipewith paper towels soaked in methyl hydrate. Then wash the utensils THOROUGHLY with hotwater and soap. Rinse several times. To remove wax from clothing, tablecloths, etc., scrape as much wax as possible off the fabricusing a dull knife. You may wish to place the item in the refrigerator or freezer first to hardenthe wax and make it easier to scrape. To remove remaining wax, place fabric between twoblotters and iron with a warm iron. If any stain remains use a commercial spot treatment andwash as recommended for the garment. 7. Evaluation Does the candle measure up to safety standards? no flammable trims non-flammable baseDo the trims suit the character of the candle?Does the base not detract from the beauty of the candle?Is the color combination of the finished candle and base and trims attractive?Is the candle itself smooth, clean, and free from air bubbles, dust, dirt, finger prints, etc.?Does the wick stand straight up through the centre?5
Project Resources:Pinterest – The Visual Discovery ToolPinterest is a social media bulletin board for you to virtually pin pictures of thingsthat interest you to your own personal boards – Pin-Explore-Discover! 4-HManitoba has a Pinterest account. Each project series has a board full of fun andinteresting ideas. There are also boards for 4-H Awesome, Community Service, Volunteers,Communications and Building Blocks. Check it out at www.pinterest.com/4hmanitoba/.The following links may be useful in completing your com/index htm files/rolling.pdfhttps://www.youtube.com/watch?v Tkv8vG5-fVQ How to Make a Candle: Step-by-StepInstructions for Learning how to Make Candleshttps://www.youtube.com/watch?v Dei0Rl Z4ak Easy Christmas Candles: Frosted CandlesSections of the Candle Making Fact Sheets were adapted with the permission of MARFD fromCreative Craft Techniques - Manitoba Department of Agriculture and the Manitoba 4-H Projects:Nature Crafts - 2004; Crafts Around the World - 2004; Cloverbud - 2013.Manitoba 4-H Contact Information1129 Queens Avenue Brandon, MB R7A 1L9Ph: (204) 726 - 6613 Fax: (204) 726 - .4h.mb.ca6
Candle Making 4‐H Manitoba 2015 Candle making is a very old craft. For centuries, people have depended on burning wax or animal fat to light their homes. Today candles are used as emergency sources of light or heat, as well as to provide a special
