Transcription
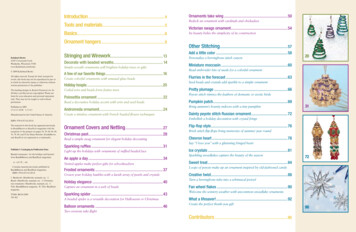
Introduction.4Tools and materials.5Basics.6Ornament hangers.9Kalmbach Books21027 Crossroads CircleWaukesha, Wisconsin 53186www.Kalmbach.com/books 2009 Kalmbach BooksAll rights reserved. Except for brief excerpts forreview, this book may not be reproduced in part orin whole by electronic means or otherwise withoutwritten permission of the publisher.Stringing and Wirework. .13Decorate with beaded wreaths. 14Simple wreath ornaments will brighten holiday trees or giftsA few of our favorite things.16Create colorful ornaments with unusual glass beadsHoliday hoopla.20The beading designs in Beaded Ornaments for theHolidays and Beyond are copyrighted. Please usethem for your education and personal enjoymentonly. They may not be taught or sold withoutpermission.Coiled wire and beads form festive treesPublished in 200913 12 11 10 09 1 2 3 4 5Andromeda ornament.24Manufactured in the United States of AmericaCreate a timeless ornament with French beaded-flower techniquesPoinsettia ornament.22Bead a decorative holiday accent with wire and seed beadsPublisher’s Cataloging-in-Publication DataBeaded ornaments : for the holidays and beyond :from Bead&Button and BeadStyle magazines.p. : col. ill. ; cm.Contains material previously published inBead&Button and BeadStyle magazines.ISBN: 978-0-87116-283-01. Beadwork--Handbooks, manuals, etc. 2.Beads--Handbooks, manuals, etc. 3. Christmastree ornaments--Handbooks, manuals, etc. I.Title: Bead&Button magazine. II. Title: BeadStylemagazine.TT860 .B4334 2009745.582Bedeck an ornament with cardinals and chickadeesVictorian swags ornament.54Its beauty belies the simplicity of its constructionOther Stitching. .57Add a little color.58Personalize a herringbone stitch crayon20Miniature moccasin.60Bead embroider bits of suede for a colorful ornamentFlurries in the forecast.63Seed beads and crystals add sparkle to a simple ornamentPretty plumage.66Peyote stitch mimics the feathers of domestic or exotic birdsPumpkin patch.69Bring autumn’s bounty indoors with a tiny pumpkin31Dainty peyote stitch Russian ornament.72Embellish a holiday decoration with crystal fringeISBN: 978-0-87116-283-0The material in this book has appeared previouslyin Bead&Button or BeadStyle magazines with theexception of the projects on pages 34, 58, 60, 66, 69,76, 78, 84, and 92 by Diane Hertzler. Bead&Buttonand BeadStyle are registered as a trademarks.Ornaments take wing.50Ornament Covers and Netting. .27Christmas past.28Bead a simple swag ornament for elegant holiday decoratingSparkling ruffles.31Light up the holidays with ornaments of ruffled beaded laceAn apple a day.34Netted apples make perfect gifts for schoolteachersFlip-flop style.76Brick stitch flip-flops bring memories of summer year roundChevron heart.78Say “I love you” with a glistening fringed heartIce crystals.81Sparkling snowflakes capture the beauty of the season72Sweet treat.84Frosted ornaments.37Loops of peyote make up an ornament inspired by old-fashioned candyCrown your holiday baubles with a lavish array of pearls and crystalsCreative twist.88Holiday elegance.40Turn a herringbone tube into a whimsical pretzelCapture an ornament in a web of beadsFan wheel flakes.90Sparkling spider.43Welcome the wintery weather with uncommon snowflake ornamentsA beaded spider is a versatile decoration for Halloween or ChristmasWhat a lifesaver!.92Balloon ornaments.46Create the perfect thank-you giftTwo versions take flightContributors.9590
IntroductionTools and materialsyou make your home cheerful and showcase your unique style all year round.Many of the projects in this book usesimilar beading tools and suppliesto create a wide variety of differentornaments. These tools and materialsare available in bead and craft stores,through catalogs, and online; sources arelisted for the most hard-to-find materialsin the project supply lists. Here are themore common tools and materials you’llwant to be familiar with to completemost of the projects in this book.Some of the projects featured here can be used to decorate for particular holidays — theTOOLSHear someone say “ornaments” and you’re likely to think of a bedecked Christmastree, its branches laden with family heirlooms and craft projects. You’ll find plentyof such traditional beaded ornaments for the winter holidays in this book. But BeadedOrnaments for the Holiday and Beyond also includes a selection of projects that will helpherringbone stitch pumpkin in “Pumpkin patch” (p. 69) for Halloween or Thanksgiving,the fringed heart in “Chevron heart” (p. 78) for Valentine’s Day — while others areadaptable for multiple holidays, like the “Sparkling spider” (p. 43) that, depending onyour color choice, can work as a Christmas or a Halloween decoration. Still other projectscan work both on the Christmas tree and off — use the “Balloon ornaments” (p. 46) todecorate a Christmas tree or perhaps a baby’s nursery. The ornaments included here areversatile. Try using ornaments around your home as drawer pulls and as embellishmentson your door handles and drapery ties. There are plenty of great gift ideas included here aswell. The netted apple in “An apple a day” (p. 34) makes an ideal gift for the teachers inyour life. And the peyote stitch roll of Lifesavers (p. 92), designer Diane Hertzler tells us, isperfect to give as a thank-you present.We’ve also tried to represent a variety of skill levels and beading techniques with theseornaments. Projects range from the easiest stringing projects that beginners — or beaderswith minimal free time — will be able to create, to more complex stitching and nettingprojects that will challenge the experienced beader. These projects are collected from thepages of BeadStyle and Bead&Button, so you know they’re editor tested and suresuccesses. Plus, Beaded Ornaments for the Holiday and Beyond features nine new projectsthat have never appeared in the magazines.So turn the page and discover 27 projects to help you deck your home with beadedornaments, during the holidays and beyond!Chainnose pliershave smooth, flatinner jaws, and thetips taper to a point.Use them for grippingand for opening and closing loops andjump rings.Roundnose pliershave smooth, tapered,conical jaws used tomake loops. The closerto the tip you work, thesmaller the loop will be.Crimping pliers havetwo grooves in theirjaws that are used tofold or roll a crimpinto a compact shape.With wire cutters, usethe front of the bladesto make a pointed cutand the back of theblades to make a flatcut. Never use your jewelry wire cutterson memory wire; use heavy-duty wirecutters or bend the memory wire backand forth until it breaks.Beading needles are coded by size. Thehigher the number, the finer the beadingneedle. Unlike sewing needles, the eye ofa beading needle is almost as narrow asits shaft. In addition to the size of the bead, the number of times you will passthrough the bead also affects the needlesize that you will use; if you pass througha bead multiple times, you may need touse a smaller needle.BEADSA huge variety of beads is available, butthe beads most commonly usedin the projects in this bookare seed beads. The mostcommon and highestquality seed beads todayare manufactured inJapan or the CzechRepublic. These seedbeads are the mostuniform and predictablein size, shape, and hole size.Seed beads are sized by number, andrange from 20 (6mm) to 240 (smallerthan 1mm) — the higher the number, thesmaller the bead. Bead sizes are writtenas a number with a symbol, such as 11/0or 110 (pronounced “eleven aught”). Themost common seed bead size is 110, butmost suppliers carry sizes ranging from60 to 150. Seed beads smaller than 150 aredifficult to work with as their holes aretiny, and thus are hard to find.THREADThreads come in many sizes andstrengths. Size (diameter or thickness) isdesignated by a letter or number. OO, O,and A are the thinnest threads; B, D, E, F,and FF are subsequently thicker.Plied gel-spun polyethylene(GSP), such as Power Pro orDandyLine, is made frompolyethylene fibers thathave been spun into twoor more threadsthat are braidedtogether. It isalmost unbreakable,doesn’t stretch, and resists fraying. Thethickness can make it difficult to makemultiple passes through a bead. It is idealfor stitching with larger beads, such aspressed glass and crystals.Parallel filament GSP, such as Fireline,is a single-ply thread made from spun andbonded polyethylene fibers. It’s extremelystrong, doesn’t stretch, and resists fraying.However, crystals will cut through parallelfilament GSP, and it can leave a blackresidue on your hands and your beads. It’smost appropriate for bead stitching.Other threads are available, includingpolyester thread, such as Gutermann(best for bead crochet or bead embroiderywhen the thread must match the fabric);parallel filament nylon, such as Nymoor C-Lon (best used in bead weavingand bead embroidery); and plied nylonthread, such as Silamide (good for twistedfringe, bead crochet, and beadwork thatneeds a lot of body).WIREWire is available in a number of materialsand finishes, including brass, gold, goldfilled, gold-plated, fine silver, sterlingsilver, anodized niobium (chemicallycolored wire), andcopper. Brass,copper, and craftwire are packagedin 10–40-yd.(9.1–37m) spools,while gold, silver, and niobium are soldby the foot or ounce. Wire thickness ismeasured by gauge — the higher thegauge number, the thinner the wire— and is available in varying hardnesses(dead-soft, half-hard, and hard) andshapes (round, half-round, and square).Flexible beading wire is composed ofwires twisted together and covered withnylon. This wire is stronger than threadand does not stretch; thehigher the number of innerstrands (between 7 and49), the more flexible andkink-resistant the wire. It isavailable in a variety of sizes.Use .014 and .015 for most gemstones,crystals, and glass beads. Use thickervarieties, .018, .019, and .024, for heavybeads or nuggets. Use thinner wire, .010and .012, for lightweight pieces and beadswith very small holes, such as pearls.
Stringing and WireworkaefghijklmbPoinsettiaornamentcby Trude JanofskyMaking beaded flowers has been my hobby for many years.I initially designed this poinsettia to be a potted plant, thenadapted it so it could be used as an ornament. It can also bemade into a brooch.stepbystepPetals and leaves[1] Transfer four strands of color Athree-cut seed beads onto 26-gauge wirethat’s on a spool. Don’t cut the wire offthe spool.[2] Make a bend in the wire 7 in. (18cm)from the end. Twist the wire around itselfseveral times 4 in. (10cm) from the end,leaving a 3–4-in. (7.6–10cm) tail. The tailwill be referred to as the stem. Stringeight or nine As from the hank on thestem (photo a). This is the base row. Bendthe tip of the stem to prevent the beadsfrom falling off.[3] Slide 10 to 11 As to the spot wherethe working wire (that’s attached to thespool) meets the stem. Bring the working22wire up, and wrap it once around the stem(photo b). These petals are pointed at thetop and bottom, so wrap the wire at asharp angle to form the points.[4] Slide 12 to 13 As along the workingwire, and guide them along the otherside of the base row. Wrap the workingwire around the twisted wire at a sharpangle, as before (photo c). Repeat thisstep, adding one or two As to each rowuntil you have five rows across thepetal. Trim the working wire.[5] To finish the petal, cut one side ofthe wire loop below the twist (photo d).Straighten the wire to form a stem. Trimthe bent wire at the other end to 3 8 in.(1cm) above the petal, and bend itagainst the wrong side of the beadwork(photo e).dmaterials 7 3mm gold beads hank size 90 or 100 three-cut seedbeads, in each of 2 colors:A, luster red or light yellowB, luster green spool 26-gauge craft wire (or 2spools, in each of 2 colors: A, B) spool 28-gauge gold craft wire 1 yd. (.9m) 34-gauge craft wire (optional) 18 in. (46cm) 1 4–3 8 in.-wide(6–10mm) ribbon 8 in. (20cm) decorative cord (optional) glue green floral tape chainnose pliers wire cutters[6] Repeat steps 2–5 to make a total of[3] Gather the base of each twist. Twistfive small petals.[7] Make a large petal as in steps 2–5,but start with 15 or 16 As. Make a totalof five large petals.[8] Transfer two strands of color Bthree-cut seed beads onto 26-gauge wirethat’s on a spool. Make a leaf, followingthe instructions for the large petals, butwork seven rows across. Make a total offive leaves.the bases together (photo g). Cut thewire from the spool, leaving a 3-in.(7.6cm) tail after the last twist.Center[1] String seven 3mm beads on 28-gaugewire that’s on a spool. Slide one 3mm to3 in. (7.6cm) from the end, hold the3mm, and twist the wire around itself afew times against the bead. Keep thetwists close together. Don’t trim the wireoff the spool (photo f).[2] Slide another 3mm about 1 in.(2.5cm) from the twist. Hold the beadand twist the wire. Repeat with theremaining five 3mms.Assembly[1] Gather the five small petals and the3mms. Twist their stems together forabout 5 8 in. (1.6cm), working close tothe beads.[2] Arrange the petals so they radiatearound the 3mms in the center, keepingtheir right sides facing up (photo h).[3] Place the large petals behind andbetween the small petals one at a time,wrapping each wire around the stem. Ifyou have 34-gauge wire, wrap it aroundthe assembled stems several times tokeep them in place (photo i).[4] Add the leaves behind and betweenthe large petals (photo j), wrapping thewires around the stem as before.[5] Trim the stem to 21 4 in. (5.7cm),cutting at a slight angle across thebottom. Twist the wires tightly togetherusing pliers (photo k).[6] Cut the end of a piece of floral tapeat an angle, and place it against the stemat the base of the beads. Stretch the tapeslightly as you wrap so the tape willadhere to itself (photo l).[7] Shape each petal and each leafindividually by lifting slightly at thecenter and pushing down on the tipto curve it.[8] Cover the floral tape with ribbon,and curl the stem into a coil (photo m).Dab the ribbon’s end with glue to keep itfrom unraveling. Add a bow, if desired.[9] Thread a ribbon or wire hook (see“Ornament hangers,” p. 9) through one ofthe leaves or petals to hang your flower.23
2e4cRemember how exciting it was as a child to open a new boxof crayons? Here’s one made in herringbone stitch over a 1wooden dowel that will always stay new! You can personalizethis crayon ornament by stitching the date into the wrapper.stepbystepCrayon[1] Sharpen a dowel to a blunt pointand paint it with two coats of paint,allowing time to dry between coats.Finish both ends with a coat of varnish.[2] On a comfortable length of beadingthread, pick up 28 color B cylinderbeads, leaving a 6-in. (15cm) tail.[3] Create a bead ladder (Basics, p. 6)two beads high and 14 sets long. Formthe ladder into a ring by sewing throughthe two end sets. Hold the ring with thetail exiting the bottom and the workingthread exiting the same set of beads onthe top. Slide the ring over the dowelwith the point facing down.[4] Pick up two color A cylinders, andsew down through the next set of beads(figure 1, a–b). Sew up through the nextset of beads, pick up two As, and sewdown through the next set of beads (b–c).Continue around (c–d). Step up by sewingthrough two beads in the ladder and thefirst bead added in this round (d–e).[5] Work 48 rounds of tubularherringbone stitch (Basics), followingfigure 2 to determine color changes.[6] Work round 51 in tubular herringbone, but pick up four Bs in each stitchrather than two, and exit the bead shown(figure 3, a–b). Reverse direction, and sewup through three beads and down throughtwo beads (b–c). Pull snug. Sew upthrough two beads and down through two(c–d).[7] Repeat around to create the look of3a ladder at the top of the crayon (d–e).Reverse direction, and sew up throughtwo beads (e–f).Add a little colorby Diane Hertzler58Other Stitchingderound 2round 1cb dfigure 1round 51round 50fround 51ca edround 50bHanging loop2[1] Sew through the beadwork to exitthe bead shown (figure 4, a–b).[2] Pick up 10 As, skip seven beads, andsew down through the top two Bs in thenext column (b–c).4[3] Sew up through the two adjacentbeads and back through the beads in the round 3round 2loop. Skip five beads, and sew downround 1through the top two beads in the nextcolumn (c–d). Sew up through the nexttwo beads (d–e).[4] Retrace the thread path through theloop to reinforce it, and end the threads(Basics). Thread ribbon or wire hook (see“Ornament hangers,” p. 9) through theloop to hang the crayon.ecbaround 51dround 50round 51round 50e112All numbers 3have beengraphed here 3so the crayoncan bepersonalizedwith anydate.445round 2a ecab dcb dfigure 25round 51round 50amaterials: size 110 cylinder beads:2.5g color A, yellow AB1.5g color B, yellow opaque2g color C, black nylon beading thread, size B,yellow #10 beading needles 3½ in. (8.9cm) dowel, ¼ in. (6mm)diameter acrylic paint, yellow artist acrylic paintbrush, approx.size 4 handheld pencil sharpener water-based varnish, satin finishbaroundround 21round 1round 3round 2round 1fround 51cdfa ecda ebround5051roundround 50bfigure 3edeccfigure 4dbabaround 51round5051roundround 5059
Other Stitchingaround 5round 6round 7round 8round 5top 6roundround 7round 8bacbegdacbghhbaeround 9round 10round 11round 12round 13fcfi ground 14round 15round 16round 17round 18round 19round 20round 21dround 10Stitch an exoticornamentby working rapidincreases and e ge cfround 11hi12gdecreases inroundtubularpeyotestitch. Add aj sparkling cascade of iround 13crystal fringe for a festive look. After the holiday season, hangyour ornament from a fan pull or drapery tieback to enjoy itround 14round 15year-round.round 16round 17round 18round 19round 20round 21Bottomstepbystepeghalfaci[1] On 4 yd. (3.7m) of conditionedDainty peyote stitchRussian ornamentby Paula Adams72round 24round 25round 26round 27round 28round 29round 24round 25 b daCs. Then workone stitchc with a B (e–f).f hround 26eRound 8: Workg three Csround 27one A, one B,kj increase),round28(splitting theand onei B (g–h).round 29around 9round 8round 7round 6bcf hmaterialsdj c rystals:10 13mm faceted teardrops10 6mm or 4mm rounds or bicones10 6mm faceted rondelles10 5mm or 3mm biconesbd10–114mm biconesfh 5mm 4mm orround beadj Japanese cylinder beads:l4g in each of 2 colors: A, C3g in each of 2 colors: B, D 3 in. (7.6cm) 20- to 22-gauge wire nylon beading thread, conditionedwith beeswax, or Fireline 6 lb. test beading needles, #12 chainnose plierse roundnosepliersh fi wire gcutters[4] Work a support round inside thethread (Basics, p. 6) or Fireline, center apoint: Sew through the beadwork torepeating pattern of seven color A andexit the B prior to the first point. Pickthree color B cylinder beads five timesup five Cs and sew through the next B.bfora a total of 50 beads. Sew throughSew through the beads in the round todf thethem cagainto form a ring, and exitexit the B prior to the next point. aehgjkthird A.Repeat around the ring. End with yourbc di[2] Using As, work two rounds of tubular, l thread exiting the B after the last point.even-count peyote stitch (Basics), steppingRed beads were used in photo a to showup at the end of each round.the support round.[3] Continue in peyote stitch, workingThe round following a support roundthe repeating pattern indicated belowwill always start with the thread exitingfor each round and stepping up at thea B after a point.aa9end of each round:Round 9: Work tworoundA stitchesand fourround8bc d with an ARound 5: Work four stitchesC stitches (figure 2,rounda–b)7 .eround6 a C, and thenand one with a B (figure 1, a–b).RoundA,a5 B,f 10: Work anroundhgiroundkjRound 6: Work three stitches with an Awork an increase with two4 Cs. Work a Cround 3and two with a B (c–d).and a B (c–d). Repeatroundaroundthe ring,2cround 1a support round.Round 7: Work two stitches with an Astep up, and then workand one with a B. Begin forming theRound 11: Work two A stitches and fivepoints by working an increase with twoC stitches (e–f).round 9round 8round 7round 6round 5round 4hfigure 2badjfigure 1round 9dbottomfekjdadc73
in Bead&Button or BeadStyle magazines with the exception of the projects on pages 34, 58, 60, 66, 69, 76, 78, 84, and 92 by Diane Hertzler. Bead&Button and BeadStyle are registered as a trademarks. Publisher’s Cataloging-in-Publication Data Beaded ornaments : for the holidays and beyond : from Bead
