Transcription
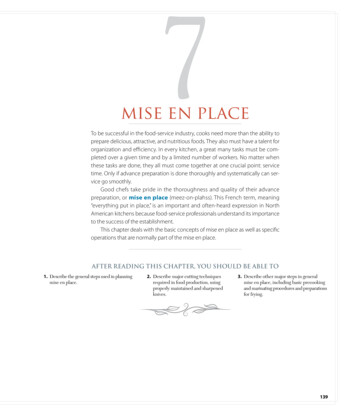
7mise en placeTo be successful in the food-service industry, cooks need more than the ability toprepare delicious, attractive, and nutritious foods. They also must have a talent fororganization and efficiency. In every kitchen, a great many tasks must be completed over a given time and by a limited number of workers. No matter whenthese tasks are done, they all must come together at one crucial point: servicetime. Only if advance preparation is done thoroughly and systematically can service go smoothly.Good chefs take pride in the thoroughness and quality of their advance preparation, or mise en place (meez-on-plahss). This French term, meaning“everything put in place,” is an important and often-heard expression in NorthAmerican kitchens because food-service professionals understand its importanceto the success of the establishment.This chapter deals with the basic concepts of mise en place as well as specificoperations that are normally part of the mise en place.AFTER READING THIS CHAPTER, YOU SHOULD BE ABLE TO1. Describe the general steps used in planningmise en place.2. Describe major cutting techniquesrequired in food production, usingproperly maintained and sharpenedknives.3. Describe other major steps in generalmise en place, including basic precookingand marinating procedures and preparationsfor frying.139
140C h a p t e r 7mise en placePLANNING AND ORGANIZINGPRODUCTIONEven on the simplest level, pre-preparation is necessary. If you prepare only one short recipe, youmust first: Assemble your tools. Assemble your ingredients. Wash, trim, cut, prepare, and measure your raw materials. Prepare your equipment (preheat oven, line baking sheets, etc.).Only then can you begin the actual preparation.When many items are to be prepared in a commercial kitchen, the situation is much more complex. Dealing with this complexity is the basis of kitchen organization.THE PROBLEMEvery food-service operation faces a basic conflict between two unavoidable facts:1. There is far too much work to do in a kitchen to leave until the last minute, so some work mustbe done ahead.2. Most foods are at their best quality immediately after preparation, and they deteriorate asthey are held.THE SOLUTIONTo address this conflict, the chef must plan preparation carefully. Planning generally followsthese steps:1. Break down each menu item into its stages of production.Turn to any recipe in this book. Note the procedures are divided into a sequence of steps thatmust be done in a certain order to make a finished product.2. Determine which stages may be done in advance. The first step of every recipe, written or not, is always part of advance preparation:assembling and preparing the ingredients. This includes cleaning and cutting produce,cutting and trimming meats, and preparing breadings and batters for frying.Succeeding steps of a recipe may be done in advance if the foods can then be held withoutloss of quality.Final cooking should be done as close as possible to service for maximum freshness.Frequently, separate parts of a recipe, such as a sauce or a stuffing, are prepared in advance,and the dish is assembled at the last minute.In general, items cooked by dry-heat methods, such as broiled steaks, sautéed fish,and French-fried potatoes, do not hold well. Large roasts are an important exception tothis rule. Items cooked by moist heat, such as braised beef, soups, and stews, are usuallybetter suited to reheating or holding in a steam table. Delicate items should always befreshly cooked.3. Determine the best way to hold each item at its final stage of pre-preparation.Holding temperature is the temperature at which a product is kept for service or forstorage. Holding temperatures for all potentially hazardous foods must be outside theFood Danger Zone. Sauces and soups are frequently kept hot, above 135 F (57 C), for service in steam tables orother holding equipment. Foods such as vegetables, however, should be kept hot only forshort periods because they quickly become overcooked.Refrigerator temperatures, below 41 F (5 C), are best for preserving the quality ofmost foods, especially perishable meats, fish, and vegetables, before final cooking orreheating.
PLANNIN G AN D O R G ANI Z IN G P R O D U C T I O N4. Determine how long it takes to prepare each stage of each recipe. Plan a productionschedule beginning with the preparations that take the longest.Many operations can be carried on at once because they don’t all require your completeattention the full time. It may take 6 to 8 hours to make a stock, but you don’t have to stand andwatch it all that time.5. Examine recipes to see if they might be revised for better efficiency and quality as served.For example: Instead of preparing a full batch of green peas and holding them for service in the steamtable, you might blanch and chill them, then heat portions to order in a sauté pan, steamer,or microwave oven.Instead of holding a large batch of veal scaloppine in mushroom sauce in the steam table,you might prepare and hold the sauce, sauté the veal to order, combine the meat with a portion of the sauce, and serve fresh from the pan.Caution: Unless you are in charge of the kitchen, do not change a recipe without authorization from your supervisor.THE GOALThe goal of pre-preparation is to do as much work in advance as possible without loss of quality.Then, at service time, all energy can be used for finishing each item immediately before serving,with the utmost attention to quality and freshness.Many preparation techniques in common use are designed for the convenience of the cooks atthe expense of quality. Remember, quality should always take highest priority.ADAPTING PREPARATION TO STYLE OF SERVICEThe way you plan production and do your mise en place depends in large part on the style of mealservice. The following discussion of set meal service and extended meal service illustrates thebasic differences.Set Meal Service All customers eat at one time. Often called quantity cooking because large batches are prepared in advance. Examples: school cafeterias, banquets, employee dining rooms.The traditional method of set meal preparation, still widely used, is to prepare the entirequantity of each item in a single large batch and to keep it hot for the duration of the meal service.This method has two major disadvantages: Deterioration of quality due to long holding. Large quantities of leftovers.Modern high-speed equipment, such as pressure steamers, convection ovens, infrared ovens,and microwave ovens, make possible a system called small-batch cooking. Required quantities aredivided into smaller batches, placed in pans ready for final cooking or heating, and then cooked onlyas needed. The advantages of this system are Fresher food, because it is not held as long. Fewer leftovers, because servings not needed are not cooked.Small-batch cooking also accommodates items prepared in advance and frozen or chilledfor storage.Extended Meal Service Customers eat at different times. Often called à la carte cooking because customers usually select items from a written menu(carte in French). Examples: restaurants, short-order counters.Individual items are cooked to order rather than cooked ahead, but pre-preparation is extensive, down to the final cooking stage.141
142C h a p t e r 7mise en placeThe short-order cook, for example, must have everything ready to go: cold meats, tomatoes,and other sandwich ingredients sliced and arranged, spreads prepared and ready, hamburgerpatties shaped, garnishes prepared, and so on. If the cook has to stop during service to do any ofthese things, orders will back up and service will fall behind.A steak that takes 10 minutes to broil may be cut and trimmed in advance, but broiling shouldbe started 10 minutes before it is to be served.Obviously, if the last step in a recipe is to braise the item for 1½ hours, one cannot wait until anorder comes in before beginning to braise. An experienced cook can estimate closely how manyorders will be needed during the meal period and prepare a batch that, ideally, will finish braisingjust when service begins.Note the differences in these two methods for Chicken Chasseur. In both cases, the final product is chicken in a brown sauce with mushrooms, shallots, white wine, and tomatoes.1. Quantity method—Chicken Chasseur:Brown chicken in fat; remove.Sauté shallots and mushrooms in same fat.Add flour to make a roux.Add white wine, tomatoes, brown stock, seasonings; simmer until thickened.Add chicken; braise until done.2. À la carte method—Chicken Chasseur:Prepare Sauce Chasseur in advance; refrigerate or keep hot in bain-marie.For each order: Brown chicken in sauté pan; finish cooking in oven. Deglaze pan with white wine; reduce. Add one portion of sauce; add chicken and simmer briefly; serve.MISE EN PLACE: THE REQUIRED TASKSUp to this point, we have discussed planning the production schedule. Our planning helps us determine the tasks we must do before beginning the final cooking during the meal service period. Chefsrefer to performing these preliminary tasks as “doing the mise en place.” In many restaurants, especially large ones, the mise en place is extensive. It includes the preparation of stocks, sauces, breadings, and batters as well as the cutting and trimming of all the meat, poultry, fish, and vegetables thechef expects will be needed during the meal service.Be aware that a classroom lab differs in many ways from a restaurant kitchen. Students workingin a lab may prepare only one or two recipes in a day. Their mise en place consists of assembling theequipment and preparing the ingredients for only those recipes. For example, the student may needto chop one clove of garlic. While you are chopping that clove of garlic, be aware that this is not thekind of mise in place you will be doing when you work in a restaurant. Rather, you may have to chopseveral heads of garlic so that you have enough for all the dishes being prepared at your station fora particular meal service.A large part of a cook’s workday is spent doing mise en place. This means that a large part oflearning how to cook is learning how to do mise en place. In fact, a large part of this book is devoted tothese tasks of preparation. There are many more such tasks than can be included in a single chapter.The remainder of this chapter discusses the most basic and general skills required for a mise enplace. The most basic of these are knife skills. Fundamentals such as howto hold the chef’s knife, how to maintain a sharp edge, and how to makeKEY POINTS TO REVIEWbasic cuts are illustrated. More specific techniques required for individualfood products are explained in appropriate chapters later in the book. For What does mise en place mean? Whatexample, mise en place techniques can be found in the following chapters:kinds of tasks are included in this term?Stock and sauce mise en place: Chapters 8 and 9 What are the five steps in planning miseen place? How does mise en place for à la carteservice differ from mise en place for setmeal service?Vegetable trimming techniques: Chapter 11Meat fabrication: Chapter 16Poultry fabrication: Chapter 18Fish and seafood fabrication: Chapter 20
U SIN G T H E K NI F EUSING THE KNIFEMany laborsaving tools are available for cutting, chopping, and slicing fresh foods. Chapter 3 liststhe basic kinds.The chef’s knife or French knife, however, is still the cook’s most important and versatile cuttingtool. The knife is more precise than a machine. Unless you are cutting a large quantity, the knife caneven be faster. Cleaning a large machine takes time.To get the best use out of your knife, you must learn to keep it sharp and to handleit properly.Knifeblade20 SharpeningstoneFIGURE 7.1 When sharpening a knife, hold theblade at a 20-degree angle to the stone.KEEPING A SHARP EDGEThe Sharpening StoneA stone is the traditional tool for sharpening a chef’s knife. The best electric sharpeners do an excellent job of sharpening chef’s knives, but many models wear away too much of your expensive knifewithout making a good edge. Modern professional knives are much harder than the old carbonsteel knives, so they are more difficult to sharpen on a stone. Nevertheless, using a stone correctly isa valuable skill.Follow these guidelines:FIGURE 7.2 Using a sharpening stone.1. Hold the blade at a constant 20-degree angle to the stone, as shown in Figure 7.1.2. Make light, even strokes, the same number on each side of the blade.3. Sharpen in one direction only to get a regular, uniform edge.4. Do not oversharpen.5. Finish with a few strokes on the steel (see below), and then wipe the blade clean.Figure 7.2 illustrates one of several sharpening methods. There are other good ones, too, andyour instructor may prefer a method not illustrated here.(a) Hold the knife firmly. Start with the tipof the knife against the stone as shown,and hold the edge against the stone at a20-degree angle. Use the guiding hand tokeep an even pressure on the blade.Other Knife SharpenersFIGURE 7.3 To use a manualsharpener, draw the blade through thesharpener from the heel to the tip ofthe knife. Do not press down hard, butmake several light strokes.As mentioned previously, today’s professional knivesare made of an especially hard material that is more d ifficult to sharpen by traditional methods. As a result,chefs often use other sharpeners to simplify the task.Such sharpeners typically have two stones set at thecorrect angle, so it is necessary only to draw the knife between them. Manual and power models of these sharpeners are available. Figure 7.3 shows a manual sharpenerin use.(b) Start to draw the knife over the stone.Press very gently on the blade.The SteelThis tool is used not to sharpen the edge but to true theedge (to perfect it, or to smooth out irregularities) and to maintain the edge (to keep it sharp asit is used).Observe these guidelines for using the steel:(c) Keep the motion smooth, using even,light pressure.1. Hold the blade at a constant 20-degree angle to the steel, just as when using the stone(Figure 7.2). A smaller angle will be ineffective. A larger one will dull the edge.2. Make light strokes. Do not grind the knife against the steel.3. Make even, regular strokes. Alternate each stroke, first on one side of the blade, then onthe other.4. Use no more than five or six strokes on each side of the blade. Too much steeling can actuallydull the blade.5. Use the steel often. Then you will rarely have to sharpen the knife on the stone.143(d) Draw the knife across the stone all theway to the heel of the blade.
144C h a p t e r 7mise en placeFIGURE 7.4 Using a steel.Figure 7.4 illustrates one of several steeling methods. This one is popular, but s everalothers are equally correct. Carefully observe your instructors’ demonstrations of theirpreferred methods.HANDLING THE KNIFEThe Grip(a) Hold the steel and the knife away fromyour body. With the knife in a vertical positionand at a 20-degree angle to the steel, touchthe steel with the heel of the blade.A proper grip gives you maximum control over the knife, increases your cutting accuracy and speed,prevents slipping, and lessens the chance of an accident. The type of grip you use depends, in part,on the job you are doing and the size of the knife.The grip illustrated in Figure 7.5 is one of themost frequently used for general cutting and slicing. Many chefs feel that grasping the blade withthe thumb and forefinger in this manner gives themgreatest control.Holding the knife may feel awkward at first, butpractice will make it seem natural. Watch your instructorsdemonstrate the grips they use, and then practice under FIGURE 7.5 Grasping the blade of thetheir supervision.knife between the thumb and forefingergives the worker good control over the blade.(b) Pass the knife lightly along the steel,bringing the blade down in a smooth arc.The Guiding HandWhile one hand controls the knife, the other hand controls the product being cut. Proper positioning of thehand achieves three goals:1. Hold the item being cut.In Figure 7.6, the item is held firmly so it will not slip.2. Guide the knife.Note the knife blade slides against the fingers.The position of the hand controls the cut.(c) Complete the movement. Do not strikethe guard of the steel with the tip of the blade.3. Protect the hand from cuts.Fingertips are curled under, out of the way of theblade.BASIC CUTS AND SHAPESCutting food products into uniform shapes and sizes isimportant for two reasons:1. It ensures even cooking.2. It enhances the appearance of the product.(d, e, f) Repeat the motion on the otherside of the steel.FIGURE 7.6 The position of the guidinghand, which holds the item being cut orsliced and also guides the blade, from twopoints of view.Figure 7.7 shows common shapes, with their namesand dimensions. The following terms describeother cutting techniques:Chop: to cut into irregularly shapedpieces.Concasser (con-cass-say): to chopcoarsely.Mince: to chop into very fine pieces.Emincer (em-man-say): to cut intovery thin slices (does not mean “tomince”).Shred: to cut into thin strips, eitherwith the coarse blade of a grater(manual or power) or with a chef ’sknife.CANADIAN CUT SIZESIn Canadian kitchens the following cuts differ slightly from those in the United States,and there are no cuts called Fine Brunoiseor Fine Julienne:Julienne: 1 2 mm 1 2 mm 2.5 4 cmAlumette: 3 mm 3 mm 5 6 cmBrunoise: 1 2 mm 1 2 mm 1 2 mmSmall dice: 3 mm 3 mm 3 mmMedium dice: 6 mm 6 mm 6 mmLarge dice: 12 mm 12 mm 12 mm
U SIN G T H E K NI F EFIGURE 7.7 Basic cuts and shapes.(a) Tourné: 2 in. long 3/4 in. diameter, with 7 sides,and flat-ended (5 cm 2 cm).(b) Large dice: 3/4 in. 3/4 in. 3/4 in.(2 cm 2 cm 2 cm).(c) Medium dice: 1/2 in. 1/2 in. 1/2 in.(12 mm 12 mm 12 mm).(d) Small dice: 1/4 in. 1/4 in. 1/4 in.(6 mm 6 mm 6 mm).(e) Brunoise (broon-wahz): 1/8 in. 1/8 in. 1/8 in.(3 mm 3 mm 3 mm).(f) Fine brunoise: 1/16 in. 1/16 in. 1/16 in.(1.5 mm 1.5 mm 1.5 mm).(g) Rondelle: round or bias-rond cuts,varied diameter or thickness.(h) Paysanne: 1/2 in. 1/2 in. 1/8 in.(12 mm 12 mm 3 mm; round, square, or rectangular).(i) Lozenge: 1/2 in. 1/2 in. 1/8 in.(12 mm 12 mm 3 mm; diamond-shape).(j) Fermière: irregular shape, varied diameter or thickness.(k) Batonnet: 1/4 in. 1/4 in. 21/2 –3 in.(6 mm 6 mm 6–7.5 cm).(l) Julienne (or allumette potatoes): 1/8 in. 1/8 in. 21/2 in.(3 mm 3 mm 6 cm).(m) Fine julienne: 2 in. long 1/16 in. 1/16 in.(1.5 mm 1.5 mm 5 cm).145
146C h a p t e r 7mise en placeCUTTING TECHNIQUESDifferent parts of the blade are appropriate for different purposes, as shown in Figure 7.8.FIGURE 7.8 Using different parts of the knife blade.(a) The tip of the knife, where the blade is thinnestand narrowest, is used for delicate work andsmall items.(b) The center of the blade is used for most generalwork.(c) The heel of the knife is used for heavy or coarsework, especially when greater force is required.1. Slicing.Two basic slicing techniques are illustrated in Figures 7.9 and 7.10. When carrots and similaritems are cut into round slices as shown, the cut is called rondelle.FIGURE 7.9 Slicing technique 1.(a) Start the knife at a sharp angle, with the tip of theknife on the cutting board.(b) Move the knife forward and down to slice throughthe carrot.(c) Finish the cut with the knife against the board. Forthe second slice, raise the heel of the knife and pull itbackward, but be sure the tip stays on the board.FIGURE 7.10 Slicing technique 2.(a) Start the blade at a 45-degree angle, with thetip on the cucumber against the fingers of theguiding hand.(b, c) Slice downward and forward through the item.2. Cutting dice, brunoise, bâtonnet, allumette, and julienne.Figure 7.11 shows the steps in dicing a product, using a potato to illustrate. Note in Figure 7.11cthat the process of cutting dice first requires you to cut stick shapes, such as bâtonnet. Thus, thisillustration demonstrates the method used to cut not only dice and brunoise (broon wahz)but also bâtonnet (bah toh nay), allumette (ah lyoo met), and julienne (zhoo lee enn).
U SIN G T H E K NI F E147FIGURE 7.11 Cutting a potato.(a) Square off the peeled, eyed potato by cutting aslice from all sides. Use the trimmings for mashedpotatoes or soup.(b) Cut the potato into even slices of the desiredthickness. Here we are making ¼-inch (6-mm) dice,so the slices are ¼-inch (6-mm) thick.(d) Looking from this angle shows how the sliceshave been stacked up.(e) Pile the bátonnets together and cut across inslices ¼ inch (6 mm) apart. You now have perfect¼-inch (6 mm) dice.(c) Stack the slices and again slice across the stack ineven ¼-inch (6-mm) slices. You now have bátonnetpotatoes, slightly smaller than regular Frenchfries. Slices 1 8 inch (3 mm) thick would give youallumette potatoes.3. Cutting paysanne.Paysanne are thin square, or roughly square, cuts. The procedure begins the same as forcutting medium dice. However, in the last step, cut the ½-inch (12-mm)-thick sticks into thinslices rather than into dice. Figure 7.12 illustrates.4. Cutting lozenges.A lozenge is a diamond-shape cut, as illustrated in Figure 7.13.5. Cutting fermière.Fermière is an irregular slice. Shapes may vary, depending on the item, but the pieces shouldbe of uniform size. Thickness must also be uniform, usually around 1 8 inch (3 mm). Cut the itemlengthwise into pieces of roughly uniform size and shape, and then slice as shown in Figure 7.14.6. Making oblique cuts.Also called the roll cut, the oblique cut is for long, cylindrical vegetables such as carrots. Asillustrated in Figure 7.15, hold the knife at an angle, cut, roll the vegetable one quarter-turn, andmake the next cut. For tapered vegetables, change the angle as you go to keep the pieces ofapproximately equal size.FIGURE 7.13 To cut lozenges, first cut thevegetable into thin slices, and then cut these sliceslengthwise into strips about 1 8 inch (3 mm) wide.Cut the strips at an angle to form diamond shapes.FIGURE 7.14 To cut fermière, cut the itemlengthwise into roughly equal pieces, andthen slice uniformly.FIGURE 7.12 Cut the vegetable into sticks ½ inch(12 mm) square. To cut the sticks into paysanne,cut them crosswise into thin slices.FIGURE 7.15 To make oblique cuts, cutthe vegetable at a sharp angle, roll onequarter-turn, and make another cut.
148C h a p t e r 7mise en place7. Dicing an onion.Dicing an onion presents a special problem for cutting because its form is in layers, not a solidpiece. This technique is illustrated in Figure 7.16.FIGURE 7.16 Dicing an onion.(a) Cut the peeled onion in half lengthwise, throughthe root end. Place one half on the cutting board, cutside down.FIGURE 7.17 To chop mirepoix, cutonions, celery, and carrots roughly intopieces of approximately equal size. Theexact size depends on what the mirepoix isto be used for.(b) With the root end away from you, make a seriesof vertical lengthwise cuts. Do not cut through theroot end. The closer together you make the cuts, thesmaller the dice will be.(c) Holding the onion carefully at the top, make a fewhorizontal cuts toward but not through the root end,which is holding the onion together.(d) Finally, slice across the onion to separate itinto dice. Again, the closer together the cuts, thesmaller the dice.(e) Continue making slices almost to the root end.The root end may be rough cut for mirepoix, to beused for stocks, sauces, and roasts.8. Chopping mirepoix.Mirepoix is a mixture of coarsely chopped vegetables, primarily onions, carrots, and celery,used to flavor stocks, gravies, sauces, and other items, as explained in Chapter 8. Becausemirepoix is not served—rather, it is almost always strained out of the product before finishing—neatness of cut is not important. The products are cut roughly into pieces of approximatelyuniform size—small pieces if cooking time will be short, larger pieces for longer cooking times.Figure 7.17 illustrates mirepoix ingredients being cut.9. Chopping herbs.This chopping technique is used to cut a product when no specific shape is needed. Figure 7.18illustrates chopping parsley.In the case of chives and scallions, a more regular cut is used, similar to the slicing cut usedfor larger items like carrots. Figure 7.19 illustrates this procedure.FIGURE 7.18 Chopping with a French knife. Holding the tip of the knife against the cutting board,rock the knife rapidly up and down. At the same time, gradually move the knife sideways acrossthe product on the board so the cuts pass through all parts of the pile of food. After several cuts,redistribute the pile and begin again. Continue until the product is chopped as fine as you want.FIGURE 7.19 Stack chives and cut crosswise intovery thin slices.
U SIN G T H E K NI F E10. Cutting parisienne.Cuts made with a ball cutter are perhaps most often used for potatoes. Potatoes cut intolarge balls, about 11 3 inch (3 cm), are called parisienne (pah ree zee enn). When cut into smallerballs, about 7 8 inch (2.5 cm), they are called noisette (nwah zet). Of course, other solid vegetables, such as turnips, as well as many fruits, can be cut the same way. The procedure isillustrated in Figure 7.20.FIGURE 7.20 Cutting parisienne potatoes.(a) Place the ball cutter against the potato as shown.(b) With the thumb, press the cutter firmly into thepotato as far as it will go.(c) Lift the handle of the cutter outward, twist thecutter around, and remove the ball.11. Cutting tournéed vegetables.To tourné (toor nay) a vegetable is to cut it into a neat seven-sided oval shape, as illustrated inFigure 7.21. Many root vegetables, such as carrots and turnips, are cut this way. When potatoesare tournéed, they are named according to their size. Cocotte potatoes are about 1½ inches(4 cm) long. Château potatoes are about 2 inches.FIGURE 7.21 Tournéing potatoes and other root vegetables.(a) Cut the potatoes roughly into pieces slightlylarger than the final size desired. Cut off the top andbottom of each piece so the top and bottom are flatand parallel.(d) Turn the potato slightly (one-seventh of a full turn,to be exact) and repeat the motion.(b) Hold the potato between the thumb andforefinger. Place the paring knife against the topedge as shown and the thumb of the cutting handfirmly against the potato. Your hand should be farenough up on the blade to maintain steady control.(e) The finished product. If perfectly done, the potatohas seven sides (but customers rarely count them).(c) Cut down toward your thumb with a curvingmovement of the blade.149
150C h a p t e r 7mise en place12. Peeling grapefruit.This technique, as shown in Figure 7.22, can also be used for peeling yellow turnips or otherround vegetables and fruits with heavy peels.FIGURE 7.22 Peeling a grapefruit.(a) Cut off the ends of the grapefruit and turn it on a flat end so it is stable.Slice off a section of the peel, following the contour of the grapefruit.(b) Make sure the cut is deep enough to remove the peel but not sodeep as to waste the product.J.Smith/ JohnslicesWileyaround& Sons,theInc.grapefruit until all the peel(c)GerardContinuemakingis removed.J.Smith/ & Sons, Inc.(d)GerardSlice orsectionJohnthe Wileyfruit. Squeezethe remaining pulp for juice. Themembrane-free citrus section cut by this method are called suprémes.13. Chiffonade.This term refers to cutting leaves into fine shreds. It is applied most often to lettuce and sorrelbut can also be used for fresh herbs such as basil. To cut chiffonade, remove the heavy leafribs, roll the leaves into a tight cylinder, and then slice the cylinder crosswise into thin shreds,as shown in Figure 7.23.FIGURE 7.23 Cutting a chiffonade of sorrel.J.Smith/ & Sons, Inc.(a)GerardRoll theleavesJohninto Wileya cylinder.J.Smith/ JohnWiley& Sons,Inc.(b)GerardCut crosswiseinto thinstripsor shreds.
O T H E R MISE EN PLACE T AS K S14. Cutting citrus zest.With a paring knife, cut strips from the citrus peel, removing only the colored part, not thewhite part below it. Then, with a chef’s knife, cut the zest into thin strips or julienne, as shown inFigure 7.24b. An alternative method is to use a citrus zester, as shown in Figure 7.24c.FIGURE 7.24 Cutting citrus zest.J.Smith/ knifeJohntoWiley& Sons,Inc.from the(a)GerardUse a paringcut thinstripsJ.Smith/ JohnWileySons, Inc.(b)GerardCut thestrips ofpeelinto&julienne.peel, being careful to cut only the outer coloredpart, not the inner white pith.J.Smith/ drawJohn aWiley& Sons,(c)GerardAlternatively,zestingtoolInc.over the fruitto cut thin strips of zest.KEY POINTS TO REVIEW How do you sharpen a knife? When performing most cutting techniques, what is the correctand safe position of the guiding hand—that is, the hand notholding the knife? What are the dimensions of the following cuts: large dice,medium dice, small dice, brunoise, fine brunoise, bâtonnet,julienne, fine julienne, rondelle, paysanne, lozenge, tourné?OTHER MISE EN PLACE TASKSAdvance preparation requires many other tasks specific to individual ingredients, such as fabrication(cutting) of meats, poultry, and fish, as noted earlier in this chapter and as explained in the relevantchapters in this book. The remainder of this chapter is concerned with additional mise en place taskscommon to many types of foods. These include preliminary cooking and flavoring and preparationfor frying.PRELIMINARY COOKING AND FLAVORINGPrecooking and flavoring of ingredients may be required to make them ready for use in the finishedrecipe. For example, if a recipe for chicken salad calls for cooked, diced chicken, you must first cookthe chicken before you can proceed with the recipe. A complete cooking procedure, in such a case, ispart of the mise en place. Complete cooking procedures are discussed in the remainder of this book,so you will have to be familiar with a wide range of techniques to complete your mise in place.In
place. The most basic of these are knife skills. Fundamentals such as how to hold the chef’s knife, how to maintain a sharp edge, and how to make basic cuts are illustrated. more specific techniques required for individual food