Transcription
Introduction toOxy-Acetylene Welding
Welcome to the Columbus Metal Shop!!rkspaThe School of the Art Institute’sColumbus Metal Shop is oneof four Instructional Fabricationshops at SAIC.The Columbus Metal Shop is ageneral access facility set up toprovide instruction and materialresources for the School’sstudents, faculty, and staff.The Metal Shop’s facilities andunique instructional programshave been structured to meetthe needs of students workingon a wide range of projects.The metal shop facilitiesinclude a wide range of hot andcold metal working equipment.INSTRUCTIONALFABRICATIONInstructional Fabrication’s mission is to serve thecontemporary art making needs of the School of the ArtInstitute of Chicago by providing instruction and technicalassistance to students and faculty using the School’s shopsand fabrication facilities. Our staff work collaborativelyacross artistic and academic disciplines to support allmanners of fabricating art objects.Cold workingcapabilities includeHot workingcapabilities include drillingpunchingmechanical fasteningroll ve blasting forging/annealingplasma cuttingoxy-fuel welding& cuttingshielded metalARC weldinggas metal arcwelding (MIG)gas tungsten arcwelding (TIG)Instructional Fabrication is a division within the departmentof Instructional Resources & Facilities Management (IRFM).Instructional Fabrication 3
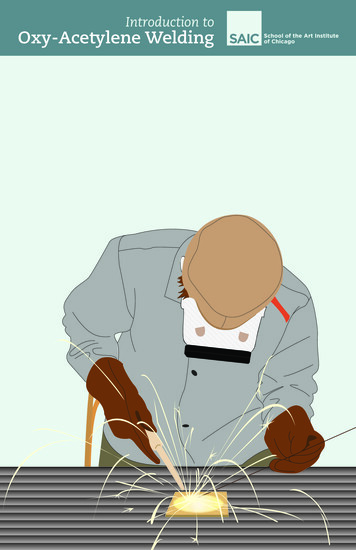
Table of Contents4 6Getting Ready8Equipment for Process : Check Out From Cage10Material Concerns11Material Handling12Welding Anatomy & Capability14Turning on Fuel16Turning on Fuel continued18Process : Welding20Process : Cutting22Closing Down : Leaving StationThe School of the Art Institute of ChicagoIntroduction toOxy-Acetylene WeldingOxy-Acetylene, commonly known as Oxy-fuel, is one of theoldest welding processes, though in recent years, it has becomeless popular in industrial applications. However, it is still widelyused for a variety of applications. Oxy-fuel equipment is versatile,lending itself to welding, brazing, braze-welding, silver soldering,metal heating (for bending and forming) and oxy-fuel cutting.This book will highlight the welding and cutting processes.Instructional Fabrication 5
Getting ReadyPersonal Preparation: Arrive Properly AttiredAuthorizationsPhysical & Mental ConditionIn order to work in the Metal Shop, you must first attendan Authorization. Authorization Sign Up Sheets andAuthorization Request Forms are posted adjacent to thetool checkout area in the Columbus Wood Shop, Room024. It is highly recommended that new patrons completethe Introduction to Metal Working Authorization beforeparticipating in the welding authorizations.Stress, anxiety, sleep deprivation, low blood sugar,and drugs (prescription & recreational) will interferePlanning Your Projectwith your ability to work safely.AccessoriesRemove all accessories that could conduct heat orget caught in moving parts of equipment: rings,piercings, watches, ID card lanyards, etcetera.Hair(See also Material Concerns, page 10)Tie hair back, tuck hair in jacket, or hold hair backwith a bandanna. A cap is also a good idea.We encourage patrons to speak with the shop’s staff aboutmaking material choices that best suit your projects beforecommitting to a purchase—your choice of materials maylimit what equipment will be available to you.ShirtsChoose natural fibers like cotton, hemp and woolto weld in. Synthetic fibers (polyester, nylon) arenot recommended. You will be required to wear awelding jacket for all welding processes.PantsFlammable Combustibles ProhibitedFlammable Liquids are prohibited in the Metal Shop,including but not limited to butane lighters, propane, aerosolcans, and solvents. Use extreme caution when working nearflammable materials (sketchbooks, backpacks, etcetera).Flames, sparks, and hot surfaces can cause fires.Choose natural fibers, no synthetic fibers (polyester,nylon). Holes or loose, frayed areas are prohibited.Cuff or roll in pant legs that touch the ground.ShoesSturdy, closed-toe shoes. Leather shoes are highlyrecommended. No synthetic material, like materialfound on running shoes.6 The School of the Art Institute of ChicagoInstructional Fabrication 7
REQUIREDEquipment For Process: Check out from cageOverviewEye Protection8 Oxy Goggles are shaded to preventradiation exposure—shade valueof 5 for Oxy, 10 for other weldingprocesses. Do not observe otherwelding processes with oxy gogglesother than oxy fuel.Flame Retardant Jacket is required forall welding processes.Hand ProtectionWelding Gloves are available in small,medium, and large. Gauntlet stylewelding gloves protect your handsfrom radiant heat—do not use thesegloves for handling material.Respiratory ProtectionWelding JacketWelding GlovesWelding Tip orCutting AttachmentStrikerFiller MaterialPersonal Protection EquipmentWelding JacketHearing ProtectionWelding GogglesRECOMMENDEDEar MuffsMagnetic Clamps& FixturesLocking PliersWire BrushSlaghammerWelding FumeRespiratorHearing protection is not required foroxy fuel. However, you may need themwhen someone near is noisy. In thatcase, use ear muffs . Foam plugs arenot recommended. NO HEADPHONES.A Welding Fume Respirator is highlyrecommended for persons withrespiratory concerns. The metal shopis equipped with an exhaust systemthat must be activated before usingwelding equipment.The School of the Art Institute of ChicagoInstructional Fabrication 9
MaterialMaterialHandlingHandlingMaterial ConcernsThe Columbus Metal Shop sells steel in a variety of shapes anddimensions. Rod stock and tubing is available in rounds and squares,angle iron is available in a variety of dimensions, and sheet metal isavailable in common gauges (thickness).Linear material is sold by the foot length or in some cases full lengthsaveraging 12 feet. Sheet metal is sold by the square foot, with aminimum purchase requirement of 4 square feet (24” X 24”).How to CarryA separate pair of gloves for materialhandling is recommended—DO NOTuse Welding Gloves. Also, it is veryimportant for your welding gloves toremain oil-free.Types of SteelHot RolledUse caution when entering & exitingdoorways or blind intersections. Grayscale on surface Clean with wire brush beforeweldingDo not try to carry long lengthsor heavy material without help.Avoid walking in front of or behindmaterials, walk alongside.Cold Rolled Shiny, oily surface Clean with orange soap and papertowels before welding. Dispose ofpaper in red fire-proof can.Keep hand onehand-length fromend of material.Before welding, make sure to removeall oil used during the preparation andfabrication of materials.DO NOT weld on materials, including hardware, that contain: Paint Wax Chrome Plated orGalvanized Surfaces Magnesium10 The School of the Art Institute of Chicago Lead Rust Grease or Oil (burned oil isa carcinogen)Reuse BinRecycle BinMaterial for the Reuse Bin mustbe approved by management.Please refrain from tossingunusable material, recycle it.Instructional Fabrication 11
Welding: Anatomy & CapabilityTorch HeadA. MixerThere are 8 mixing stationsattached to the wall. This isyour source for oxygen andacetylene fuel.C. Cutting AttachmentThe cutting attachment simply functions asa convenient and economical approach tocutting steel. The cutting attachment can beused for material up to 3/4 of an inch thick.BarrelThe mixer is where you willattach welding tips, cuttingattachment, and the rosebudheating torch.Oxygen Control ValveMixing ChamberAcetylene Control ValveControl ValveClose up ofCutting AttachmentAcetylene Hose (red)Oxygen Control AttachmentOxygen Hose (green)D. Rosebud Heating TipB. Welding TipsThe Rosebud Heating Tip is used for specificheating applications. The Rosebud is a fuelintensive attachment that should be usedwith discretion. Please check with shop staffto see if it might be right for your project.There are 3 types of weldingtips available: 1, 3, 5, and 9. Tipsize will depend on type of fillermaterial used, see below chart.REGULATOR SETTINGSMaterialTip SizeAcetyleneOxygenFiller Rod22-18 gauge18 psi8 psi1/16"16-14 gauge38 psi8 psi3/32"12-10 gauge58 psi8 psi1/8"1/4"-3/8"98 psi8 psi3/16" ** 3/16" filler rod is not available through Resale.12 The School of the Art Institute of ChicagoClose up ofRosebud Heating Tip1359Instructional Fabrication 13
Turning On Fuel1.Before you begin, perform Hover Test.4.Place the back of your bare hand close to a worksurface or tool before touching or setting downsomething heat sensitive.Install tip into mixer, hand tighten nut on topwith touch tip facing to the left (for right hand use)or facing right (for left-hand use).ABWelding tables, stationary equipment, tools, andscrap material might not appear hot, but may behot enough to injure you or damage equipment.2.Take enough hose off hanger carefullyso the mixer reaches the welding table withoutcreating a tripping hazard.5.Check torch handle to make sure it is closed bygently turning knobs counter clockwise to open andthen clockwise to completely close.A3.Inspect the hose for wear or damage bymaking your way from the torch handle tothe regulators.6.BCheck regulator keys to make sure they are backedout (disengaged) and approximately ½ inchof threads are exposed.approximately ½ inch14 The School of the Art Institute of Chicagosteps continue to next page15
Turning On Fuel continuedStanding to the side of regulators, open both oxygen andacetylene shut-off valves slowly by turning counter-clockwise untilfully opened, then close ½ turn clockwise.acetylene goggles.BClose ½ turn: ClockwiseOxygen Number Increments: 5, 10, 15, 800600040100 12014060080010while directing welding tip towards exhaust. Turn regulator keyclockwise until 5 psi registers on regulator gauge, always reading inred. Then close mixer valve.01604020020USE NO OIL12006000040080400 0180208.Open acetylene (red) and oxygen (green) mixer valves ¼ turn1000160001608000100 12 14080601200000Open: Counter-clockwiseBefore the torch is lit, put on welding gloves and oxygen-240A9.12007.180200psikPa0014Acetylene Number Increments: 1, 2, 3, 4, .024012006040000200001601806080400 00100 12 140801000000160800028001510Ratio 1 : 11 part acetyleneto 1 part oxygen16 The School of the Art Institute of Chicago0.551.5202530psi2.0kg/cm2proceed to lighting the torch17
Process: WeldingLight the TorchAnd Weld!1.Direct torch away from you, towards the ventilation.5.Focus green cone's tip (neutral flame) onto area you are welding.2.Open acetylene control valve on mixer, approximately1/8 turn rotation counter-clockwise.6.Maintain a consistent distance from material, heating a narrowpath between two materials.3.Light with striker. Never use lighters or othersources for ignition.7.After puddle is established, introduce filler rod.*Always position yourself with fresh air at yourback so fumes are drawn away from you, notpast you.8.Melt filler rod into puddle and move along, establishing a weldpath, often called a bead.rk!spaWeld PathFlame TipAdjust the Flame4.ion —ectDirofldWeAdjust acetylene to form feather shaped flame.Welding TipIf there is too much acetylene, flame breaks away from the tip.Slowly add oxygen—flame will sharpen and elongate.Filler RodContinue to add oxygenuntil neutral flame is established.18 The School of the Art Institute of ChicagoInstructional Fabrication 19
Process: CuttingA. Prepare EquipmentB. Ignite Flame1. Inspect cutting attachments before use. If there appears1. Open acetylene valve on torch 1/8 turn and light with striker.to be grease, oil, or equipment damage, return tools to thecage and exchange for a working replacement.2. Open oxygen valve and flame should appear, also known asacetylene feather. Continue to add oxygen and reduce featheruntil neutral flame is established.2. Insert cutting attachment into the torch handle andhand tighten the connection nut.3. Establish puddle by maintaining a consistent distance from3. Adjust oxygen regulator to the pressure setting relativematerial, heating a narrow path (same as welding).to material size, see tip chart below. Then open oxygen valveon torch handle.4. Depress oxygen lever and move to make cut.4. Adjust acetylene regulator to 10 psi. Then open acetylenevalve on torch handle.Weld CutCutting AttachmentDirection of Cut — FlameREGULATOR SETTINGSOxygen Lever20 MaterialCutting Tip SizeAcetyleneOxygenUp to 10 gauge0008 psi20 psiUp to 3/16"008 psi20 psiUp to 1/4"08 psi30 psiUp to 3/8"08 psi35 psiUp to 1/2"08 psi35 psiUp to 5/8"08 psi40 psiThe School of the Art Institute of Chicagonotes: Material must besupported and cut with thegrain of the table, never against.Keep feet and hose from underthe table and away from fallingmetal debris.Instructional Fabrication 21
Closing Down: Leaving Station1.Extinguish flame by first closing oxygen at mixer.Turn torch handle knob counter-clockwise. Repeatprocess to close acetylene at mixer.A2.Oxygen first,B4.Close shut-off valves for oxygen & acetylene byregulators, exposing approximately ½ inch of threads.approximately ½ inchthen acetylene.turning clockwise.Back out regulator keys on oxygen & acetylene5.Take tip off, be careful of temperature. Allow tip orattachment to cool before returning to cage!HOT!Close: Clockwise3.Bleed the line. Open acetylene at mixer and allow fuel toempty for a few seconds, a process known as bleeding theline. Then close acetylene at mixer. Repeat for oxygen.A22 Acetylene first,The School of the Art Institute of ChicagoB6.Hang hose up on wall rack in large, neat loops. Returnall the equipment back to the cage.then oxygen.Instructional Fabrication 23
End CommentsPlease do not hesitate to ask for help. If you are not absolutelycertain about what you are doing, or if you are having difficultywith any aspect of the process we can help.If the equipment is not working properly or appears to bedamaged stop immediately and seek shop staff.General Principles in Welding SteelA well balanced neutral flame is used for welding most steels.To be sure the flame is not oxidizing, it is sometimes used with aslight acetylene feather. A very slight excess of acetylene may beused for welding alloys with a high carbon, chromium, or nickelcontent. However, increased welding speeds are possible by usinga slightly reduced flame. Avoid excessive gas pressure becauseit gives a harsh flame. This often results in cold shuts or laps, andmakes molten metal control difficult.The tip size and volume of flame used should be sufficient toreduce the metal to a fully molten state and to produce completejoint penetration. Care should be taken to avoid the formation ofmolten metal drip heads from the bottom of the joint. The flameshould bring joint edges to the fusion point ahead of the puddleas the weld progresses.The pool of the molten metal should progress evenly down theseam as the weld is being made.The inner cone tip of the flame should not be permitted to comein contact with the welding rod, molten puddle, or base metal. Theflame should be manipulated so that the molten metal is protectedfrom the atmosphere by the envelope or outer flame.The end of the welding rod should be melted by placing it in thepuddle under the protection of the enveloping flame. The rodshould not be melted above the puddle and allowed to drip into it.INSTRUCTIONALFABRICATION
oldest welding processes, though in recent years, it has become less popular in industrial applications. However, it is still widely used for a variety of applications. Oxy-fuel equipment is versatile, lending itself to welding, brazing, braze-welding, silver soldering, meta
