Transcription
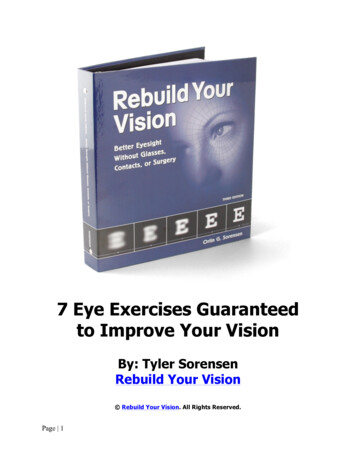
7 Eye Exercises Guaranteedto Improve Your VisionBy: Tyler SorensenRebuild Your Vision Rebuild Your Vision. All Rights Reserved.Page 1
Welcome to my special report, “7 Eye Exercises Guaranteed to Improve YourVision.”My name’s Tyler Sorensen. I’m the President & CEO of Rebuild Your Vision.By using the eye exercises in this report, my brother improved his visionfrom 20/85 to 20/20 and passed the visual acuity test given to United StatesNavy fighter pilots after wearing glasses for a good portion of his life. He wasa commercial airline pilot at the time and the FAA had always required himto where his glasses while he was flying. But his vision improved so muchthat the FAA medical examiner actually removed the restriction that wasrequired for him to wear his glasses while he was flying!As you can imagine, it literally changed his life, and everyone wanted toknow how he did it. Men’s Health magazine even featured his story of visionimprovement, calling it “One of the Greatest Comebacks of All Time!”That was the moment we knew we had to get this information into the handsof the millions of people who suffer from poor and deteriorating eyesight.And that’s how Rebuild Your Vision came to be. Our company is entirelydedicated to helping people improve and preserve their vision safely andnaturally.The eye exercises contained in this special report work to improve yourvision by helping you regain lost flexibility, strength, and coordination in themuscles of your eyes. Through repetition, these exercises and techniquesstimulate and relax your eyes in ways that normal, daily activities do not,helping to improve your vision naturally.Sounds pretty exciting, doesn’t it? Well before we get started, a littlehistory Natural vision improvement and vision training are not new concepts. Theywere pioneered by Dr. William H. Bates in 1919, a highly respected doctorwithin the field of ophthalmology who wrote The Bates Method for BetterEyesight without Glasses.Dr. Bates examined thousands of patients and observed that many cases ofrefractive errors changed their form or suddenly improved. This led him tobelieve that these conditions were not permanent and that there could be acure or prevention for them. Dr. Bates stated, “Every ophthalmologist of anyexperience knows that the theory of incurability of errors of refraction doesnot fit the observed facts. Not infrequently such cases recoverspontaneously, or change from one form to another.”Page 2
Doctors that teach and offer services in vision training are referred to as“behavioral optometrists.” There are a few associations and groups devotedto this practice, although the numbers are quite small in relation to thenumber of total practicing doctors in the eye care field.Like most people, eye exercises were never presented to my brother by hiseye doctors. It was the same thing every year – eye exam, stronger glasses,and more money, a story you are probably familiar with.This special report outlines seven eye exercises and vision improvementtechniques that can help you to safely and naturally improve your vision. Tryto spend a few minutes a day on each of them. Make an effort to do theexercises without your glasses if possible, but always be conscious of safety.Do not attempt to do these exercises or anything else without your glasses ifit would be unsafe to yourself or others.Within a few weeks, or possibly even days, you should begin to notice youreyes feeling stronger and your vision becoming crisper and sharper than youever thought possible!Exercise #1: Distant NightThe first eye exercise is called “Distant Night.” It is actually more of arelaxation technique that you can use anytime your eyes feel tired orstrained during your training sessions or your daily activities. Prolonged eyestress is one of the most common causes of vision deterioration. Wheneveryour eyes feel fatigued, perform the Distant Night technique asdescribed here for at least 30 seconds up to a few minutes.Warm up your hands by rubbing them together or sitting on them.Sit down in a chair and place your elbows on your knees or a table.Face your palms toward your face and slightly cup the lower portion of yourhands while keeping your fingers straight. Place your eyes in the cups ofyour hands, which should gently rest above and below the bone surroundingyour eye and cheek. No portion of your hand should touch your eyeball, butit is alright if your eyelashes brush against your palm. The fingers of bothhands should slightly overlap, resting near the center top of your forehead.With your eyes open, be sure there is no light entering into your eyes. Whilemaintaining this position, relax and close your eyes while you imagine you’relooking into the distant night. Your eyes are relaxed as they look out at adistance – the purpose of this technique. You might see flashes or floatingcolors, but the goal is to relax enough that you see nothing but black.Page 3
Exercise #2: In & OutAn excellent drill for improving your distance vision is called “In & Out.” Thisalso works great to improve upon “aging vision” (vision loss at a near point)and prevent the further onset of it. Internally, this drill stimulates andstrengthens your ciliary muscle, which is the muscle responsible forexpanding and contracting the lens to focus on an object.You will need something small, such as a pencil tip or newspaper article, thatyou can focus on from a couple inches away, as well as something you canfocus on from at least 10-20 feet away without your glasses on (a picture, amagazine headline, etc ).Hold the pencil or article a couple inches from your face at eye level andfocus on the pencil tip or a letter. Quickly and smoothly adjust your focus tothe distant object that you have picked. Once you have obtained the bestclarity possible, quickly switch your focus back to the close object. The goalis to quickly and accurately adjust your focus between the two objects veryrepetitively, over and over.Performing this drill with each eye independently increases effectiveness. Dothis by using an eye patch or your hand to cover one eye while performingthe drill with the uncovered eye. You can also spend additional time with aneye that is weaker or has worse vision than the other. Work on this drill forapproximately 5 to 10 minutes per day.You will find that over time you will be able to quickly adjust your rate offocus and both objects will become clearer. At this point you can movefurther from the distant object and find an article with smaller text.Exercise #3: 3 Cups – Level 1The following exercise is excellent for focus and coordination. It switchesback and forth to stimulate the muscles used for both near and distantvision.1. This is one of the more challenging exercises to learn. Troubleshootingtechniques are included below to help with some of the problems youmight initially encounter. Relax and it will come. Print the chart labeled“#3 – 3 CUPS” at the end of this report. You will also need a pen orpencil.Page 4
2. Sit relaxed and hold the chart 12 to 24 inches in front of you at eyelevel. If the image is not perfectly clear to you, that’s alright as long asyou can make out the image. You might find it easier to place yourelbows on a table so that your arms do not become fatigued as youhold the chart.3. Hold the pen vertically between the two circles approximately 1-inchfrom the chart. The top of the pen should be at the same level as theimage.4. Focus on the top of the pen as you slowly bring it toward your face.(Refer to Figure 3.2) As you bring the pen closer to your face you willnotice the two circles appear to become three circles. When it appearsthat the three circles are all the same shape and proportion, stopmoving the pen.5. Try to shift your focus from the pen to the center circle. This may bedifficult and could take a few days to master. If you have trouble doingthis, refer to “Troubleshooting” below.6. Once you can focus on the center circle, move your pen away whilemaintaining your focus. Try to see the center circle as clearly aspossible. As you increase your focus you will notice that the centercircle becomes three-dimensional. It will look as if you are peeringdown into a Styrofoam cup. (Refer to Figure 3.3)7. Your final goal for Level 1 is to be able to look at the chart and createthe three circles, the center one appearing three-dimensional, withoutusing your pen.Figure 3.2Page 5
Figure 3.3Troubleshooting for 3 Cups – Level 1a. You have trouble creating the third circle.Cross your eyes as you focus on the pen approximately halfwaybetween the chart and your face. You can also move the chart closeror farther from your face. Your eyes may have also become tired veryquickly, so briefly look away or perform the Distant Night exercise torefresh your eyes.b. You see four circles.Focus closer to the tip of your nose. Bring the pen closer to your faceand keep your eyes focused on it. This should transform the fourcircles into three. Another option is to move the chart a few inchesfarther from your face.c. You cannot focus on the center circle.If you can see the center circle but have trouble focusing on it withoutthe pen, be assured that this is normal when you’re first performingthe exercise. Focus on the top of the pen, and then slowly look over itat the center circle. Keep going back and forth between the two untilyou are able to focus on the center circle without the pen.Page 6
Exercise #4: 3 Cups – Level 2Note: Level 1 and 2 may appear very similar, but they are not. In order toachieve success in Level 2, you must be focused and relaxed. You cannotforce your eyes to perform this drill. You must follow the directions exactlyand let the images appear on their own.1. Place your chair in a position where you can sit and focus on an objectat least 10 feet away. The object can be in the same room or outside awindow – just choose something at a distance.2. Hold the “#3 – 3 CUPS” chart approximately 12 to 24 inches in front ofyou at eye level.3. Position the chart so that when you look just over the top of it you cansee the distant object. Focus on the distant object.4. You should notice in your lower peripheral vision that, again, thereappear to be three circles. Your eyes will feel much more relaxed thanthey felt when focusing on the pen in Level 1.5. Try to adjust your focus on the center circle as if you are trying to lookthrough the laminated chart at the distant object. In other words,maintain your point of focus on the distant object but look at thecenter circle. This is the only way you will be able to obtain and holdthe image of the center circle. If you lose the image of the centercircle, look at the distant object and it should reappear.6. As you increase your focus on the center circle as if you are lookingthrough it at the distant object, you will notice that the circle againappears three-dimensional; only this time the Styrofoam cup willappear upside down as if you are looking down onto an overturnedcup. (Refer to Figure 3.4)Page 7
Figure 3.4Exercise #5: 3 Cups – Level 2b7. Now, try switching back and forth between the two different cupimages. Begin by using your pen and the distant object, alternatingbetween them to obtain the two different cup images. Focus close andyou will be looking into the cup; relax your eyes and you will belooking down onto the overturned cup. Obtain a clear image of eachcup before switching your focus.8. Finally, try to alternate between images without using your pen or thedistant object. You should be able to control your point of focus intothe position needed to see these images.Exercise #6: 3 Cups – Level 3a1. Tape the “#3 – 3 CUPS” chart at eye level on any window where youcan step back at least five feet from it.2. Begin by standing 12 to 24 inches from the chart and obtain the firstimage from Level 1 – looking inside the cup.3. Slowly walk backward and maintain that image as far back as possible.Once you can no longer maintain the image of the cup, slowly walktoward the chart until you are approximately 12 inches from thewindow. At this time you should feel slightly cross-eyed, like you’refocusing near the bridge of your nose.Page 8
Exercise #7: 3 Cups – Level 3b1. Tape the “#3 – 3 CUPS” chart at eye level on any window where youcan step back at least five feet from it, the same way you did for Level3a.2. Begin by standing 12 to 24 inches from the chart and obtain the imagefrom Level 2 – looking down on an overturned cup.3. Start walking backward, maintaining your focus on the cup. Thisexercise might be more difficult. If you lose the image, try to get itback by looking through the window. Remember to walk slowly, relax,and concentrate.4. Once you can no longer maintain the image of the overturned cup,walk toward the chart until you are as close to it as you can be withoutthe cup appearing blurry.5. Record how far you can walk backward for both Level 3a and Level 3b.You don’t necessarily need a tape measure; just write a note that youwere one step in from a particular object (for example, the refrigeratoror a picture on the wall). As you progress, you should be able to movefarther from the window while still maintaining the cup images.Advanced Technique: Try switching back and forth between the twoimages as described in Level 2b at different distances up to 5 feet from thechart. This takes a great amount of control and focus.Bonus Vision Improvement Technique: Focus – Focus – FocusTry to focus on everything you can during your normal daily activities. Whiledriving, waiting in line, or going for a walk, work at challenging your eyesand adjusting your focus to see things clearly. Test how far away you canread a street sign or the name of a book on the shelf across the room. Trynot to strain to see clearly. Relax and control your focusing abilities. This willkeep your eyes constantly stimulated and help them re-adapt to clear vision.To your vision – for life.Sincerely,Tyler SorensenPage 9
Rebuild Your Vision, LLC14241 NE Woodinville-Duvall Road, #398Woodinville, WA 98072Toll-Free 1-877-733-4543 Rebuild Your Vision. All Rights Reserved.DISCLAIMER: The information contained within this report is intended for use as aneducational device for the improvement of the visual system. The reader assumes all risksand liabilities associated with the application of the techniques defined within this book.Neither the author nor any individual who has partaken in the conception or publication ofthis report may be held responsible for any damage, claim, or injury resulting from any ofthe applied or practiced techniques or exercises contained within this report. In no formshall this report be considered a substitute for professional optometric or ophthalmologiceye care. Consult an optometrist or ophthalmologist before beginning this or any othervision improvement program.Page 10
Aug 07, 2018 · Men’s Health magazine even featured his story of vision improvement, calling it “One of the Greatest Comebacks of All Time!” That was the moment we knew we had to get this i