Transcription
User's Guide
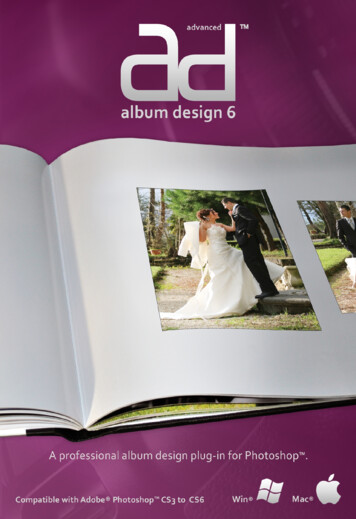
User's GuideAlbum Designwww.SPC-international.com
Index1.0 Introduction2.0 Getting started and System Requirement3.0 Understanding basics of Album Design3.1 Workflow of Album Design3.2 Eight Major section of Album Design4.0 Templates4.1 How to open and resize template4.2 How to create own template4.3 Auto Album5.05.15.25.35.45.5PhotoHow to import photo into folder “Album Design / My Photo”How to insert image into templateAuto templateHow to convert the format of the imagesAdd functions6.0 Effects6.1 How to apply an effect7.0 Masks7.1 How to apply a mask on image8.0 Styles8.1 How to apply a style on image or object9.0 Clipart9.1 How to apply an object into template10.0 Frame10.1 Now to apply / delete frame11.0 Background11.1 How to apply a background into template12.0 Save12.1 How to save ready page12.2 How to modify page which was saved12.3 How to resize the ready project12.4 How to delete a project12.5 Publish Disk Burning / Send via FTP
User's Guide Album Design1.0 IntroductionAlbum Design is a plug-in for Adobe Photoshop that helpsmaking exclusive and premium Photo Album. Album Designis very simple and easy to use. Album Design helps youincrease productivity and make big profits because of itsease of operation and the numerous albums, decorationsand tools it is bundled with.This manual user guide will provide guidelines for using theAlbum Design tools and options included in this package.Description of the various tools and options will be dividedinto categories like for example, User interface, explanationof commonly and repetitively used options and features,more detailed discussions about the each tools and theirspecific usage.Hints and tips will be provided along the way to presentideas of how to get the most from the Album Design and toprovide information to use the tools more efficient andeasily.
User's Guide Album Design2.0 Getting started and System RequirementIt is very important to set the working environment ofAlbum Design before we actually use it for making our Albumpages. After the successful installation of Album Design, insert theUSB dongle. Set the Resolution of Monitor to 1024 x 768 pixels or higher System Requirement For Album Design.To use Album Design you must have the following:A Personal Computer (or comparable laptop),SVGA monitor (24-bit color at 1024x768 resolution or better)SYSTEM REQUIREMENTS - WINDOWS PLATFORM Operating System Windows XP, Windows Vista or Windows 7 QuickTime 7.5 or higher 2GB RAM (Recommended 3GB) Dual-core or higher HD 100 GB Free Space (Recommended SATA 7200RPM )SYSTEM REQUIREMENTS - MACINTOSH PLATFORM Operating System Mac OS X 10.5 or higher 2GB RAM (Recommended 3GB) Intel Core Recommended HD 100 GB Free Space (Recommended SATA 7200RPM ) Setting the Preference of Album Design with your version ofAdobe Photoshop.
User's Guide Album Design3.0 Understanding Basics of Album DesignThis section of manual is very essential for the end users of AlbumDesign as it explains the basic components and the working tools.The Album Design is plug-in software for Adobe Photoshop thathelps to make creative and exclusive photo album pages quicklyand easily.The working environment of Album Design has been designed in away to match the production requirements of a busy commercialphoto lab.The workflow of Album Design is very simple and easy for anyphoto lab operator or any amateur user (designer) to understandand work with a professional system.The instruction for installation an applicationontoWindows Vista1. The following procedures have got to be done in order to get to worksoftware correctly:* go to Control Panel;* User Accounts;* Parental Controls;* Family Safety Options and set to NEVER.2. Restart computer.3. Install “Quick Time”.4. Install the software.Windows 7* go to the Control Panel;* User Account and Parental Controls;* User's Account;* Change the settings of your User Account;* take and drag the cursor down;* click "OK";* Install “Quick Time”;* Restart computer.
User's Guide Album Design3.1 Workflow of Album DesignAt the first you must insert the USB Dongle into your computer.Follow these passes:* Install “Quick Time”* Install “Album Design”* Open “Album Design”* Connect the Preference of “Album Design” with some versionof Photoshop.Choose the version of Photoshop you want to work with.When you like to work with advanced objects turn on the function“Use Advanced Objects”. So all photos will be inserted asadvanced objects and they preserve their original quality.You can also choose some other photo editor software.
User's Guide Album DesignYou can also choose some other photo editor software.Here you can set the option to see the preview of the photos whenyou move the cursor on the thumbnail of it.The next passes:Window of Abobe PhotoshopCOLOR SETTINGS – disable:“PROFIL MISMATCHES”Ask When Opening;Ask When Pasting.“MISSING PROFILES”Ask When Opening.
User's Guide Album Design3.2 Eight major sections of Album Design.The user interface-starting window of Album Design shows 8 Majorsections.As you start Album Design, the default user interface window willbe in Templates tab.As shown above the user interface-starting window includes thefollowing tsBackgroundsSave
User's Guide Album Design4.0 TemplatesAs you start Album Design, the user interface – starting windowappears, wherein the program will be in Templates tab by default.Import folder ofTemplatesCreate/DeleteFolderLibraryof templatesSelect dimensionCreate yourtemplateShow folderTemplatesDelete Photofrom templateUndoGive the numbersto the photo layersCreate Photo Object from your SelectionRotation and flip ofthe templateLayout p
User's Guide Album Design4.1 How to open and to set size of templateClick on button “Dimension”Type the size and the resolution or choose one from the “Custom”Attention!If you don't choose any size template will be opened in its originalsize (40x60cm).Select type of the templates.Selected dimentionChoose some folder with default templates.Double click on thumbnail of a template and it will be opened inAdobe Photoshop with the setted dimension.Attention!Every next template will be opened with the same dimension.Application remembers the last setted dimension and selectedprofile in its next opening.
User's Guide Album DesignClick with the right key on the the thumbnail in order to open thatmenu.You can here:* add green mark;* delete it;* copy template;* past it;* rename;* delete template.When you choose the option copy and past template the copy of itis created and thumbnail of that copy will be shown in the windowautomatically.
User's Guide Album Design4.2 How to create own templateClick icon “Create your template”Type a name,a size anda resolutionof a new template.Click “OK” Select tool “MARQUEE TOOL”of Adobe Photoshop.Select area whereyou want to placephoto.Click icon “Create photo layer from your selection”.
User's Guide Album Design4.3 Auto AlbumClick icon “Auto Album”* Select the folder of the templates* Select dimension for templates* Select the folder of the photos* Select the folder to save the projectNote: when the templates, which were selected, have the differentdimensions they will be resized to the selected dimensionautomatically.
User's Guide Album Design5.0 PhotoSelect tool “MUVE TOOL” from the window “TOOLS” of AdobePhotoshop.The options “AUTO – SELECT, LAYER” and “SHOW TRANSFORMCONTROLS” from tools bar of Adobe Photoshop must be activated.Import photosPlace imageas backgroundAdd/delete a folderCreate newPhoto LayerShow folderPhotoInsert imageinto templateConvertformatof photo
User's Guide Album DesignResize and rotateselected photoApply chian toDistort photoall photo layersHorizontal flip of photoVertical flip of photo5.1 How to import Photo inside of the folder“Album Design / My photo”Create a new folder clicking the icon “Add new folder”Import your folder of the photos or one photo using the icon:“Import a folder of Photo” .You may select a single photo or a group of them using the keysShift or Ctrl from the keybord.Keep the mouse on the thumbnail of the photo in order to see itspreview.
User's Guide Album Design5.2 How to insert image into templateThere are two way to insert images into template:The 1st select Photo Layer of the template where you want to insert photo.Select a photo clicking one time on it. Click icon “Insert image intoTemplate”. Image will be resized and inserted into selected layerAutomatically. Place image and hit “ENTER”.The 2nd – select Photo Layer where you want to insert photo.Double click on thumbnail of the photo to insert it into template.Resize and place image. Hit “ENTER”When the function “UseAdvanced Object” from thewindow Preference is turn onthe photo is inserted asadvanced object without losingits quality.
User's Guide Album Design5.3 Auto templateWhen you like to insert the photos into template automatically dofollowing:* open template;* select all photo objects keeping key Shift;* click icon “Number photo layers” in the window TemplatesAll photo layers are numbered.* go to Photo;* keep the Shift and select more photos;* click icon Insert resized photoAll photos will be insertedaccording to the order of theselection automatically.
User's Guide Album Design5.4 How to convert the format of imagesClick icon “Converter”Select photo.Click button “PROCESS”.Image will be converted from RAW, TIFF, PSD and others formatsto JPEG, TIFF automatically."Album Design 6" permit to layout your digital album using thephoto in their original RAW format.* support format RAW: CRW; NEF; CR2 and DNG.* photo in RAW format may be corrected in some your preferredediting software. When you import this corrected photo into "AlbumDesign" in XMP format the value of profile setting of the photo willbe recognized.* photo in RAW format may be corrected in Camera RAW duringthe layout of your digital album directly. In this case all changes willbe saved in XMP format and you can return to original photo everytime when you need.* It is possible to connect “Album Design 6” with all types of thephoto editing softwares such as Light Room from the windowPreference.
User's Guide Album Design5.5 Add functionsWhen the photo was inserted the green mark appear on the rightdown corner of it.When you need to order the photos according to the data of thecreation or the note click hereClick with right key of mouse on the thumbnail of the photo and thismenu will open.This menu permit:* open photo with Adobe Photoshop;* open it with color correction editor;* get file info;* add mark;* remove all marks;* move this photo to folder “Inserted photo”;* copy this photo;* past it into another folder;* rename;* delete it.
User's Guide Album Design6.0 EffectsSelect folderof effectsPurchaseof effectsOpen PhotoShowfolder“Effects”Extract photofrom templateDelete effectDistort photoResize andRotate photoFlip VerticalFlip Horizontal
User's Guide Album Design6.1 How to apply effectEffect is inserted as advanced object with the openedlayers. It can be modified easily.Effect can be applied onto:* opened document in Photoshop;* image of the selected layer of the template.How to apply an effect onto the opened document inPhotoshop.* select some image in the section “Photo” of “Album Design”;* click with right key of mouse on it;* choose “Open”.Image will be open in Adobe Photoshop.Go to section “Effects”Select type of effects from menu “Select Effects”Double click on the thumbnail of desired effect.This effect will be applied onto that photo.This new image can be saved in Photoshop.
User's Guide Album DesignIf you need to insert that photo into template go back to the PhotoSection and click on the icon “Insert resized photo”That photo will be inserted into the selected layer of the template.How to apply an effect onto image of the selected layerof the template.* select a layer into template;* double click on the thumbnail of the desired effect;* the image is taken out from the template;* the effect is applied on it;* this new image is inserted into template as a new layerautomatically.If you need to delete that new image you should only delete thatnew layer.
User's Guide Album Design7.0 MasksAdd a new folder intoImport own folder “Album Design / Masks”of masks fromDelete folderanother deviceSelect folderof MaskShowfolder“Masks”Delete maskApply mask onlyon the selected areaof imageResize and Rotate MaskApply andmanually resizeDistort Mask
User's Guide Album Design7.1 How to apply mask on imageSelect photo layer from the window“Layers” of Adobe Photoshop.Select type of masks from menu “SELECT MASKS”Mask can be applied on the image inside of the template in two ways:The 1st - double click on thumbnail of the desired mask. It will beapplied and resized automatically.The 2nd – select desired mask and click icon “Insert mask and resizemanually”Resize mask.Hit “ENTER”
User's Guide Album Design8.0 StylesAdd a newfolderImport the folderof stylesSelect folderof StylesDeletefolderShow folderStylesDelete styleModify style8.1 How to apply style on image or objectSelect photo layer or object where you want to apply some style.Select desired style from menu “Select Style”Double click on the thumbnail of the desired style.The style will be applied onto selected photo layer or object.
User's Guide Album Design9.0 ClipartsAdd a newfolderImport ownfolderof clipartDelete folderSelect folderof ClipartsShowfolderClipartsDeleteobject9.1 How to apply an object onto templateSelect type of objects from menu “Select Object”Double click on the thumbnail of the object.It will be applied onto template.Resize and place it. Hit “ENTER”Resize androtate objectDistortobject
User's Guide Album Design10.0 FramesImportframesAdd/deletea folderShow folderFramesClick on thumbnail by right key in order to open that menu.10.1 How to apply / delete a frame* Select type of frame from menu “Select Frame”;* select a photo object on the template;* double click on the thumbnail of the frame.It will be applied onto photo object and the new layer will be createdin the Layers window.To delete the frame take and drag the layer of that frame into thetrash in the Layers window.
User's Guide Album Design11.0 BackgroundAdd a new folderImport own folderof backgroundsSelectfolderShow folderBackgroundsDeletefolderInsert a newDeletebackgroundbackgroundModify styleof background11.1 How to apply background into templateSelect some type of backgrounds from menu “Select Background”.Choose a background, double click on the thumbnail of it.The background will be placed into template automatically.For inserting the 2nd background into template:- select desired background;- click icon “Insert background”.The background will be inserted into template.
User's Guide Album Design12.0 SaveSelect folderof projectShow folder“Album Design /Album Building”Add / deleteprojectTiff converterNumberof pageCreate anindex page ofyour albumResizeprojectSave pageSplitpagePDF converterPreviewMultimediaSend yourproject or WEBAlbum by FTPCD or DVDrecorder
User's Guide Album Design12.1 How to save ready pageSelect the folder or create a new one in order to save the project.Click the button “Save”. The page will be saved by the number one.The thumbnail of the saved page will appear into window of “AlbumDesign”.All subsequent pages will be stored in ascending order theregistration automatically.Ready page is saved in 5 formats automatically: PSD, JPEG, forMultimedia and for WEB.INDEX, SPLIT and TIFF formats can be created manually.Click icon “Show folder Building” for visualized all 7 folders wherethe page was saved.
User's Guide Album Design12.2 How to modify page which was savedIf you want to modify page which was saved – double click onthumbnail of this page in the window of “Album Design”.The page will be opened in the window of Adobe Photoshop.Now you can edit this page.When modification are made you ought to select the same numberof the page from menu “Select number of Page”.Click button “Save”Old page will be overwritten.Attention!When you don't choose some number in order to save that page itwill be saved as a new page in ascending order the registrationautomatically.
User's Guide Album Design12.3 How to resize the ready project* Open the project which you need to resize;* click button “Resize the project”* choose the desired dimension;* when you like to save the resized projectin “Album Design” create a new folder;* click button Start.All templates and all graphic items inside them will be resizedproportionally and all of them will be saved in the new folderautomatically.You only have to check the position of the photos in the project andcenter them if it is necessary.
User's Guide Album Design12.4 How to delete a projectSelect the folder of the project which you want to delete frommenu “Select Project”Click icon “Delete Folder”This window is opened. You have to click the button “Ok”.
User's Guide Album Design12.5 Publish Disk Burning / Send via FTPDisk Burning1. Select “Disk Burning”2. Burning on CD-DVDyour album projectSend via FTP1. Select “Send via FTP”2. Type server information and press Save3. Drag and drop your data for sending in the FTPServerUser's namePasswordSave Account
Adobe Photoshop. User's Guide Album Design. 3.0 Understanding Basics of Album Design This section of manual is very essential for the end users of Album Design as it explains the basic compon
