Transcription
Guide to Using Audacity
Table of ContentsGetting Started. 1Introduction . 1Features . 1Quick Start. 1Technical Requirements . 1Hardware . 1Software. 2Setup . 3Configure Recording Settings for Mac . 3Configure Recording Settings for Windows XP. 4Configure Recording Settings for Windows Vista/7 . 5Adjust and Test Microphone. 7Download and Install Audacity for Mac. 9Download and Install Audacity for Windows . 11Download and Install Lame for Mac . 14Download and Install Lame for Windows. 16Recording . 19Recording in Audacity . 19Editing Recordings . 20Stop vs. Pause in Audacity . 21Re‐recording Using Audacity. 23Cut and Paste . 24Exporting . 26Establish Export Settings. 26Export to MP3 Format . 27iii
Getting StartedIntroductionYou have many options when it comes to recording audio for posting online. You willneed software that can record audio to accomplish this. This tutorial covers recordingaudio using a program called Audacity — a simple, free program for recording andediting audio.This guide will walk you through the entire process of using Audacity to record audioand export MP3 files.Features Record and edit audio clips.Convert recorded audio to mp3 format.Quick StartLet's say you need to record an audio presentation and upload it to an online course.Here's a quick overview of what you need to do:1. Setup microphone and configure audio settings.2. Download and install Audacity and Lame.3. Record and edit audio.4. Convert audio to mp3 file format.5. Upload mp3 file to online course.Technical RequirementsHardwareUsing a headset microphone will provide the best results. The Center for Teaching andLearning with Technology (CTLT) only offers technical support for USB headsetmicrophones. Analog microphones and built‐in microphones on laptops are notsupported.1
Guide to Using AudacitySoftwareBecause Audacity is a free application, not everything you need is included in a singledownload. You must first download and install Audacity, and then install a piece ofsoftware called LAME that will let Audacity create MP3 files. Instructions fordownloading and installing both programs can be found in this guide.You should also make sure that your computer also meets the minimum requirementslisted on the eLearning site.2
SetupConfigure Recording Settings for MacMake sure that your USB headset is connected to your computer and that the headsetitself is not set to mute (if the option is available) before following the steps below.1. Open System Preferences and click the Sound icon to open your sound options.2. Click the Input tab.3. Be sure to choose your USB microphone.3
Guide to Using Audacity4. You can adjust the volume slider as necessary. When you speak into themicrophone while this window is open, the input level meter should reach pastthe halfway point as you speak.Configure Recording Settings for Windows XPMake sure that your USB headset is connected to your computer and that the headsetitself is not set to mute (if the option is available) before following the steps below.1. Open the Start menu and go to All Programs.2. Go to Accessories and then Entertainment.3. Select Volume Control.4. In the upper left corner of the dialog box that opens, click Options and thenProperties.5. In the Properties window, make sure your USB headset mic is chosen as yourmixer device. Then select Microphone under Show the following volumecontrols.4
6. Be sure to click OK at the bottom of the dialog box.7. On the box that pops up, you can use the slider control on the Volume switch toadjust the volume as you begin to record.Configure Recording Settings for Windows Vista/7Make sure that your USB headset is connected to your computer and that the headsetitself is not set to mute (if the option is available) before following the steps below.1. Open the Start menu and select Control Panel.5
Guide to Using Audacity2. Click the Classic View link on the left side of the window and then double clickSound.3. Click the Recording tab.4. Make sure your headset mic is chosen and says that it's working.5. Double‐click your headset mic.6
6. Click the Levels tab.7. Use the microphone slider to set the volume.8. Click OK.Adjust and Test MicrophoneThe online microphone tester is a convenient way to test whether your computer isgetting input from your microphone before you record. A USB connection looks like this:Note: the Center for Teaching and Learning with Technology only offers technicalsupport for USB microphones.1. Make sure that your USB headset is connected to your computer and that theheadset itself is not set to mute (if the option is available) before following thesteps below.7
Guide to Using Audacity2. The mic tester will let you know that your USB microphone has been detectedwith the dialogue shown below. Click Start Test to begin the test. If you aregetting a message that it appears you don't have a USB headset microphoneconnected, but you are sure that you do, view the configure recording settingsinstructions for your operating system. If you still want to test your microphone,click the Test Anyway button.3. When prompted, click Allow to give the microphone test permission to pick upsound from your microphone.4. Speak loud and clear into the microphone for at least 5 seconds. After 5 seconds,the tester will give you feedback on your microphone's volume. If yourmicrophone volume is too high or too low, you will get one of these messages:8
To learn how to adjust your microphone's volume, please view the configurerecording settings instructions for your operating system.5. When your input is acceptable, you will get the below message. Click the StopTest button to end the test.Download and Install Audacity for MacThis tutorial covers instructions for downloading and installing Audacity 1.2.6 to anIntel‐based Mac since that is the most prevalent Mac in use at the School. If you have aPPC‐ based Mac or are running Mac OS 10.6, please follow directions on the Audacitysite.1. Go to the Audacity Web site at http://audacity.sourceforge.net/.2. Click the link that corresponds to your Mac.9
Guide to Using Audacity3. Once the download has completed, open your Downloads folder, then open theAudacity folder.4. Drag the Audacity icon into your Applications folder. Then double‐click theAudacity icon to launch the program for the first time.5. Choose the language you want Audacity to use. Click OK.10
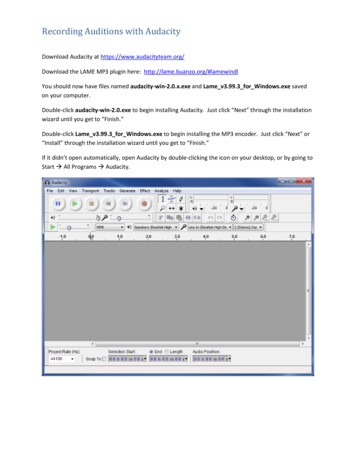
This is the Audacity interface. You can now begin recordingBefore recording, check your audacity audio settings to make sure that your recordingand playback devices are selected:1. Click Preferences from the Audacity menu.2. Click the Audio I/O tab.3. Select your recording and playback devices from the Playback Device andRecording Device drop down lists.4. Click OK.Download and Install Audacity for WindowsThis tutorial covers instructions for downloading Audacity to your PC using Firefox.Note: If you use a different browser, wording and pictures may be slightly different.1. Go to the Audacity Web site at http://audacity.sourceforge.net/.2. Click the Download tab.3. Click the Audacity 1.2.6 installer link.Note: Windows 7 users will need to download the 1.3.12 (Beta) version.4. Click Save File in the dialog box. Save the file where you wish.11
Guide to Using Audacity5. Click OK to open the executable file.6. Run the Audacity Setup Wizard by clicking Next.7. If you choose to launch Audacity, the interface will appear and you can beginrecording.12
This is the Audacity interface. You can now begin recordingBefore recording, check your audacity audio settings to make sure that your recordingand playback devices are selected:1. Click Preferences from the Edit menu.2. Click the Audio I/O tab.3. Select your recording and playback devices from the Playback Device andRecording Device drop down lists.4. Click OK.13
Guide to Using AudacityDownload and Install Lame for MacThis tutorial covers instructions for downloading Lame to your Mac. Use Lame to exportyour Audacity recording to mp3 format so that it can be posted online.1. The free Lame downloader for the Mac can be downloaded from the School'sservers here.Note: PPC‐based Mac users will need to download the LameLib‐Carbon‐3.91.sitfile from the Audacity site and follow instructions from there.2. Once you've downloaded the Lame dmg file, double click the Lame Libraryv3.98.2 for Audacity.pkg file.Note: if prompted, double click the Lame Library v3.98.2 forAudacity on OSX.dmg file to reveal the pkg file.3. The installer wizard window opens. Click Continue.4. If prompted, choose the location where you want to save the file. Click Choose.The first time you export your recording from Audacity's file format to mp3, youwill have to locate the file. Don't forget where you saved it.14
5. The location now appears in the installer window. Select the volume where youwant to install the Lame software then click Continue.6. Click Install. Enter your computer password if prompted.7. You have installed LAME successfully! Click Close to complete the installation.15
Guide to Using AudacityDownload and Install Lame for WindowsThis tutorial covers instructions for downloading Lame to your PC using Firefox. UseLame to export your Audacity recording to mp3 format so that it can be posted online.Note: If you use a different browser, wording and pictures may be slightly different.1. The free Lame downloader for the PC can be downloaded from the School'sservers here.2. When prompted, choose Save File, and then click OK.3. Double‐click the downloader file in the location where it was saved.4. The downloader comes as a compressed zip file and the files must be extracted.Choose the directory where the extracted file will run the extraction wizard.16
Note: If you do not see a wizard, select and copy the file(s) to your desktop.5. Locate the file on your computer and click it.6. Choose Save File.7. Install the program files wherever you want, but remember where you savethem. Audacity will ask you to find lame enc.dll the first time you export to mp3format.17
Guide to Using Audacity8. Open the file, and then click OK to launch it.9. Click Next to run the Lame for Audacity Setup Wizard.Note: the first time you export to mp3 format, Audacity will ask you to findlame enc.dll.18
RecordingRecording in AudacityRecordUse the recordbutton to record your audio. Once you press record, speak clearlyinto your microphone so that you can see the waves on the interface change accordingto your voice.Tip: Mac users, do you receive an error message when you click the record button? If so,install the 1.2.6 version.Pausebutton to take a break from recording. If you press pause, you canUse the pausecome back to the recording and still record on the same track.Note: It is not recommended that you press pause and walk away from your recordingsession, for an extended period of time, without saving your progress first. While youare away from your session, something could go wrong with your computer, and youcould lose your recording.StopUse the stopexport the file.button when you have finished recording and are ready to save orNote: If you press stop by mistake, then the record button again, you will beginrecording a second track that will begin at the same time as the first one. This meansthat if you export the tracks as they are, then the tracks will play simultaneously. Formore information, please see Stop vs. Pause in Audacity.Tip: Audacity 1.3 users can hold down the shift key on their keyboard while clicking theRecord button to continue recording on the same track if the Stop button was pressed.19
Guide to Using AudacityRight‐click image to view audacity recording basics demo in full screenEditing RecordingsGenerally, we find that it is easier to record your presentation and then edit out themistakes after you've finished. When you're recording, and you stumble over a word ormisspeak, just take a breath, keep recording, and edit when you're done.Once you're done recording.1. Press the playbutton to listen to the recording.2. Use the bar at the bottom of the window to get to the area where you want toedit.3. Highlight as much audio as you want to remove.4. Click Delete from the Edit menu. The area you highlighted has been removedfrom the recording. Do this as many times as you want for any part of therecording you want to remove.5. If you find that you have deleted something by mistake, click the Edit menu andselect Undo Delete. Do this as many times as necessary.6. Use the File menu to export the file to mp3 format.Tip: If you are not able to hear playback of the recording, follow instructions from theDownload Audacity for Mac or Download Audacity for Windows sections on how tochange audio settings within Audacity preferences.If this is the first time you've exported to mp3 format, you'll have to download, and thenlocate the Lame library file. Instructions on how to download the file can be found in theSetup section. To locate the Lame library file view the establish export settings section.20
Stop vs. Pause in AudacityThe Stop and Pause buttons function quite differently inside Audacity.Generally, you should use the Stop button when you are completely done recording atrack, and want to edit, or export it to mp3 format. You should also use the Stop buttonif you want to suspend a recording and start fresh.Use the Pause button to take a break from recording a track.If you press the Stop button by mistake, and then press Record, another track willrecord. When you export these tracks to mp3 format, the tracks will be compiled into asingle audio file, and will play back simultaneously.Tip: Audacity 1.3 users can hold down the shift key on their keyboard while clicking theRecord button to continue recording on the same track if the Stop button was pressed.Right‐click image to view stop vs pause demo in full screen21
Guide to Using AudacityAvoiding simultaneous playback1. Inside the first track's field, place the cursor where you want to continuerecording.2. Click the Recordbutton.button when you're finished. The two tracks will be exported3. Click the Stoptogether as usual, but will play as one continuous track because the audiodoesn't overlap. Before exporting to mp3 format, you may want to edit theaudio so that it will play back smoothly.Tip: Audacity 1.3 users can hold down the shift key on their keyboard while clicking theRecord button to continue recording on the same track if the Stop button was pressed.Right‐click image to view avoiding simultaneous playback demo in full screenIf this is the first time you've exported to mp3 format, you'll have to download, and thenlocate the Lame library file. Directions on how to download the file can be found in theSetup section. To locate the Lame library file view the establish export settings section.22
Taking a break during recording1. Click Pause.2. Click the Pausebutton again to resume recording. The recording will pick upwhere it left off. You may want to play it back and edit it as necessary beforeexporting to mp3 format.Note: Your file is not automatically saved when you pause your recording. You still needto save your file. We don't recommend pausing a recording, going away for a few hours,and then coming back to the recording. There may be a problem with the computer inthe interim that could case you to lose the recording.Re‐recording Using AudacityLet's say that you made a recording and you don't want to keep it. Below are steps onhow to re‐record using Audacity.1. Press the Stopbutton.2. Open the Edit menu.3. Click Undo Record. The recording has now been erased.4. Click the Recordbutton again to re‐record the audio.5. When you're happy with it, press Stop.6. Open the File menu and select Export as MP3 to export it as an mp3 file.23
Guide to Using AudacityRight‐click image to view re‐recording demo in full screenIf this is the first time you've exported to mp3 format, you'll have to download, and thenlocate the Lame library file. Directions on how to download the file can be found in theSetup section. To locate the Lame library file view the establish export settings section.Cut and PasteLet's say that you have recorded two separate tracks, after pressing Stop then Record.You may want to insert all or part of one of those tracks into the other. The tracks canthen be exported and will play smoothly as a single track.How to cut audio from one track and paste it into another1. Highlight the part of the second track that you want to cut.2. Open the Edit menu.3. Select Cut. The part that you just highlighted has been removed from the secondtrack.4. Place the cursor inside the first track where you want to paste the cut audio.5. Open the Edit menu.6. Click Paste.7. Repeat steps 1‐6 as many times as you want until the track sounds the way youwant.24
8. Remember to close the second track before exporting so that any leftover audiois not exported with the first track. To do this, click the X in the second track'sfield.Right‐click image to view cut and paste demo in full screen25
ExportingEstablish Export SettingsBefore you can export your audio using the Lame encoder, you have to make sure theexport settings are correct. You only have to do this once; all other mp3s will generateaccording to these settings.Once you have recorded your audio.1. Open the Edit menu. Mac users will open the Audacity menu.2. Select Preferences.3. Click the File Formats tab.4. Click Find Library.5. Find the Lame encoder file that you saved to your computer when youdownloaded the LAME encoder.Tip: On a PC, this file is named lame enc.dll. On a Mac, this file is namedlibmp3lame.dylib or lamelib.6. Open the file.7. Open the Bit Rate drop down menu and set the bit rate to 48.8. Click OK.You can now export all future audio files recorded in Audacity to mp3 format.Note: Windows 7 users do not need to follow these steps if using Audacity 1.3.12 (Beta)or higher.Right‐click image to view export settings demo in full screen26
Export to MP3 FormatOnce you establish your export settings, you can export your recording to mp3 formatso that it can be posted online and played in an mp3 program such as iTunes.1. Open the File menu.2. Select Export as MP3.3. Choose the location where you want to save the mp3 file.4. Click Save.5. Enter a title and artist for the recording. This will make it easier to identify therecording in a media audio player such as iTunes.6. Click OK.The file is now in the location where you saved it and can be posted online.Right‐click image to view export to mp3 demo in full screen27
PPC‐based Mac users will need to download the LameLib ‐ Carbon ‐ 3.91.sit file from the Audacity site and follow instructions from there. 2. Once you've downloaded the Lame dmg file, double click the Lame Library v3.98.2 for Audacity.pkg file. Not

