Transcription
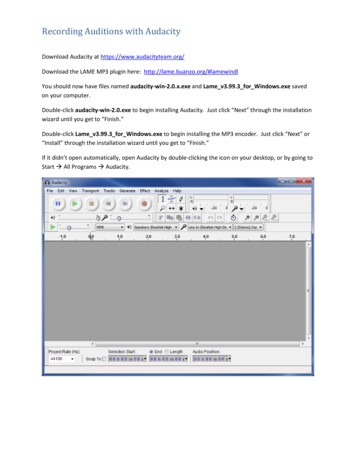
Recording Auditions with AudacityDownload Audacity at https://www.audacityteam.org/Download the LAME MP3 plugin here: http://lame.buanzo.org/#lamewindlYou should now have files named audacity-win-2.0.x.exe and Lame v3.99.3 for Windows.exe savedon your computer.Double-click audacity-win-2.0.exe to begin installing Audacity. Just click “Next” through the installationwizard until you get to “Finish.”Double-click Lame v3.99.3 for Windows.exe to begin installing the MP3 encoder. Just click “Next” or“Install” through the installation wizard until you get to “Finish.”If it didn’t open automatically, open Audacity by double-clicking the icon on your desktop, or by going toStart All Programs Audacity.
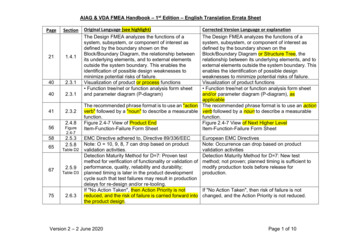
Click “Edit” and then “Preferences” and then select “Libraries” in the left column of the preferenceswindow. Then, click the top “Locate ” button.If the location of lame enc.dll textbox already has the path to the file in it, just click “OK.” If that textbox is blank, click “Browse” and click on your C: drive, then “Program Files (x86)” (if you don’t have onewith the (x86) after it, just click “Program Files”), then “Lame for Audacity” then lame enc.dll. Click“OK” to close that window and go back to the Preferences window.Click “Devices” at the top of the Preferences Window:
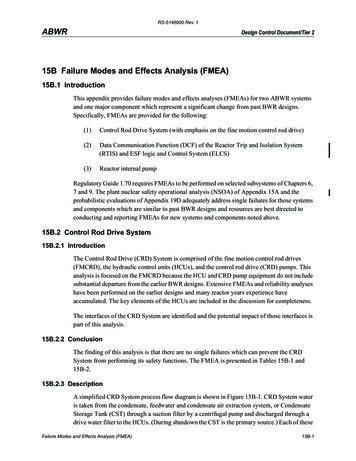
Under “Recording” select your external interface as the Device. The name will vary depending on whattype of audio interface or USB microphone you are using, but will probably have either “USB” or thebrand-name of your interface or microphone in the name of it.Do NOT select “Line In” or “Mic” or “Internal Mic” or “Stereo Mix” or anything like that. Look for “USB”or the brand name of your external interface that is connected between your computer and themicrophone(s).Click “OK” to close the Preferences window and return to the main Audacity window.Click the triangle next to the microphone icon and then click “Start Monitoring.”Talk or play into the microphone, and you should see the audio meter movingabove the microphone icon. Adjust your levels using the controls on your audiointerface or using the slider on the upper right of the Audacity window. Themeter should be peaking between -24 and 0 while the student is playing theirloudest.Generating the Temporary mp3 files (FBA FOA FVA District Officers Only)In MPA-Online, go to the details section for your auditions and click “Download empty MP3 files.” Thenclick the link(s) to download a zip file containing the mp3 files for each room.
For each zip file, open it and drag the mp3 files into the USB drive that you will give to that room:The person running the computers in each room should then create a folder on the computer they areusing, and copy all those mp3 files from the USB drive onto that computer.
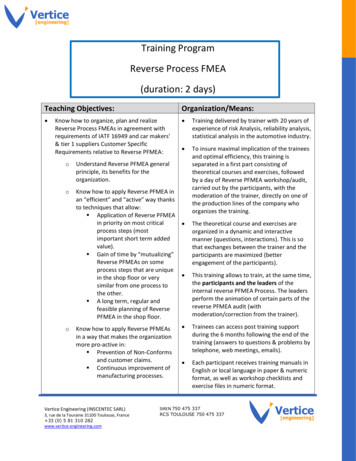
Recording the AuditionThe buttons work very similar to a CD or Tape Recorder. Here is what you should use each button for:Record Button: Only use this once at the very beginning of the students’ audition to beginrecording. Hold down SHIFT while clicking this button if you accidentally clicked Stop instead of Pause,and you need to start recording again at the end of the current track rather than creating a new track.Pause Button: Use this to temporarily pause recording while you read the instructions to thestudent, or when your script says “Recording Pause” or “Recording Off.” Click it again before thestudent starts playing or when the script says “Recording On.”Stop Button: Only use this at the very end of a student’s audition when you are finished withall recording for that student.While Recording, you can use the meter at the top and the waveform in the track to confirm that thestudent is being recorded and that the levels aren’t too high:After Recording, press the “Home” hey on the keyboard to return to the beginning (or clickwith the selection tool anywhere on the waveform), and then click the Play button to listen and confirmthe quality of the recording.
If there is a lot of silence at the beginning, you can click-and-drag the silent part and then press the“Delete” key on the keyboard to delete it. Be careful not to cut it too close there should be a secondor two of silence before you hear anything, and sometimes if an etude has a soft beginning it will looklike silence on the waveform. Always press “home” and “Play” to listen to make sure you didn’t cut toomuch off, and if you did, press Control-Z to undo and try it again.Saving the RecordingYou will need to “Export” the recording to an mp3 file on your computer, and then copy that mp3 file tothe USB Thumb Drive that the runners will pick up and take to the district chair for uploading.Click “File” and then “Export ”Select the folder that contains the empty mp3 files you copied to the computer earlier.
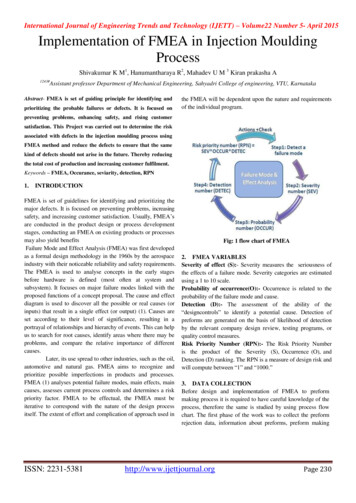
Select (click once) the audition code of the audition that you just recorded. DOUBLE CHECK THAT YOUCLICKED THE CORRECT CODE. A simple error here could cause this student’s audition to be mixed up orlost. The correct code will appear in the “File name” box when you click it.Change “Save as type:” to MP3 Files.After you have double-checked that the audition code is correct in the filename, click “Save.” This willask you to confirm you want to replace the existing file and then bring up the Edit Metadata window you don’t need to enter any metadata so just click “OK”Go to your folder of mp3 files on the computer. To make sure your most recent mp3 file is always at thetop of that window and easy to find, you can add a “Date Modified” column and then click the columnheader and then sort by that column.Right-Click any column header, and then find “Date Modified.” If there is not a check by it, click it to addthat column.Then scroll to find the Date Modified column and click it. You may need to click it twice, once sorts itAscending, clicking it again sorts it Descending putting the most recent file on top.Drag the file you just saved from the window to the USB Thumb Drive. (In the picture it is called “USBDrive,” but it might be something else for you).
You should now have a copy of the file on the Thumb Drive. Do not delete the file from the computer,just in case something happens with the thumb drive version and they need to get it from you again.Prepare for the Next AuditionNow that you are sure you recorded the audition and have two copies of the mp3, you can return toAudacity and prepare for the next audition. There is no reason to save an individual Audacity Project filefor each student as long as the mp3 was exported, so we’re just going to delete this student’s track andmake a new one for the next audition.Delete the previous audition track(s) by clicking the X in the upper left corner of the track.You may need to enable “Start Monitoring” again to pre-check levels for the next student. It turns itselfoff every time you stop recording with the stop button:
When you click the Record button for the next audition, it will automatically create a new track and startrecording to it.Other Audacity Things You May Need To Know:If you hit Stop and then Record again, it may start recording on a new track. Click the cursor to the endof the last track first, so it will start recording the new track after the old track. (If you’re using the latestversion of Audacity, it no longer creates a new track every time you start recording, so if you accidentallyclick Stop instead of Pause, you can just click Record again)If you need to move objects around so that two tracks aren’t playing back at the same time, click themove tool,and then drag the objects to position them in order. Click back to the regular select toolwhen you are finished.If you have headphones plugged into the computer that you want to listen on, click “Transport” andthen “Software Playthrough” to listen in the headphones while the student is playing.It will only work when “Start Monitoring” is enabled (see above) or when you are actually recording. Ifthere is a slight delay, that is normal.
Generating the Temporary mp3 files (FBA FOA FVA District Officers Only) In MPA-Online, go to the details section for your auditions and click “Download empty MP3 files.” Then click the link(s) to do