Transcription
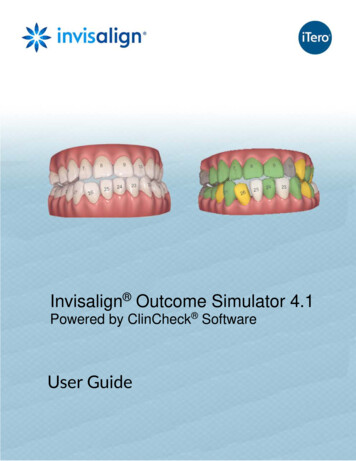
Invisalign Outcome Simulator 4.1Powered by ClinCheck SoftwareUser Guide
Invisalign Outcome Simulator 4.1User GuideCOPYRIGHT NOTICECopyright 2017 by Align Technology, Inc. All rights reserved.Invisalign Outcome Simulator 4.1 User Guide, English language version.Updated March 16, 2017.No part of this manual may be reproduced, photocopied, stored in a retrieval system, ortransmitted in any manner (electronic or mechanical) for any purpose other than thecustomer’s normal usage, without the prior written permission of Align Technology, Inc.TRADEMARKSINVISALIGN, ITERO, ITERO ELEMENT, and CLINCHECK, among others, are trademarksand/or service marks of Align Technology, Inc. or one of its subsidiaries or affiliatedcompanies and may be registered in the U.S. and/or other countries. All other trademarksare the property of their respective owners.USA CORPORATE HEADQUARTERSINTERNATIONAL HEADQUARTERSAlign Technology, Inc.2560 Orchard ParkwaySan Jose, California 95131, USATel: 1 (408) 470-1000Align Technology B.V.Arlandaweg 1611043 HS AmsterdamTel: 31 (0) 20-586-3600EU AUTHORIZED REPRESENTATIVEEmergo EuropeMolenstaat 152513 BH, The HagueThe NetherlandsCUSTOMER SUPPORTFor questions, please contact your local Customer Support. Contact details are available onyour Invisalign Doctor Site under the Support tab.Align TechnologyPage ii
Invisalign Outcome SimulatorUser GuideCONTENTSWHAT IS INVISALIGN OUTCOME SIMULATOR? . 1Indications for Use .1Intended Use .1How this Document Is Organized .1MODEL CREATION. 31. Starting a New Scan . 3New Patient .3Existing Patient .32. Completing the Prescription . 43. Performing the Scan . 54. Correcting Axis Lines and Tooth Numbers . 5Adjusting Incorrect Axis Lines .5Adding Axis Lines .6Deleting Axis Lines .6Updating Tooth Numbers .6Undo/Redo/Reset Buttons .75. Creating the Simulated Outcome. 76. Launching the Simulator . 8From MyAligntech .8From the Patient List.8From the Orders List .9THE SIMULATOR USER INTERFACE . 97. The Main Menu. 10File Operations . 10View Menu . 11Help Functions . 128. Toolbar Overview . 139. File Operations Bar. 14OPEN and SAVE Buttons . 14D16795 Rev BPage iii
Invisalign Outcome Simulator 4.1User GuideSHARE Button . 1410. Undo/Redo Buttons . 1411. 3D Model Bar . 14NUM Tool . 15IPR Tool . 15DFCLTY Tool . 16OCCLUS Tool . 1712. Primary Views Bar . 1813. Translate/Rotate Toggle . 1814. Zoom Slider . 20TREATMENT PLANNING. 2015. Setting Treatment Goals . 21Selecting Tooth Status . 22Changing Simulation Settings . 2216. Starting the Adjustment Process. 2317. Changing IPR Values . 24Adding IPR and Spacing . 24Removing IPR and Spaces . 2418. Changing Tooth Positions . 25Changing a Single Tooth . 25Working with Multiple Teeth . 2619. Changing Arch Positions . 2620. Sharing Simulated Outcomes with Patients. 27Viewing the Shared Treatment Simulation . 28Deleting the Simulation . 2921. Sending the Simulation to Align . 29PROGRESS ASSESSMENT . 3122. Launching the Simulator in Assessment Mode . 31From MyAligntech . 32From the Patient List. 32Align TechnologyPage iv
Invisalign Outcome SimulatorUser GuideFrom the Orders List . 3323. Adjusting Axes . 3424. Setting Up the Assessment . 35Identifying the Patient . 35Choosing the Treatment Plan (Optional) . 36Choosing the Current Treatment Stage . 3625. The Progress Assessment Screen . 37The Assessment Toolbar . 38SINGLE, ARCHES, and DUAL Tools . 38REPORT Tool . 39ASSESS Tool . 40SUPER Tool . 40LEGEND Tool . 41Stage Controls . 4126. The Report Panel . 42CONFIGURATION. 4327. Hardware Requirements. 4328. Anti-Virus Software Requirements . 4329. Graphics Driver Requirements . 4330. Data Security . 4331. Symbol Definitions . 44D16795 Rev BPage v
WHAT IS INVISALIGN OUTCOME SIMULATOR?The Invisalign Outcome Simulator software is a proprietary 3D computer applicationfor creating, depicting, viewing and editing an orthodontic treatment plan outcomesimulation, including a virtual representation of the patient’s initial teeth position in avirtual, 3D model.Note: All names used in this document are fictitious. Any similarity to an actual personis coincidental.Indications for UseThe Invisalign System is indicated for the alignment of teeth during orthodontictreatment of malocclusion.Intended UseThe Invisalign Outcome Simulator software is designed to be available on the treatingdoctors’ computer or iTero scanner. The software provides a computerizedapproximation of possible teeth position which can be achieved after Invisaligntreatment.The simulated outcome includes the 3D model, options to adjust it using 3D controls,and Interproximal Reduction (IPR) if needed. The doctor is requested to thoroughlyreview the simulated outcome, and may make changes or modifications prior to sharingit with the patient or submitting the simulated outcome to be used as the desired resultin treatment plan creation.The doctor’s submission of the simulated outcome from the Invisalign OutcomeSimulator software is considered a prescription and constitutes authorization for Align tocreate an Invisalign treatment plan using the information in the simulated outcome.How this Document Is OrganizedSection I, Model Creation, explains the process from scanning the patient’s teethusing iTero scanners and adjusting axis lines and tooth numbers to creating the 3Dmodel.Section II, The Simulator User Interface, explains the use of the menus, tools, andother controls in the Invisalign Outcome Simulator software that are available to thepractitioner for examining the 3D model.Section III, Treatment Planning, describes the various options that the practioner canuse to change IPR values, modify final tooth and arch positions, set treatment goals,and send the simulated outcome to Align to start the process of creating an Invisaligntreatment plan.
Invisalign Outcome Simulator 4.1User GuideSection IV, Progress Assessment, explains how the practitioner can use iTeroscanners to capture information about the patient’s current dentition and then use theInvisalign Outcome Simulator software to compare the current dentition against theInvisalign treatment plan.Section V, Configuration, presents important information about supported operatingsystems, minimum hardware requirements, security, graphics driver requirements, andantivirus recommendations.Align TechnologyPage 2
Invisalign Outcome SimulatorUser GuideMODEL CREATION1. Starting a New ScanYou can start a new scan from the Home page in one of two ways, depending onwhether you are working with a new or existing patient.New Patient Click the New Scan button as shown at left.The New Scan screen appears. Go to “Completingthe Prescription.”Existing Patient Click the Patients button as shown at left.The Patients list appears as shown below. Choose the patient from the list. Youcan search by patient or chart number.The patient’s individual record appearsas shown below.D16795 Rev BPage 3
Invisalign Outcome Simulator 4.1User Guide From the patient’s individual record,choose New Scan as shown below.The New Scan screen appears asshown in the next chapter.2. Completing the Prescription Click the New Scan button.The New Scan screen appears as shown below.Align Technology Add the patient information. Sections marked witha red asterisk (*) are required. For the Case Type field, choose Invisalign fromthe dropdown menu shown at left.Page 4
Invisalign Outcome SimulatorUser Guide3. Performing the ScanOnce you have completed the prescription, you can perform the scan. The scanningprocess is described in detail in the “iTero Element Intraoral Scanner OrthodonticTraining Guidebook.”Once the scan is completed, the 3D model is automatically created. The on-screenProcessing bar allows you to track the progress of model creation.4. Correcting Axis Lines and Tooth NumbersYou can perform several actions to make the 3D model more closely conform to thepatient’s actual dentition.Adjusting Incorrect Axis Lines To adjust an incorrect axis line,click on the incisal or gingival dotand drag to the correct position.The figures at left show before andafter images of axis line correction.BeforeD16795 Rev BAfterPage 5
Invisalign Outcome Simulator 4.1User GuideAdding Axis LinesAn axis line is required for eachtooth that you want to include inthe simulation. If an axis line ismissing, you can add it using thisprocedure: Right-click or tap on the pointwhere the axis line shouldstart: incisal edge, cusp tip ortop of molar groove. The AddAxis Line Point context menuitem appears as shown at left. Click on the context menuitem to add the point. The firstpoint appears as a red dot asshown.Repeat the procedure for the endpoint of the axis line. The completed line appears in green asshown.Deleting Axis Lines To delete an axis line, click or tap on an axis. Thepop-up menu appears as shown at left. Click on Delete Axis.Updating Tooth NumbersAlign Technology To update a tooth number, click ortap on an axis. The pop-up menuappears as shown at left. Click on Increment or Decrementuntil the tooth number is correct.Page 6
Invisalign Outcome SimulatorUser GuideUndo/Redo/Reset ButtonsThese buttons allow you to easily correctmistakes and reverse actions that you haveperformed as you work with the axis lines. UNDO reverses the last action performed. REDO reverses the last UNDO action. RESET reverses all actions taken and returns the model to the original position.5. Creating the Simulated OutcomeWhen you have made all the adjustments tothe 3D model, you are ready to create thesimulated outcome.D16795 Rev B Click the CREATE SIMULATION button.The system displays a series of processingmessages similar to the one shown below. When the simulation processing is complete, the system displays the current dentition on the left and the simulated outcomeon the right, as shown in Section II, TheSimulator User Interface.Page 7
Invisalign Outcome Simulator 4.1User Guide6. Launching the SimulatorWhen the patient scanning is complete, the system prompts you: “Do you want to runInvisalign Outcome Simulator?” Choose “Yes” to launch the simulator.You can also launch the simulator from the MyAligntech site, the patient list, and theorders list as described below.From MyAligntechClick the Open With IOSim field highlighted in the screen shot below.From the Patient ListClick the Invisalign Outcome Simulator button highlighted in the screen shot below.Align TechnologyPage 8
Invisalign Outcome SimulatorUser GuideFrom the Orders ListClick the Invisalign Outcome Simulator button highlighted in the screen shot below.THE SIMULATOR USER INTERFACEThis section describes the organization of the buttons, menus, and windows that allowyou to interact with Invisalign Outcome Simulator software. This section is intendedboth to familiarize new users with the user interface of the Invisalign OutcomeSimulator software and to serve as a reference guide for experienced users.D16795 Rev BPage 9
Invisalign Outcome Simulator 4.1User Guide7. The Main MenuThe Invisalign Outcome Simulator software Main menu allows you to open and savesimulated outcomes, set display parameters, and exit the Invisalign OutcomeSimulator program. Each menu is described in more detail below. Note that the Mainmenu is not available when the Invisalign Outcome Simulator program is launched onthe iTero Element scanner.File OperationsThe File submenu enables you to performthe following tasks by clicking the item orusing the keyboard shortcut, if any, shownin parentheses.Align Technology Open displays the standard WindowsOpen dialog box, which allows you toselect a simulated outcome (Ctrl-O).You can also open files using the Openbutton on the Toolbar, see page 14. Save (Ctrl-S) opens the standard Windows Save dialog box, which allowsyou to name the simulated outcomeand save it to your chosen file location.You can also save files using the Savebutton on the Toolbar, see page 14. Recent Items allows you to quicklyopen a simulated outcome that you recently accessed. Click on or mouseover Recent Items to see the availablesimulations, then click on the name toopen. Display Settings opens the Display Settings dialog box, described below. Exit closes the Invisalign Outcome Simulator software.Page 10
Invisalign Outcome SimulatorUser GuideDisplay SettingsThe Display Settings dialog box allows you tocustomize the following parameters:COLORS Background: Choose from the colors paletteor create a custom color. Tooth: Choose Light, Medium (default) orDark. Tooth Numbers: Choose from the colors palette or create a custom color.TOOTH NUMBERING SYSTEM Choose Universal (default), Palmer or FDI.ROTATION Choose Free-Form (default), Simple or Precise (see page 18 for more information).Click OK to save your changes or CANCEL torevert to the previous settings.View MenuThe View menu gives you access to a number ofsecondary views of the 3D model. The outcomeof selecting these views is shown in the figurebelow. See page 18 to learn how to change theprimary view.D16795 Rev BPage 11
Invisalign Outcome Simulator 4.1User GuideHelp FunctionsThe Help submenu provides access tothe following information:Align Technology Quick Reference Guide opens thisuser guide in the browser. Change Language displays the dialog box shown. Select the desiredlanguage by checking the box. About Invisalign Outcome Simulatorprovides key information as shown atleft. It also includes a link to contactcustomer support or clinical supportat Align Technology.Page 12
Invisalign Outcome SimulatorUser Guide8. Toolbar OverviewThe Invisalign Outcome Simulator software provides a rich set of tools that allow you tofine-tune the visual information shown for the 3D model. You can activate any tool byclicking the icon in the Toolbar. Tools can be in one of three states: Inactive (blue with white text) – The tool function is disabled. Mouseover (light blue with white text) – The mouse is in the proper position tochoose the tool. Active (white with orange bar) – The tool function is enabled.The full Toolbar is shown below, broken into segments. Each segment is described in aseparate section below, starting with the File Operations bar and moving clockwise.D16795 Rev BPage 13
Invisalign Outcome Simulator 4.1User Guide9. File Operations BarOPEN and SAVE ButtonsThe OPEN and SAVE buttons on the File Operations bar are identical in function to theFile Open and File Save commands described on page 10.SHARE ButtonThe Invisalign Outcome Simulator software allows you to share simulated outcomesdirectly with your patients using the SHARE button. See page 27 for more informationabout sharing simulations.10. Undo/Redo ButtonsThe UNDO and REDO buttons are primarily used when youare making changes to the simulated outcome. When youfirst open a patient file in the Invisalign Outcome Simulatorsoftware, both buttons are inactive. As soon as you makechanges to the simulation, you can use the buttons in theusual way: UNDO steps back one operation, while REDOsteps forward one operation.11. 3D Model BarThe 3D Model bar allows you tocontrol the display of information onthe patient’s model. Each of theindividual tools – NUM, IPR,DFCLTY and OCCLUS – isdescribed below.Align TechnologyPage 14
Invisalign Outcome SimulatorUser GuideNUM ToolThe NUM tool enables you to hide or display tooth numbers on the3D model. This tool is always active. By default, numbers are notdisplayed. To display numbers, click the NUM button. To hide numbers, click the button again.3D Model with Numbering ShownYou can change the numbering system – Universal, Palmer, orFederation Dentaire Internationale (FDI) – in the Invisalign DoctorSite clinical preferences. The current numbering system displays onthe ClinCheck model and on the Invisalign Doctor Site.IPR ToolThe IPR tool toggles the display of IPR numerical values andcontrols. The figures below show the IPR display for the Align plan(left) and doctor plan (right). The function of the IPR controls shownin the doctor plan are discussed on page 24.As shown in dual viewD16795 Rev BAs shown in adjusted outcome viewPage 15
Invisalign Outcome Simulator 4.1User GuideDFCLTY ToolThe DFCLTY (Movement Difficulty) tool shows tooth movements thatcould be more difficult to achieve in the treatment. Level of difficulty isindicated by color coded dots: Blue for moderate and Black for high.Note that you can also mouse over any dots to see the movementdifficulty information as shown below. Movement difficulty includesextrusion, intrusion, rotation, and root movement.Align TechnologyPage 16
Invisalign Outcome SimulatorUser GuideOCCLUS ToolThe OCCLUS (Occlusal Contacts) Tool toggles the view of occlusalinterarch contacts in the 3D model.When you click OCCLUS, the teeth become semi-transparent as shownbelow. Heavy occlusal contacts are shown in red, while normalocclusions are shown in green. Teeth become solid whenever you areviewing a single arch.Note: The simulated outcome created by the Invisalign OutcomeSimulator avoids heavy occlusal contacts; they are typically only presentwhen the doctor makes changes to the outcome that create heavycontacts.D16795 Rev BOCCLUS offOCCLUS onOCCLUS offOCCLUS onPage 17
Invisalign Outcome Simulator 4.1User Guide12. Primary Views BarThe buttons on the Primary Views bar control the 3D display as shown in the figurebelow. See page 11 for a discussion of the secondary views.13. Translate/Rotate ToggleThis tool toggles between two modes of motion, ROTATEand TRANS (translate).The TRANS tool enables you to move the model in theplane of the display. Click anywhere on the screen anddrag the model to the desired location.The ROTATE tool enables you to rotate the 3D model soyou can inspect the surfaces from any direction. Clickanywhere in the 3D area and drag the model to thedesired rotated view.The ROTATE tool has three states – Free-form (default),Simple and Precise – which can be set using DisplaySettings dialog box described on page 10. The definitionsof these states are shown below.Align TechnologyPage 18
Invisalign Outcome SimulatorUser GuideROTATE OptionsModeDescriptionReferenceAnterior viewFree-form(default)Drag in any direction to rotate themodel.SimpleClicking and dragging anywhererotates the model in either thehorizontal or vertical plane, even if thecursor moves diagonally.Effect of MovementShown by ArrowTo change the orientation, release andclick again.Clicking on the model and draggingrotates the model in the direction ofthe cursor movement, using the clickpoint as the rotational axis.PreciseClicking outside the model anddragging vertically tilts the model.Clicking outside the model anddragging horizontally rotates themodel around the click point.D16795 Rev BPage 19
Invisalign Outcome Simulator 4.1User Guide14. Zoom SliderThe Zoom Slider enlarges or reduces the size of the 3D model soyou can see more or less detail. (Note that the mouse scroll wheelperforms the same function.) Click the plus sign to enlarge. Click the minus sign to reduce. Place your cursor over the flag to move the flag to a horizontalposition. Click the flag and move it to the zoom factor youneed.The default zoom value for each view is defined by the best fit forcurrent window size.TREATMENT PLANNINGWhen you have created the simulation using the iTero scanner, the Invisalign OutcomeSimulator screen shows the simulated outcome side by side with the current dentitionas shown below.There are three primary actions that can be taken from this screen, corresponding tothe three Action bar buttons: set treatment goals, adjust the outcome, and send thesimulation to Align. Each of these actions is described in a separate section below.Align TechnologyPage 20
Invisalign Outcome SimulatorUser Guide15. Setting Treatment GoalsTo set treatment goals, first click on the TREATMENTGOALS button. The Treatment Goals dialog boxappears as shown below. Missing teeth are indicated bycrosshatching as shown in the figure.You can perform two basic actions using this dialog box,select tooth status and change simulation settings.When the UPDATE SIMULATION button is grayed out,the current simulation reflects the current settings in theTreatment Goals dialog box.Conversely, when you change any setting, the UPDATESIMULATION button becomes active, indicating that youmust update the simulation to reflect the changes.D16795 Rev BPage 21
Invisalign Outcome Simulator 4.1User GuideSelecting Tooth StatusYou can designate one of three states for teeth thatare present in the simulation model: Unmovable,Extracted, and Clear. (You can’t change the status ofmissing teeth.) To change the status of a tooth, first click on thetooth. The Tooth Status menu appears as shownat left. Select the desired state by clicking the radio button. Use the Clear option to remove prior actions onthe tooth.Changing any tooth status requires that the simulationbe run again.Tooth status is indicated by the symbols shown in thediagram below.Changing Simulation SettingsBy default, the initial simulation is run with Allow IPRactive and Anterior-Posterior Correction inactive, asshown at left. To prevent IPR and spaces, deselect Allow IPR. To add posterior tooth alignment to the simulatedoutcome, select Anterior posterior correctionChanging either of these settings requires that thesimulation be run again.Align TechnologyPage 22
Invisalign Outcome SimulatorUser Guide16. Starting the Adjustment ProcessTo begin the process of adjusting the outcome, first clickon the ADJUST OUTCOME button. The screen changesto the view shown below.At any time during the process of creating the simulatedoutcome, you can view the original simply by mousingover the COMPARE WITH ORIGINAL button.The view returns to the adjusted plan within a fewseconds after you move the mouse away from the button.To return to the dual view of current dentition andsimulated outcome, click the BACK button.D16795 Rev BPage 23
Invisalign Outcome Simulator 4.1User Guide17. Changing IPR ValuesAdding IPR and SpacingTo add IPR or spacing: Click the green plus sign. Select the option to add IPR or spacing.Note: If the “Add IPR” option is not visible, youhave selected No IPR on the 3D Controls toolbar.Either a diamond-shaped (IPR) or rectangular(spacing) box appears as shown at left. Adjust the values by clicking on the up anddown arrows, by using the mouse scroll wheel,or by swiping up and down on the IPR/spacebox.Removing IPR and SpacesTo remove IPR or spacing:Align Technology Click the X in the red dot. Select the option to remove IPR or Spacing.Page 24
Invisalign Outcome SimulatorUser Guide18. Changing Tooth PositionsThe
Mar 16, 2017 · INVISALIGN, ITERO, ITERO ELEMENT, and CLINCHECK, among others, are trademarks and/or service marks of Align Technology, Inc. or one of its subsidiaries or affiliated companies and may be registered in the U.S. and/or other countries. All oth


![Welcome [neso ]](/img/18/neso-2019-onsite-program.jpg)