Transcription
Operation Manual
Contents1. What is Chordana Play?2. Connecting to a Musical Instrument2.1 Connecting to a Musical Instrument52.2 How to Connect and What You Need62.3 Connecting via a Bluetooth Adapter (CASIO WU-BT10)72.4 Adjusting Bluetooth MIDI Playback Quality92.5 Bluetooth Audio Connections103. Using Lesson Mode3.1 Selecting a Song Built-in songs113.2 Selecting a Song MIDI Files133.3 Importing MIDI Files143.4 Playing Back Songs153.5 Using the Keyboard163.6 Useful Playback Methods for Practice173.7 Scoring Performances183.8 Music Score Window203.9 Changing the Lesson Mode Settings233.10 Transferring Songs to a Musical Instrument263.11 Using Keyboard Link284. Using Audio Mode4.1 Supported Audio Formats334.2 Selecting Songs344.3 Playing Back Songs362
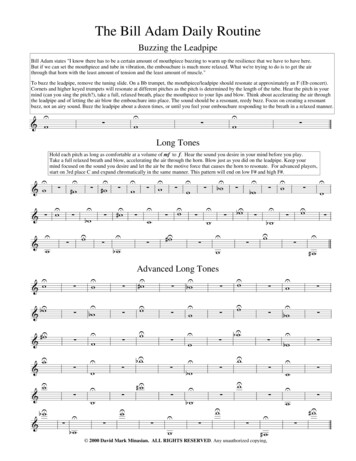
1. What is Chordana Play? Music score and piano roll notation make it fun and easy to learn!Chordana Play displays the music score and piano roll notation for built-in songs and MIDI files.With MIDI files, you can select one of your favorite tracks as the left- and right-hand parts, oryou can use the right hand as the melody part and the left hand as the chord part. Slow thetempo down, transpose to a key that is easier to play, and with the AB repeat function, takelessons (practice) at your own pace.You can take a three-step lesson using either the app keyboard or the keyboard on a MIDIconnected musical instrument. Select from 128 different tones. Plus, a scoring system lets youkeep track of your progress. Lesson ModeIn Lesson Mode, you can use MIDI files as well as the 50 built-in songs in the app.Chordana Play can generate a music score from the MIDI file and detect chords, too, making iteasy to learn to play two-handed piano pieces. You can search for MIDI files on yoursmartphone or tablet (referred to below as smart devices) and download them to use in yourlessons. Or you can import MIDI files from your computer.* The chords are determined automatically based on the performance information in the MIDI file,so they may differ from the original score.You can take a three-step lesson using either the app keyboard or the keyboard on a MIDIconnected musical instrument while looking at a score or a piano roll. The scoring featuremakes mastering a song even more fun.3
Audio ModeThis mode allows you to play along to your favorite music stored on a smart device. You canvary the tempo of an audio file on the smart device, shift the key or use features such asRepeat and Cancel Melody for any section of the file.Important! You may not be able to use Cancel Melody for all the data on some audio files.4
2. Connecting to a Musical Instrument2.1 Connecting to a Musical InstrumentWhile you can use this app in standalone mode, connecting to a musical instrument gives youa broader range of options, as outlined below. On the models below, you can transfer songs and use the musical instrument’s keyboardfor lessons.* The connection method and supported functions vary depending on the model. CT-S1,CT-S400, CT-S410, LK-S450Supports USB-MIDI/Bluetooth MIDI connections. Connection via a USB cable Connection via a Bluetooth adapter (CASIO WU-BT10) CT-S200, CT-S300Supports USB-MIDI connections. Connection via a USB cable On the models below, you can transfer songs and view melodies and chord information onthe musical instrument’s LCD panel. CTK-2550, CTK-3500Supports Keyboard Link. Connection via an audio cableImportant! Do not connect a USB cable and audio cable to the smart device at the same time. Set the connected smart device to a mode that prevents mobile data communication,such as In-Flight mode. Do not use USB-MIDI and Bluetooth MIDI connections concurrently. Do not use Bluetooth MIDI and Bluetooth audio connections concurrently. There is no song transfer function on the CT-S1.5
2.2 How to Connect and What You NeedSee the connection procedure below for more information on connections.Connection t/connect.html6
2.3 Connecting via a Bluetooth Adapter (CASIO WU-BT10)This app enables you to connect via Bluetooth MIDI to supported CASIO keyboardmodels using the optional Bluetooth adapter (CASIO WU-BT10). Once you haveconnected to the keyboard, you can use Lesson Mode playback while linked to thekeyboard and transfer songs to the keyboard. Getting Ready Once you have connected the Bluetooth adapter (CASIO WU-BT10) to the CASIO keyboard,take the next steps using the Lesson Mode screen. See the manuals for the keyboard and the WU-BT10 for information on the connectionmethod.[Top menu screen]1. Tap Lesson Mode.[Lesson Mode screen]2. Select a song.[Lesson Mode screen]3. Tap the Settings button.7
[Settings screen]4. Tap Bluetooth MIDI Device.[Bluetooth MIDI device connection screen] *iOS5. The available Bluetooth MIDI devices aredisplayed. Tap the Bluetooth MIDI device to beused in the list to connect to the device. If you areusing the CASIO WU-BT10, tap “WU-BT10 MIDI”.Once you are successfully connected, theconnection completed dialog box appears.[Bluetooth MIDI device connection screen] *AndroidImportant! The connection procedure above may be necessary each time you use a BluetoothMIDI device. If no Bluetooth MIDI devices are shown on the list, check that Bluetooth is enabled onyour smart device and on the musical instrument. In the Android version, you will need to permit access to the location information onyour smart device when you connect. When you make a Bluetooth MIDI connection, or when you select Lesson Mode whileconnected via Bluetooth MIDI, the Bluetooth audio connection with the supportedmodel(*) is canceled. When you exit Lesson Mode, the Bluetooth audio connection tothe supported model is restored. (*Supported models: CT-S1, CT-S400, CT-S410, LKS450)8
2.4 Adjusting Bluetooth MIDI Playback QualityWhen you are using Lesson Mode playback while connected to a supported model viaBluetooth MIDI using the CASIO WU-BT10 and you find that playback on the musicalinstrument from your smart device is not stable, try adjusting the Bluetooth MIDI playbackquality. Selecting a setting that is higher than the current value may improve the playbackquality.Note that this setting is enabled when Step Lesson is set to OFF or when you are usingmode 3.[Lesson Mode screen]1. Tap the Settings button.2. Tap Bluetooth MIDI Playback Quality.Note You can only tap when your smart deviceis connected to the WU-BT10 via BluetoothMIDI.3. Select the level of correction from the fiveplayback quality settings.Note Playback quality 1 provides less correction,while playback quality 5 provides greatercorrection.Important! If changing the playback quality does not stabilize Lesson Mode playback, it isrecommended that you disconnect Bluetooth audio. In iOS, go to Settings Bluetooth,select “WU-BT10 AUDIO” and disconnect it. In Android, cancel the connection to “WUBT10 AUDIO” in the Bluetooth Settings menu on your smart device. (See the User’sGuide for your smart device for details.)9
2.5 Bluetooth Audio ConnectionsWhen you are using Audio Mode, you can connect via Bluetooth to play the sound from thespeakers on the musical instrument. This is supported on the following models: CT-S1, CT-S400, CT-S410, LK-S450To connect the audio via Bluetooth, select “WU-BT10 AUDIO” in the Bluetooth settingsscreen on your smart device and then set up audio pairing on the musical instrument. Referto “Bluetooth Audio Pairing” in the User’s Guide for the musical instrument for theprocedure.10
3. Using Lesson Mode3.1 Selecting a SongBuilt-in songs[Top menu screen]1. Tap Lesson Mode.[Lesson Mode screen]2. Tap the [Select Song] button.[Select Song] Built-in songs3. For built-in songs, tap the song name toplay it.11
[Select Song] Import options4. Select an import option and tap the OK button toimport the song.①②① Turn this ON when reading the modified chords.② Turn this ON when using Chord Play.Note For built-in songs, the setting will changedepending on the song selected. (1-20: “ON”,21-50: “OFF”)[Lesson Mode screen]Note To play back built-in songs or take a lesson, see section “3.4 Playing Back Songs”onwards.12
3.2 Selecting a SongMIDI Files[Lesson Mode screen]1. Tap the [Select Song] button.[Select Song] MIDI Files2 . For MIDI files, tap the song name to play it.[Select Song] Import optionsNote MIDI file playback supports Type 0 andType 1 formats. With Type 1, tracks are imported as-iswhen there are 15 or fewer tracks. Whenthere are 16 or more tracks, up to 32 tracksare imported to the corresponding channelfor each event. (When using a conductortrack for tempo information etc., there will beup to 31 usable tracks.)3. Select one of the import options and tap the OKbutton to import the song.①②① Turn this ON when reading the modified chords.Note Chords generated from the MIDI file can bemodified.② Turn this ON when using Chord Play.③ Tap the [OK] button to import the song.[Lesson Mode screen]4 . Specify the right-hand and left-hand parts.When [Display chord names] is enabled, the lefthand part cannot be specified. To specify tracksfor the left-hand, first disable [Display chordnames].13
3.3 Importing MIDI Files In iOSMIDI files can be imported using method A or B.A. Import using iTunes or on a MacSee Apple’s public support site for details on file sharing in iTunes or on a Mac.https://support.apple.com/en-us/HT201301B. Import using iTunesConnect the smart device to the computer via USB and synchronize the data in iTunes. Thenclick “Chordana Play” in App File sharing and add the MIDI files to the “Documents” list. In AndroidMIDI files can be imported using method A or B.A. Download the MIDI file via the browser on your smart device and save the file to internalor external storage.B. Connect the smart device to your PC via USB and add the MIDI file to any location ininternal or external storage.After taking the steps above, use the procedure in “3.2 Selecting a Song MIDI Files” toimport the songs. You can also open MIDI files by sharing them with an external app.14
3.4 Playing Back Songs[Lesson Mode screen]②①① Begins playback.② Shows the position within the song. Tap orswipe in the area when the song is paused tochange the location in the song.③ Swipe left or right in the music score window tomove backwards or forwards through the song.③④⑤④ Tap the [AB Repeat] button to enablecontinuous repetition of a specific part.⑤ Tapping the [AB Repeat] button sets thecurrent playback location as the start point (A) ofthe portion you wish to repeat.⑥⑥ You can specify the position of B (the end ofthe repeated section) by swiping the right-handmark.15
3.5 Using the Keyboard[Lesson Mode screen]You can change the number of keys in displayedin the app by pinching in or out sideways in thepiano roll area. You can also change the positionby swiping left or right.Pinching in increases the number of keys that arevisible.Pinching out decreases the number of keys thatare visible.Swipe left to move the keyboard display positionto a higher range.Swipe right to move the keyboard display positionto a lower range.16
3.6 Useful Playback Methods for PracticeWhen you are learning to play a song, you can learn more efficiently by adjusting thetempo and practicing the left-hand and right-hand parts separately. You can also try usingthe fingering guides and step lessons.[Lesson Mode screen]Tap the [Play Settings] button.[Play Settings screen]⑦①③②④⑥⑤[Fingering guide ON]① Change the tempo (from 20 to 300 bpm).・Hold the [ /–] buttons to increase or decreasethe number.・Tap the [Reset] button to return to the originaltempo.② Change the pitch of the sound (transpose).・Tap the [ /–] buttons to change the key relativeto the original.・Tap the [Reset] button to return to the originalkey.③ The selected part will be shown in the musicscore and piano roll.・Select left-hand, right-hand, or both hands.④ Toggle the fingering guide on or off.⑤ Select the step lesson [Step].OFF: Normal playback.1: A mode in which playback waits until you playusing either the app keyboard or a MIDIconnected musical instrument keyboard.2: A mode in which playback waits until you playcorrectly using either the app keyboard or a MIDIconnected musical instrument keyboard.3: A mode in which you play the selected partyourself.⑥ [Scoring function] Enable or disable the scoringfunction for your playing using either the appkeyboard or a MIDI-connected musical instrumentkeyboard.⑦ Return to the Lesson Mode screen.Important!Due to the characteristics of Bluetooth, the communications environment or the functionsyou are using may cause a noticeable delay in the sound or operation if you use aBluetooth MIDI connection. In step lesson 1 or 2, playback is matched to the way you strike the keys. As a result, as youbecome used to the playing style, the delay in the sound or operation may become a problem. In this event, use step lesson 3 or normal playback (step lesson OFF).17
3.7 Scoring PerformancesYou can use the scoring function to check the level at which you were able to play a song.This function will also show information such as the number of mismatched notes.Scoring evaluates your playing using either the app keyboard or a MIDI-connectedmusical instrument keyboard.Note・Scoring is applied to the parts specified in the playback setting or the lesson part.[Lesson Mode screen]1. Tap the [Select Song] button and choose thesong you want to play from the “Song List”.2. Tap the [Play Settings] button.[Play Settings screen]3. In the Play Settings screen, set “Scoring” to“ON”.Setting “Scoring” to “ON” displays the scoringfunction in the Lesson Mode screen.[Lesson Mode screen]①4. Tap the Play button to play back the song andbegin your performance.②① Scoring progress gauge, score display:Shows a gauge of your score as you play thesong and your final score.②Timing results display: Evaluates your playingon 3 levels: “Perfect”, “Good” and “Miss”.Displayed when you strike a key on thekeyboard.18
[Lesson Mode screen]5. Your final score is shown when you finishplaying the song.①②⑤③④① Score display: Shows a score between 0 and100.② Scored part: Shows the “Lesson Part”selected in the playback settings.③ Total timing score: Shows the respectivetotals for the 3 marking levels.④ Share Button: This allows you to share acapture of your scoring results screen via SNSor with other apps. Tapping this button opensthe sharing menu selection screen in your OS.⑤ Marking results: Shows your score in 5grades: “Perfect!!” (100), “Great!” (80-99),“Good!” (60-79), “Nice try!” (20-59), “Keeptrying!” (0-19).Note・Tap the stop button when you want to repeat part of a song mid-way through yourperformance. This stops scoring and returns you to the start of the song.19
3.8 Music Score Window[Lesson Mode screen]①②③⑤④⑥① Measure number② Chord name (when [Display chord names] is enabled).③ Right-hand part④ Left-hand part⑤ Pinch in or out horizontally in the music score window tochange the number of measures displayed on each line.⑥ Pinch in or out horizontally in the piano roll window tozoom in or out.Five measuresdisplayedNine measuresdisplayedImportant!・Chordana Play generates a music score from the MIDI data, and therefore the scoreshown may differ from the original music score. For detailed scores with grace notes andsimilar elements, up to 32nd notes are displayed. In the case of MIDI files that areinterpretations, rather than exact renditions of the original music, the music timing and notelengths may differ from the original score.20
You can choose which parts of the score are displayed and how they are displayed, asshown below.[Lesson Mode screen]① Touch and hold in the music score window.①[Score display options]②③④⑤② [Fixed measure width] Select whether to showmeasures with equal width, or adjusted to bestdisplay the score.③ [Fingering] Show or hide fingering information(finger numbers).④ [Multiple voices] Divide the left-hand and righthand parts and show them on separate lines, orkeep them together.⑤ [Quantization] Select the shortest notes thatcan be displayed. Select either 16th notes or 32ndnotes.[Fixed measure width] OFF[Fixed measure width] ON[Fingering] ON[Fingering] OFF[Multiple voices] ON[Multiple voices] OFF[Quantization] 16[Quantization] 3221
You can change the chords displayed in the score.[Lesson Mode screen]1. Tap the chord you want to modify.[Chord Select]2. Select an optional chord.*For built-in songs, optional chords are notsuggested.Select a chord directly from the drop-downmenu.①① Tap the [Custom Chords] button to choose anyother chord.② Select the chord root and type.②Important! The chord modifications above are applied to the chords shown in the score and on thepiano roll. They are not applied to the playback sound.22
3.9 Changing the Lesson Mode Settings[Lesson Mode screen]Tap the [Settings] button[Settings]①②③④⑤⑥⑦⑧⑨⑩① Guide SelectionSelect score piano roll, score only, or piano rollonly.② Number of chords per measureSelect the number of chords per measure whengenerating chords. Select between 1 chord permeasure, 2 chords per measure, or automatic.③ Display chord namesTurn on the function that automatically determinesand generates chords for the left-hand part.④ Track SettingsSelect “ON” to open the [Track Setting] screenwhere you can specify the mute or solo functionand specify the right-hand or left-hand parts foreach of up to 16 tracks.⑤ App built-in soundEnables or disables playback for the Play appbuilt-in sound source.⑥ Bluetooth MIDI deviceConnect via Bluetooth MIDI to a supported modelusing the CASIO WU-BT10.⑦ Bluetooth MIDI playback qualityWhen you are using Lesson Mode playback on asupported model using the CASIO WU-BT10 andyou find that playback on the musical instrumentfrom your smart device is not stable, select thelevel of correction here.⑧ Transfer to musical instrumentTransfer built-in songs or imported MIDI songs toa supported model using USB or Bluetooth.⑨ Keyboard LinkConfigure the settings for the Keyboard Linkfunction.⑩ Tone SelectionYou can select the tone played by either the appkeyboard or a MIDI-connected musical instrumentkeyboard.23
[Keyboard Link settings screen] *iOS① Keyboard Link① To use the Keyboard Link function, set this button② to ON.② Level SettingEnable or disable level limits and level settingswhen transferring data with the keyboard linkfunction.③ App VolumeAdjust the playback volume when using the[Keyboard Link settings screen] *Android Keyboard Link function.①②③[Level Settings]④② ①③Important!・ With Android devices the app automaticallysets the volume to maximum except for somedevices. In such cases set the volume tomaximum manually.① Adjust the data signal level for the keyboardlink function. If the keyboard link fails to work, anerror message reading either “App Vol ” or “AppVol–” may appear on the keyboard’s LCD. In thiscase, first tap the [Reset] button.② Tap this button if the keyboard error messageis “App Vol–”.③ Tap this button if the keyboard error messageis “App Vol ”.④ Level LimitThis limits the volume of the song audio asrequired for the keyboard link function, but it canbe disabled. Switch this to “OFF” if you want toincrease the volume beyond the limit. Switch thisto “ON” if the keyboard link function does not workcorrectly.Important! “App Vol OK” indicates that the level iscorrect.・ The Keyboard link function may not workproperly if the volume is not set at the rightlevel. On some Android devices, messages maynot appear on the keyboard’s LCD panelwhen the device is connected to thekeyboard. If this occurs, press the keyboardvolume button on the Android device once.24
[Track Settings]①Shows the state of each track, as follows:No data①②Playing③Has data, but not playing② You can specify “mute” or “solo” for each track.If any track is set to play solo, the mute option isdisabled and only that track will play. If no tracksare set to solo, all un-muted tracks will play.③ Specify the right- and left-hand parts. When[Display chord names] is enabled, the left-handpart cannot be specified. To specify tracks for theleft-hand, first disable [Display chord names].[Tone Selection]④④ Tap the tone name to select the tone for yourperformance on the app keyboard or the MIDIconnected musical instrument keyboard.Note The sound produced by the smart device isthe sound from the app. The tone on the musical instrument is notchanged.25
3.10 Transferring Songs to a Musical InstrumentYou can transfer built-in songs or MIDI files to a musical instrument connected via USBMIDI or Bluetooth MIDI. Supported modelsCT-S400, CT-S410, LK-S450[Lesson Mode screen]1. Select a song.[Lesson Mode screen]2. Tap the Settings button.[Settings screen]3. Once you are connected to a supportedmodel via USB-MIDI or Bluetooth MIDI, tap“Transfer to Musical Instrument”.26
[USB/Bluetooth transfer screen]4. Tap the transfer button to transfer theselected song.① Shows the information for the transferredsong.② Specifies the area to which the song istransferred on the musical instrument.② ③ Tap to start the transfer process.③①[Transfer Area Settings screen]Specify the area to which the song istransferred on the musical instrument.Important! The number of areas varies depending onthe connected model.27
3.11 Using Keyboard LinkThe keyboard link function enables you to use an audio cable to send melody and chorddata along with the audio playback. Use the keyboard’s light-up function and practicestep-up lessons directly on the keyboard itself. The function has two modes. Performance modeWhen a song is played, the light-up keyboard shows the left-hand part and the melody.The notes and chords for the melody are shown on the keyboard’s LCD. Save modeYou can transfer and save the song’s right-hand melody and left-hand chord data, or theleft-hand performance data, to the keyboard. You can then play along to the song and usethe step-up lesson function.Important!・ Stereo mini to stereo mini cable required.・ Compatible with Casio LK-265, LK-266, CTK-2500, CTK-2550 and CTK-3500keyboard models.・ Song audio is sent using the left channel of the smart device stereo output, while themelody and chord data is sent on the right channel.・ On the CTK-2500, CTK-2550 and CTK-3500, notes and chords for the melody areshown on the LCD.・ If using right-hand (melody) and chord data, up to approximately 880 notes of theright-hand part can be transferred to the keyboard, assuming two chords per measurefor 200 measures.・ If using right-hand (melody) and left-hand (accompaniment) data, up toapproximately 1100 notes can be transferred.・ If non-note MIDI data (patches, pedals, etc.) is included, this reduces the number ofnotes that can be transferred, leading to potential errors even if the approximate limitof 880 or 1100 notes is observed.28
How to set up for both performance mode and save mode②③④①① Ensure that the keyboard is poweredoff.② Insert an audio cable into the audioport of your smart device.③ Insert the other end of the cable intothe AUDIO IN port on the keyboard.④ Turn the keyboard on, and enable theapp function.(*For details about operating yourkeyboard, refer to the its operationmanual.) IMPORTANT・ To use the keyboard link function, ensure that a compatible keyboard is connected withthe cable, and that the app function is enabled. In the following circumstances, you mayhear the sound of data being transferred:- When connected to a non-compatible keyboard- When headphones or other audio equipment are connected・ Do not use an audio cable with electrical resistance.・ Keyboard link may not function on incompatible smart devices.・ Some smart devices use audio effects and equalizers for playback, which may interferewith the keyboard link function. Please turn off audio effects and equalizers.・ The smart device settings for notification tones may interfere with the keyboard linkfunction. If this occurs, steps such as disabling notification tones will enable you to use thekeyboard link function.29
Using performance mode[Lesson Mode screen]1. Tap the [Settings] button.[Settings]2. Tap Keyboard Link.[Keyboard Link settings screen]3. Set Keyboard Link to ON.30
[Keyboard Link Settings]Make sure that the cable connection andkeyboard settings are completed, then tap the[OK] button.Note・ “App Mode” will be displayed on thekeyboard’s LCD.After this, the melody and chords will betransmitted as the song plays.If “App Vol OK” appears on the musicalinstrument’s LCD panel, tap the OK button toreturn to the Lesson Mode screen. If “App Vol ” or“App Vol–” appears, adjust the level setting.[Lesson Mode screen]Once you have returned to the Lesson Modescreen, press the Play button to use the screen.During playback, the melody and the left-handpart are shown in the keyboard area on themusical instrument’s LCD panel. The notes andchords for the melody are also displayed on theLCD panel.31
Save mode[Lesson Mode screen]1. Tap the [Settings] button.[Settings]2. Tap the [Song Transfer] button.[Song Transfer]①③②[Select Rhythm]⑥3. Tap the transfer button to transfer the selectedsong.① Check the rhythm and tempo of the song to betransferred.* The fastest tempo that can be used whentransmitting song data is 255 bpm.② Polyphony LimitSets a polyphony limit according to the upper limitof keyboard illuminations that the light-upkeyboard can perform. (Polyphony limit of 1 for④ the right hand and 3 for the left hand.)③ AuditionListen to the audio that is transferred to the⑤ instrument. Because the sound source and theway the play-along works are different, the appand keyboard audio can differ.④ Select RhythmChange the rhythm of the transferred song. When[Display chord names] is turned off, you canselect “No Rhythm”.⑤ TransferStart the transfer.* When a MIDI file is transmitted to the electronicmusical instrument, the file name will be displayedconverted to ASCII characters.⑥ Tap a rhythm name to select the rhythm.32
4. Using Audio Mode4.1 Supported Audio FormatsThe audio formats that can be played with this app are listed below. iOSAAC (.m4a), MP3 (.mp3), Linear PCM (.wav, .aif), Apple Lossless (.m4a) AndroidFLAC (.flac), MP3 (.mp3), PCM/WAVE (.wav), Vorbis (.ogg), AAC (.m4a)* May differ depending on the model and/or OS version.Note・Playback is not guaranteed for all songs, even those in the above formats.・Songs stored in the Cloud, protected (DRAM) songs and songs played via a streamingservice are not supported.33
4.2 Selecting Songs Selecting songs by category[Top menu screen]1. Tap Audio Mode.2. A list of songs and categories appears.・Select the desired category and choose thesong you want to listen from the song listdisplayed.・You can choose from “Songs”, “Artists”,“Albums”, “Playlists” (iOS only) or “Folders”(Android only).34
Selecting songs by searching[Top screen]1. Tap Audio Mode.2. Tap the Search button.3. Enter a keyword in the Search bar in thedisplayed Search screen.・The list of results appears.・The results are shown sorted according to song,artist or album.・If no results are found, “No Results” is shown.Select the desired song from the search results list35
4.3 Playing Back Songs①②③④⑨⑤⑧⑦⑥① Returns to the song selection screen.② Title/Artist/Album display③ Change tempoChanges the tempo through 5 levels.④ Shift keysYou can change to a different key. You can shift the key through 7 levels (–3 0 3). Thecenter position ( 0) is the normal key, while moving left lowers the key and moving rightraises the key. The default is the center position ( 0).⑤ Cancel Melody/Normal/Cancel AccompanimentSelect “Cancel Melody” to suppress the main notes during playback. Select “CancelAccompaniment” to stress the main notes during playback. Select “Normal” for normalplayback.The default setting is “Normal”.Important!・The effectiveness of Cancel Melody/Cancel Accompaniment varies depending on the song.⑥ Play/Pause button⑦ Shows the playback position, the current position/total time, the AB repeat area and theA/B point time.⑧ AB repeat buttonShows the start point (A) and end point (B) for repeat playback on the playback progress bar.⑨ Album jacket displayJacket images show the artwork used on album covers.Note・This can be used during playback or when playback is stopped.・Playback stops if the connected earphone is unplugged or the Bluetooth connection iscut during playback.36
IOS (iOS) is a trademark or registered trademark of Cisco Systems, Inc. in the UnitedStates and certain other countries.iTunes and Mac are trademarks of Apple Inc. registered in the US and other countries.Android is a trademark or registered trademark of Google LLC.Other service and product names, etc., mentioned herein may be trademarks orregistered trademarks of their respective companies.The Bluetooth word mark and logos are registered trademarks owned by the BluetoothSIG, Inc. and any use of such marks by CASIO Computer Co., Ltd. is under license. 2021 CASIO COMPUTER CO., LTD.V2002021041337
Music score and piano roll notation make it fun and easy to learn! You can take a three-step lesson using either the app keyboard or the keyboard on a MIDI-connected musical instrument while looking at a score or a pia