Transcription
6-BOTTLE, 8-BOTTLE, 12-BOTTLECAPACITY WINE CELLARINSTRUCTION MANUALCATALOG NUMBERBD60316, BD60326, BD60336Thank you for choosing BLACK DECKER!PLEASE READ BEFORE RETURNING THIS PRODUCT FORANY REASON.If you have a question or experience a problem with your BLACK DECKERpurchase, go to www.blackanddecker.com/instantanswersIf you can’t find the answer or do not have access to the Internet, call844-299-0879 from 10:30 a.m. to 6:30 p.m. EST Mon. - Fri. to speak with anagent. Please have the catalog number available when you call.SAVE THIS MANUAL FOR FUTURE REFERENCE.Page 1
Page 2
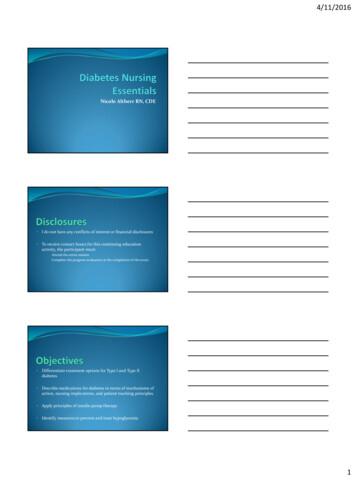
CONTENTSSAFETY INFORMATIONImportant Safety Instructions. 4-6Grounding Instructions. 5SET UP & USEParts & Features.7-9Installation Guide. 10Operation Guide.10-11Benefits of Thermal Electric Cooling.11CLEANING & CARE.12TROUBLE SHOOTING & WARRANTY.13-14Before You Call For Service.13Customer Service.13Troubleshooting.13Limited Warranty. 14PRODUCT REGISTRATIONThank you for purchasing ourBLACK DECKER product. Thiseasy-to-use manual will guide youin getting the best use of your winecellar.Remember to record the model andserial numbers. They are on a labelon the back of the product.Model numberSerial numberDate of purchaseStaple your receipt to your manual.You will need it to obtain warranty service.Page 3
SAFETY INFORMATIONDANGERDANGER - Immediate hazardswhich WILL result in severepersonal injury or deathWARNINGWARNING - Hazards or unsafepractices which COULD result insevere personal injury or deathCAUTIONCAUTION - Hazards or unsafepractices which COULD result inminor personal injuryIMPORTANT SAFETY INSTRUCTIONSWARNINGWhen using electrical appliances, basic safety precautionsshould be followed, including the following:READ ALL INSTRUCTIONS BEFORE USING THE UNIT1.Read all of the instructions before using this appliance.2. This wine cellar must be properly installed in accordance with the installationinstructions before is it used. See grounding instructions in the installation section.3. Never unplug the wine cellar by pulling on the power cord. Always grasp the plugfirmly and pull straight out from the outlet.4. Repair or replace immediately, all electric service cords that have become frayedor otherwise damaged. Do not use a cord that shows cracks or abrasion damagealong its length, the plug or the connector end.5. Unplug the wine cellar before cleaning or before making any repairs.NOTE: If for any reason this product requires service, we strongly recommendthat a certified technician performs the service.6. If the wine cellar is not being used, we recommend to remove the door and leavethe shelves in place. This will reduce the possibility of danger to children.7.This wine cellar should not be recessed or built-in an enclosed cabinet. It isdesigned for freestanding installation only. Allow 2” of space between the cooler’sside and wall and 4” between the back and wall.8. Do not operate wine cellar in the presence of explosive fumes.9. Do not store foods in wine cellar as interior temperature may not be cool enoughto prevent spoilage.SAVE THESE INSTRUCTIONSHOUSEHOLD USE ONLYDANGERRisk of child entrapment. Before disposing of any refrigerator or freezer, remove all doors.Leave any shelves in place so that children may not easily climb inside.Page 4
SAFETY INFORMATIONGROUNDING INSTRUCTIONSSAFETY INFORMATIONELECTRICAL REQUIREMENTSIn the event of malfunction or breakdown, grounding provides a path ofleastresistance for electriccurrent to reduce the risk of electric shock.GROUNDINGINSTRUCTIONSThe appliance must be connected to a cord having an nd a grounding plug. The plug must be pluggedintoInanoutlet thatis properlyinstalledprovidesand groundedtheappropriateevent of malfunctionor breakdown,groundinga path of inleast resistanceelectriccurrentto reducethe risk of electric shock.accordancewith forall localcodesandordinances.The appliance must be connected to a cord having an equipmentDANGERconductor- ImpropertheTheequipmentgroundingandconnectiona groundingofplug.plug mustgroundingbe pluggedconductorcan resultoutletin a riskelectric installedshock. Theconductorinto an appropriatethat ofis properlyand groundedin withaccordancewith anall localand thatordinances.insulationhavingoutercodessurfaceis green with or withoutyellowstripesis the equipmentgroundingconductor.If repairorDANGER- Improperconnection ofthe equipmentgroundingconductorcan result inofa therisk ofelectricshock.conductorreplacementcordor plugis Thenecessary,dowithnot insulationconnect thehaving an outer surfacethat is greenor terminal.without yellowstripesequipment-groundingconductorto witha liveCheckwithisathe equipmentgroundingconductor.If repairreplacementof thequalifiedelectricianor servicepersonif theorgroundinginstructionsplug is necessary, do not connect the equipment-groundingarecordnot orcompletelyunderstood, or if in doubt as to whether the [tool/conductor to a live terminal. Check with a qualified electrician orappliance]is properlygrounded.Do not modifythe plug connected toservice personif the groundinginstructionsare not completelytheunderstood,[tool/appliance]– if it aswillfit thehave a properoutletor if in doubttonotwhethertheoutlet,[tool/appliance]is properlyinstalledby aDoqualifiedelectrician.grounded.not modifythe plug connected to the [tool/appliance] –if it will not fit the outlet, have a proper outlet installed by a qualifiedFORGROUNDED, CORD-CONNECTED [TOOL/APPLIANCE] RATEDelectrician.LESS THAN 15A AND INTENDED FOR USE ON A NOMINAL 120VFOR GROUNDED,SUPPLYCIRCUIT CORD-CONNECTED [TOOL/APPLIANCE] RATEDLESS THAN 15A AND INTENDED FOR USE ON A NOMINAL 120VCIRCUITTheSUPPLYapplianceis for use on a nominal 120V circuit and should beconnectedto a groundingthatlookslikeandtheshouldone illustratedThe applianceis for use on outleta nominal120Vcircuitbebelow.The usea temporarynotrecommended.connectedto aofgroundingoutlet adaptorthat looksisliketheone illustratedbelow. The use of a temporary adaptor is not recommended.Page 5Page 5
SAFETY INFORMATIONPOWER SUPPLY CORD1. A void the use of an extension cord because of potential safety hazards undercertain conditions. Have a qualified electrician or serviceman to install anoutlet near the appliance.2. I f it is absolutely necessary to use an extension cord, extreme care must beexercised. a) Use only a grounding type 3-wire extension cord that has a 3-bladegrounding plug and a 3-slot receptacle that will accept the plug on theappliance. b) T he marked electrical rating of the extension cord must equal to or greaterthan the electrical rating of the appliance. The longer cord should bearranged so that it will not drape over the counter top or table top where itcan be pulled on by children or tripped over unintentionally.NOTE: Neither BLACK DECKER nor the dealer can accept any liability for damageto the product or personal injury resulting from failure to observe theelectrical connection procedures.Page 6
SET UP & USEPARTS & FEATURESModelBottle CapacityNumber of ShelvesTemperature RangeBD603166246 - 66 FFront Control PanelSolid MirroredDoorLegLightFan GrillChrome Wire ShelvesLeveling Leg (3)Page 7
SET UP & USEPARTS & FEATURESModelBottle CapacityNumber of ShelvesTemperature RangeBD603268446 - 66 FFront Control PanelSolid MirroredDoorLegLeveling Leg (3)Page 8LightFan GrillChrome Wire Shelves
SET UP & USEPARTS & FEATURESModelBottle CapacityNumber of ShelvesTemperature RangeBD6033612546 - 66 FFront Control PanelSolidMirroredDoorLegLightFan GrillChrome Wire ShelvesLeveling Leg (3)Page 9
SET UP & USEINSTALLATION GUIDE1.Unpack your wine cellar by removing all packaging materials like carton, base,foams, adhesive tape, etc.2. Remove all accessories, internal packaging material that was used to hold shelves,etc., in place during transport.3. Clean the remains of all adhesive tape used and remove all printed materialsupplied.4. Install the wine cellar in a convenient location away from extreme heat and cold.Allow sufficient clearance between the wine cellar and side wall so the door(s)will open without obstruction. Wine cellar is not designed for recessed or built-ininstallation.5. The floor on which the wine cellar should be placed must be flat, hard, solid, andeven. The wine cellar should not be placed on any soft material such as carpet,foam, plastic, etc.6. To level your wine cellar, use the two leveling legs in the rear and one in the frontleft of your wine cellar. Adjust by turning the legs counter clockwise to raise orcounterclockwise to lower your wine cellar.NOTE: The front right leg that is part of the door hinge bracket is not adjustable.7. The following are recommended minimum clearances around the wine cellar forproper air circulation:Sides: 2” (50mm)Top: 4” (100mm)Back: 2” (50mm)Proper air circulation will help your wine cellar work at maximum efficiency.NOTE: · Allow enough space in the front of the unit to open door to at least 120 .OPERATION GUIDE1.Plug in the wine cellar to power the unit on.2. You may choose a temperature setting for your wine cellar within the range of 46 to66 Fahrenheit . The temperature of your wine cellar can be set by pressing the uparrowon the exterior of the door you can raise the temperature. By pressing thedown arrowon the exterior of the door you can lower the temperature. Once youhave completed your set temperature selection, the temperature readout will revert tothe actual temperature.Page 10
SET UP & ettingColdersettingInteriorLightSwitchPlease note that the actual interior cabinet temperature in a thermalelectric unit is dependent on the ambient (room) temperature. You may setthe cabinet temperature within the operational range but due to high ambienttemperature the unit may not reach the selected temperature.As an example, when the ambient temperature is 72 F, the lowest interior cabinettemperature that can be reached is 46-48 F. When the ambient temperature is 89 F, thelowest interior cabinet temperature that can be reached is 50-56 F.NOTE: W hen the ambient (room) temperature is below the set temperature, thewine cellar will not operate until the ambient temperature increases higherthan the set temperature.3. Allow the wine cellar to operate empty for approximately one hour. This should allowthe unit to reach the desired temperature.4. Fill the wine cellar with your choice of wine bottles. Allow 1-2 hours of operation toreach the desired temperature.5. Your wine cellar has a light to display your wine bottles. The manually operated lightswitch is located on the touch control panel. A small illuminated circle will appear onthe bottom right side on the temperature display to indicate the light is on.NOTE: T he interior light should not be kept ON when the door is closed and notin use. Touch the Interior Light Switch Symbol to shut it OFF and close thedoor. The interior light indicator will not appear on the bottom right of thetemperature display.BENEFITS OF THERMAL ELECTRIC COOLINGThermal Electric or semiconductor technology is an environmentally friendly coolingprocess which does not use any CFC, HCFC or HCF-type of refrigerants which areharmful to the environment.The absence of a compressor reduces the noise and vibration usually associated withrefrigerated appliances.Page 11
CLEANING AND CARECLEANING AND MAINTENANCEWARNING: To avoid electric shock always unplug the wine cellar before cleaning.Ignoring this warning may result in death or injury.CAUTION: Before using cleaning products, always read and follow manufacturer’sinstructions and warnings to avoid personal injury or product damage.General: Prepare a cleaning solution of 3-4 tablespoons of baking soda mixedwith warm water. Use sponge or soft cloth, dampened with the cleaningsolution to wipe down your wine cellar. Rinse with clean warm water and dry with a soft cloth. Do not use harsh chemicals, abrasives, ammonia, chlorine bleach,concentrate detergents, solvents or metal scouring pads. SOME of thesechemicals may dissolve, damage and / or discolor your wine cellar.Power InterruptionsOccasionally there may be power interruptions due to thunderstorms or other events.Remove the power cord from AC outlet when a power outage occurs. When powerhas been restored, replug power cord to AC outlet.Vacation and Moving CareFor long vacations or absences, unplug the unit, empty contents from wine cellar andclean the wine cellar and door gaskets according to “General Cleaning” section. Propdoors open, so air can circulate inside. When moving always move the wine cellarvertically. Do not move or store the unit on its side.Page 12
TROUBLESHOOTING & WARRANTYBEFORE YOU CALL FOR SERVICEIF THE UNIT FAILS TO OPERATE:A) Check to make sure that the unit is plugged in securely. If it is not, remove the plugfrom the outlet, wait 10 seconds and plug it in again securely.B) Check for a blown circuit fuse or a tripped main circuit breaker. If these seem to beoperating properly, test the outlet with another appliance.IF NONE OF THE ABOVE SOLVES THE PROBLEM, CONTACT A QUALIFIEDTECHNICIAN. DO NOT TRY TO ADJUST OR REPAIR THE WINE CELLAR YOURSELFIMPORTANTDO NOT RETURN THIS PRODUCT TO THE STOREIf you have a problem with this product, please contact theBLACK DECKER Customer Satisfaction Center at844-299-0879 or service@equitybrands.comDATED PROOF OF PURCHASE, MODEL # AND SERIAL #REQUIRED FOR WARRANTY SERVICETROUBLESHOOTINGTroubleshoot your problem by using the chart below. If the unit still does not workproperly, contact customer service center or the nearest authorized service center.Customer must never troubleshoot internal components.SYMPTOMSThe wine cellardoes not work.Wine cellar isnot reachingthe desiredtemperatureFrost forming inthe wine cellarPOSSIBLE CAUSESOLUTIONSThere is a power failure.Ensure the cellar is plugged in andthe power socket is turned on.A circuit breaker hasactivated.Reset circuit breaker.The cellar is placed tooclose to a heat sourceKeep the cellar away from sunshineor other heat sources.No sufficient ventilationPlace the wine cellar in goodventilation and keep any items awayfrom the fans.The door is opened toofrequently or for a longperiod of time.Close the door tightly and do notopen the door too frequently or for along period of time.Too much humidity.Unplug to defrost, plug again afterthe frost thaws.The ambienttemperature is too low.Page 13
LIMITED WARRANTYLIMITED WARRANTYAny repair, replacement, or warranty service,and all questions about this product should bedirected to BLACK DECKER at 844-299-0879from the USA or Puerto Rico.BLACK DECKER warrants to the original purchaserthat the product will be free from defects in material,parts and workmanship for the period designated forthis product. The warranty commences the day theproduct is purchased and covers up to a period of1 year (12 months) for labor/1 year (12 months) forparts (manufacturing defects only). BLACK DECKERagrees that it will, at its option, replace the defectiveproduct with either a new or remanufactured unitequivalent to your original purchase during thewarranty period.Exclusions: This warranty does not apply to thebelow:1. If the appearance or exterior ofthe product has been damaged ordefaced, altered or modified in design orconstruction.2. If the product original serial numberhas been altered or removed or cannotbe readily determined.3. If there is damaged due to power linesurge, user damage to the AC powercord or connection to improper voltagesource.4. If damage is due to general misuse,accidents or acts of God.5. If repair attempts are done byunauthorized service agents, use ofparts other than genuine parts or partsobtained from persons other thanauthorized service companies.6. On units that have been transferredfrom the original owner.7. On products that have been purchasedas refurbished, like new, second-hand, ina “As-Is” or “Final Sale” terms.8. To products used in a commercial orrental setting.9. To products used in settings other thanordinary household use or used otherthan in accordance with the providedinstructions.10. To damages for service calls forimproper installations.11. Transportation and shipping costsassociated with the replacement of theunit.12. Service calls to instruct you how to useyour product.13. Service calls to repair or replace thehouse fuse, reset the circuit breaker orcorrect the wiring in the house.Page 14REPAIR OR REPLACEMENT AS PROVIDED UNDERTHIS WARRANTY IS THE EXCLUSIVE REMEDY OFTHE CUSTOMER; BLACK DECKER. SHALL NOT BELIABLE FOR ANY INCIDENTAL OR CONSEQUENTIALDAMAGES FOR BREACH OF ANY EXPRESS ORIMPLIED WARRANTY ON THIS PRODUCT, EXCEPTTO THE EXTENT PROHIBITED BY APPLICABLE LAW.ANY IMPLIED WARRANTY OF MERCHANTABILITYOF FITNESS FOR A PARTICULAR PURPOSE ON THISPRODUCT IS LIMITED TO THE DURATION OF THEWARRANTY.Some states do not allow the exclusion or limitationsof incidental or consequential damages, or limitationson how long the warranty lasts. In these cases theabove exclusions or limitations may not apply to you.This warranty gives you specific legal rights and youmay also have other rights which vary from state tostate.Obtaining Service: To obtain service, productliterature, supplies or accessories please call844-299-0879 to create a ticket for exchange/repair.Please make sure to provide the date of purchase,model number and a brief description of the problem.Our customer service representativewill contact you or send detailed return instructions.BLACK DECKER does not warrant that the appliance will workproperly in all environmental conditions, and makes no warrantyand representation, either implied or expressed, with respectto the quality, performance, merchantability, or fitness for aparticular purpose other than the purpose identified within thisuser’s manual. BLACK DECKER has made every effort to ensurethat this user’s manual is accurate and disclaims liability for anyinaccuracies or omissions that may have occurred. Information inthis user’s manual is subject to change without notice and doesnot represent a commitment on the part of BLACK DECKER.BLACK DECKER reserves the right to make improvements tothis user’s manual and/or to the products described in this user’smanual at any time without notice. If you find information in thismanual that is incorrect, misleading, or incomplete, please contactus at 844-299-0879.W Appliance Co.1356 BroadwayNew York, NY 10018
This appliance is designed for free standing installation only. This appliance is intended to be used in household and similarapplications: Staff kitchen areas in shops, offices and other workingenvironments; Farmhouses and by clients in hotels, motels and other residentialtype environments; Bed and breakfast type environments; Catering and similar non-retail applications.Page 15
Page 16
BLACK & DECKER, BLACK DECKER, the BLACK & DECKER andBLACK DECKER logos a nd product names and the orange and black colorscheme are trademarks of The Black & Decker Corporation, used under license.All rights reserved.Product in this box may differ slightly from that pictured. Does not affectfunction. Not all accessories shown in photography are included in thispackage.Imported by W Appliance, Inc., 1356 Broadway, New York, NY 10018July 2020Printed in ChinaPage 17
Page 18
BODEGA PARA VINOS CON CAPACIDAD DE6, 8, Y 12 BOTELLASMANUAL DE INSTRUCCIONESNÚMERO DE CATÁLOGOBD60316, BD60326, BD60336¡Gracias por elegir BLACK DECKER!POR FAVOR, LEA ESTE MANUAL ANTES DE DEVOLVER ESTEPRODUCTO POR CUALQUIER MOTIVO.Si tiene alguna pregunta o tiene algún problema con su producto deBLACK DECKER vaya a www.blackanddecker.com/instantanswersSi no puede encontrar la respuesta a su pregunta o no tiene acceso a Internet,llame al 844-299-0879 de 10:30 a 18:30 EST de lunes a viernes para hablar conun agente. Por favor, tenga el número de catálogo a mano cuando llame.GUARDE ESTE MANUAL PARA SU REFERENCIA EN ELFUTURO.Page 19
Page 20
CONTENIDOINFORMACIÓN DE SEGURIDADInstrucciones importantes de seguridad.22-24Instrucciones de conexión a tierra.23CONFIGURACIÓN Y USOPartes y funcionalidades.25-27Guía de instalación.28Guía de operación. 28-29Beneficios del enfriamiento térmico eléctrico. 29LIMPIEZA Y CUIDADO.30SOLUCIÓN DE PROBLEMAS Y GARANTÍA.31-32Antes de llamar al Servicio Técnico.31Atención al cliente.31Resolución de problemas.31Garantía limitada.32REGISTRO DEL PRODUCTO¡Gracias por comprar nuestroproducto BLACK DECKER! Estemanual fácil de usar le guiarápara darle el mejor uso a subodega para botellas de vino.Recuerde anotar el número demodelo y el número de serie.Están en una etiqueta en la parteposteriordel producto.Nº de modeloNº de serieFecha de compraGrape o adjunte su recibo a su manual.Lo necesitará para acceder el servicio degarantía.Page 21
INFORMACIÓN DE SEGURIDADPELIGROPELIGRO - Amenazas inmediatasque resultarán en lesionespersonales graves o la muerteADVERTENCIAADVERTENCIA - Peligros oprácticas inseguras que puedenresultar en lesiones personalesgraves o la muertePRECAUCIÓNPRECAUCIÓN - Peligros oprácticas inseguras quePODRÍAN resultar en lesionespersonales menoresINSTRUCCIONES IMPORTANTES DE SEGURIDADADVERTENCIACuando utilice electrodomésticos, debe seguir algunas medidasbásicas de seguridad, entre las que se incluyen:LEA TODAS LAS INSTRUCCIONES ANTES DE USAR LA UNIDAD1.Lea todas las instrucciones antes de usar este electrodoméstico.2. Esta bodega para vinos debe ser instalada debidamente de acuerdo con lasinstrucciones de instalación antes de ser utilizada. Vea las instrucciones deconexión a tierra en la sección de instalación.3. Nunca desconecte su bodega para vinos tirando del cable de alimentación.Siempre tome el enchufe firmemente y tire hacia afuera de la toma.4. Repare o reemplace de inmediato todos los cables de alimentación eléctrica quese hayan pelado o dañado de otra manera. No use un cable que presente grietaso daños de abrasión a lo largo del cable, el enchufe o el extremo del conector.5. Desconecte su bodega para vinos antes de limpiarla o realizar cualquierreparación.NOTA: Si por alguna razón este producto requiere servicio, le recomendamosencarecidamente que un técnico certificado lo lleve a cabo.6. Si no está usando su bodega para vinos, le recomendamos que quite la puerta ydeje los estantes en su lugar. Esto reducirá las posibilidades de peligro para losniños.7.Esta bodega para vinos no debe ser empotrada o colocada en un armariocerrado. Está diseñada solamente para su instalación de manera independiente.Deje 2” (5 cm) de espacio entre los lados de la bodega y la pared y 4” (10cm)entre la parte posterior y la pared.8. No opere su bodega para vinos en la presencia de gases explosivos.9. No almacene alimentos en la bodega para vinos ya que su temperatura interiorpuede no ser suficiente para prevenir que se echen a perder.CONSERVE ESTAS INSTRUCCIONESSOLO PARA USO DOMÉSTICOPELIGRORiesgo de atrapamiento de niños. Antes de desechar cualquier congeladoro refrigerador, retire la(s) puerta(s).Deje los estantes en su lugar para que los niños no puedan meterse dentro.Page 22
INFORMACIÓN DE SEGURIDADINSTRUCCIONES DE CONEXIÓN A TIERRAREQUISITOS ELÉCTRICOSEn caso de mal funcionamiento o avería, la conexión a tierra reduciráel riesgo de descarga eléctrica al proporcionar una ruta de menorresistencia para la corriente eléctrica. Este aparato debe estarconectado con un cable que posea un conductor de conexión a tierray enchufeSAFETYcon conexióna tierra. El enchufe debe estar enchufado enINFORMATIONuna toma de corriente apropiada que esté correctamente instaladay conectada a tierra de acuerdo con todos los códigos y ordenanzaslocales.GROUNDING INSTRUCTIONSPELIGRO- Una conexiónincorrecta del conductor para la conexiónELECTRICALREQUIREMENTSa tierra puede causar una descarga eléctrica. El conductor conIn the event of malfunction or breakdown, grounding provides a path ofaislamientode color verde con o sin franjas amarillas es el conductorleast resistance for electric current to reduce the risk of electric shock.de puestaThea tierradel equipo. Si es necesario reparar o reemplazarappliance must be connected to a cord having an equipmentel cable eléctricooel enchufe,conecte elconductorde conexióngrounding conductorandnoa groundingplug.The plug mustbe pluggeda tierra dela un terminalactivo.Consultea unandelectricistaintoequipoan appropriateoutlet thatis properlyinstalledgrounded inwithlocal codesandordinances. de conexión acalificadoaccordanceo personaldeallserviciosi lasinstruccionestierra no DANGERse comprendencompletamenteo equipmentsi tiene dudassobreconductorsi el- Improperconnection of hecorrectamente.modifiquecan result ina riskof electric ashock.conductor withNoinsulationhavingoutersurfacethat is green with orstripesel enchufeque anvieneconel electrodoméstico.Siwithouteste noyellowencajaen isthecorriente,equipmentpidagroundingconductor. If querepairor replacementofdethela toma dea un electricistainstaleuna tomaor plug isnecessary,dodebenot connectthe toestar conectadocon un cableconductor to a live terminal. Check with a qualified electrician orque posea un conductor de conexión a tierra y enchufe con conexiónservice person if the grounding instructions are not completelya tierra. Elenchufe debeen theuna[tool/appliance]toma de corrienteunderstood,or if inestardoubtenchufadoas to whetheris nectadaa tierra de –grounded. Do not modify the plug connected to the [tool/appliance]acuerdo contodoslosthecódigosy ordenanzaslocales.if it willnot fitoutlet, havea proper outletinstalled by a qualifiedelectrician.PARA ELECTRODOMÉSTICOS CON CONEXIÓN A TIERRA MEDIANTEFOR CONSUMOGROUNDED, NOMINALCORD-CONNECTED[TOOL/APPLIANCE]CABLE CONINFERIORA 15 AMPERIOSRATEDYLESS THAN 15A AND INTENDED FOR USE ON A NOMINAL 120VDISEÑADOSPARA SU USO EN UNA RED ELÉCTRICA DE 120VSUPPLY CIRCUITNOMINALESThe appliance is for use on a nominal 120V circuit and should beEl electrodomésticousarseoutleten uncircuitode the120Vconnected to debea groundingthatlooks likeonenominalesillustrated ydebe conectarsea unatomade tierraque seis parezcaa la que se ilustrabelow. Theuse ofa temporaryadaptornot recommended.a continuación. No se recomienda el uso de un adaptador inclusive deforma temporal.Page 23
INFORMACIÓN DE SEGURIDADCABLE DE ALIMENTACIÓN1. E vite el uso de un cable de extensión debido a los potenciales riesgos deseguridad bajo ciertas condiciones. Pida a un electricista
BLACK DECKER product. This easy-to-use manual will guide you in getting the best use of your wine cellar. Remember to record the model and serial numbers. They are on a label on the back of the product. _