Transcription
ScrewDriveBelt/Chain DriveScan code for a video of this installation orvisit: www.GenieCompany.comWithin these pages you may see a QRcode for certain steps. Scan this codeto go directly to a video for that particularinstallation and/or programming step.Download a Code Reader app from yourapp store.PROGRAMMING,BELT/CHAIN/SCREW DRIVEGARAGE DOOR OPENER MODELS2562, 2568, 3022, 3024, 3042, 3062 ,3064, 4024, 4042, 4062, 4064, SC1200,CB1000, CB1200OPERATION &MAINTENANCEMANUALIncludes factory programmed INTELLICODE Remote Control.The included Safe-T-Beam system MUST be installed to close the door. DO NOT use other brands or types.Homelink and Car2U compatible.For use ONLY with residential Sectional or One-Piece overhead garage doors.STOPNeed help or have questions?For answers and assistance,visit www.GenieCompany.comor call Customer Service at: 1-800-35-GENIE!WARNINGTo reduce the risk of injury to persons or damage to property - use this opener only with a sectional or one-pieceresidential door.!AVERTISSEMENTPour réduire le risque de blessures ou de dommages matériels, utilisez cet ouvre-porte uniquement pour une porteà section ou monopièce.INSTALLER: LEAVE THIS MANUAL WITH HOMEOWNERHOMEOWNER: SAVE THIS MANUAL FOR FUTURE REFERENCESerial Number DecalAlternate language manuals available at:Idioma alternativo manuales disponibles en:Autre langue manuels disponibles à:www.GenieCompany.com39495503493
INDEX1Safety InformationSafety Notifications. 4Important Safety Instructions . 52FeaturesSafety Features . 6Opener Features . 63Programming InformationIntroduction . 7Overview of Powerhead Controls. 7Travel LimitsClosing Garage Door (DOWN Limit) . 8Opening Garage Door (UP Limit). 9Force Control.10Contact Reverse Test .10Contact Reverse Adjustment .10Remote Control Programming .114Maintenance and AdjustmentsImportant Safety Instructions .12Regular Maintenance .13Remote Battery Replacement .13Light Bulb Replacement .14Adjustment Guides . 14-15Resetting Travel Limits.15Locating Safe-T-Beam Pairs .16Wire Diagram .165Troubleshooting . 17-186Optional Programming & AccessoriesClearing Memory for Remotes .19Programming Vehicle Remotes .20Programming Wireless Keypad . 21-227One-Piece Door Supplement.238Parts . 24-279DASMA Information . 28-31Warranty.32SAVE THESE INSTRUCTIONSREAD AND FOLLOW ALL INSTRUCTIONSFCC Part 15.21 Statement:Changes or modifications not expresslyapproved by the party responsible forcompliance could void the user’s authority tooperate the equipment.FCC / IC Statement:This device complies with FCC Part 15and Industry Canada licence-exempt RSSstandard(s). Operation is subject to thefollowing two conditions: (1) this devicemay not cause harmful interference, and(2) this device must accept any interferencereceived, including interference that may causeundesired operation of the device.Le présent appareil est conforme aux CNRd’Industrie Canada applicables aux appareilsradio exempts de licence. L’exploitation estautorisée aux deux conditions suivantes : (1)l’appareil ne doit pas produire de brouillage,et (2) l’utilisateur de l’appareil doit acceptertout brouillage radioélectrique subi, même si lebrouillage est susceptible d’en compromettre lefonctionnement.T
Thank you for purchasing aGenie brand garage dooropener. The leader in garage dooropener technology.Please take a moment to preview this manual and assembly poster(if applicable) to ensure that you have the proper tools and skill set toinstall a new garage door opener. Pay particular attention to all SafetyWarnings, Cautions and Information. Remember, your garage door isthe largest and heaviest moving object in your home.DO NOT RETURN PRODUCT TO STOREIf you require assistance or have any questions,a knowledgeable Genie Service Technician is justa phone call away at:1-800-35-GENIE (1-800-354-3643)Or visit our website at:www.GenieCompany.comBefore setting up your new garage door opener, please locate and record the model plate on theopener. This information will be necessary should you seek technical support via our website,customer support department or local servicing Genie dealer.Model Number:Serial Number: 2017. Genie, the Genie logo, Intellicode, Safe-T-Reverse, SmartSet, Sure-Lock, Door Detect, IntelliG, PowerLift, ChainMax, Excelerator II,and Safe-T-Beam, are registered trademarks of The Genie Company. TriloG and GPower are trademarks of GMI Holdings, Inc d/b/a The GenieCompany. All other trademarks are property of their rightful owners. Consistent with our policy of continuing product improvements,we reserve the right to change product specifications without prior notice or obligations. HomeLink is a registered trademark of GentexCorporation. Car2U is a registered trademark of Lear Corporation.3
SAFETY NOTIFICATIONS & INSTRUCTIONS1OVERVIEW OF POTENTIAL HAZARDSREAD THIS SAFETY INFORMATIONGarage doors are large, heavy objects that move with the help of springs under high tension and electric motors. Since moving objects, springs under tension,and electric motors can cause injuries, your safety and the safety of others depend on you reading the information in this manual. If you have questions or donot understand the information presented, call your nearest trained door system technician or visit our website at www.geniecompany.com.CONVENTIONS USED IN THESE INSTRUCTIONSThe following safety alert symbol and signal words are used throughout this manual to call attention to and identify different levels of hazards and specialinstructions.This is the safety alert symbol. This symbol alerts you to potential hazards that can kill or hurt you and others. All safety messages will follow the safety alertsymbol and the word “DANGER”, “WARNING”, or “CAUTION”. DANGER indicates an imminently hazardous situation which, if NOT avoided, will result in death or serious injury.WARNING indicates a potentially hazardous situation which, if NOT avoided, could result in death or serious injury.CAUTION indicates a potentially hazardous situation which, if NOT avoided, may result in injury or property damage.The word NOTE is used to indicate important steps to be followed or important considerations.Tous les messages concernant la sécurité seront indiqués après un symbole d’alerte de la sécurité et l’une des mentions suivantes “DANGER”,”AVERTISSEMENT” ou “MISE EN GARDE”. DANGER signale une situation dangereuse imminente qui, si elle n’est pas évitée, risque d’entraîner des blessures graves, voire mortelles. AVERTISSEMENT signale une situation potentiellement dangereuse qui, si elle n’est pas évitée, risque d’entraîner la mort ou des blessuresgraves. MISE EN GARDE signale une situation potentiellement dangereuse qui, si elle n’est pas évitée, risque d’entraîner des blessures ou desdommages matériels. Le terme REMARQUE est utilisé pour signaler les étapes importantes à suivre ou d’importants éléments à prendre en considération.IMPORTANT SAFETY INSTRUCTIONSPOTENTIAL HAZARDEFFECTPREVENTIONMOVING DOOR! WARNINGCould result in SeriousInjury of DeathDo Not operate unless the doorway is in sight and free ofobstructions. Keep people clear of opening while door is moving.Do Not allow children to play with the door opener.Do Not change opener control to momentary contact unless andexternal reversing means is installed.Do Not operate a door that jambs or one that has a broken spring.ELECTRICAL SHOCK! WARNINGCould cause SeriousInjury or DeathTurn off electrical power before removing opener cover.When replacing the cover, make sure wires are not pinched or nearmoving parts.Opener must be electrically grounded.HIGH SPRING TENSION! WARNINGCould cause SeriousInjury or DeathDo Not try to remove, repair or adjust springs or anything to whichdoor spring parts are fastened such as wood block, steel brackets,cables or any other structure or like item.Repairs and adjustments must be made by a trained servicerepresentative using proper tools and instructions.IMPORTANTES CONSIGNES DE SÉCURITÉDANGER POTENTIELPORTE EN MOUVEMENTEFFET! AVERTISSEMENTPourrait entraîner desblessures graves voire la mortCHOC ÉLECTRIQUE! AVERTISSEMENTPourrait entraîner desblessures graves voire la mortTENSION ÉLEVÉE RESSORT! AVERTISSEMENTPourrait entraîner desblessures graves voire la mort4PRÉVENTIONUtiliser uniquement si la porte est en vue et libre de tout obstacle.Ne laisser personne se tenir dans l’ouverture de la porte pendantqu’elle est en mouvement.Ne pas permettre aux enfants de jouer avec l’opérateur de la porte.Ne pas modifier la commande de l’opérateur à contact momentanéà moins qu’un moyen d’inversion externe soit installé.Ne pas faire fonctionner une porte qui bloque ou dont le ressortest cassé.Couper le courant avant d’enlever le couvercle de l’opérateur.Lorsque le couvercle doit être remplacé, s’assurer que les fils ne sontni coincés ni près des pièces mobiles.L’opérateur doit être correctement mis à la terre.Ne pas essayer d’enlever, réparer ni ajuster les ressorts outoute autre pièce à laquelle le ressort de la porte est attaché, ycompris blocs de bois, supports en acier, câbles ou autres articlessemblables.Les réparations et les réglages doivent être effectués partechnicien qualifié qui se sert d’outils appropriés et qui respecte lesinstructions.
IMPORTANT INSTALLATION INSTRUCTIONS!WARNINGTO REDUCE THE RISK OF SEVERE INJURY ORDEATHREAD AND FOLLOW ALL SAFETY, INSTALLATION AND OPERATION INSTRUCTIONS. If you have any questions or do notunderstand an instruction, call The Genie Company. DO NOT install opener on an improperly balanced door. An improperly balanced door could cause severe injury. Repairsand adjustments to cables, spring assembly and other hardware must be made by a trained service person using propertools and instructions. Remove all ropes, and disable all locks connected to the door before installing opener. Where possible, install the door opener 7 feet or more above the floor. For products having an emergency release,mount the emergency release within reach, but at least 6 feet above the floor and avoiding contact with vehicles toavoid accidental release. DO NOT use emergency release cord to pull door. DO NOT connect the opener to the source of power until instructed to do so. Locate the wall control button: A) Within sight of door. B) At a minimum height of 5 feet, so small children cannot reachit. C) Away from all moving parts of the door. Install the entrapment WARNING label next to the wall button or console, in a prominent location. Install the emergencyrelease handle on the emergency release cord. The opener must reverse when the door contacts a 1-1/2 inch high object on the floor at the center of the doorway. Thisis about the size of a 2” x 4” board laid flat.IMPORTANTES INSTRUCTIONS D’INSTALLATION!AVERTISSEMENTPOUR RÉDUIRE LES RISQUES DE BLESSURES GRAVES VOIREMORTELLESLIRE ET SUIVRE ATTENTIVEMENT TOUTES LES INSTRUCTIONS D’INSTALLATION ET DE FONCTIONNEMENT AINSI QUE TOUTES LES CONSIGNESDE SÉCURITÉ. Si vous avez des questions ou si vous ne comprenez pas une instruction, veuillez contacter directement The Genie Company. NE PAS installer l’opérateur sur une porte mal équilibrée. Celle-ci pourrait entraîner de graves blessures. Les réparationset les réglages des câbles, ensembles de ressort ou tout autre article de quincaillerie doivent être effectués par un professionnel qui se sert d’outils appropriés et qui respecte les instructions. Enlever toutes les cordes et désactiver toutes les verrous de la porte avant l’installer l’opérateur. Dans la mesure du possible, installer l’ouvre-porte à 2,1 m ou plus au-dessus du sol. Pour les produits dotés d’un cordonde déclenchement d’urgence, installer le déclenchement d’urgence mais au moins à 1,8 m au-dessus du sol en évitanttout contact avec les véhicules pour éviter qu’ils ne soient déclenchés accidentellement. NE PAS utiliser d’urgencecordon de libération pour ouvrir ou fermer la porte. NE PAS connecter l’opérateur à la source d’alimentation tant que l’instruction n’est pas donnée. Repérer la console murale: A) En vue de la porte. B) À une hauteur minimale de 1,5 m afin que les jeunes enfants nepuissent pas l’atteindre. C) Loin de toutes pièces mobiles de la porte du garage. Placer l’étiquette d’AVERTISSEMENT en cas de coinçage à proximité du bouton mural ou de la console de manière à cequ’elle soit bien en évidence. Installer la poignée du cordon de déclenchement d’urgence. L’opérateur doit s’inverser lorsque la porte entre en contact avec un objet d’une hauteur de 3,8 cm placé sur le sol, aucentre de l’ouverture de la porte. Ceci équivaut environ à une planche de 5 x 10 cm posée à plat sur le sol.!WARNINGOpener is equipped with grounded electrical plug foryour protection, and only fits grounded electricaloutlets. DO NOT alter plug in any way! If your have nogrounded outlets, have one installed by a licensedelectrician. Opener must be properly grounded to preventpersonal injury and equipment damage. NEVER USE ANEXTENSION CORD! Check local building codes for anyrequirement that you must have a permanent hard-wiredconnection. Permanent hard-wired connections must beperformed by a licensed electrician using proper tools andinstructions.!AVERTISSEMENTL’opérateur, qui est équipé d’une prise électrique mise à la terrepour votre protection est compatible uniquement avec desprises électriques mises à la terre. NE PAS modifier la fiche dunequelconque manière. Si vous n’avez pas de prises mises à la terre,faites-en installer par un électricien agréé. L’opérateur doit êtrecorrectement mis à la terre pour éviter les blessures corporelles etdes dommages matériels. NE JAMAIS UTILISER DE RALLONGE!Vérifiez les codes locaux des bâtiments pour connexions câbléespermanente. Les connexions câblées permanentes doiventêtre effectuées par un électricien agréé qui se servira d’outilsappropriés et respectera les consignes.5
SAFETY & STANDARD FEATURES2Safe-T-Beam (STB) Non-ContactReversing SystemPuts an invisible beam across the door opening. Thedoor stops and reverses to the full open position ifanything passes through the beam. LED indicatorlights on the powerhead and on the STBs provideself-diagnostics if an operational problems exists.Door Detect Monitoring SystemMonitors the Safe-T-Beam system to ensure properfunctionality and will automatically stop andreverse a closing door if a problem is detected.Safe-T-Reverse Contact Reversing SystemAutomatically stops and reverses a closing doorwithin two seconds of contact with an object.Safe-T-Beam (STB) FUNCTION1. The Safe-T-Beam has no effect on the door during an opening cycle.2. If the Safe-T-Beam detects an obstruction when trying to close thedoor, it will not allow the door to close.3. When the garage door is closing, if Safe-T- Beam is interrupted bya person or obstacle, the garage door will stop its downward traveland reverse automatically to its fully opened position.4. If the Safe-T-Beam System fails, loses power, or is installedimproperly, press and hold the wall console “open/close” buttonuntil the door reaches its fully closed position. If you releasethe “open/close” button on the wall console during the closingmovement, the door will reverse automatically to its fully-openedposition.Manual Emergency ReleaseManually releases door from door opener. Used during a power failure or other emergency to allow manual opening and closing of door.DO NOT use emergency release cord to pull doorSmartSet Electronic ProgrammingEasily adjust the programming to set limits and program new remotes.PRGMSETAutomatic Lighting System (Motion Detection on select models)Single or Dual Bulb lighting system supplies light for safer evening exits and entries. Turn ON when door is activated and automaticallyturns OFF 4 minutes later.Motion Detection available on select models. Turns lights on when motion is detected in range of opener. Lights will automatically turnoff in 4 minutes.Intellicode An encryption system that enhances the security of the door opener by continuously changing the access codeeach time the remote is used. The door opener responds to each new code only once. An access code copied froma working system and tried again, will not control the door opener.1&243Wall ConsoleOperates door opener from inside garage. The wall console has an indicator light, Open/Close, Sure-lock , andindependent light control buttons.1.) Indicator LightLarge white button will display Red when wall console is properly wired and Sure-Lock is OFF. When Sure-Lock is ON, this light is off.2.) Open/Close ButtonUse this button to open or close garage door. When Sure-Lock is ON the Open/Close button will CLOSE the dooronly.NOTE: Constant button pressure in the CLOSE mode will override STB fault in the powerhead and close door.3.) Independent Light Control ButtonUse this button to turn the powerhead lights ON. Powerhead lighting will remain ON until this button is pressedagain or a door action has been completed.4.) Sure-Lock ButtonWhen Sure-Lock is ON, and the door is closed, the powerhead cannot be activated by the wall console or aremote. Slide switch up to activate Sure-Lock (red light goes off ). Slide switch down to turn Sure-Lock OFF (red light goes on).Home Link and Car2U compatible. See instructions in this manual, refer to the motor vehicle manual or visitwww.GenieCompany.com for instructions.Factory Programmed Remote ControlFor ease and speed of installation, the remote included with this opener comes from the factory, pre-programmed.No additional steps are required to activate the door using the remote.6
3OPENER PROGRAMMINGNOTE: Before programming the opener, check to make sure thereare no objects in the garage door opening.INTRODUCTIONNow that the Genie garage door opener is installed, followthe steps in this manual to program the opener so thatthe door opens and closes properly and all remote devicesoperate correctly. The following steps are a guide to settingopener so it functions properly.MotionDetector(Select Models)The following steps list the order of programming theopener’s functional settings for use.1.“TRAVEL LIMITS”2.“FORCE CONTROL”3.“REMOTE PROGRAMMING”OVERVIEW OF POWERHEAD CONTROLSThis section describes the programming functions of theopener. Use the following information to understand thebuttons and LED indicators used to program functions.Term Definitions:Travel Limits Programmable setting to adjust how far doortravels up or down.Force Control refers to how much power is needed tomove (open/close) a particular door and does NOT requireprogramming.Remote Programming synchronizes remote devices(remote and keypad) with the powerhead.Speed Control refers to how fast or slow the opener opensand closes the door. This is factory set and does NOT requireprogramming. NOT available on all models.Powerhead: There are 3 programming buttons and 2 LEDlights on the powerhead. Each of the buttons are used toenter and complete the setup programming. The LED lightsindicate status or a function change by illuminating ON, OFF,or ON FLASHING.There are 4 programs:1.Door Travel Limits.This program is used to set how far the doortravels up and down.2.Remote Programs (default menu)–only required foradding remote control transmitters.Describes how to program remotes to sync withadditional remote control devices, wall consoles,keypads and the powerhead.3.Force Setting Program.This program controls the force applied duringthe closing and opening of the door. They arefactory set and will rarely require adjustment onlyunder certain circumstances.4.Door Speed Program.This program does not require manually initiatedchanges.NOTE: The 3 programming buttons are for programmingONLY. These buttons CANNOT be used to operate theopener once the required programming section has beensuccessfully completed.ORIENTATIONStanding under the opener’s powerhead – facing the door – lookingup – this is the view you will see of the programming buttons andLEDs.Program/MenuClose TravelButtonPRGMSETLED IndicatorsDOOROpen TravelButtonPRGMEnters into and selectsprogramming menus.SETMoves door up or down duringprogramming and advancesthrough menus.Indicates various programmingmodes and trouble codes.NOTE: Each programming step has a 30 second time limit for completionafter the function is initiated. After 30 seconds, two LED’s will illuminate REDindicating time has expired and the step must be restarted. Restart the step asmany times as necessary to complete the programming. Just remember—the pointed end of the button (like anarrowhead) points in the direction the carriage will move whenthat button is pushed.7
PROGRAMMING DOWN TRAVEL LIMIT! ! WARNINGMake sure doorway is in full view and clear of obstacles andpeople to avoid injury or property damage.DO NOT operate this unit from the wall control before LIMITSare set. Severe damage to the opener could occur.The carriage MUST be engaged to Bullet/Screw BEFOREsetting limits. See installation poster or call Customer Serviceat 1-800-35-GENIE or visit www.GenieCompany.com.DO NOT set limits with Battery Backup attached. AC powerMUST be connected to the opener while setting limits forproper operation.1-2. Enter Programming ModePRGMAVERTISSEMENTS’assurer que le passage de la porte est visible et dégagé, àsavoir sans obstacles ni personne afin d’éviter toute blessurepotentielle ou dommage matériel.NE PAS utiliser cette unité avec la console murale avantd’avoir réglé les LIMITES. L’ouvre-porte pourrait subir desérieux dommages.La tendeur DOIT être engagée dans le chariot AVANT derégler les limites. Voir le poster d’installation (si fourni) ouappelez le service clientèle au 1-800-35-GENIE ou visitez lesite www.GenieCompany.com.NE PAS fixer de limites en mode batterie de secours.L’alimentation CA DOIT être branchée sur l’ouvre-porte,pendant le réglage des limites, pour assurer un bonfonctionnement.NOTE: Carriage should be lockedto opener. Door should rest somewherebetween full open and closed. Do not startwith door fully open or closed.!SETHOLDUNTILLEDLIGHTSSteady BluePRGMSETRELEASEFlashing Blue3. Adjust Door PositionPRGMProgramming DOWN Limit:1. Press and hold the DOWN arrow button. Long LED will light BLUE.2. Release DOWN arrow button. Long LED will flash BLUE.3. Press and hold the DOWN arrow button untildoor is fully closed. Use the UP arrow button if door closes toofar. Use both UP and DOWN buttons toadjust close travel as necessary.Door should rest on the floor until the weather stripis compressed enough to seal along the width ofthe door. Damaged doors or uneven floors may notseal properly. Repair these conditions to achieve aproper seal. DO NOT compress seal so much that thedoor will bend or buckle.4. Press and release the SET/PRGM button Both LEDs will flash BLUE then go out.SET4. Lock ProgrammingPRGMSETFlashing BluePRGMSETThe DOWN limit is now programmed.8PRESS&RELEASE
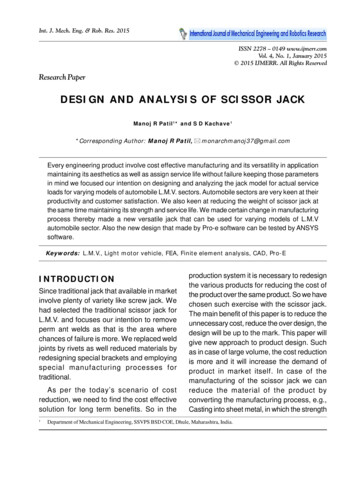
PROGRAMMING UP TRAVEL LIMIT1-2. Enter Programming ModeProgramming UP Limit:1. Press and hold the UP arrow button. Long LED will light BLUE.2. Release UP arrow button. Round LED will flash BLUE.PRGM3. Press and hold the UP arrow button until dooris fully open. Use the DOWN arrow button if door openstoo far. Use both UP and DOWN buttons toadjust open travel as necessary.SECTIONAL DOOR UP LIMIT:Door should fully open so that door seal is evenwith door header. Do not adjust so much thatthe door will bend, buckle or stretch door springcables backward. Stop carriage short of the openerpowerhead.ONE-PIECE DOOR UP LIMIT:Door should fully open so that the door arms will bein line and push forward and up on the door.Door damage can result If up limit is set too farback and door arms are angled downward pushingagainst the natural travel direction. Fig. A4. Press and release the SET/PRGM button Both LEDs will flash BLUE then go out.SETSteady BlueHOLDUNTILLEDLIGHTSPRGMSETRELEASEFlashing Blue3. Adjust Door PositionPRGMThe UP limit is now programmed.SETOne-Piece Door Limit SettingCorrectAngle4. Lock ProgrammingPRGMFig. AProper UP limit settingSETFlashing BlueIncorrectAnglePRESS&RELEASEPRGMSETUP limit set too high9
PROGRAMMING FORCE AND CONTACT REVERSEForce ControlContact Reverse TestThe force controls are automatically set when thewall control is used for the first time with garagedoor opener. The door MUST complete one full cycle, from fullopen to full close and then, full close to full open, before thesettings are automatically recorded.NOTE: The limit and Force settings MUST BE COMPLETEDbefore performing the Contact Reverse Test.!WARNING1. With the garage door open, lay a 2 X 4 boardflat on the floor at the center of the dooropening.2. Close the garage door using the wall control.TO AVOID INJURY OR DAMAGE NEVER adjust the force settings to adjust for damage,including an unbalanced door, binding door track orbroken spring. Perform a CONTACT REVERSE TEST monthly.!AVERTISSEMENTPour éviter les blessures ou des dommages NE JAMAIS régler la force pour compenser des dommages,y compris une porte mal équilibrée, un rail de porte coinçantou des ressorts cassés.Tous les mois, EFFECTUEZ LE TEST D’INVERSION AU CONTACT.1. Press and release the wall control button andallow the garage door to travel and stop at theDOWN limit.2. Press and release the wall control button andallow the garage door to travel and stop at theUP limit. When the door contacts the board, it shouldstop and reverse direction within 2 seconds.Door will move to the full open position.The long LED light on the powerhead will beginto flash RED with the reversal of the door.Remove the 2” x 4” board and operate theopener with the wall control again. This cyclewill clear the flashing red LEDs.Contact Reverse AdjustmentForce Control AdjustmentsForce settings are programmed from the factory toremain within safe parameters. These should notrequire adjustments. However, certain circumstancesmay require adjustment. See section 4 Maintenanceand Adjustments for detailed instructions pertainingto the adjustment of force controls.10If the door stops before contacting the board or if itdoes not reverse direction to fully open after contactwith the board, it may be due to an improperly setDOWN limit. Verify settings by:1. Repeat the “Down Travel Limit” section to makecertain the door is closing tight against the floor.2. Repeat the “Force Control” section on the left toset force limits.3. Repeat the “Contact Reverse Test” above.Repeat this process as needed until the door passesthe Contact Reverse Test. For further help, refer tothe “Maintenance and Adjustment” section/RegularMaintenance.
PROGRAMMING ADDITIONAL REMOTE CONTROLSTHE REMOTE CONTROLS INCLUDED WITHTHIS OPENER HAVE BEENPROGRAMMED AT THE FACTORY FOR YOURCONVENIENCE.NOTE: The following instructions are for remote control transmitterspurchased separately in addition to those provided with this opener,but can also be used if any remote(s) may require re-programming.1. Activate Remote(s)2. Enter Programming ModeNOTE: Each programming step has a 30 second time limit forcompletion after the function is initiated. After 30 seconds, twoLED’s will illuminate RED indicating time has expired and the stepmust be re-started. Restart the step as many times as necessary tocomplete the programming.NOTE: Do not hold remote too close to the powerhead whenprogramming remote buttons.NOTE: Each button on each remote must be programmedseparately, following these steps.PRGMSETSolid BluePRGM1. Remove the battery’s protective film from theremote by pulling straight out.2. Press and hold the SET/PRGM button on theopener for two seconds. The ROUND LED will turn BLUE. The LONG LED will then flash PURPLE.3. Stand at least 5 feet away from opener andslowly press and release the desired button onthe remote two times. Both opener LEDs will flash and turn offindicating the remote has been programmed.SETFlashing Purple3. Press Remote Button TwicePRGM4. Press the desired remote button again. The opener should run.SETTo program the same remote for other garage dooropeners, repeat the steps above using one of the otherremaining remote buttons.REPEAT STEPS 1 TO 4 FOR EACH OPENER ANDREMOTEPRESS for 2SECONDS& RELEASEFlashing4. Test RemoteNOTE: It is possible to press the remote button too quicklyor lightly. If the LEDs do not go off, press the remote buttonseveral more times to achieve confirmation.BASIC PROGRAMMING IS COMPLETE AND YOUR GARAGEDOOR OPENER IS READY TO USE.See page 19 to erase remote devices from memory.11
IMPORTANT SAFETY INSTRUCTIONSWARNING!To reduce the risk of severe injury or death,read and follow all instructions.1.2.3.4.5.6.7.NEVER let children operate or play with the door controls.Keep remote away from children.ALWAYS keep the moving door in sight and away from people and objects until door is completely closed. NO ONESHOULD CROSS THE PATH OF THE MOVING DOOR.NEVER GO UNDER A STOPPED, PARTIALLY OPEN DOOR.Test opener monthly. The door MUST reverse on contact with a 1-1/2” high object (or 2”
a knowledgeable Genie Service Technician is just a phone call away at: 1-800-35-GENIE (1-800-354-3643) Or visit our website at: www.GenieCompany.com Thank you for purchasing a Genie brand garage door opener. The leader in garage door opener technology. Before setting up your new garage doo