Transcription
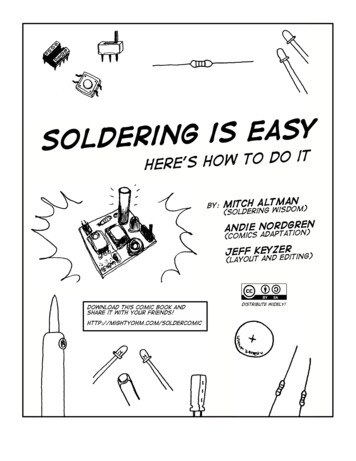
ysaesignireSolddo itotwoh'serehanby: Mitch Altmm)(soldering wisdoenAndie Nordgron)(Comics adaptatiJeff Keyzer ing)(Layout and editDownload this comic book andshare it with your friends!http://mightyohm.com/soldercomicDistribute widely!
iron.This is a solderingto meltingSolderlly useful skill.Its tip gets hot enoughsolder, which is metal.s Celsius!That's about 200 degreeis a reaIt is alsoway easy!REally, it is!You’ll see.Soldering is alsolots of fun!you can make justabout anything with electronics, which isIf you know how to solder,just too cool!There are many ways to make good solder connections.I’m going to explain how I do it.Safety tip #1(of 3):If you touch the tip, you willlet go very quickly!Let's get started!llowly ho osintualrcahd toIt is illed witf usestuf sfedhtan ilar tolinr vioWe use the soldering iron to melt thesolder and make electrical connections.When the solder heatsup, the rosin meltsalmost immediately(sim bows fomake ).ystickThe Metalfollowsshortlythereafterthe elSn an ementsd PbThis is solder.The ROSIN flows around whatyou want to solder, cleans themetal, and helps make a goodsolder connection.It is made of metal, Usually tin and lead.The best solder for electronics hasSafety tip #2rosin core and is 60% tin, 40% lead.nalso knowas flux(of 3):Lead is poisonous. It getson your skin when you hold thesolder, so wash your handsafter soldering!There are other types, for instance lead-free solder, butit has toxic chemicals in its core, and it is not quite aseasy to use as solder with lead. It also corrodessoldering iron tips quickly. If you can only get lead-freesolder where you live, it’s OK, but please don’t breathe inthe nasty smoke.If you don’t wash your hands after soldering, the lead mayget in your body, where it gets stored in your brainfor your entire life. if enough collects there then yougo insane, and you lose all of your friends. So - washyour hands after soldering, and keep your friends!2
There are many ways to connect electronic partstogether, but perhaps the easiest way is with ae made upc circuitsdarElectronipargether.toteecnnts coof electronicPrinted Circuit BoardPCB orjust"THBo Eard"The PCB makesit easy becauseit haspads foreach part.For a circuitto workcorrectly, wetogether everneed to connectything that should connectnot connecttogethtogether.If you look carefully at the PCB, you willsee lines connecting pads together withother pads – these lines are called traces.anything thater, andshould not beconnected(pronounced “leedz”)All of the parts have wires sticking out of them:Most pads have a hole in the middle – this is where thelead pokes through and makes a connection to thecircuit!All of these wires, regardless ofwhat they look like, are calledleadssince they lead to the parts.If you put all of the leads from the parts intothe correct pads for the partssomeand if you put all of the parts in the correctcan g partsoorientationwron in theg way!and if you make all good solder connectionsirstke our fLet’s ma onnection!solder cthe circuit will just work!thenThis is because the board connects everything thatshould be connected, and nothing that should not beconnected.3
We’ll start with aresistor.So, to solder in the resistor, you start by finding thecorrect value of resistance from the project’sdocumentation.Then bend the twoleads of the resistordown the width of thepart, like this:Resistors have two leads and (unlike some parts, such asdiodes, which have a “plus” side and a “minus” side) can beplaced in their pads in either direction.Then place the twoleads through the twopads on the PCB forthis resistor.PCBs usually have markings to show where each partgoes (and if the orientation matters, the PCB usuallyhas some way to show you this).You push the resistor’sleads through the padsuntil the part rests flaton the PCB(sometimes you may need towiggle and tug gently on theleads from the bottom of thePCB to do this).For most PCBs, all of the parts are placed through the padson the printed side of the PCB (which we’ll call the top ofthe board), and we’ll solder all of the pads on the bottomof the board.Since the word “resistor” starts with the letter “R”, the PCBusually marks places where resistors go with an “R”,followed by the resistor’s number, such as “R3”Then you turn the PCB over so we can solder the two pads.As you turn the PCB over, youwill need to hold the resistorwith your finger so it doesn’tfall out of the board.As I said earlier, soldering ironsget hot enough to melt metal.That means that the tips get hotenough to oxidize quickly, whichbasically means that they getdirty just sitting in the air!The oxides are an insulator forheat, so we want to cleanthem off the tip beforeeach solder connection so theheat flows nicely and wecan make good solderthen you bend the leads of the resistoroutwards at about 45 degrees so the partwon’t fall out while we solder it in place.connections.Got it? Great!Time to actually solder!This is why we have a wet sponge:to clean the oxides off the tip. Justscrape thetip across the sponge gently,then rotate the iron and scrape gentlyacross the sponge again.Hold the soldering iron in your dominanthand, like you would hold a pencil.This should make the tip silvery and somewhat shiny – readyto solder. Remember to clean the tip like thisbefore each connection you make – the tips oxidizequickly!If the tip is nice and silvery and shiny, youcan make good connections.Hold the solder in your other hand.4
Touch the cleaned tip toThen addof solderboththe pad and the lead of theabout 1mm to 3mmunder the tip.part you want to solder.Keep it there for about 1second, so everything heats up nicely.Don’t add it above the tip, since that melts the solderonly onto the tip, where it doesn’t do any good.we want the solder to flow nicely all aroundboth the pad and the lead to make a goodconnection.The solder won’t melt until it actually touches the hotsoldering iron tip, but once it touches the tip, that’swhen it melts, and you can then add your 1mm to 3mmof solder.But – and this is VERY important –keep the soldering iron tip on the padand lead for about 1 more secondsince it takes time for the solder to flow around thepad and the lead, and it will only flow when it is hot.Then pull the soldering iron away, and take a look atyour perfect solder connection!Then, pull the solder away.See how easy it is!Now put that soldering iron back in its standwhile we’re not using it.the solder cools down andhardens quickly all on its own. It onlyPlease note thattakes about a second. And then you are ready foryour next solder connection.That smoke that you sawwhen the tin/lead soldermelts is the rosinvaporizing.The stand keeps the hot iron safely on thetable. Most people say that it’s not fun to have it landit contains some chemicalsthat are not good for you,so try not to breathe it!in your lap!blow gentlyon the connection asyou solder to keepthe smoke away fromyour lungs.you can5
Let’s take a look at whatmakes a good solderconnection.You can tell a goodsolder connectionbecause the soldercan seeany of thehole or padIf youtotally covers thepad and surroundsthe lead.theo,Alslderso kes ama allor ifthe solderis flat alongthe boardsm mp.buthen you didn’t add enough solderand so there may not be aconnection where we need one.If this is the case, no problem – just repeat the procedure(clean the tip, touch the tip for 1 second on the pad and lead,add 1mm to 3mm of solder, pull the solder away, keep the tipon the pad and lead for 1 more second, and pull the tip away),and it should then be totally fine.If it does, no problem!just clean the tip, hold theIf there is too much solder, thatmeans that you added so much solder thatthere is a solder blob on a pad that is bigenough to also touch another pad,creating a connection where thereshould not be one. This can happen.tip to the solderblob between the pads for 1 secondthen bang the board against your worktable to fling the excess molten solder to the tableThe connections should then be fine(though you may need to lightly scrape anyexcess solder from the PCB, which you canusually do with your fingernail)nduch aoo maeen tiswtreIn bsolde .ittletoo lewayn whyelfoeasolot isone r easy.isThisginrsoldeBothgood!you mayto wea wantrglasse safetys!Some people like to solder parts to their padsafter adding a bunch of parts to the board.I prefer to add and solder only one partto the board at a time. I find this easiersince there aren’t so many leads that can getin the way of my soldering iron.good too!Also, if I add more than one part to the board Isometimes miss soldering a pad, since it isn’t soeasy (as you might think it would be) to see whichconnections are soldered.6
To cut the lead, we’ll use asmall wire cutter.One side has flat cuttingedges, and the other side has aAfter soldering all of the leads of the partyou are soldering, it is time to cut off theexcess leads.deep groove.This must be done to ensure that the excessleads do not bend over and short toanother lead or pad.Place the flat edge down, parallel to thejust at the top of the little bump ofsolder.squeeze the handles, and the cutting edgessnap shut.PCB,which turns theexcess lead into aprojectilethat hitsyou right inyour eye!if this happens, then there will be aconnection where we do not want one.If the excess lead is too short to hold onto (but longenough to potentially short out to something on your PCB),then position the wire cutter,this whold your fingers overilexcess l keep thethe lead,hitting lead fromthe ey anyone ineshortin (orsomew g outand then squeeze.your p here onroject)Safety tip #3(of 3): ALWAYS hold thelead you are cutting with one hand whileyou cut with your other hand.you mayalsowantto wearsafetyglasses!If you always do this, you will always be safe.Leads that are already very short, such as ICsockets, do not need to be cut – they haveleads that are too short to bend over and makeshorts.it is totally OK.All mistakes are fixable (though someIf you make a mistake,are easier than others).making mistakes is how welearn to become better at everything weAnddo.While soldering is easy, unsolderingtakes lots of practice. And if youmake a mistake, you get to have somepractice!7
As you soldermany tips andmore, you will pick uptricks that will makesoldering even easier.If you like soldering, and want to solderwell, you’ll want to buy some good tools.But you do not need to spend a lotof money to get them.But you are nowtotally readyto solder justabout anything!You can buy a decent solderingiron (in the shape of a long, fatpencil) for about US 15You’ll need asoldering ironstand that fits awet sponge,which will cost youabout US 6Then you’ll need anOK wire cutter,for another US 6If you really want to get fancy, or if you think you willbe soldering lots, or soldering a bunch of smallthingsyou can buy a decent soldering station, completewith a stand and sponge for about US 60Buy a pound roll (or a 500groll) of decent solderfor about US 35 and you’llbe set for years ofsatisfying solderingit, Igetcan duowithif y mmenleadorectin/,04ore ork60/ n corened befilwiw l asy toreerosI mentiodassol(as -free is notlead , but it .)ehfin k witworYou really don’t need moreBut you might also want long nose pliers (about US 6) and wire strippers(about US 10). (And safety glasses can be bought for as little as US 2.)ofrtpaiscmi uteco a b oak sis o khMTgoabto in -Distribute widely!w l ThicroersooH o M ll WhCoith ro ple ng)w ntPeo thian ,co r NoEnjoy!otm r(F owAl yze yhbes.Kncit f K hed resNarration by Mitch Altmanhttp://cornfieldelectronics.comCOmics adaptation byhttp://log.andie.seM ef lis Pby d J pub chan be tarStoAndie NordgrenNoEdited by Jeff Keyzerhttp://mightyohm.comTranslate it, use it, spread it, color it, teach with it!http://mightyohm.com/soldercomic8
Soldering is easy to do it: Mitch Altman isdom) Andie Nordgren (Comics adaptation) Jeff Keyzer (Layout and editing) Distribute widely!
