Transcription
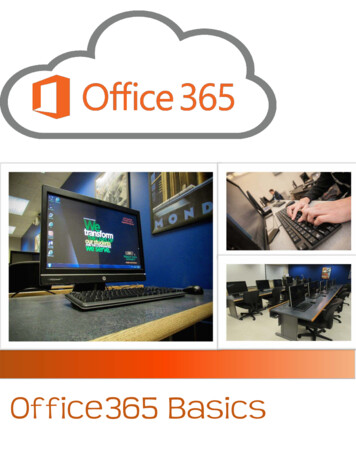
Office 365 Basics
Office 365 Basics TrainingTable of ContentsAbout Us. 3Outlook Web App (OWA) vs. Outlook Client . 4Accessing OWA Apps . 5Mail (Outlook Web App) . 6Adding/Removing Folders . 7Adding/Removing Folders to/from “Favorites” . 8Adding/Removing Subfolders . 9Automatic Forwarding. 10Filters . 11Automatic Replies . 12Adding an Email Signature . 13Mail Security. 14Calendar . 15Setting up Calendar Events – Repeating and Single . 16Calendar Events Invitations . 17Scheduling Assistant in OWA vs. Outlook Client. 18Sharing Your Calendar . 19Adding Others’ Calendars. 20OneDrive for Business . 21Uploading Files onto OneDrive. 22Cloud Storage Options. 23Skype for Business . 24Adding a Contact . 25Messaging. 26Skype for Business in Outlook Client . 27SharePoint . 28Searching for a Site. 29ProPlus . 30Atomic Learning . 30Other Office 365 Apps . 31Wright State UniversityComputing and Telecommunications Services (CaTS)(937) 775-4827helpdesk@wright.edu2 P a g e
Office 365 Basics TrainingAbout UsCaTS (Computing and Telecommunications Services) provides service and support for all campus technology, includinginternet access, computer labs, electronic classrooms, telephones, IT security, and administrative and computingresources.For students, we offer a variety of services ranging from email and 24-hour computer labs to reduced cost software andfree laptop rentals. For faculty and staff, we provide phone and voicemail services, an equipment checkout/deliveryprogram to enhance technology use in the classroom, and support for your university-owned computers.ResourcesOur IT website is a great resource to learn about all of our services, as well as access Atomic Learning where you canwatch free video tutorials! Visit wright.edu/it to learn more about CaTS!Contact UsCaTS Help DeskPhone: (937) 775-4827Location: 025 Library AnnexEmail: helpdesk@wright.eduFollow UsFollow us on Twitter @WrightStateITWright State UniversityComputing and Telecommunications Services (CaTS)(937) 775-4827helpdesk@wright.edu3 P a g e
Office 365 Basics TrainingOutlook Web App (OWA) vs. Outlook ClientThere are two different applications available to access Office365: the Outlook Web App (OWA), and the Outlook Client.This training guide is for use in OWA, but highlights the differences between applications and which app would be betterto use for specific tasks.OWAAvailable: on the web.Accessible: through most browsers from yourWright State Wings account.Provides: Quick and easy access to Office 365.Best for: times when you only have access toshared computers.Cons: Requires internet access.Outlook Client (PC)Available: on all Wright State computers and as afree installation to all WSU faculty, staff, andstudents.Accessible: through your computer’sapplications.Provides: Complete functionality. Full-featuredapplication with advanced options in Office 365.Best for: when you want full capability of Office365.Cons: More advanced than OWA.OWAOutlook ClientWright State UniversityComputing and Telecommunications Services (CaTS)(937) 775-4827helpdesk@wright.edu4 P a g e
Office 365 Basics TrainingAccessing OWA AppsAccess to most applications discussed in this manual can be found under the grid icon, located in the upper left handcorner of your OWA mail page. After clicking on the grid icon, a dropdown menu will appear with different applicationsto choose from.grid iconWright State UniversityComputing and Telecommunications Services (CaTS)(937) 775-4827helpdesk@wright.edu5 P a g e
Office 365 Basics TrainingMail (Outlook Web App)To access your account, you will need to login to outlook.wright.edu with your Wright State email address.Wright State UniversityComputing and Telecommunications Services (CaTS)(937) 775-4827helpdesk@wright.edu6 P a g e
Office 365 Basics TrainingAdding/Removing FoldersAdding Folders1. Hover your mouse over your name, as shown highlighted in Red.2. Click on the icon that appears.3. Type the name of the new folder you would like to create into the Textbox that appears.4. Press Enter.Removing Folders1. Right Click the Folder you would like to remove.2. Click Delete, as shown highlighted in Blue.3. Click Okay.TIPS & TRICKS A folder that is stored under Favoritescannot be deleted until removed fromFavorites.Wright State UniversityComputing and Telecommunications Services (CaTS)(937) 775-4827helpdesk@wright.edu7 P a g e
Office 365 Basics TrainingAdding/Removing Folders to/from “Favorites”Adding Folders to “Favorites”1. Hover your mouse over the folder you wish to add to your Favorites until you see the star icon.2. Click the star icon to add the folder into your Favorites.Removing Folders from “Favorites”1. Hover your mouse over the folder you would like to remove from Favorites.2. Click the star icon to remove it from your Favorites.3. Click OK.Wright State UniversityComputing and Telecommunications Services (CaTS)(937) 775-4827helpdesk@wright.edu8 P a g e
Office 365 Basics TrainingAdding/Removing Subfolders1.2.1.2.Adding Subfolders1. Right Click the folder you wish to add a subfolder to.2. Click Create new subfolder.3. Type the name of your new subfolder into the text box that appears.4. Press Enter.Removing Subfolders1. Right Click the subfolder you wish to delete.2. Click Delete.Wright State UniversityComputing and Telecommunications Services (CaTS)(937) 775-4827helpdesk@wright.edu9 P a g e
Office 365 Basics TrainingAutomatic Forwarding1.4.5.6.7.3.2.1. Click on the gear icon in the upper right hand corner of your email.2. Click Mail under Your app settings at the bottom of the menu.3. Click Forwarding under the Accounts section.4. Click the circle next to Start forwarding.5. Type in the email you would like your Wright State email to forward to.6. Click the box next to Keep a copy of forwarded messages if you would like a copy of the forwarded email to save inyour Wright State email.7. Click the circle next to Stop forwarding to stop the automatic forwarding.Wright State UniversityComputing and Telecommunications Services (CaTS)(937) 775-4827helpdesk@wright.edu10 P a g e
Office 365 Basics TrainingFilters1.7.5.3.4.6.2.1. Click on the gear icon in the upper right hand corner of your email.2. Click Mail under Your app settings at the bottom of the menu.3. Click Inbox and sweep rules under the Automatic processing section.4. Click the icon.5. Name the filter.6. Add your conditions/actions.7. Click OK to save.Wright State UniversityComputing and Telecommunications Services (CaTS)(937) 775-4827helpdesk@wright.edu11 P a g e
Office 365 Basics TrainingAutomatic Replies1.5.2.3.3a.4.4a.1. Click the gear icon in the upper right hand corner of your email.2. Click Automatic replies.3. Click the circle next to the Send automatic replies.a. OWA allows you to assign specific times and actions to your automatic reply.4. Type the message that you would like to appear in your automatic reply.a. OWA allows you to adjust how senders outside of your organization see your automatic reply.5. Click OK to save.Wright State UniversityComputing and Telecommunications Services (CaTS)(937) 775-4827helpdesk@wright.edu12 P a g e
Office 365 Basics TrainingAdding an Email Signature1.6.4.5.3.2.1. Click on the gear icon in the upper right hand corner of your email.2. Click Mail under Your app settings at the bottom of the menu.3. Click Email signature under the Layout section.4. Check the box next to "Automatically include my signature on new messages I compose, if you would like thesignature to appear on new messages. Check the box next to Automatically include my signature on messages Iforward or reply to in order to have the signature appear on emails you reply or forward to.5. Type the signature that you would like to appear in your emails.6. Click Save to apply your changes.TIPS & TRICKS Your email signature will save as text.Therefore, if there is ever an email youwish to send without your signature,you can simply delete the text, withoutaltering your settings.Wright State UniversityComputing and Telecommunications Services (CaTS)(937) 775-4827helpdesk@wright.edu13 P a g e
Office 365 Basics TrainingMail SecurityTo protect Wright State Users from emails that could contain malware, CaTS has implemented a protection programfrom Proofpoint called the Targeted Attack Program (TAP). TAP is an enhancement feature that works alongside the preexisting spam filtering system. When Proofpoint detects an email that contains a malicious attachment, TAP strips theattachment to prevent phishing and targeted malware attacks.Some things to note about TAP: TAP is automatically implemented through your email, so you do not have to install anything yourself. TAP is an enhancement to your email’s spam filtering system, NOT a replacement. With TAP, all URL attachments in emails are rewritten as "proofpoint.com" addresses. When you click a URL in an email message, the URL will be redirected to Proofpoint's URL validation service. Ifthe URL is not found to be malicious, you will be redirected to the original URL. If the URL IS malicious, the userwill see a warning message and the site will be blocked in the browser. In most cases, any email sent to you with malware will be removed immediately. Meaning you will not see theseemails in your inbox.If you click a URL and believe that the site is blocked in error, call the CaTS Help Desk at (937) 775-4827, or emailhelpdesk@wright.edu, so that CaTS can further investigate the b
Office 365 Basics Training Wright State University Computing and Telecommunications Services (CaTS) (937) 775-4827 helpdesk@wright.edu 6 P a g e Mail (Outlook Web App) To access your account, you will need to login to outlook.wright.edu with your Wright State email address.