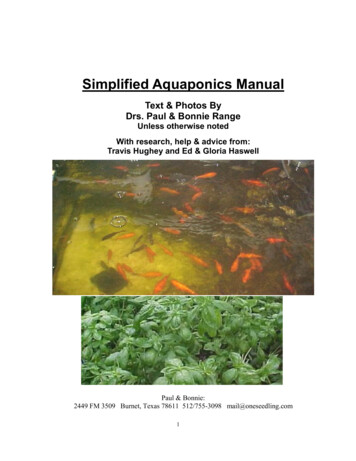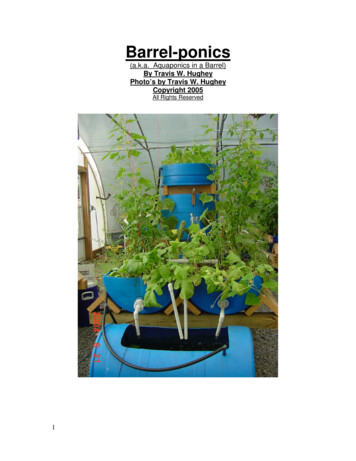
Transcription
Manual forBuilding an Aquaponics Systemwith 55 gallon barrels (Barrel-ponics)by FoodChainFoodChain, Inc.501 W. Sixth St., Suite 105Lexington, KY 40508859.428.8380foodchainlex.orgFoodChainLex on Social MediaFoodChain is a 501c3 and therefore we appreciate your support of ournonprofit work through the purchase of this manual!
A Bit of BackgroundThe first aquaponics system that FoodChain ever built was a small demonstrationsystem, using recycled 55 gallon barrels and locally available materials. This systemhouses approximately 100 gallons of water that is continuously cycling throughout.Our aquaponics system can be constructed using whatever materials you haveaccess to, and only cost FoodChain roughly 350 to construct in the spring of 2012.Since its construction, we’ve grown a variety of plants in its grow beds and raisedtwo varieties of fish. Now that it is well established it requires very littlemaintenance and upkeep is very simple. As more people are interested in gettingtheir feet wet with aquaponics, we believe that this system is both highly adaptable,approachable, and replicable. It is therefore our hope that by putting together thissimple manual that we’ll be able to encourage others to take the plunge!So, what is Aquaponics?Aquaponics is a way of growing both fish and plants symbiotically. As the fish arefed, they naturally produce waste, which over time can become toxic to them.However, this waste is very rich in nitrogen, in the form of ammonia, and plantsneed nitrogen to grow. The nitrogen of the ammonia is made available to the plantsthrough naturally occurring nitrifying bacteria (the good kind!) that turn theammonia into nitrate, which works as excellent plant food. Therefore, in anaquaponics system, the fish waste is used as free fertilizer for plants who thenabsorb the nitrogen from the water, which cleans the water that then goes back tothe fish.
ConstructionThese directions are intended to provide only one way of how such an aquaponicssystem can be constructed. There are countless variations that can be made, and weencourage you to the make the most of the resources most available in your area.Feel free to experiment to find what works best for you! Also, keep a look out forrepurposed or recycled items that can be used, provided that they’ve been cleanedand didn’t previously contain harmful chemicals.SuppliesFrom Hardware Store: LumberPVC (2)(2)(4)(2)(2)8' 2x6 – cut into (6) 30” lengths8' 2x8 – cut into (6) 30” lengths10' 2x4 – cut into (4) 64” lengths and (4) 33” lengths10’ 2x4 – cut into (4) 54.5” lengths8’ 1x2 – cut into (4) 48” lengths 10' length 1" PVC3' length of 3" PVC – cut into (2) 18” lengths(4) slip elbows for 1" PVC(1) "T" for 1" PVC(2) endcaps for 1" PVC Metal Chain (to support lights) (4) 60” length (2) 12” length (4) S-hooks to hold chain 300gph Fountain/Water Pump20’ ½” flexible tubing (to fit pump)Metal clamps to hold tubing to pump and bulkheadsDuct tape or metal c-clamp (2) 48” Florescent Shop Lights with plugs(2) cool 48” bulbs(2) warm 48” bulbs (8) Cinder BlocksTwineBox 2” Deck ScrewsPower StripTimer for lights
From Hydroponics Store (bolded ones are local) Aquarium Aerator (with 4 nozzles) (4) air stones 20’ airline tubing (to fit nozzle on aerator) (2) ¾” to ½” tubing barb bulkhead fittings(1) Uniseal for 1” PVC Aquarium Heater for 100 gallonsLocal Supplier (4) Cylindrical Blue Tanks - 24” x 36” – 55 gallon capacity (these can be recycledbarrels, just be sure they’ve been cleaned thoroughly and are BLUE. Thisindicates that they didn’t hold chemicals previously and are food grade) ¼ cubic yard of expanded shale (sold as Kenlite from many landscapingcompanies.) Hydroton can be substituted though it’s more expensive.Power Tools: Power drill with a hole saw bit of 1.75”and 1.375” and a drill bits of ¼” Jigsaw for cutting into plastic barrelsFor Maintenance: A water test kit for testing pH, ammonia, nitrite and nitrate. We recommend theAPI Freshwater Master Test Kit.
DirectionsBarrels:a.b.c.d.Each of the 4 barrels will serve a different purpose.Tank 1 will be the fish tankTank 2 will be the grow bedsTank 3 will be the sump tankTank 4 will be the extra holding tank1. Tank 1: You will cut a rectangular hole along the side of this barrel.It should measure approximately 23” in length by 13” in width.2. Repeat step 1 on Tank 3.3. Going back to Tank 1, you will need to drill a hole on the circularside of the tank. Use the 1.75” hole saw for this, and cut the hole
4.5.6.7.approximately 4” from the outer lip of the barrel, in line with therectangular hole already cut.Now slip the 1” Uniseal through this hole.For Tank 1 and Tank 3, you’ll want to be sure the bungholes arefully screwed in and plugged, as these tanks will hold water ontheir sides.For Tank 2, using the seam already in the barrel, cut the barrel inhalf lengthwise so that you have two half-moon shaped barrels(see images below). Be sure to cut through the two holes on theedges. You will not need the bunghole plugs for this tank.Measuring approximately 1” from the lip of the barrel, drill a1.375” hole on the bottom of each half tank using the hole saw bit.Thread the barbed bulkhead fitting through this hole and affix it sothat ½” barbed fitting is on the outside of the half tank and theinside of the bulkhead is mostly flush with the insidecircumference of the half tank.8. Tank 4 simply needs the top removed, which can be done with ajigsaw. It will stand up on its end and hold water to be aerated andadded over time to the system to top it off.Lumber:1. Using deck screws, attach one of the 33” 2x4 sections to another33” 2x4 section to make essentially a 33” long 4x4 (timbers).2. Repeat this step with the other pairs of lumber to make 2 33”timbers, 2 64” timbers and 2 54.5” timbers.
3. Using a 30” length of the 2x6 and a 30” length of the 2x8, create a“V”. Use deck strews to affix these together by drilling from the2x8 into the 2x6. Construct 6 of these “V” pieces.4. Lay out the 2 54.5” timbers so that they run parallel to each other,about 30” apart.5. Position one “V” on each end, with the V facing downwards andaffix them to the 54.5” boards by drilling screws through the outeredge of the V down into the board on both sides.6. Measure approximately 12” from the inner edge of the one of theoutside “V”s to find the placement for the center V. Affix this one inthe same fashion.This is referred to as the Grow Bed Stand7. Lay out the 2 30” timbers so that they’re parallel to each other,about 30” apart.
8. Position one “V” on each end, with the V facing downwards andaffix them to the 54.5” boards by drilling screws through the outeredge of the V down into the board on both sides.This is referred to as the Fish Tank Stand.Assembly:1. Using cinderblocks, make the footprint of the system with arectangle of 36” x 56”. Use four cinderblocks to mark the cornerswith the outer edge of each block marking the outer edge of therectangle. Then place a 2nd cinderblock on top of each corner tomake four corners of double-stacked cinderblock columns.2. Place a 64” timbers on top of two cinderblock columns, which are56” end to end.3. Overtop of the 64” timbers, balance the Grow Bed Stand, with theVs facing towards the front. The edge of the outer V should be
flush with the front edge of the 64” timber, putting the Grow BedStand towards the front portion of the 64” timbers.4. Now place the Fish Tank Stand on the back portion of the 64”timbers with the Vs perpendicular to the Vs on the Grow BedStand. The edge of the back V should be flush with the back edge ofthe 64” timbers.5. Position a 48” length of 1x2 to the corner of the Grow Bed Stand,keeping the bottom of the board flush with the bottom of the 54.5”timber. The 2” width of the board should be along the 30” side ofthe Grow Bed Stand. Use a deck screw to affix the board in place.Repeat on all 4 corners, similar to a poster bed design.
6. Affix a single screw in the top of each of the 1x2 posters with asmall length sticking out. Later you will attach chains to hold thelights with these posters by threading a link in the chain over theprotruding portion of each screw.7. It’s now time to add the tanks. Place Tank 1 on the Fish Tank Standwith the barrel sides supported by the two downward facing Vs.The Uniseal hole should be at the top of the barrel facingoutwards. Place the 2 halves of Tank 2 in the two supports of theGrow Bed Stand, where again the Vs will cradle the barrel sides.The barbed ends of the bulkhead fittings should be pointing downand are closest to the front edge of the system, opposite the FishTank.8. Finally, place Tank 3, with the cut side up, on the floor in front ofthe Grow Bed Stand, and brace it in place using the final unused V.Adding the PVC (Carrying the water from the Fish Tank to the Grow Beds and back):1. Cut a short section of 1” PVC, approximately 3” long. Push this sectionthrough the Uniseal in the fish tank so that only about 1” sticks into the tankwith the remainder sticking out.2. Add an “L” connector to the end of this piece so that the next PVC pipe will gostraight down along the side of the tank.3. Cut another piece of PVC approximately 4” long and attached it into the Lconnector, ending about midway down the height of the fish tank.
4. Add another “L” connector to the end of this piece to change the direction tohead towards the Grow Beds.5. Cut a 4” section of PVC to slip into the L connector and travel beyond theedge of the fish tank.6. Add another “L” connector to the end of this piece to change the direction towrap around the midsection of the tank. This will make the next piece of PVCtravel along the length of the Fish Tank.7. Cut a 16” length of PVC and fit it into the L connector. This piece should endroughly near the midpoint of the long dimension of the fish tank.8. Add a final “L” connector to the end of the PVC to change the director to pointaway from the Fish Tank and towards the Grow Beds.9. Cut a final 4” section of PVC and slip it into the L. It should end over the GrowBeds, running between the two halves.10. Add a “T” connector to the end of the pipe to split the flow between the twoGrow Beds. If necessary, add a short section of PVC to each side of the T sothat the water flows into the Grow Beds, rather than in the crack between thetwo halves.Adding the Siphons (Carrying the water from the Grow Beds to the Sump Tank):1. Using a ¼” drill bit, drill a hole into the end wall of each Grow Bed Half Tanknear the upper edge. This should be on the same side near the bulkheadfitting sticking out of the bottom.2. Affix a 24” section of ½” black vinyl tubing onto the barb end of the bulkheadfitting in the Grow Bed Half Tank. If needed, you can use a metal clamp tosecure this tubing on so that it doesn’t leak from the barbed fitting.3. Thread a 12” section of twine through the ¼” hole at the top of the Half Tank.4. Twist the vinyl tube into a loop so that the other end of the tube ends overtopof the Sump Tank below. Hold it in place by looping the string through thehighest point of the tube and tying it in a knot. The highest part of the tubeshould be approximately 2” from the top lip of the Half Tank, and this will bethe high water mark of the Grow Beds.5. Repeat steps 1-4 on the other Half Tank.Installing the Pump1. Using a metal clamp, affix the end of the remaining black vinyl tubing to theoutflow of the water pump.2. Place the pump in the bottom of the Sump Tank.3. Snake the tubing along the outside of the Sump Tanks and Grow Beds and upthe side of the Fish Tank so that it ends up at the opening in the fish tank.This will return the water from the Sump Tank back to the Fish Tank.4. Affix the tubing to the Fish Tank either with duct tape or a metal C- clamp.Final Touches1. Using one of the 18” lengths of 3” diameter PVC, center it around the hole inthe Grow Bed that leads to the bulkhead fitting and the loop siphon.
2. Holding this pipe in place, fill the bed with either expanded shale orHydroton grow medium until it is 1” below the rim of the half tank.3. Repeat steps 1 and 2 for the second Grow Bed.4. Install the Heater so that it rests in the Fish Tank. This can be dangled intothe fish tank through the opening on the top.5. Run two lengths of airline tubing with air stones from the Air Pump to theFish Tank. This will provide the necessary oxygen to your fish.6. Run two more lengths of airline tubing with air stones from the Air Pump tothe Holding Tank (Tank 4). This aeration will help dissipate the chlorine fromthe tap water.Congratulations! You’ve now assembled your Aquaponics System and you’reready to begin operations!
OperationsAdding the WaterFor a healthy aquaponics system you need a supply of fresh, clean water with NOCHLORINE! Typically city water is treated with either chlorine or chloramine tokeep it from growing bacteria, and you’ll need to dissipate that chlorine beforeadding living organisms to your system. We recommend doing this by aeration andmovement. Now’s the time when you’ll add the bulk of the water to your system.Add water to the Sump Tank first and after the water level is above the pump, youcan turn on the pump to send water up into the Fish Tank while you continue to addwater to the Sump Tank. Keep adding water until the Fish Tank is fully filled andbegins overflowing through the pipe into the Grow Beds. You can continue to addwater to the Sump as the Grow Beds fill, until either the siphons trigger on or untilyou’ve filled the Sump Tank 2/3rds full. In total you should add about 100 gallons ofwater to the system.Once all the water is added, you want to be sure to check for leaks and thateverything is running as it should. The pump in the Sump Tank should never getclose to running dry. If you find this happening, you need to add more water to thesystem. Also, this is the time to check that your loop siphons in each Grow Bed work.Each Grow Bed should fill with water to about 2” below the rim, when it will thenbegin trickling out of the loop siphon. As more water pressure builds it willeventually force all the air out of the tube and create a siphon that drains the waterin the Grow Bed faster than it is filling from the Fish Tank. When it has drained tothe bottom of the Grow Bed, the siphon will make a sucking noise until the siphonbreaks, once again filling with air and the water will stop flowing until it triggers onagain when the bed is filled with water. This creates a natural “ebb and flow”pattern in the Grow Beds, which will provide the plant roots with alternating accessto nutrient rich water and oxygen.After you’ve ensured there are no leaks and the siphons are functioning correctly,let the water run throughout the system for at least 4 days. This will eliminate all thechlorine. It can be confirmed with an aquarium chlorine test if needed. During thistime you can also switch on the heater and the aerator to begin preparing the waterfor the fish.Next Comes FishOnce you’ve confirmed there’s no chlorine in your system you can add your fish. Werecommend tilapia as these do very well in reciruculating systems and are veryhardy. As they are tropical fish, though, they’ll need a water temperature of at least75 degrees F so be certain your heater has been on. If you chose a different fish,check to ensure your water temperature meets their specific needs. You’ll also want
to check the pH of the water to ensure it is in a range appropriate for your fish.Tilapia tolerate a wide range of pH, but ideally between 6.5 – 8.There is no magic number of fish to add, though we recommend starting with 6-8small fingerlings, around 4” in size. If your fish are smaller you can add more. Youwon’t be operating your system at its limits so as long as you don’t overcrowd it, itshould be fine. The feed rate is actually what will determine your plant growth, notthe number of fish.Once your fish are added, ensure they have enough oxygen. You can do this visuallyby ensuring that they don’t “gasp” at the surface. If you have access to it, you canalso use a Dissolved Oxygen (DO) meter, where you want a reading of at least 4mg/L.Finally, you’ll want to get a basic fish feed. The tilapia will eat as much as they’regiven, but ideally you’ll feed them 1 or 2 times per day for about 10 minutes at atime until they stop eating the feed.Next Comes Waiting .and Water TestingThe next phase is called cycling and you’re essentially waiting for the nitrifyingbacteria to show up. These naturally occurring bacteria will essentially “unlock” thenitrogen from the fish waste (ammonia) to make it available to the plants first in theform of nitrite and then nitrate. Before these bacteria colonize though, you aren’tready to add plants since they won’t have any food. This is very vulnerable time forthe fish, too, since they won’t have the filtration of the plants and bacteria to removetheir ammonia waste and therefore they need to be fed sparingly. Too much feedwill cause them to be sick and potentially die.During this time you’ll also get comfortable with your water testing kit. Every dayyou’ll test the pH, along with the levels of ammonia, nitrite and nitrate.pH: You just want to ensure that your water pH doesn’t change radically. Ideally, thesystem will hold around 6.8, but an established system could drop in pH. In this firststage of operations, you’ll likely hold fairly steady.Ammonia: This is fish waste. Therefore, once you add your fish, you’ll begin to seerising levels of ammonia. Ammonia is toxic to fish, though, so if it rises too high, youwant to cut back on feed or hold off feeding them entirely for a few days. (This won’thurt the fish, but rather they’ll simply slow down their metabolism.)Nitrite: This is the fist sign to show your bacteria are colonizing. The first wave ofbacteria will begin to convert the ammonia to nitrite so once you see this show up,you should notice a corresponding drop in ammonia. You’re well on your way now!
Nitrate: This is plant food and also the final product from the bacteria. The secondwave of bacteria converts the nitrite to nitrate. Therefore, as you see the nitratelevels appear, you should see diminishing nitrite levels. By this point the ammonialevels should be close to zero. After a few more days, the nitrite levels will also dropto near zero and all the fish waste will be available as nitrate for your plants.Once your water tests show low to no ammonia and nitrite but measureable levelsof nitrate, you’ve got a fully cycled system and you’re ready to add plants! You canalso now feed your fish more aggressively!Adding PlantsYou can either add seeds directly to your Grow Beds or seedlings. If you useseedlings you can “rinse” the dirt off the roots so they’re planted bare roots. Just besure you plant them low enough so that they get moist from the rising water (butnot washed away if using seeds). Seedlings are easier as they’re already established.You can arrange them in whatever pattern you’d like, but be mindful of where yourgrow lights cast light. Good plants include herbs like mint and lettuces. Experimentto what grows best in your system though. (Be sure to plug your lights on once theplants are added, and if you want, put them on a timer to give the plants up to 6hours of darkness at night).And you’re DONE! You’ve now got a fully functioning Indoor AquaponicsSystem!
Maintenance and TroubleshootingMaintaining your Aquaponics system is a relatively simple process, it just needs awatchful eye.1. Fish: You’ll want to feed your fish each day (can be up to 3 times a day formaximum growth). They’ll tell you when they’re full. If after 30 min there isstill food in the tank you can feed less next time. If it’s all gone within the first5 minutes or so you can feed more.2. Plants: Keep an eye to see that the plants are growing and when things lookread feel free to begin harvest!3. Water Quality: Continue to monitor your pH, ammonia and nitrate levels.Ammonia should stay close to zero and nitrates can rise to as much as100ppm, though between 30-60 is better. The pH should hover around 6.8and within the range of (6.5 – 7.2).Still have questions? Here are some common questions and hints.About the Fish1. My fish seem to be “gasping” a lot at the top of the tank, is this normal?Yes and No. Fish that come up for air and “gasp” at the top of the tank do so becausethe water does not contain a sufficient amount of oxygen for them to be comfortable.You can find this out by using a Dissolved Oxygen (DO) meter; you want a reading ofat least 4 mg/L. This however is most likely due to your air pump, so you shouldcheck to make sure that it is working properly and bubbles are rising from the airstone. A simple fix might be to add an additional air stone or a stronger pump.2. My fish keep dying, but I’m feeding them regularly, what’s going on?With this, any number of things could be happening. The most likely situation is thatthe ammonia that the fish are producing is not being cycled properly into the rest ofthe system and is polluting the holding tank. Check this by using a water test kit fortesting pH, ammonia, nitrite and nitrate. We recommend the API Freshwater MasterTest Kit. If there is too much ammonia in the water, you can lessen the strain on thefish by simply replacing some of the water with new dechlorinated water. However,this issue is probably caused by either a blockage in the system, or with the bacteriadying off. For a short term solution stop feeding the fish (don’t worry they won’t die,but they wills top pooping which should allow your bacteria time to catch up). Whenthe levels drop again to zero or close you can resume feeding but just do less.3. I put feed into the tank, but my fish don’t seem to be eating. Is this normal?Fish have a tendency to be very shy when it comes to eating, and they may simply bewaiting for you to leave. One thing you may check is the water temperature, as fishmay not be likely to eat when they’re cold. Always try to keep your temperature justabove 75 to make the atmosphere as comfortable as possible for the fish. Oddly
enough, the size of the feed may also be in question. Compare the size of the feed tothe mouth of one of your fishes. Fish do not have teeth, and must therefore be ableto gulp entire pellets of feed. Often if feed is too big for them they will wait and allowit to dissolve in the water before they attempt to eat.About the Plants1. How long can I expect until I see my plants start growing?Every plant is different, and will grow at different rates. For example, herbs willgrow much quicker than a tomato plant. However, if you are working fromseedlings, it will generally take about two weeks for a plant to get fully acclimated toa system and to start growing new sprouts. Naturally, if you began with seeds, theprocess will take longer. Don’t despair though, as with all manner of growing,patience is key.2. I’m getting a lot of yellowing leaves from my plants, is this normal?Yellowing leaves simply mean that the plant is not healthy, and could be caused byany number of things. First, check to make sure they are getting enough light. You donot want your grow lights high above the plants. Have your grow lights a few inchesabove your tallest plant. Check the water levels as well to make sure you haveenough nitrate (plant food). If your system has been running for a while, you may berunning low on iron. In our system, when needed, we supplement our plants byadding some chelated iron (we recommend Grow More Organic Iron ChelateConcentrate, available on Amazon). We add it directly to the sump tank. Look onlinefor more details on this procedure and amounts.3. I’m noticing some insects in my system, what do I do with them?The most important thing to note here is not to use any form of insecticide. Theingredients in insecticides will immediately kill all the bacteria in the system, whichwill severely cripple it, as well as your fish. The best thing to do is to eitherphysically remove the bugs, or to place sticky yellow traps around the edges of thesystem. You can prevent insects by removing sick or dead leaves and plants from thetank, and cleaning out any accumulated dead plant material.About the System Water1. How frequently do I need to do water quality testing?Ideally everyday. This will ensure nothing happens suddenly. With only 100 gallonsof water in your system, things can change quickly!2. There seem to be some sort of solid accumulating at the bottom of my fish tank,is this normal?Yes, it’s normal, but it’s not ideal. The solids can get stirred up in the water andeventually hurt the fish as they break down into ammonia. The best way to cleanthese solids out is to buy an Aquarium Vacuum at the local pet store (it’s a simplesiphon) and siphon off any solid fish waste or uneaten food you see that accumulate.
3. According to my meters, my pH levels are getting really low, what can I do to fixthem?First this is a good thing and means your bacteria are healthy! The best and mostefficient way to push your pH level back up is to add Calcium Hydroxide (availableat most hardware stores as a garden amendment) into the sump tank so that it maybe slowly funneled through to the rest of the system. Look online for more detailson this procedure and amounts.4. I’ve recently had a huge spike in ammonia, what’s going on?A big spike in ammonia could result in the death of a lot of fish so you want to take itseriously. You may already have a dead fish in the system, which is breaking downalready. (Note: not all fish float when they die, some sink, so be sure to dredge thebottom of the holding tank from time to time) Our recommendation is to stopfeeding immediately (fish can go a few days without being fed), check to make sureyou don’t have large amounts of solids in the bottom of the fish tank or a dead fishand let your bacteria convert the surplus ammonia to nitrate. If that doesn’t workand the ammonia is still high after a few days you may need to resort to a waterexchange with chlorine free water. This is the last resort though.5. My power has gone out, what do I do?The plants can go some time without receiving light, but the most importantelectrical aspect of the system is the Air Pump. Without it the fish may not receiveenough oxygen and could quickly die. If you have a means to provide electricity tothe system via generator, first get the air pump back on, the rest can then follow.OtherIf you do not see your question on this list, there are obviously a lot of otherresources for assistance. The internet has hundreds of pages for reference and manyforums. Also, your local County Extension Agent may be able to help with plantquestions.
Repeat on all 4 corners, similar to a poster bed design. 6. Affix a single screw in the top of each of the 1x2 posters with a small length sticking out. Later you will attach chains to hold the lights wit