Transcription
Getting started withMicrosoft Teams
Client Relations and CommunicationsRodney EmeryJennifer St. LouisOlinda Hubbscrc@siu.eduoit.siu.edu/crc Southern Illinois University
Team EmpowerpointMake sure no perspective is lost. Get involvement from everyone on your team from various backgrounds, age groups, and cultures which sparks ideas and innovation that wouldn’t have happenedwithout getting all these people involved in one common thread of communication.Enhanced CommunicationHave chats with one person or multiple people. Jazz up your messages with emojis, stickers, andformatting tools. Show someone appreciation by sending them a customizable “praise” card. Startconversations with your team have a constant thread of communication that you can go back inhistory and see.Real-time CollaborationEasily share files with your team members and work on them together in real-time. Working on thesame file? See the exact spot in the file that your team member is working on so that you don’toverlap each other. Have a question about a specific document? Start a conversation and invitespecific team members (or the whole team) to discuss it—all without having to exit the document.Streamlined MeetingsCheck team member availability and schedule meetings. Change your phone call into a video callwith the click of a button. Realize during a meeting that you need another team member to be a partof it? Invite them to join! Need someone in a meeting that is outside of your team? Invite them, too!Seamless IntegrationAccess websites, videos, surveys, and so much more from outside applications like YouTube,Survey Monkey, and Abobe PDF Reader, all without leaving Teams. Need to access something, butyou’re not on campus? You can access everything in Teams whether you’re on campus or not.Reliable SecurityFeel confident about the security of your Team, Channels, files, and projects with end-to-end securitypowered by Microsoft Office 365.
MS Teams GuideChannels and TabsTeam OwnersRequesting a New TeamRoles DefinedCustomizing Your Team1.11.11.23.1Creating a Channel3.1Showing/Hiding a Channel3.1Change Team Name1.2Channel Notifications3.1Change Team Description1.2Editing a Channel3.1Change Team Privacy1.2Change Team Picture1.2Deleting a ChannelRestoring a Channel3.23.2Member Permissions1.3Adding a Team Member1.3Removing a Team Member1.31.31.3Changing a Member’s RoleProcessing Member RequestsInitial SetupSigning Into Microsoft Teams2.1Browser Instructions2.1Desktop Instructions2.1Profile and Settings2.2Using Tabs3.2Files and FoldersDownload a File4.1Create a New Folder4.1Uploading Files4.1Creating New Files4.1Collaborating on Files4.2Moving a File4.2Accessing Your Profile Settings2.2Copying a File4.2Changing Your Profile Picture2.2Renaming a File4.3Changing Your Status2.2Deleting Files and Folders4.3Changing Notification Settings2.3Working with TeamsTeam InterfaceManaging a TeamiiWorking with Channels2.42.42.4
Table of ContentsCollaboratingPostsCreating a Post5.15.1Replying to a Post5.2Sharing a File in a Post5.2Reacting to a Post5.3Saving a Post5.3Viewing Saved PostsMentionsMention Your Whole TeamMention an IndividualMention a ChannelChatsChat Notifications5.35.15.15.15.15.45.4Starting a New 1:1 Chat5.4Starting a Group Chat5.4Adding People to a Group Chat5.5Message Format Options5.5Sharing a File in a Chat5.5-5.6Message Search5.6-5.7Meetings5.7Scheduling a Meeting5.7Inviting Outside Guests5.8Joining as a Guest5.8Channel Meetings5.8Meet Now Meetings5.9Invite Someone to a Meeting5.9System Audio5.11View Upcoming Meetings5.12Record MeetingsScreen SharingStart Screen SharingScreen Sharing OptionsGive and Take Back Control5.12-5.135.105.105.105.11iii
TeamOwners
Microsoft Teams OwnersRequesting a New Team1. In your browser, go to ithelp.siu.edu.2. Select Communication.3. Select the “I Don’t Have” option.4. Select Teams Request.5. Complete the form with the necessary information:a. Departmentb. Team Display Namec. Departmental Email Addressd. Brief description of what the Team will be used for.e. Name and email address of the Group Owner(s). If you have multiple owners, separate their informationwith commas. You can also add/remove owners on your own later.f. Name and email address of the Group Member(s). If you have multiple members, separate theirinformation with commas. You can also add/remove members on your own later.6. Click the Submit button.Team Owners/Members/Guest DefinedEvery member in Teams has a role, and each one has different permissions associated with it.RoleOwnersPermissionsManages certain setting for the team. They add and remove members, add guest,change team settings and handle administrative tasks. There can be multiple ownersin a Team.MembersThe people in a Team. They talk with other team members in conversations. Theycan view and usually upload and change files. They can also do the usual sorts ofcollaboration that the team owners have permitted.GuestsGuests are people from outside of your organization that team owners invite, such aspartners or consultants to join the team. Guests have fewer capabilities than teammembers or team owners, but there is still a lot that they can do.Section 1 Page 1
Microsoft Teams OwnersCustomizing your TeamChange Team Name1. Click the ellipsesnext to the Team name.2. Click Edit Team in the dropdown window.3. Delete the Team Name that is already there and type a new one.4. When you are done, click the Update button to save your change.Change Team Description1. Click the ellipsesnext to the Team name.2. Click Edit Team in the dropdown window.3. Delete the text that is already in the Description field and type a new description.4. When you are done, click the Update button to save your change.Change Team Privacy1. Click the ellipsesnext to the Team name.2. Click Edit Team in the dropdown window.3. Click on the Privacy dropdown.4. Select whether you want your team to be Private or Public.4. When you are done, click the Update button to save your change.Change Team Picture1. Click the ellipsesnext to the Team name.2. Click Edit Team in the dropdown window.3. Click a Team Avatar icon to set it as your team picture.4. When you are done, click the Update button to save your change.Section 1 Page 2
Microsoft Teams OwnersChanging Member PermissionsAdding a Team Member1. Click the ellipsesnext to the Team name.2. Click Manage Team in the dropdown window.3. Click the Add Memberbutton.4. Type the name of the person(s) you would like to add.5. Select the appropriate person(s) from the dropdown list.6. Click the Addbutton. The person(s) will receive an email notifying them that they have been added.Removing a Team Member1. Click the ellipsesnext to the Team name.2. Click Manage Team in the dropdown window.3. Scroll down to the name of the member(s) you want to remove.4. Click thebutton on the far-right side of the screen on the same line as their name.Changing a Member’s Role1. Click the ellipsesnext to the Team name.2. Click Manage Team in the dropdown window.3. Scroll down to the name of the member(s) you want to modify.4. On the same line as the person’s name, click the Owner/Memberdropdown.5. Select whether you want the person(s) to be a Member or an Owner. Their role will change instantaneously.Processing Member RequestsAlthough Team Members cannot add new members to the team, they can submit requests for you to add newindividuals. As an owner, you can accept or deny these requests.1. Click the ellipsesnext to the Team name.2. Click Manage Team in the dropdown window.3. Click the Pending Requests tab at the top of the screen.4. Review the list of pending requests and click Approve or Deny appropriately for each of them.Section 1 Page 3
InitialSetupInitialSetupLorem ipsum dolor sit amet, consectetuer adipiscing elit, sed diam nonummy nibh euismod tincidunt utlaoreet dolore magna aliquam erat volutpat. Ut wisi enim ad minim veniam, quis nostrud exerci tationullamcorper suscipit lobortis nisl ut aliquip ex ea commodo consequat. Duis autem vel eum iriure dolorin hendrerit in vulputate velit esse molestie consequat, vel illum dolore eu feugiat nulla facilisis at veroeros et accumsan et iusto odio dignissim quihttps://youtu.be/m1VQpIahGBc?list PLXPr7gfUMmKwYKFSqoPN-aHQppI7rRQLf
Signing into TeamsBrowser Instructions1. Using your Network ID and password, login to SIU’s Microsoft Outlook Web Application at office.siu.edu.2. Click the App Launcher icon in the top left corner.3. A dropdown will appear. Click the purple Teams icon to launch Microsoft Teams in your browser.The browser application is a great tool because it can be accessed from anywhere and on anydevice, you have access to.Desktop Instructions1. Click on the Windows iconlocated at the bottom left of your screen and start typing the word “Teams.”2. Click the Microsoft Teams icon at the top of the list. This will launch the Microsoft Teams desktop application.You can pin the MS Teams application to the taskbar at the bottom of your screen by rightclicking on the MS Teams icon and selecting “Pin to Taskbar.”Section 2 Page 1
Updating Your Profile and SettingsAccessing Your Profile Settings1. Click the ellipsisnext to your profile picture in the top right corner of MS Teams.2. Click Settings.3. Browse through the settings and change the ones that you would like or leave them set to their defaults.Changing Your Profile Picture1.2.2.3.4.Click Accounts,Click your Profile Icon.Click Upload Picture.Select a picture from your files and click Upload.Click Save.The picture you select for profile will become your default profile picture in MS Outlook(and visa-versa).Changing Your StatusBy default, your status in MS Teams will update based on the events that are scheduled in your Outlook Calendar.1. Click on (or hover over) your status. A drop-down will appear with additional options.2. Choose the appropriate status.If your status is set on “Do Not Disturb”, you will not receive any notifications. However, youcan set “Priority Access” for contacts that you would like to receive notifications from regardlessof your status. When you have chosen this setting, a message will appear at top of your screen.Click Change settings to manage your priority access.Section 2 Page 2
Updating Your Profile and SettingsChanging Notification Settings1. Click Settings.2. Click Notifications. This opens the default notification settings which you can adjust.Mentions:Personal mentions: When you are mentioned in MS Teams.Channel mentions: When a Team Channel is mentioned in MS Teams.Team mentions: When your entire team is mentioned in MS Teams.Messages:When you get a direct message in MS Teams.Other:When changes occur such as modifications to team membership, team role changes, or missed activity.Status:Follow a person’s status and get notified when their status changes to Available or Offline.Section 2 Page 3
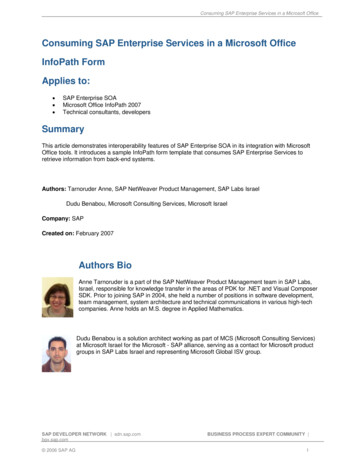
Working with TeamsTeam InterfaceThe Team Interface lists all the teams that you are a member of (you may only have one team). If you want to accessconversations or files within a specific team, you will select that Team from the interface. If you click an option on the lefthand navigation (Activity, Chat, Calendar, Calls, or Files) these are not tied to a specific Team.Managing a Team1. Click on a Team on your Team Interface (you may only have one team).2. Click the ellipsesto the right of the team name.3. Click on Manage Team in the drop- d o w n window. A list of owners, members, and guests appears.Adding Team Members (only owners can add members)4.5.6.7.Click on the purple Add Member buttonon your Team Interface (you may only have one team).Enter the name of the potential team member in the search field. A list of names appears as you type.Choose a name from the list.Click Add.If you are not an owner, but believe someone should be added to your Team, you can requestfor the owner to add them. Follow the instructions as stated above. Instead of clicking Add, youwill have the option to Submit Request. Your Team owner will have to approve/deny the request.Section 2 Page 4
Section 2 Page 5
Channels& Tabs
About ChannelsCreating a ChannelCreate a Standard Team Channel1. Click the ellipsesto the right of the Team name.2. Click Add Channel.3. Enter Channel Name and a Description of the channel’s purpose.5. Click Add.Create a Private Channel1. Follow steps 1-3 above.2. Click the Privacy drop-down menu and choose Private.3. (Optional): Enter the name(s) of the individual(s) you would like to also have access to the channel.4. Click Add.Section 3 Page 1
About ChannelsShow/Hide a ChannelWhen your Team has multiple channels, some channels may become “Hidden” on your Channel List by default. Youcan customize your list by choosing which channels you want shown or hidden.To Show a Channel:1. At the bottom of your channel list, click the Arrow next to “Hidden Channels.”2. A drop-down will appear. Click the Show icon next to name of the channel you would like to add to your list.To Hide a Channel:1. Right-click on the name of the Channel you want to hide from your list.2. Click Hide.Channel NotificationsYou can choose to be notified when there are new posts to Channel, when posts in a Channel receive a reply, or whena Channel is mentioned in a conversation. These settings are unique to each channel. Changing your notificationsettings on one channel will not change your settings on any other channels.1.2.3.4.Right-click on the Channel Name in your list of Channels.Click Channel Notifications.Choose the settings you prefer.Click Save.Editing a Channel1.2.3.4.Right-click the Channel Name.Click Edit This Channel.Edit the name of the channel or the description in the window.Click Save.Deleting a Channel1. Right-Click the Channel Name.2. Click Delete This Channel.3. Click the Delete button.When you delete a channel, conversations, files, and tabs that were created within thechannel can still be recovered up to 30 days after deletion.Section 3 Page 2
About ChannelsRestoring a Channel1.2.3.4.5.Right-click on the Team Name.Click Manage Team.Click the Channels tab to access a list of all current and deleted channels.Scroll to the bottom of the page and click the Deleted option. A list of deleted channels will appear.Click the Restore option to the right of the channel name.6. Click the Restore button to confirm.Using Tabs within a ChannelEvery channel has its own set of tabs. Tabs have a wide variety of uses; they store your conversations andfiles within a channel and allow you to include links to websites, play videos, conduct surveys and more.Posts Tab:Each channel has its own Posts Tab. This is where you can collaborate with team members and haveconversations and share files related to that specific channel. For example, if you have a channel called“Annual Report,” this is where you would have all conversations related to working on the report. This keepsyour posts organized and easy to search. Channel posts are viewable by all team members.Files Tab:Like Posts, each channel has its own Files tab. For additional information on the Files tab and workingwith Files in Microsoft Teams (section 4, page 2).Adding a Tab/Application:1. Click the Channel Name to open the channel.2. Click theicon on the Tab Bar.3. Select the application you want to add to the channel.4. Click Save.Some applications may require additional information or setup to add it to your channel.Section 3 Page 3
Files &Folders
Files and FoldersMake sure to use the Files tab at the top of the Channel window instead of the Files button onthe left-hand navigation bar. The Files button accesses all your SIU cloud files (Teams,OneDrive, etc.), whereas the Files tab will only show the files available in that channel.Download a File1. Click the File(s) that you want to download, which highlights in gray when they are selected.2. Options will appear at the top. Click Download.Create a new Folder1.2.3.4.5.Open the Files Tab in your Channel.Click New. A drop-down list will appear.Select Folder.Name the folder.Click Create.Upload a File1. Open the Files Tab in your Channel.2. Click the Upload buttonlocated under the channel name at the top of the screen.3. Select the files(s) on your computer that you would like to upload.4. Click Open.OR1.2.3.4.Open the Files Tab in your Channel.On your computer, open the Folder that has the File(s) you want to upload.Click and drag the File(s) from the current location, using your mouse.Drop the File(s) into the Teams Files window.Create a new File within Teams1.2.3.4.5.6.7.Open the Files Tab in your Channel.Click New. A drop-down list will appear.Select one of the File Options to create.Name the file.Click Create. The file automatically opens.Add text to your file. Changes will save automatically.Click the Close button at the top of the screen to exit.Section 4 Page 1
Files and FoldersCollaborate on a File in real-time1. Open the File that you want to edit by clicking the name.2. Click the Edit button at the top of screen.3. Choose the way you want to open the document to make changes to it.Edit in Teams and Open in Browser will open the document in your Teams App. These options allowyou to work on a document with your team members in real-time if they also have it open.Open in Desktop App opens the file with the corresponding desktop application (Word, PowerPoint,Excel, etc.). This option works better when only one person is making updates, due to the small lag indisplaying the updates. Changes have to upload to the server before your team members can see them.4. Click the Close button at the top of the screen when you are done editing.Move a FileA file can be moved:to another Teamto another Channelto another FolderTo move a file from the Files Tab:1.2.3.4.Click the File, which highlights in purple, and adds a checkmark to the left of the name.Click the Movebutton at the top.Select the location you want to move the file to.Click Move.Copy a File1.2.3.4.Click the File, which highlights in purple, and adds a checkmark to the left of the name.Click the Copy button at the top.Select the location you want to copy the file to.Click Copy.If you are working on a file and would like to have a backup, creating a copy of it can be a greatoption. If something happens to the document that you are working in, you can always revertback to the copy you made. However, copies can also get confusing. If you copy a documentinto another folder, channel, or team, it will not automatically update whenever a change ismade to the original document. Therefore, we recommend only making copies of documents ifyou are using them as backups.Section 4 Page 2
Files and FoldersRename a File1.2.3.4.ClickClickTypeClickthe File, which highlights in purple, and adds a checkmark to the left of the name.the Rename button at the top.a new name in the field.anywhere on the screen to save the new name.Deleting Files and Folders1. Click the File or Folder you would like to delete, which highlights it in purple and adds a checkmark to the left.2. Additional options appear at the top. Click Delete.3. Click Confirm.If you delete a file or folder by accident, it can be restored! Contact SalukiTech at 618/453-5155or salukitech@siu.edu and they will assist you.Section 4 Page 3
Collaboratingin MS Teams
Collaborating in MS TeamsPostsPosts occur within Team Channels. Each channel has its own Posts tab. All team members can view messages orposts that occur in the Posts Tab. They are not private.1. Select the Channel you would like to start a conversation in. The Posts Tab opens automatically.2. Click the New Conversation button and type a message in the text box that appears at the bottom of the screen.3. Click Send.Mention a Team Member or a whole TeamTo get someone’s attention in a channel post, you can @mention them! This will send them a notification letting themknow that you have started a post that requires their attention. You can mention individual people or whole teams.@Mention your Team (@Team)1. Select the Channel you would like to start a post in. The Post Tab opens automatically.2. Click the New Conversation button.3. Type @Team in the text box at the bottom of the screen. Your team will appear.4. Select your Team.5. Type the rest of your message.6. Click Send.@Mention an individual1. Select the channel you would like to start a post in. The Post Tab opens automatically.2. Start typing @theirname in the text box at the bottom of the screen. A list of people will appear.3. Click the name of the person you want to mention.4. Type the rest of your message.5. Click Send.Mention a ChannelA post using an @Channel can be used to announce and supply a link to a new channel. For example: “@Team,here’s a new channel I made: (@channel name). Check it out!”1.2.3.4.5.6.7.Select the Channel you would like to start a post in. The Post Tab opens automatically.Click the New Conversation button.Type the @ symbol, plus the name of the channel in the text box at the bottom of the screen. A list will appear.Select your Channel.Type the rest of your message.(Optional) @Mention your team or an individual to notify them about the Channel mention.Click Send.Use the Team’s General Channel to post about miscellaneous topics. Posts about specific topicsshould be held in a specific channel related to that topic. When changes occur in a channel (a newpost, new file, etc.) the channel’s name appears in bold.Section 5 Page 1
Collaborating in MS TeamsReply to a PostPosts are organized by date and then threaded. The replies in a thread are organized under the initial post so it iseasier to follow multiple posts.1. Find the Post Thread you want to reply to.2. Click the Reply button3. Type your message.4. Click Send.Share a File in a Post1. Click the channel you want to share the file in.2. Click the Attachment iconbelow the text box at the bottom of the Posts tab.3. Choose which of the three location options you want to share the file from.Option One: Browse Teams and Channels4. Select the file you want to share, which highlights it in purple.5. Click Share Link.6. (Optional) Type a message and @mention your team to provide context for the file and notify them that youhave shared it. If you skip this step, your team will not get a notification that you have shared a file.7. Click Send.Option Two: OneDrive4. Select the file you want to share, which highlights it in purple.5. Click Share Link.6. (Optional) Type a message and @mention your team to provide context for the file and notify them that youhave shared it. If you skip this step, your team will not get a notification that you have shared a file.7. Click Send.Option Three: Upload from my Computer4. Navigate to the location on your computer where the file is stored.5. Select the file you want to share.6. (Optional) Type a message and @mention your team to provide context for the file and notify them that youhave shared it. If you skip this step, your team will not get a notification that you have shared a file.6. Click Send.All Files/Documents posted to a channel can be found in the Files tab located at the top of the channel,next to the Posts Tab.Section 5 Page 2
Collaborating in MS TeamsReact to a ConversationLike Facebook, the reaction buttons can be used to acknowledge that a conversation was read or indicate howyou feel about content of the conversation.1. Hover your mouse over the post or message you want to react to.2. Click one of the reaction buttons like the thumbs-up iconreceive a notification that you reacted to it. The person who initially sent the message willUndo your ReactionWhen you react to a conversation or message, the icon of your reaction choice will be shown in the top rightcorner. To undo your reaction, click the icon and it will be removed.Save a Conversation Message1. Hover your mouse over the conversation or message you want to save.2. Click the ellipsesthat appears in the top right corner of the message.3. Click the Save this message optionon the list.View a Saved Message1. Click on your profile iconat the top right corner of the MS Teams application.2. Click the Saved option. A list of your saved messages will open.OR1. Type /saved in the Search Bar at the top of the MS Teams application.2. Hit Enter on your keyboard. A list of your saved messages will appear.Section 5 Page 3
Collaborating in MS TeamsChat NotificationsAs in Skype for Business, Chat in Teams provides a way to have a private 1 on 1 conversation or, an ad hocgroup conversation that provides immediate notifications and quick answers from team members whether they arein the office or on the go.Default NotificationsEach team member will need to setup their Notifications for Chats in Settings—Notifications located in thedrop-down list under your profile picture.A notification will appear on the Teams icon in the Taskbar and in the Teams Interface.A notification will appear on the Chat button on the App Bar.An email is sent with a link to the message (only if the message isn’t viewed within 5-10 minutes).Notification Preferences1. Click your profile icon in the top right corner of the MS Teams application.2. Click Settings on the drop-down.3. Click the Notificationsbutton.4. Change the notification settings you would like.5. When you have finished, click theicon in the top right corner. Your preferences will be saved.Start a New 1:1 Chat1. Click on the Chat iconlocated on the Application bar to the left of your screen.2. Click in Command/Search box at the top of the screen.3. Enter the name of the person you want to message.4. Choose the correct person from the drop-down list.5. Click in the textbox at the bottom of the screen.6. Type your message.7. Click Sendto start a chat.Start a Group Chat Message1. Click on the Chat iconlocated on the Application bar to the left of your screen.2. Click on the New Chat icon to the left of the Command/Search box at the top of the screen.3. Type the names of the people you want to add to the chat in the To Field.4. To name the group, click the down arrowto the far right of the To Field.5. (Optional) Type a group name for the chat in the Group Name field.Section 5 Page 4
Collaborating in MS TeamsAdd More People into a Group Chat1. Click on the Chat that you want to add more people to.2. Click the Add Peopleicon in the top right corner of the screen.3. Type the name(s) of people you want to add.4. Click on the appropriate person(s) from the drop-down list that appears.5. Click Add.6. Determine how much chat history to allow the new person to have access to.7. Repeat steps #2-#6 until you have added everybody that you want to the chat.Chat Message Format Options1. Click on the Chat that you want to send a message in.2. Click the Format buttonlocated under the text box at the bottom of the screen.This expands the compose box and exposes more formatting options.3. Click the ellipsesto view additional formatting options.Sharing a File in a ChatThere are three ways that you can share a file in a chat:1. Upload the file to your chat.2. Share a OneDrive Link.3. Share a MS Teams Link.Uploading a File to your Chat1. Click on the chat you would like to share your file in.2. Click the attachmenticon at the bottom of the screen.3. Click Upload from my Computer.4. Select the File you want to upload.5. Click Open.6. Click the Sendicon to send the file in your chat.Section 5 Page 5
Collaborating in MS TeamsSharing a File in a Chat (Cont.)Share a OneDrive Link1. Click on the chat you would like to share your file in.2. Click the attachmenticon at the bottom of the screen.3. Click OneDrive.4. Click on the File you want to share a link to.5. Click Share.6. Click the Sendicon to send the file in your chat.Share a MS Teams Link1. Navigate to where your file is in MS Teams.2. Click on the file. The file name will highlight in purple when it is selected.3. Click the Get Linkbutton at the top of the screen.4. Click the Copy button.5. Click the Chat icon on the navigation bar on the left of the screen.6. Click on the Chat you want to share the file in.7. Click in the text box at the bottom of the screen.8. Right-click and Paste (or use the keyboard shortcut ctrl v) to insert the link.9. Click the Sendicon to share a link to your file in the chat.Message SearchThere are two ways that you can search for a chat message:1. Search based on a person’s name.2. Search based on a keyword.Search Based on a Person’s Name1. Click in the Search bar at the top of your MS Teams screen.2. Type the person’s name into the box. When you are done typing, hit enter on your keyboard.3. A list of messages including the person’s name will pop-up. This list will include conversations that you’vehad with this person, as well as conversations with other people where you mentioned their name.4. Click on a conversation with the person to resume chatting with them or click on a conversation thatmentioned that person to view the full context of the message.Search Based on a Keyword1. Click in the Search bar at the top of your MS Teams screen.2. Type the keyword into the box. When you are done typing, hit enter on your keyboard.3. A list of messages including the keyword will pop-up.4. Click any of the messages to view the conversation surrounding that key word.Section 5 Page 6
Collaborating in MS TeamsFile Search1. Click in the Search bar at the top of your MS Teams screen.2. Type the file name (or key words that you can remember) into the box. When you are done typing, hitenter on your keyboard.3. A search window will open with three tabs:4. To see a list of relevant files, click the Files tab at the top left of the screen, near the search bar.5. Click on the file name and MS Teams will open a preview of the file.6. (Optional) While in the preview window, click the ellipsesin the top-right corner to download the file.Meetings in TeamsMicrosoft Teams meetings are a great way for colleagues and
to launch Microsoft Teams in your browser. Desktop Instructions 1. Click on the Windows icon located at the bottom left of your screen and start typing the word “ Teams.” 2. Click the Microsoft Teams icon at the top of the list. This will launch the Microso