Transcription
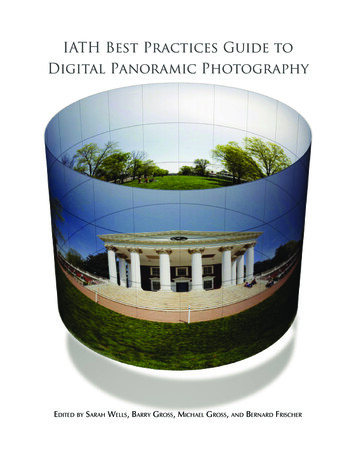
IATH Best Practices Guide toDigital Panoramic PhotographyEdited by Sarah Wells, Barry Gross, Michael Gross, and Bernard Frischer
ii
IATH Best Practices Guide toDigital Panoramic PhotographyEditors:Sarah WellsBarry GrossMichael GrossBernard FrischerContributors:Brian DonovanBarry GrossMichael GrossEugene JohnsonWorthy MartinLisa ReillyWill RourkeKen StuartMichael TuiteTom WatsonMadelyn WesselThanks to:Daniel PittiRick MandelkornGretchen Wagner
2007 by The Board of Visitors of the University of Virginia. All rights reserved.Cover photo by Barry and Michal Gross. Cover art by Karey Helms/IATH.Photo pg. i by Brian Donovan.ii
Table of Contents1. Overview and Objectives. .61.1. Who is this guide for?. 61.2. Introduction and examples. . 71.3. Brief history and use of panoramic photography. 81.4. Basic digital panoramic photography methods. . 131.5. How to use this guide. 142. Pre-Production .172.1. Establishing project goals. 172.2. Choosing the site. 182.3. Choosing site nodes. 182.4. Environmental considerations/scheduling the shoot. 212.5. Equipment. 222.6. Travel preparations. . 352.7. Local site liaison (Mr. Fix-It/Fixer). 412.8. Site access and resources. 432.9. Budget. 463. Copyright and Permissions.503.1. Copyright. 513.2. Fair Use and De Minimis Use. 533.3. Contract versus Copyright. 533.4. Permissions and Releases. . 543.5. Permits and Insurance. . 553.7. International Copyright. 573.8. Additional Resources and References . . 584. Panorama Creation (Part 1): Methods and Techniquesfor Capturing Images.604.1. Introduction to types of digital panorama photography and structures. . 604.2. Introduction to photography and digitization. 614.3. Selecting image file formats . 614.4. Using image capturing systems and lenses. 634.5. Panoramic tripod heads. 704.6. Photographic workflow . . 71iii
5. Additional Related Media.775.1. Object/inverse panoramas. 775.2. Audio . 795.3. Video panorama (moving image). 805.4. Associated hardware and software . 826. Panorama Creation (Part 2): Stitching and Rendering .846.1. Introduction to the stitching and rendering process. 846.2. Preparing raw data. 846.3. Software. 856.4. Color management on the computer. . 886.5. HDR and multiple exposure compositing . 886.6. Stitching the panorama. 886.7. Batch processing, scripts. . 896.8. Rendering the panorama. 906.9. Hot spots, (hyper)links, and executable scripts. 926.10. Embedding author information, watermarks, sprite tracks,and copyright. 926.11. Converting historical images. . 937. Standards for Data Documentation.967.1. Introducing standards for data documentation. 967.2. Domain specific data documentation standards. . 977.3. Introduction to metadata . 977.4. Controlled vocabulary . 987.5. Resource discovery metadata. . 987.6. Terminology resources and classification schemes. . 997.7. Physical geo-referencing. 998. Resource Delivery and User Issues. .1018.1. Overview of resource delivery issues and user interface (VR tours) . 1018.2. Viewing platform. . 1018.3. Presentation: software and viewing options. 1028.4. Aliasing, moiré patterns, and other viewing pitfalls and solutions . 1048.5. Incorporating additional media. . 1068.6. Virtual tours. . 1078.7. Applying panoramas. 109iv
8.8. Track synchronization . 1108.9. Controlling access . 1109. Use.1149.1. Use of panoramas and VR in the lecture/classroom/lab/home. . 1149.2. Scholarly use . . 1159.3. Practical use for engineers and architects. . 1179.4. Internet. 1189.5. Publications. . 1189.6. Hand-held device at site/landscapes. 1199.7. Historical and heritage site preservation and restoration . 11910. Storage and Preservation. .12110.1. Long-term physical storage . 12210.2. Digital preservation strategies . 12210.3. The global digital preservation arena. 12311. Conclusion.125Appendix 1. Author contact information.127Appendix 2. Image capture workflow.129Appendix 3. Image Pre-Processing, Stitching, andRendering Workflow. .130Appendix 4. Sample batch scripts. .132PanoImageSorter.pl .132PTMacPanoImageSorter.pl. .134Appendix 5. HTML and embed examples.138References.139v
1. Overview and Objectives1.1. Who is this guide for?The IATH Best Practices Guide to Digital Panorama Photography is written for researchersand photographers looking to use digital technology to build digital panoramas of culturalheritage sites, architecture, and art works. There are several types of expertise requiredto create this kind of tool, and the guide contains advice and guidance on some of thetechnical, administrative, legal, and interpretive issues that may arise at each step of theprocess.The contents are designed for three groups of users: the commissioner, the photographer,and the developer. The commissioner is the person or group who commissions thepanorama, whether for research or educational use. In many cases the photographerand developer are the same person, but this guide deals with their tasks separately: thephotographer is the person (or persons) who travels to the site and creates the sourceimages and the developer creates digital panoramas from the source images and makesthem available in some way, usually through a virtual tour on a website.This guide will focus mainly on the workflow for academic uses of panoramic photography.The guide aims to give practical guidance on the many issues involved in the creationand use of digital panoramas, as well as to provide suggestions for the creative use of theresource. We urge the reader to begin by considering the project's end use, the intendedaudience and their information needs. These considerations will be the crucial basis fornumerous decisions that need to be made throughout the process. For example, if the enduser will be viewing the panorama on a normal computer display and will not need tozoom in on decorative details of a building, then lower resolution JPEGs will be sufficientin the initial data capture phase. However, if zoom functionality will be important to theend users or if the panorama is to be printed by offset press or larger display prints, thenthe data capture process must yield high-resolution TIFs.We advise both novices and experts to read the entire guide. There are many stepsinvolved in this type of undertaking and even a seasoned photographer may not have
thought of all of them. Many of the topics are interrelated and various aspects of the topicsare covered throughout the guide.Please note that the guide assumes a general knowledge of photography, computer literacy,and experience in travel. There are many fine books and web sites that specialize in thosetopics and readers are encouraged to seek them out. Whenever possible, World WideWeb links are provided to illustrate examples and point towards further information.1.2. Introduction and examplesPanoramas began as a way to broaden the field of view of ordinary cameras, but haveevolved through digital techniques to provide an entire "sphere of view," that is theentire field of view surrounding one point in space. The "sphere" is further enhanced byzoom options that allow the viewer to focus on details that would normally be difficult todiscern from the original vantage point. Multiple panorama techniques extend the range ofviewpoints and provide a functionality for more complete guided tours. This evolution ofdigital panorama photography has made it particularly well-suited to virtual representationof three-dimensional sites such as architecture, archaeological sites, and sculptural worksand when documenting geographically or politically inaccessible places.Digital panoramic photography is sometimes referred to as "QTVR," referring to Apple'sQuickTime Virtual Reality software. "QTVR" is not quite accurate at two levels: othercompanies provide software with much of the same functionality, and the fixed pointof view (albeit with pan and zoom) on each panorama does not allow the unrestricted"fly through" control that is often part of "virtual reality" displays. To obtain the "flythrough" functionality, virtual reality displays are most often based on Computer AidedDesign (CAD) modeling, in which case the structures and textures on the surfaces of thosestructures are computer generated. In contrast, the panorama displays are more realisticin that they derive from photographs of the original building, site or sculpture.Digital panoramas, as with other digital presentation methods, do provide a very naturalconnection to additional information sources that enable extremely rich guided tourexperiences. At its most intricate, multiple digital panoramas are combined into a virtualtour that provides varied viewpoints into and about a space, accompanied by ambientthree-dimensional audio recorded on-site and video clips and additional high-resolutionstill images. As with any guided tour, a floor plan of the space provides the visitor withan important abstraction for orientation and navigation. In the digital media domain, thefloor plan can be made interactive and thus form the basis of a deeper understanding ofthe space through the availability of additional contextualizing information.Digital panoramas have recently been used in the classroom and for scholarly research.There are many wonderful examples of stand-alone digital panorama and full-featuredvirtual tours available via the World Wide Web. A few notable sites are:7
BetterLightThe Original Worldwide Panorama EventPanoramas.dkA Virtual Walking Tour: The AlhambraA Virtual Walking Tour: The Suleymaniye MosqueThere are also good websites and lists that provide guidance on the creation and displayingof digital panoramas. For example, Panoguide has guidance on creating and displayingpanoramas as well as an active user forum.1.3. Brief history and use of panoramic photographyHuman vision is essentially a spherical panorama of approximately 140 . Althoughour vision is in sharp focus only in the center, our peripheral vision is sharp enoughto help us navigate safely. The seamless flow of information in vision is intellectuallybeyond computing. We can identify and avoid an obstacle that we have seen days ormonths in the past. The importance of panorama as a human experience can be found inPaleolithic cave art dating from 35,000 years ago in Chaveut and Lascaux, France. Theseunconstrained artists drew grazing animals and carnivores on the walls and ceilings up tofifteen meters in width.Over time, the proportions of five units in one dimension and four in the other becamenormal in response to the media that conveyed the image; canvas stretched over woodframes, book printing and, more recently, early photographic processes.The notion of a sweeping panoramic view goes back well beyond the invention ofphotography. The Roman poet Horace, in one of his odes, complains of hilltops withfine views being levelled for the building of houses, and Pliny the Younger refers to theimportance of panoramic views to the owners of Roman villas. At the excavated Romanseaside town of Herculaneum, some of the finest houses were positioned overlookingthe Bay of Naples. There has been a long tradition of drawn and painted depictions ofpanoramic views (usually thought of as panoramic if width exceeds height by a factor of2:1 or greater).However the word "panorama" itself did not enter the language until it was coined inthe late eighteenth century to specifically describe a new type of large curved paintingdepicting vistas,1 an early example being those of Edinburgh by Robert Barker (whoreceived a patent for his method) exhibited in London in 1792. These large-scale workswere mounted on the inside surface of a cylinder and viewed from the cylinder’s center,generally with an attempt to fill the viewer’s field of view through the full 360 and create1. With the disappearance of the art form it was invented to describe, the original, quite specific,definition has now been effectively replaced by other usage and meanings: a circular or extrawide vista, overview, even a survey. These new forms themselves developed not long after theterm was coined.8
a sense of immersion. During the nineteenth-century displays of this kind — usuallydepicting landscapes or historical events and created by teams of specialist artists — grewin size, ingenuity, and variety. They were generally exhibited in specially built rotundasand enjoyed great popularity. Many of these works were of epic proportions, perhaps tenmeters high and one hundred meters or more long.Soon after the 1839 introduction of the first widely used photographic process (thedaguerreotype), photographers were rotating their cameras to capture several viewsof a scene, then assembling the resulting pictures to create the impression of a singlepanoramic image (although these would almost inevitably be flawed by visible seams andjarring mismatches of perspective). This period also saw early experiments with rotatingcameras or lenses and curved focal planes in efforts to overcome these deficiencies. Astime went on, especially after the introduction of flexible film in 1887, many new andincreasingly successful cameras were specifically designed to create seamless panoramicimages. One such improvement was the short rotation or swing lens camera, whichtypically captured a horizontal field of view of 100-140 or so. Other designs allowedfor full 360 rotation; the rotational scanning camera employed clockwork or motorizedsystems to synchronize the rotation of the entire camera. During exposure the film movedaround a curved focal plane. A narrow slit (typically less than one millimeter wide)often interposed between lens and film, so that the scene was "painted" onto the filmduring the rotation. Descendants of such cameras, in one form or another, continue tobe manufactured and used today.2 Both of these types of cameras produced images withcylindrical perspective, an unavoidable result of their rotation: straight horizontal linesin the subject take on distinctive cigar-shaped curves once imaged (though not verticalfeatures, as with fish-eye lenses). Another invention was the fixed lens camera, where theperspective was rectilinear (i.e., normal). Most conventional cameras use this approach;it employs stationary lenses and flat film planes, relying on the use of wide angle lensesand/or extended film planes to achieve a panoramic field of view. Another variant is thepanoramic pinhole camera.Figure 1. Circuit camera panorama. Photo by Tom Watson.2. Some typical modern examples of short rotation cameras include the Noblex, Widelux, andHorizon. Full rotation models include the Hulcherama and Seitz Roundshot. Of the lattergroup there are now digital models, which include (at the time of writing) the Panoscan, theSeitz Super Digital model, Spheron, and others.9
A student engineer, named Arthur C. Pillsbury, invented the circuit camera in 1906.Today we take “circuit” to mean an electronic circuit, but the circuit camera was a springwound, gear-driven camera weighing about twenty pounds. It exposed a piece of 8"x20”negative film which was then contact-printed on photographic paper. These cameras arestill in use. Many veterans of World Wars I and II had their platoon pictures taken with thecircuit camera.3If the negative and print were properly fixed and washed, these imageslast hundreds of years. With digital technology we can recreate the look of the circuitcamera portrait (Fig.1). The image, when reproduced with archival ink on acid-free paper,will last an estimated two hundred years.Late twentieth-century developments in digital imaging gave a new lease of life to theassembling of multiple images. Where early panorama photographers used a segmentedapproach (taking a series of photos of segments of a panorama and then placing them nextto each other to create a single view), it became possible to use digital tools to stitch anumber of discrete digital images into a single seamless panorama, making the seams anddiscontinuities of tone, contrast and color mostly invisible. Since about the mid-1990s,this has been the most commonly employed technique for creating digital photographicpanoramas. Not only can stitching replicate the kinds of cylindrical images made withoften costly purpose-built panoramic cameras, but it can create images recording anentire 360 by 180 scene, including the zenith and nadir (imagine standing at the centreof a sphere instead of a cylinder). Such images are usually mapped in equirectangularprojection and have an aspect ratio of 2:1. The recent introduction of digital versions ofrotational scanning cameras also enables direct creation of such images. An equirectangularprojection exhibits increasingly severe distortions away from its center, and photographerswho are primarily interested in printing their images (or displaying them digitally as stills)consequently most often use cylindrical (Fig. 2) or equirectangular (Fig. 3) projections.Figure 2. Cylindrical projection, 110 vertical field of view. Photo by Tom Watson.3. Someone will always be in the picture twice, having run from one end of the picture to theother while the camera swings through its arc.10
Figure 3. Equirectangular projection, 180 vertical field of view. Photo by Brian DonovanIt also became possible to view digital panoramas on computer displays in such a way thatthe images are warped back into ‘normal’ rectilinear perspective (image-based rendering).These systems offered viewers interactivity: by clicking and dragging with a mouse, anyarbitrary viewpoint could be panned left and right, and up and down. This interactiveimmersion in a scene naturally invites comparison with concurrent developments invirtual reality systems and recalls the experience of viewing nineteenth-century paintedpanoramas where the viewer’s position near the center of a cylindrical environmentprovided a natural perspective.The most well-known and widely used example of this is Apple’s QuickTime VR (QTVR).The technology was developed around 1995 by Eric Chen and other members of Apple’sAdvanced Technology Group and was an extension of the existing QuickTime digital mediaframework (as such it became an integral part of any installation of the Macintosh operatingsystem4). While any installation of QuickTime allowed playback of QTVR content both inmovie-playing applications and on web pages, the early authoring software employed tocreate QTVR content lacked a graphical user interface and was difficult to use. By 1997,Apple (and others) had introduced user-friendly stitching and authoring tools. QuickTimeVR Authoring Studio software (QTVRAS, released in late 1997) simplified the creation ofmultinode QTVR panoramic "scenes," where a series of individual panoramas (or nodes)could be linked to create virtual tours. A "hotspot" in an image (such as a doorway) couldbe clicked to switch the view to a new node, so that the viewer could explore a complexlocation. QTVRAS also had a capable stitcher. At this point, QTVR was limited to creationand playback of cylindrical panoramas; version 5 of QuickTime, released in early 2001,added support for cubic QTVR, enabling playback of full 360 by 180 equirectangularmappings (cubic because the source image was mapped onto six cube faces, although theend result for the viewer is essentially indistinguishable from a spherical environment [Fig.4. A version of QuickTime (which includes QTVR playback capability) is also available for theMicrosoft Windows operating system.11
Figure 4. Six rectilinear cube faces (90 by 90 each) derived from the equirectangular image inFigure 3. Photo by Brian Donovan.4]). At the time of this writing, Apple has not upgraded QTVRAS: two other Apple optionsare MakeCubic, a legacy application that allows creation of cubic QTVR panoramas fromsix faces or from equirectangular images, and VRMakePano, which converts a panoramicimage into a QuickTime VR panoramic movie.5 But such has been the popularity ofnavigable panoramas in general, and QTVR in particular, that many other companieshave developed a range of stitching and authoring applications.A notable and influential early contributor to the field of stitching, image mapping, andpanorama creation and playback, was a German professor of mathematics, Helmut Dersch,who freely distributed his suite of software utilities, known as Panorama Tools. Versionsof this software, still widely used, are available for Linux, Mac OS, and panoramas (which occupy anuncertain space somewherebetween the still image andthe time-based linear movie),the continued growth in thepower and speed of computershas meant that photographerscan now deploy theirpanoramas at high resolutionand at screen-filling imagescales, something barelyimagined in the mid-1990s.Today a richly detailed digitalpanorama can not only fill alarge computer display, butcan move (Fig. 5).Figure 5. A screenshot from the QuickTime Player viewingapplication. Photo by Brian Donovan.5. See Web References, below, for URLs.12
1.4. Basic digital panoramic photography methodsThere are many methods for capturing panoramic images. Generally, a photographer willtake a series of photographs or use a scanner to scan a space. These source images canbe made with traditional or digital film. They are then either digitized or imported into acomputer where they are edited and “stitched” into a complete digital panoramic image.These images can then be projected by a computer and printed on paper in a flattenedform. The various methods of photography, editing, stitching and display are discussed indepth throughout the guide.1. Segmented, stitchedA camera is mounted on a turntable that segments arcs of a circle. An image ismade, the camera is turned a few degrees manually, another exposure madeetc. The images are stitched together later to make a complete panorama.2. ContinuousA camera is mounted to a step motor that is connected to a computer.The operator enters the degrees of rotation, the lens length, and exposurerequirements. The software captures a seamless panorama (Fig. 6) and little orno post production is necessary. This method induces curvilinear distortion.Figure 6. Port of Seattle. Photo by Tom Watson.3. Flat stitchedThis method takes advantage of the fact that light passes through a cameralens as a cone, the radius of which is much larger than a single piece of 4x5film. A digital scanning array makes an image on the right and then on the leftand stitches them (Fig. 7). Done carefully, this is the most accurate method ofstitching and induces no curvilinear distortion.13
Figure 7. Museum of the Earth. Photo by Tom Watson.1.5. How to use this guideThe guide is divided into five main sections, each divided into smaller subsections. Belowis a list of the sections of this guide and a brief description of what is covered:Pre-ProductionThis discusses choosing a subject and a goal for the project, as well as choosing a siteand specific site nodes, and the legal issues involved, such as intellectual property rights,restrictions and permissions, copyright, agreements, and professional liability insurance.There is also discussion of environmental considerations and scheduling the shoot,choosing equipment, travel preparations, local site liaison, site access and resources, andproject budgets.ProductionProduction covers methods of image capture and the photographic workflow. Topicsinclude selecting image file formats, using image capturing systems and lenses, hardware,lighting, color management, environmental issues and special situations, site datadocumentation, short-term image storage and back-up, and organizational structure.Post-ProductionThis section includes in-depth discussion on stitching and rendering and datadocumentation. Subsections include preparing raw data, software, color management,high dynamic range (HDR) and multiple exposure compositing, batch processing, scripts,hot spots and hyperlinks, executable scripts, selecting file formats and output types,watermarks, sprite tracks, copyright, and converting historical images.Viewing, Publication, and UseTopics include viewing platforms, presentation, viewing pitfalls and solutions, incorporatingadditional media, virtual tours, track synchronization, controlling access, and standards14
for data interchange. The section also discusses some possible applications for the enduser, including use of panoramas and VR in the lecture/classroom/labs/home, scholarlyuse, practical use for engineers, hand-held devices at site/landscapes, and historical andheritage site preservation and restoration.PreservationThis section focuses on the long term physical storage and preservation of the archive andthe global digital preservation
IATH Best Practices Guide to Digital Panoramic Photography Edti E d by Sa r a h WE ll S, barry Gr o S S, Mci h a E l Gr o S S, a n d bE rnard Fri S ch E r. ii. Edti o r S: Sarah Wells Barry Gross Michael Gross Bernard Frischer contributor S: Brian Donovan Barry Gross Michael G