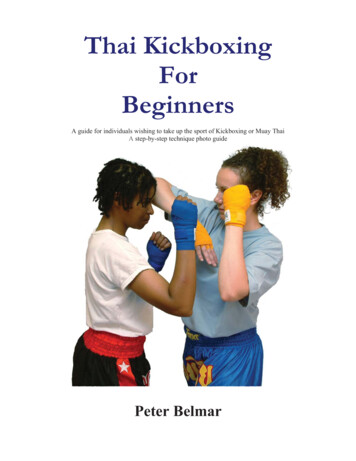
Transcription
BOXINGFUNDAMENTALSWorking on the fundamentals. Everyone starts here, no exceptions. Get readyto experience the toughest, most intense workout you’ve ever had—and love it.As you learn these boxing fundamentals, expect us to throw everything at youexcept punches.You’ll find out how to perform the basic movements correctly and how tocombine them into effective routines you’ll use over and over again whiletraining others. Even if you’re members are in great shape, expect them to bechallenged at the highest level.Boxing fundamentals focus on how to: Stand, position your body, relax, and breathe correctly. Understand proper body mechanics, to avoid injury. Increase your flexibility, speed, and endurance. Build your core strength—by incorporating your whole body into eachmovementAfter mastering these fundamentals, you’ll learn to train others to achieve theunique benefits of the Boxing and Barbells workout in fast paced dynamic50minute workouts that are tough and fun—efficient and effective.Plan ahead to make the most of your instruction during your Boxing and BarbellsTraining. Use this Handbook to refresh your memory and help you fine tune yourown movements and prepare better to train others through BNB your gym orhealth club offers.To get the most from your onsite training, set goals for yourself right at thestart and record your progress. After your initial Boxing and Barbells training,track your workouts, and monitor your progress toward certification as aCertified BNB Trainer. By setting goals and monitoring progress, you’ll geteven greater benefits from your training and commitment.PreparationParticipants come to each class ready to get down to work immediately. Properpreparation: Starts with the right equipment
Includes a positive mental attitude.Depends on a relaxed, limber, conditioned body.Demands your commitment to give your workout everything you’ve got.But—don’t go overboard. Your participants will be working and moving yourbody in new and more demanding ways than they are probably used to. Taketime to teach movement properly. Push them but keep their limitations in mind.EquipmentBoxing and Barbells training doesn’t require a lot of elaborate equipment.Much of it is already available at the gym or fitness center where you work.You’ll need the following individual equipment: 180-inch hand wraps (we prefer the elastic ones) BNB gloves (sizes: Small, Medium, Large Jump rope (depending on height: 8, 9, or 10-feet long).Inform participants to wear comfortable workout clothes and a pair oflightweight running shoes. Tell participants to come to each training sessionready to work—that means arrive early and wrapped hands. They won’t wantto miss a thing!Always remember and practice the most important rule inboxing: Safety, Safety, Safety.HOW TO WRAP HANDSPurchase elastic-style or canvas hand wraps about 180-inches long. We likeelastic wraps best, because they conform to the shape of your hands. Beforegetting started, be sure to remove any rings, watches, and other jewelry thatcan cause injury to your hands, fingers, or wrists.Wrapping your hands separates your joints; keeps your wrists, fingers, andknuckles secure, and reduces the chance of injuries. Your method of wrappingwill depend, in part, on the size of your hands. Spread the fingers of one hand wide and start by threading your thumbthrough the loop. Take the wrap across top of your hand and wind it 2 or 3 times aroundwrist—not too tight. Drop the wrap down and wrap your knuckles 3 or 4 times. Wrap your wrist once or twice, then wrap between your outside fingers(pinky and ring finger). Wrap the wrist again, then take the wrap down between your index andmiddle finger.
Wrap the wrist again, then go through the center two fingers (middle andring fingers).Next, wrap across the knuckles a time or two, then move back up to wrapsnuggly around wrist.Continue to wind the remaining wrap higher on the wrist, well above yourwrist joint, then fasten with the Velcro strip.Repeat on your other hand. Always look at the top of hand whenwrapping.Muscle FocusIn the introduction, we briefly discussed the focus on developing a strong, stablecore. Now let’s look at how specific areas of the body are impacted by thevarious activities boxing involves.JUMPING ROPE:Dorsal flexion (ankle joint extension), front of shin, tibialis anterior, extensordigilorum longus, peroneus tertius.Plantar flexion (extension), back of calf, gastronsnemius, soleus.Knees—(shock absorbers), participate in push off: quadricep femoris, gluteusmaximus. Upper body: biceps, triceps, deltoids.
Hands up:Holding up the hands/arms: anterior deltoid, pectoralis major,coracobrchialis. Shoulders: serratus anterior, upper and lower trapezius,supraspinatus, deltoids.Throwing punches: Leg abduction used to push body weight from back leg: gluteus medius.Core: upper and lower rectus abdominis, internal and external obliques,erector spinae, medial and lateral rotators, quadratus lumborum.Getting punches out and back: latissimus dorsi, teres major, lowerpectoralis major.Slow swinging action: upper trapezius, levator scapulae, rhomboids.Pushing out punches: tricep brachii.Turning hands over: (forearm) supinator, pronator teres, flexor carpiulnaris, flexor carpi radialis; (wrist) pronator quadratus,Shadowboxing: Upper body: upper trapezius, deltoids, biceps brachii, triceps brachii.Calves, quadriceps, rectus femoris, gluteus mediusLower trapezius, rhomboids, erector spinae, rectus abdominis, internaland external obliques.Forearm: brachioradialis.Speed bag: Upper trapezius (top of shoulder). Deltoids, biceps, triceps, and forearms.Beginners:Expect to experience some tightness in calf muscles and maybe in knees andankles. If tightness or cramping occurs, slow down, and stretch your muscles. Ifyou experience shin splints, that usually means you need shoes with bettershock absorbency. After class, ice down any areas of soreness. You’ll adapt,and the workout will get easier. Of course, it’ll get harder before it gets easier!Note:We use a clock to help you position your body as we go through the rest of thefundamentals. Imagine 12 o’clock directly in front of you while you face themirror. And, view your reflection in the mirror as your opponent. This will helpyou align your body correctly and focus your punches.
Remember:Whatever fundamental or combination you work on, all movements—includingyour punches— start at the core. Keep this in mind. Everything emanates fromthe core.Fundamentals FirstAs you’ll learn, proper stance, breathing, body mechanics, and form all play arole in performing the fundamentals correctly and generating the benefits thisworkout offers, while sloppy fundamentals can lead to injuries.Tips for improved performance when learning the fundamentals:Remember to breathe! Exhale on the exertion.Loosen up and relax; shake out your shoulders and arms when you tighten up.Keep your focus on the mechanics of your movements.Actions emanate from your core. Imagine your punches originating not from yourhands and arms, but from your abs and shoulders. Engage your whole body inthe workout for maximum effect.When hands are wrapped and ready to go, time to grab a jump rope. Positionat the far end of one of the 5-foot lines in front of the full-length mirrors. Performthe first segment of workout back and forth along this line—according to thetrainer’s instructions. Monitor form and movement using the mirrors.The fundamentals start with skipping rope—an integral part of every boxer’straining. Skipping rope provides an excellent warm-up, improves footwork andcoordination, and it’s a great addition to your cardio routine. You’ll get more fromskipping rope and from all the fundamentals as you master your movementsfrom the inside out.Take the time to master the fundamentals, and you’ll experience positivechanges from your very first BandB workout.That’s a promise 1. JUMP ROPE FUNDAMENTALSBREAKDOWN Practice first without the rope to find your rhythm, then add the rope.Square off facing the mirror so you can monitor your posture.Release upward in a slight burst—only ¼-inch off the ground.Maintain a slight bend at the knees.Focus on synchronizing the rotation of the rope with your jump.
Jump once for each rotation of the rope.Tuck your elbows in close to your waist, with forearms horizontal to thefloor.Relax your wrists and let your wrists do the work of rotating the rope.Stay loose and keep breathing.Start slow and work on your rhythm and wrist/foot coordination.Add speed gradually. We’ll focus on 3 basic methods of skipping rope:STRAIGHT-LEGGED SKIP:Your basic skip. Jump straight up in the air—just ¼ inch. Keep your feet together. Maintain slight bend at the knees. Relax your upper body. Tuck your elbows in and hold arms horizontal to the floor. Keep the action in your wrists.Tip:Never allow your hands or forearms to rotate the rope;keep the rotation in your wrists.BOXER’S SHUFFLE: Again, practice first without the rope. Skip using your heel and toe: kickone foot outward touching the heel of the other foot, then quickly switchfeet.Start with a straight-legged skip.Find your rhythm, then kick one foot out forward, heel touching the floor.Quickly bring that foot back, jumping over rope with both feet.Next, kick out the opposite foot and repeat the sequence.Time each rotation of the rope with your moving feet.Above all, stay relaxed. It’ll come.When you have trouble finding your rhythm, practice without the rope.Concentrate on staying limber and relaxed.KNEES-UP JOG:
Simple as it sounds. Jog in place, keeping your knees up, one rotation ofthe rope for each step. In other words, bring your alternate knee up atevery turn of the rope.Stay balanced on the balls of your feet as you skip.Short burst upward just a little—1/4 inch—and raise your knees up high.Rotate the rope once with each skip.Work the rope with your wrists—instead of your hands and forearms.2. BOXER’S STANCE FUNDAMENTALBREAKDOWN: Position yourself at the end of your 5-foot line, left shoulder faces themirror, feet shoulder-width apart. Position your left shoulder at 11 o’clock with your right shoulder about 5o’clock.Bend slightly forward from the waist.Always keep the ball of your left foot on your line pointing at 2 o’clock.Position your right foot behind and to the right of the line—pointing toward2 o’clock. Note that both feet point in the same direction.)
Raise your right heelKeep both your kneesBothtoes point inand keep it liftedslightly bent; stay balancedthe same direction:slightly off the ground.on the balls of your feet.at 2 o’clock.Very Important: Keep about 2/3 of your weight on your back (right) foot. As you step forward, always lead with your left foot and push off with yourright foot.Focus point:As the basic stance for all of your movements, you’ll return to your basic stanceagain and again.3. HANDS-UP FUNDAMENTALBREAKDOWN: Start from boxer’s stance, facing the mirror with your left shoulder.Keep left hip and left knee in line with left shoulder.Raise your hands up to a point just beneath your cheekbones.Make fists with thumb clasped on the outside of your fingers.If you can’t see the back of your thumbs, your hands are too close to yourface.Bend your wrists slightly inward.The sides of each palm face the mirror.Bend slightly forward bend at the waist.
Avoid chicken wings! Keep elbows tucked close to your waist.Next, add your step-drag, moving back and forth along your line, withhands in correct position.FOCUS POINTS: Avoid bringing your hands too close to your face.Keep your chin down and tucked.4. STEP-DRAG FUNDAMENTALBREAKDOWN: Starting from your boxer’s stance, always lead with your left foot whenyou step forward and drag your back (right) foot along the floor behindyou.Leading with your left foot, take a small step forward, stepping in a toetoheel motion, along your line.Drag your back foot along the floor the same distance as the step youtook with your front foot.Distribute weight on the balls of your feet, with 2/3 of the pressure on theball of your back foot.Take small steps, just a few inches at a time.Tuck your chin and keep your upper body relaxed.Maintain a slight bend in the knees.Moving backward, always move the back (right) foot first.Back foot points toward 2 o’clock when dragging.Keep a constant distance between your feet.Stay relaxed and focused!
Practice moving forward and backward along your line.Use the mirror to check your posture.When you get your coordination down, speed up the step-drag.Finish in your basic boxer’s stance.FOCUS POINTS: Never stand or step flat-footed or with the heel first.Avoid lifting your back foot off the ground as you move it forward.Keep the pressure on your back foot as you drag it forward, knee slightlybent and toes pointed toward 2 o’clock.When advancing, front foot moves first and when retreating, back footmoves first.Never allow your feet to get too close together.5. JAB FUNDAMENTAL BREAKDOWN: Starting from boxer’s stance, break it down first, to get the footwork, thenadd the arm movements.With hands down, practice moving your left shoulder and left foottogether, then incorporate the step/drag.Focus on your nose (in the mirror); imagine your reflection as youropponentStart all your movements from your core—your abs—keep themengaged.Maintain a slight forward bend at the waist.Once you get a feel for the rhythm of this movement, add the jab.Extend your left arm, bringing your forearm down like a hammer.As your left forearm drops, rotate your wrist forward at the very end,knuckles facing the mirror.
Release your left arm,Rotate your wrist forwardImagineyour left arm bringing your forearmthe very end, knucklesmoving as an extension down like a hammer.facing the mirror.of your left shoulder.Step with the ball of your front foot, while pushing off from the back foot at thesame time you jab. Make these movements simultaneous.Breathe as you throw your jab and rotate your left shoulder forward. When youreturn your left hand back to your face, drag your back foot same distance asyou stepped with the front foot.FOCUS POINTS: Keep your chin tucked and elbows in. When throwing jab, left elbow should always point down. Avoid hyper-extension (locking the elbow on extension). Keep theslightest bend in elbow on extension. Immediately snap your arm right back up. Your jab operates like a whip—fast and focused. Once the ball of the foot hits the ground, the punch is at impact—simultaneous movement.
6. RIGHT HAND (STRAIGHT-RIGHT ORRIGHTCROSS) FUNDAMENTALBREAKDOWN: Imagine holding a baseball in your right hand. You’re in the outfield, andyou’ve just caught a fly. Now, throw the ball home, following through withyour body.From that position, shift your weight to the ball of your back foot and forma fist with your right hand—making sure it covers the nose of youropponent in the mirror—and bring up your left hand.As you twist your hip, allow the right knee to bend. Without this rotation,you could strain your right knee.As your right shoulder propels your right arm forward, your shoulder, hip,knee, and foot rotate forward together, all in alignment.Bend your right knee slightly, as you twist your right hip.Your right fist follows through in a straight line toward your opponent’snose in the mirror.Rotate your forearm downward at the end of your extension, so yourpunch lands palm down, knuckles facing the mirror. Keep elbows down as you twist your hipKeep left hand upKeep pressure on back footBend right knee and chin down Keep your knees slightly bent the whole time.Rotate your body back into starting position, as you return your right handto position in front of your face. When you throw your punch, exhale out loud: “Shhhh.”
FOCUS POINTS: Remember to keep 2/3 of your weight on the ball of your back foot.Avoid hyper-extending your right elbow by keeping it slightly bent on theextensionTwist the core of your body including hips, which allows your rightshoulder to move correctly.Do not twist the back foot completelyAvoid turning your head to the left as you throw your right hand.Keep chin down and neck relaxed.BONUS: BASIC ONE-TWOBREAKDOWN:The basic one-two combines fundamentals #5 & #6: the jab and the straightrightpunch. First, practice with shoulders only—while keeping your hands limp andarms completely relaxed. Coordinate your upper body movements with your step/drag as youmove back and forth along your line. When you get that down, add the arm movements (punches). Start slowly, breaking this combination down into its separate parts. Your left hand and foot work together, as you step you also jab. Your right hand works and foot work together as you drag the back footforward. The left and right hand pass one another in this combination. As onehand returns to the face, the other is just moving forward.Here is where this simple combination gets tricky. As you bring your left hand back to your face (dragging the ball of yourright foot), rotate your right shoulder forward and throw out your righthand, while you drag your back foot forward and twist it. In a word,synchronize your movements. Bring your right hand back to hands-up position by twisting your shoulderand hips back into basic stance. Keep your elbows close to the waist and chin tucked in Breathe—and remember to exhale each time you throw a punch.FOCUS POINTS:
Remember to move your arms as extensions of your shoulders.Keep your knees slightly bent, 2/3 of your weight on your back foot.Bring your arms out fast and bring them right back in to protect your face.Don’t hyperextend your elbows—ever.Keep your wrists bent slightly forward and rotate them: fists should landpalm-down when punching.CONSECUTIVE ONE-TWOS7. LEFT HOOK FUNDAMENTALBREAKDOWN: Again, start in your basic stance with hands down.Rotate your left shoulder, hip, knee, and foot as you forcefully twist yourtrunk until your left shoulder and hip face 12 o’clock. Try not to twist frontfoot but rather roll it inward.Right shoulder and hip is thrust behind you, in turn, placing your backheel down and pulling your weight slightly back.At the same time, move your right shoulder to 6 o’clock, as you roll onthe inside of your left foot, keeping your heel just slightly off the ground.Keep your shoulders and hips in line with each other and contract yourabdominals.Then bring hand back to position.
1. Rotate right, bringing your left forearm forward and turned down to theright. Bend your left elbow in a 90-degree angle2. As you rotate your body to the right, bring your left forearm out in front ofyou, turned down to the right. (L-shape).3. Keep your forearm horizontal to the GROUND Bend your left elbow at a 90-degree angle (L-shape), keeping yourforearm horizontal to the ground.Turn your knuckles down slightly on impact to avoid wrist injury.Do not allow your punch to get too close to your face or your elbow topass your left ear in the mirror.After impact, allow the twisting of your trunk to return your hand back intoposition while placing your feet and body back in to your basic stance.
Move through this rotation slowly at firstImagine a string ties your wrist and knee together. Everything movessimultaneously.Add speed as you find your rhythm.FOCUS POINTS: Avoid swinging your right arm back as you throw your left hook. Avoid overextending your arm—beyond a 90-degree angle. Bend your wrist slightly—just before impact. Keep your weight evenly distributed, but pull some of the weight to backfoot. Bring your elbow up as you throw your hook, but make sure you can seeover your forearm.8. THE UPPERCUT (LEFT & RIGHT)FUNDAMENTALBREAKDOWN: Left uppercut: Start in your boxer’s stance, left shoulder at 11o’clock.Bend your knees slightly, dropping about 2 inches.As you drop, lean your upper body forward slightly.Then push up with your legs, swinging the left side of your body upwardin a swooping motion, your left shoulder rotates the left arm out andupward.Punch upward with your left fist, keeping your palm facing you, with aslight bend in the wrist.Keep your pressure on your back foot for leverage and power.Keep your opposite arm up, protecting your face.Finish with your left shoulder at 12 o’clock.Pull your hand and arm right back into position.RIGHT UPPERCUT: Closely review instructions for left uppercut and reverse them.
From boxer’s stance, bend your knees slightly, dipping about 3 to 4inches, as you lean slightly forward with your upper body.Push upward forcefully, engaging both legs.Rotate slightly on the ball of the right foot, but do not move the front foot.Be sure you slightly twist your back foot and bring your right shoulder to11 o’clock.Bring your right fist up and outward as you rise.FOCUS POINTS: Avoid standing straight up as you throw your punch but don’t staysquatted. Keep your left hand close to your face until you push up with your legs. Make sure punch ends up at least 1 foot away from your face.UPPERCUTPROGRESSION:9. BODY PUNCHES (LEFT & RIGHT)FUNDAMENTALBREAKDOWN: LEFT-BODY PUNCHES: Starting from the orthodox boxer’s stance, bend your knees deeply tomove into a“crouched” position (sometimes called “wrestler stance”).Keep your weight evenly balanced while maintaining 2/3 of your weighton your back foot
As you lean forward, thrust your left arm in a swooping motion whilerotating forward with your left shoulder, hip, knee, and foot. Keep your knees deeply bent, with your head at your opponent’s chestlevel. Your target is your opponent’s lower body.Allow the momentum of your body to throw your arm out from yourshoulder. Your punch impacts at waist height.Maintain a slight bend in the wrist; in a scooping motion, throw your bodyshot with your palms facing up and impact the bag with first 2 knuckles(of your index and middle fingers). Leaning forward, thrust your left arm in a swooping motion, as you rotateKeep your knees bent in crouched stance. Punch will impact the left side of opponent’s body, rotate forward with leftshoulder, hip, knee & foot.RIGHT-BODY PUNCHES: Similar to left body shot, but everything is opposite Start from your crouched position. As you begin to lean forward, thrust your right arm in a swooping motionand rotate your right hip and right shoulder forward, twisting slightly onthe ball of the right foot. Allow the momentum released by the twist at your core to throw yourright arm out horizontally.
Keep your palm upLean forward at the waistand wrist bent on impact.and thrust your right armAlways keep knees bent.out as the right side of yourbody rotates forward.FOCUS POINTS: Be sure to bend your wrists on impact and avoid hitting the bag with youroutside knuckles. Common causes of wrist injuries include hitting the bagwith the outside knuckles and failing to keep palms up on impact. Avoid standing straight up when throwing the body shots. Keep yourknees bent.10. THE PICK FUNDAMENTALBREAKDOWN: Rotate your right shoulder forward, bringing along your right hip, knee,and foot.Keep your weight centered on the balls of the feet.Bring your right hand forward only a few inches, palm facing mirror.Cup your hand in front of your nose to “pick” your opponent’s punch.Return your hand immediately to position in front of your face.
Cup your hand in front ofyour nose to pick the punch.inches, withfacing toward mirror.Move your hand forwardjustafewpalmPRACTICE #1: Practice slowly first, to get a feel for the movement. When you’ve got it down, perform the whole sequence in real time.PRACTICE #2: Now, let’s add some offense.Rotate forward and pick the punch.
As you bring your right hand back up into position, throw your jab.Be sure to step forward as you jab.Return immediately to your basic stance.FOCUS POINTS: Keep your shoulder, hip, knee, and foot—all in alignment Avoid pushing your hand out too far. Keep it close to your face. Tuck your elbows in and keep your movement compact, to maintaingreater control of the sequence.
11. THE SLIP FUNDAMENTALBREAKDOWN:Start your slip with a forceful twist at the waist (left or right), encompassing thatwhole side of the body.SLIP LEFT: Stay balanced in your stance. Center of movement is at your hips. Move the right hip along with your right shoulder and knee, as the ball ofright foot twists slightly in the same direction. Your right shoulder moves to 1 o’clock and left shoulder to 7 o’clock, withyour right forearm vertical in front of body.Your fist covers your nose, while the back of your hand faces the mirror.Twisting your body moves your head out of the way of the punch. Now twist right backinto your basic stance position.ADDITIONAL SLIPS:The slips above are side bend slips, the slips in the video also show more slips that youcan counter from. For the left slip on those, the right shoulder is brought down lower thanthe left shoulder and vice versa for the right slip.
BONUS: SLIP-JAB Keep the pressure and balance on your back foot, so you can push offwith that foot. After slipping to the left, shoot out your jab as you step with the front footand push off your back foot simultaneously. Drag the back foot forward as you bring the jab hand back to your face.BONUS: SLIP-HOOK: From your starting position, the boxer’s stance, move into a defensive“slip” to the left. As you return to your starting position, roll on the inside of your left foot,engaging your left hip and left shoulder. Thrust your right shoulder backward, raise your left elbow upward withforearm horizontal, and turn over your hook. Remember: your target is your opponent’s nose in the mirror.You should be able to see over your forearm in this position.Bring your arm back in immediately, and resume your basic stance.FOCUS POINTS: Avoid leaning too far forward, simply twist your body. Your head continues to face the mirror; don’t twist it along with your body.12. BOB & WEAVE FUNDAMENTALBREAKDOWN: Think of tracing a big “U” in the mirror with your head and torso.Starting from your basic stance, slip to the left.Drop straight down by bending your knees.Keep your torso upright. Avoid leaning forward as you move downward.Swing your body around to the right, bringing your left shoulder forwardto 12 o’clock.Staying low, swing your body back around to the left, coming up in theleft slip position.Twist your shoulders back into your basic stance, left shoulder at 11o’clock and right shoulder at 5 o’clock.Maintain pressure on the ball of your back foot at all times.Keep your hands up, elbows and chin tucked in.FOCUS POINTS:
If you feel this in your lower back, you are leaning too far forward andcould injure your lower back.Always remain upright, bent slightly forward at the waist.Progression of the bob & weave:13. PIVOT & DOUBLE PIVOT FUNDAMENTALSBREAK DOWN FOR THE PIVOT: Begin in your basic boxing stance.Swing your right leg clockwise, balancing on the ball of your left foot;allow the left foot to pivot with your body, keeping your heel slightly offthe ground.Keep your right foot on the ground as it moves, allowing knees, hips, andshoulders to adjust to your new position.Finish in your basic stance, at a 45-90-degree angle from your startingposition.To return to your starting position, push off your right foot and swing itback around, while pivoting on the left foot keeping the left heel slightlyoff the ground.
DOUBLE PIVOT: Also starts from your basic stance. Swing your left foot and left side of your body around counter-clockwiseinto “southpaw” (left-handed) stance, still facing the mirror. Then, using the same technique, immediately swing the right foot andside of the body back clockwise, sliding your right foot along the flooruntil it reaches your orthodox starting position. Stay balanced on the balls of your feet and slide your foot along the flooras you move. Start your pivot in foot clockwise, keeping starting position Swing left foot and leftThen slide your right clockwise. Finally, return to your basic or “orthodox” side of body counter-boxer’sstance it on the floor.FOCUS POINTS:
Avoid straightening out your legs as you pivot.Placing too much weight on the front foot prevents your foot from pivotingwith your body and could lead to knee injury.14. STEP BACK FUNDAMENTALBREAKDOWN: From boxer’s stance, step back with your right foot 6 to 12 inches.Bend your back (right) leg and hold your front (left) foot in place.Keep your back straight.Next, drag your right foot forward to return to your basic stance, feetshoulder-width apart.FOCUS POINTS: Step back far enough to avoid a punch Drag your right foot back into position, not too close to your front foot. Avoid leaning your torso backward.15. THE SHAKE FUNDAMENTAL
BREAKDOWN: Start from your basic boxer’s stance:Burst slightly upward into the air.Shoot your left foot back so it faces 9 o’clock; land in a spring positionwith your left heel up. At the same time, shoot your right foot forward (facing 3 o’clock), whilekeeping your feet shoulder-width apart. Your body faces 3 o’clock withhead points toward12 o’clock.Push off with your left foot, walk to the right a few steps, then return toyour basic stance.Take a comfortable walk–about 3 steps—then back-peddle. NOTE: Back-peddle means jogging Progression for the shake:backwards, kicking up your heels.
FOCUS POINTS: Always take a few comfortable steps to the right after the shake. Make sure you kick the left foot back toward the left, not the right foot.16. HEAVY BAG FUNDAMENTALSBREAKDOWN: THE ZONE:Think of the heavy bag as your opponent. Imagine the space between you andthe bag as a zone—if you can hit the bag, you’re within reach of an opponent.Your “zone” includes all the space behind your knuckles. The key to all yourpunches is the distance between you and the bag-TO FIND YOUR ZON
unique benefits of the Boxing and Barbells workout in fast paced dynamic 50minute workouts that are tough and fun—efficient and effective. Plan ahead to make the most of your instruction during your Boxing and Barbells Training. Use this Handbook to