Transcription
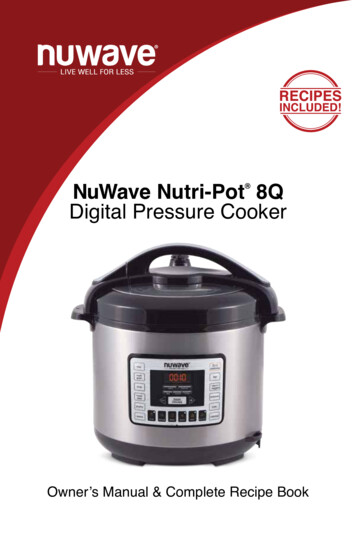
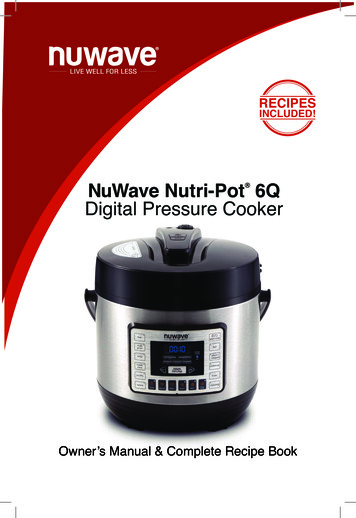
NuWave Nutri-Pot 6QDigital Pressure Cooker Owner’s Manual & Complete Recipe Book
NuWave Brio 6Qt NuWaveNutri-Pot 6QDigital Air FryerDigital Pressure CookerSuper-heated air cooksyour food to crispy,tender perfection.The digital touch screengives you precisetemperature control.Easily cook rice, poultry,vegetables, and more allwith the press of a button!The Nutri-Pot’s safetyrelease valve and hingedlid make for convenientand safe operation.For more about our innovative products, visit:
NuWave PIC NuWave Oven(Precision InductionCooktop)Cook healthier mealsfaster and more efficientlywith Triple ComboCooking Power.Cook faster, safer,and more efficientlythan you ever couldon your gas orelectric stovetop. Pro Pluswww.nuwavenow.com1-877-689-2838
NuWave BruHub Coffee MakerQuality and convenience at yourfingertips. The NuWave BruHubaccommodates virtually all of yourfavorite single serve pads, butwith more flavor. Makes an 8 or12-ounce and full carafe.The thermal stainless steel carafekeeps coffee hot for hours.NuWave Moxie High-PerformanceVacuum BlenderWith the simple press of a button, theNuWave Moxie can remove all theexcess air from the blender.By vacuuming the air out of theblender, you can ensure no air isbeing mixed with your ingredientsduring the blending process,maximizing the nutritional value andensuring your blender creations willremain fresh longer.For more about our innovative products, visit:
NuWave Duralon Healthy CeramicNon-Stick CookwareCoated with Duralon Healthy CeramicNon-Stick coating for easy cleanup, thisversatile cookware is perfect for usein ovens or on gas, electric, and eveninduction cooktops.www.nuwavenow.com1-877-689-2838
TABLE OF CONTENTSOWNER’S MANUALParts Description.7Important Safeguards.8-9Additional Safeguards.9-10Care & Maintenance. 11Product Features.11-13Operating Instructions.13-15Silicone Gasket Installation.15Save These Instructions.16-17Control Panel.17-19Preset Guide.20-21Functions.21-24Pressure Canning.25-28Troubleshooting Guide.29-30Warranty.30-31Natural & Quick Release.32-33SoupsAndouille Sausage &Cabbage Soup.34Barley Beef Soup.35Chicken & Rice Soup.36PoultryCassoulet Chicken.38Chicken a la King.39Salsa Chicken and Rice.40BeefBeef Mac & Cheese.42Beef Short Ribs.43Spicy Beef and Cabbage.44BBQ & MeatsBaby Back Ribs.46BBQ Pulled Pork.47Honey BBQ Meatloaf.48Pork Shoulder with Sauerkraut.496Owner's ManualPot Roast.50Swiss Steak.51Braised Lamb Shanks.52Sailor’s Mussels.53Veggies, Pastas & SaucesHash Brown Frittata.55Blistered Cherry TomatoStuffed Peppers.56Stuffed Squash.57Classic Chili.58Risotto with Italian Sausage& Parmesan.59Jambalaya.60Garlic Cheddar MashedPotatoes.61Marinara Sauce.62Rice and Beans.63Tortellini.64BakingBox Cake Mix.66Orange Cheesecake.67Brownies.68SpanishManual e Instrucciones.70-99
PARTS DESCRIPTION12a14Part #: 34107RELEASEOFF2b341215135Inner Lid9Pressure Indicator2b Pressure Release Valve12aFloater Valve3Pressure Release Button4OFF Button5Inner PotPart #: 341096Pressure Cooker Handle7Control Panel8Housing9Lid10Silicone GasketPart #: 3411011Food Blocking CapPart #: 3410812Measuring CupPart #: 34103Water-Collection Box13 Part #: 34104Rice Ladle14 Part #: 34102615 Rice SpoonPart #: 34101781011Owner's Manual7
IMPORTANT SAFEGUARDSREAD ALL INSTRUCTIONSWhen using electrical units, basic safety precautions should always befollowed including the following:1. Do not touch hot surfaces. Use handle.2. To protect against electrical shock, do not immerse cord, plugs, or the unitin water or other liquid.3. Close supervision is necessary when any unit is used by or near children.4. Unplug from outlet when not in use and before cleaning. Allow unit to coolbefore adding on or removing off parts.5. Do not operate any unit with a damaged cord or plug, after the unitmalfunctions or it has been damaged in any manner. In case the unit ismalfunctioning, please contact Customer Service at 1-877-6889-2838or via email help@nuwavenow.com.6. The use of other accessories that are not intended to be used withthis unit is not recommended. Doing so may damage the unit and cancause accidents.7. NOT INTENDED FOR OUTDOOR USE.8. Do not let cord hang over edge of table or counter, or touchhot surfaces.9. Do not place on or near a hot gas or electric burner and or in aheated oven.10. Extreme caution must be used when moving a unit containing hot oil orother hot liquids.11. Always attach the plug to the unit first, then plug the cord into thewall outlet. To disconnect, turn any control “OFF”, then remove plugfrom the wall outlet.12. Always check the pressure release devices for clogging before use.13. DO NOT place any object above the pressure release Valve. This iswhere steam is being released from the NuWave Nutri-Pot DigitalPressure Cooker.14. DO NOT USE THE UNIT FOR OTHER THAN INTENDED USE.8Owner's Manual
IMPORTANT SAFEGUARDSCAUTIONa)A short power-supply cord should be provided to reduce risksresulting from becoming entangled in or tripping over a longer cord.b)Longer detachable power-supply cords are available and maybe used if care is exercised in their use.c) If a long detachable power-supply cord is used:1)The marked electrical rating of the detachable power-supply cordshould be at least as great as the electrical rating of the unit;2)If the unit is of the grounded type, the extension cord should bea grounding type 2-wire cord; and3)The longer cord should be arranged so that it will not drape overthe countertop or tabletop where it can be pulled on by childrenor tripped over unintentionally.ADDITIONAL SAFEGUARDS1. If you cook meat with skin, such as sausage, swelling can occurwhen cooked under pressure. Piercing skin after cooking can leadto bursts of hot liquid.2. Do not lean over the NuWave Nutri-Pot Digital Pressure Cooker at anytime while it is cooking.3. The NuWave Nutri-Pot Digital Pressure Cooker should not be used forany medical purposes. It is not designed to reach the requiredtemperature for sterilization.4. The Silicone Gasket creates a pressure seal between lid and pot. Keepthe gasket completely clean and free from any cracks or deterioration.5. It is extremely important to fill the NuWave Nutri-Pot DigitalPressure Cooker with liquid prior to operation. Never cook without liquidas doing so can cause it to overheat and damage the safetymechanisms. In case of overheating, never remove the NuWaveNutri-Pot Digital Pressure Cooker from the heat source. Instead, shut itoff immediately and let it cool.6. Make sure all parts of the pressure regulator and ventilated pipe areclean and properly assembled.Owner's Manual9
ADDITIONAL SAFEGUARDS (Continued)7. Do not alter the safety mechanisms or attempt to repair the NuWaveNutri-Pot Digital Pressure Cooker as this will void the warranty.Please adhere to the Maintenance Instructions specified for use.8. Use only the appropriate replacement parts from NuWave tomaintain proper functionality and safety. Visit www.nuwavenow.comfor replacement parts and pieces.9. Do not place the unit close to flammable materials and heatingunits or wet environments.10. Height of ingredients that is to be put into inner pot should comply with“Operating Instructions”.11. Do not break the Silicone Gasket. Do not replace it with otherrubber gaskets, nor use a tension belt to make it seal.12. Check and wash anti-clog filter and pressure release valve regularlyto avoid being blocked.13. Do not open the lid when the Floater Valve is down.14. Do not put anything on or use other object to replace the PressureRelease Valve.15. Never use a towel to clog the gap between the lid and edge of the Housing.16. The bottom of the inner pot and heating plate should be kept clean.Do not put the inner pot on other heat sources. Do not replace theinner pot with other containers.17. Only use wood or plastic ladle spoons so not to ware the non-stickcoating in the inner pot.18. Do not attempt to move the unit while it is cooking. Only after the unitcools down completely can the it be moved. Move the unit using thebody handles, do not try to hold in from the lid handle.19. Do not disassemble on your own or try to replace with non-specialworn parts.20. Make sure the air/pressure discharges completely before opening the lid.21. Fit on Water-Collection Box before use.23. Contact our Customer Service Department at 1-877-689-2838 orvia email help@nuwavenow.com for the following: If the main power cord is damaged. In the case the unit emits a continuous amount of smoke while in use.10 Owner's Manual
CARE & MAINTENANCE Unplug the NuWave Nutri-Pot Digital Pressure Cooker priorto cleaning. Wipe the base and inside of the base, if necessary, with a clean cloth.Do not immerse the base in water or spray any water in it. Remove and clean the water collection box. Wipe with a wet toweland insert it back to the body of the NuWave Nutri-Pot DigitalPressure Cooker. The lid can be detached from the base. See image on page 14 step 1for proper operating instructions. All parts inside the lid can be handwashed separately with water and should always be checked to makesure they are not damaged or cracked. Use a sponge or non-metallic soft brush to clean the inner pot,then wipe the surface with a clean cloth.PRODUCT FEATURESThe NuWave Nutri-Pot Digital Pressure Cooker combines the advantages ofa Pressure Cooker, Rice Cooker and Slow Cooker all in one. The advantagesinclude: structure, vanguard shape, enhanced safety settings, multiple functions,easy operation, saving time and energy and locking in nutrition of food. It is anideal unit for any modern home.BenefitsThe NuWave Nutri-Pot Digital Pressure Cooker consists of a cookingpot and a special lid that locks into place on the top of the pot. Whenit is heated, steam is sealed inside, which creates pressure. With thishigh pressure, the internal temperature of the NuWave Nutri-Pot DigitalPressure Cooker is raised above the normal boiling point of water. Thecooking process is thus expedited leading to healthier meals made faster.Owner's Manual11
PRODUCT FEATURES (Continued)Multiple Cooking FunctionsNow you can sear, stew, steam, simmer, bake, can, slow-cook, and keepyour foods warm all by the push of a button.DigitalIngredients are automatically cooked to the right specifications.During operation, the NuWave Nutri-Pot Digital Pressure Cooker willindicate which cooking function it is performing. Once finished, dependingon the function, it will automatically switch to the Warm setting until you’reready to eat.Preset Time FunctionThe NuWave Nutri-Pot Digital Pressure Cooker includes a Delay feature soyou can start cooking exactly when you want.Saved MemoryIf the NuWave Nutri-Pot Digital Pressure Cooker is disconnected from itspower supply and reconnected within 20 minutes, all programmed settingswill be retained.High EfficiencyCooking in the NuWave Nutri-Pot Digital Pressure Cooker saves you timeand energy.Perfect SealThe Silicone Gasket locks in the taste and nutrients of your favorite foods.Easy to CleanThe inner pot is non-stick so it’s easy to clean. The stainless steel lidis durable and detachable for easy cleaning.Innovative DesignThe NuWave Nutri-Pot Digital Pressure Cooker features a user-friendlydesign that releases any excess steam away from the unit, ensuring peaceof mind.Faster CookingOn average, pressure cookers prepare food faster than traditional cookingmethods and the NuWave Nutri-Pot Digital Pressure Cooker is no exception.Tastier MealsPressure cooking allows food to retain its full flavor by cooking quickly andefficiently. With the natural flavor intact, less seasoning is required, enabling youto craft your meals precisely to your taste.Healthier ResultsMore vitamins and minerals are retained in food prepared with the NuWaveNutri-Pot Digital Pressure Cooker compared to conventional stovetop cooking.In addition, pressure cooking utilizes water in lieu of additional unhealthy oils orfat, virtually eliminating the need to add extra, unnecessary calories to your diet.12 Owner's Manual
PRODUCT FEATURES (Continued)MultifunctionalThe NuWave Nutri-Pot Digital Pressure Cooker can be used for steaming,simmering and stewing fresh or even frozen foods. You can even use it forcanning and baking. Prepare everything from delicate soups and desserts tohearty meat dishes.MULTIPLE SAFETY DEVICESSure Lock TechnologyThe NuWave 6Q Nutri-Pot Digital Pressure Cooker is equipped with therevolutionary Sure Lock technology. It surpasses other pressure cookers inadvanced safety features. Sure Lock is comprised of multiple independent safetyfeatures, such as:Lid Lock: The 3-point Lid Lock system locks the lid in place at three independentpoints. It ensures that the unit will not pressurize unless the lid is completely closed.Once the Nutri-Pot is pressurized the lid will not open.Maintaining Pressure: The Bottom Pressure Switch monitors the cooking chamberand helps keep the unit at the perfect pressure. The Lower Disc is designed torelease pressure automatically if the Nutri-Pot ever becomes over-pressurized.The Food Blocking Cap: The Food Blocking Cap ensures that the pressure ventssmoothly. It covers the inside of the release valve and prevents foods or liquids fromclogging the valve.ADDITIONAL SAFETY FEATURES:Pressure Release Safety Device: If the pressure exceeds the maximum level, theexcess pressure will automatically discharge safely via the pressure relief valve.Temperature Control: If the inner pot heats up while empty or if it exceeds themaximum temperature limit, the Pressure Cooker will automatically shut off.Thermostat: Once the inner pot exceeds the maximum temperature limit, theNuWave Nutri-Pot Digital Pressure Cooker will automatically shut off.OPERATING INSTRUCTIONS1Open lid: Hold the lid handle. Turn the lid counterclockwise toopen position then raise it. (See above)Owner's Manual13
OPERATING INSTRUCTIONS2Place ingredients and water in the inner pot. (See below).For rice, beans, and grains ,do not fill more than half full.For soups, sauces, and broths do not fill more than ¾ full.Rice, Beans, & Grains12Soups, Sauces & Broths34Over filling may risk clogging the vent pipes and developing excesspressure. This could also cause spillage and may damage to the unit.The total amount of food and water should NEVER exceed the maximumlevel marking of the inner pot. Please refer to the max fill lines in theinner pot.3Place the inner pot in the Housing. Clean the bottom of inner pot andsurface of heating plate before inserting the inner pot. (See below).4The Water-Collection Box opening is located toward the back of the unit.Slide the Water-Collection Box into grooves near the top and slide inuntil secure.Slide watercollection boxinto grooves5Close lid: Check that the Silicone Gasket is secured in the lid before closing. Hold the lid handle. Lower the lid, then turn the lid clockwise to close.A sound will confirm that the lid has been closed properly. (See below).Align both the safety tabson the lid and the base.14 Owner's Manual
OPERATING INSTRUCTIONS (Continued)The push rod on the side of the lid needs to align properly to the base in orderfor the lid to lock into place.6Sure Lock : Once the lid is properly locked in place, the LED panel will display thatthe Sure Lock Safety Feature is activated.7Once the lid is locked in place the PressureRelease Valve should be level.8Plug the NuWave Nutri-Pot Digital PressureCooker into an electric power supply. The LCDdisplay will show “--:--” and the unit will go intostandby mode.PressureRelease ValveSILICONE GASKET INSTALLATIONRemovalInstallationMAKE SURE THE SILICONE GASKET HAS NO CRACKS OR IS IN ANYWAY DAMAGED.Remove Lid from the Pressure Cooker. Rotate counterclockwise; this will detach the Lid. With one hand holding the Lid down, gently pull the Silicone Gasketup from the Inner Lid.Installing the Silicone Gasket Line up the Silicone Gasket on top of the metal ring. Gently push the Silicone Gasket making sure you see the metal ring isinside the Silicone Gasket’s grove. Continue pushing the Silicone Gasketall around.Owner's Manual15
SAVE THESE .17.18.Do not place the unit close to flammable materials, heating units, orwet environments.Height of ingredients placed in the inner pot should comply with thedirections listed under “Operating Instructions”.Do not break the Silicone Gasket. Do not replace it with other partsthat are not designed specifically for the NuWave Nutri-Pot DigitalPressure Cooker.Check and wash anti-clog filter and Pressure Release Valve regularlyto avoid blockage.Do not attempt to open the lid when the floater is down.Do not put anything on or use other objects to replace the PressureRelease Valve.Never use a towel to clog the gap between the lid and edge of Housing.The cooking pot and heating plate should always be kept clean.Do not put any other cooking pots on the heating plate. Do not replaceany parts with other containers.Do not use metal utensils with the coated cooking pot as this candamage the surface.Keep hands and face away from the venting outlet or where pressure isbeing released.Depending on the function, when cooking is complete, the NuWave NutriPot Digital Pressure Cooker will automatically go to Warm Mode. Avoidletting ingredients sit in Warm Mode for more than 4 hours as this couldaffect the taste.If a lot of smoke is escaping from the lid during operation, unplug the unitimmediately and contact customer service.Do not move the unit while in operation. Only after the NuWave Nutri-PotDigital Pressure Cooker has completely cooled down should you attemptto move it. When moving the NuWave Nutri-Pot Digital Pressure Cooker,use the handle. Do not lift from the lid.If any troubles arise during operation, any necessary service must bedone by NuWave, LLC or authorized by the manufacturer for repairs.Do not disassemble the unit on your own or replace any parts.If the power cord is damaged, do not attempt to operate the unit.Contact Customer Service Department at help@nuwavenow.comfor assistance.Keep the unit out of reach of children when the unit is operating orcooling down.16 Owner's Manual
SAVE THESE INSTRUCTIONS19.20.Place the Water-Collection Box in the NuWave Nutri-Pot Digital PressureCooker before every use. Make sure it is always cleaned prior to cooking.It is normal for some smoke to escape the unit when heating for the first time.CONTROL PANELMain Display igrainmeat/poultry w manual canningsear rmalbarthe time button has beenfishmore will light up only whenpressed or when the cooking time has been changed rmcook set your time for each function.This delaywillminutesallowyou tomanuallydelaymanuallesssearwarm stopThe “less”,bars light individually, indicatinghours“normal” and “more”potatoesyour currentsetting.The“texture”functionapplies to these ycookwith “normal”the defaultsetting. “texture” is a function thatbakepresets. This also affects thehas 3 times pre-programmed for selectconsistency of your food. All functions default to laytextureslowcookminutesThe“delay”barwill light up once the delay button has beenlessnormalmorepressed. This function will allow you to delay the start time offishpotatoesbakehoursfunction.steam/each esearWhen unit is not cooking, or when no function has beenselected, the LED screen will display “--:--” indicating thatfishbakesteam/delay the unitmanualis not inoperation. veggiesPressure Cooker uremorehoursminutesmeat/ricesouptexturetime start/stopPressonceto start orstop.Presstwiceto clear.delaywarmsearslowcookcanningOwner's Manual17
ued)lessnormalmoresteam/veggiesmanualWhen making rice usingournormal“rice”can normalmakemorestickypotatoesricelessmorefunction, youlesshoursricericemeat/meat/ and if you wantpotatoesstart/stopstart/stopstart/stopby sstew the ure” to “less”.Figure ultrymeat/stewricedelaymultigrainooker UIoker aldelaydelayslowcanningbeans start/stopveggiesseartime lessmoremeat/ tesit ggiesslowcookmorepotatoeshoursPressto “normal”(00:10). Press “texture”to elaymanualbake poultryveggiesbakeThe bar will lightpoultryup indicating what modeyou are in. Press sstewtexturetimehours slowtexturetime kNote (Applies to all):poultrybake Pressingthe “-”Pressureor “ ”buttonswill switch to “manual” mode.Pressure CookerUICookerUI Press “start/stop” twice to clear.slowbeanscanningtexturetimedelaywillwarm ThePressureCookerclearsearout incook30 secondsif the “start/stop” button isnot pressed.ricestart/stophours/minutesThis button will let you manually adjustthe time. When the “hours/minutes”fishPressure Cooker UIPressure Cooker UIbutton is pressed,the 2 digits will flash to indicate these are selected.steam/soupPressing the “ ” and “-” buttons willincrease and decrease the almorepotatoeshoursminutespoultrybakeminutesFigure Preheating: While the unit reaches the appropriate temperature for the functionselected, the display will show “PH”, indicating that it is preheating. Once theunit reaches the appropriate pressure, it will shift from preheating to the selectedpreset cooking time. Once pressure has built inside the Pressure Cooker, the“PH” displayed will change to “P”, followed by the amount of time it will remainunder pressure.Pressure: The function selected will determine the amount of pressure time.For example, the display will show “P0:10” (pressure time). The colon or “:”will flash to indicate that the Pressure Cooker is under pressure and the timeris counting down.Example:Preheat timecan take up to15 minutesRefer to the Preset Times Chart on page 20 for default times for each function.18 Owner's Manualfishpotatoesbakecanning
CONTROL PANEL (Continued)Auto Warm Feature: When pressure cooking is complete, the NuWave Nutri-Pot Digital Pressure Cooker will automatically switch to the warm function. This allowsthe pressure to naturally release while your food remains warm. The times for thepresets are listed below.PresetsRiceMulti GrainAuto Warm FeatureAutoIndefinitelyShutoffTimeHours: nction)04:00Example: When the “rice” preset is complete, the NuWave Nutri-Pot DigitalPressure Cooker will keep your “rice” warm indefinitely, until you press the“start/stop” button.Note:Food can be prepared at an earlier time and kept warm inside the PressureCooker using the “warm” function. Food can be kept warm for up to 4 hours.Additional time may cause a change in flavor, appearance, and cause foodto spoil.Owner's Manual19
ePRESET GUIDENormalMoreMin.*MaxRiceMulti 00:0800:0600:0800:4000:20DelayWarmSlow mum minutesminutesmorepoultryfishsoupslowdelay potatoesmanual canning delay tatoescookbakemultifish“hours/minutes”and “texture” sectionsfor instructionson adjusting3 See imewarmdelayPressure Cooker UIthe spotatoeshoursFollowsimple steps for eachpreset. On thisexample P0:10 is the defaultmultimultifishminutesCooker UIfishPressuregraingrainpressure time. The pressure time will vary depending on the preset you choose.poultry20 Owner's Manualsoupsoup Cooker anningcanningpoultrywarmhours delaytexturetimetimesearsearwarmcookcookTo begin cooking,closethe .minutesbeansmoremorehours delaytexturePressbutton(Ex: “rice”). The main display will show the defaulttimemeat/a presetmeat/steam/slow manual canningbeansmanualslowbakepoultry canning delay potatoesbeanssouphourshours potatoesstewtime fishtexturesearwarmdelaytimestew texturecooksearwarmdelaycookfor thispreset (Ex: minutesand the digits left of the colon display the hours. On bakedelay potatoesmanual uteslessnormalmorewhichriceis the default.beansricePressure CookerriceUIre Cooker ricebeanstime00:0101:40The NuWave Nutri-Pot Digital PressureCooker is programmedtomeat/a set pressure ricericedelaymanualveggies hoursstewgrain usedveggiesstart/stop the70kPa. kPa as minutesahoursunit of pressure measurement, essnormalmoreworld instead of the “Pounds per Square Inch, (PSI)” method. kPa to PSImeat/meat/multimultisteam/bakefishsoupfish delay potatoesmanualpoultry to 14kPa.manualricehoursstew hoursstewgrain nutes & hours)Presets t ywarmhourshours Cooker UIPressureminutesminutesslowsear potatoescookpotatoesbakecanningsearslowcookcanning
r UIricemultigrainsoupstart/stopFUNCTIONSfishIf lid is not locked and "start" is pressed, "Lid"will flash, the unit will beep threetimes. Time selected will flash. If lid is not locked in place within 30 seconds,program will clearout. atoeshoursminutes"Lid" is displayed when unlocked.poultrybakeTime: This function lets you manually adjust the cooking time, overridingthe presets and functions.slowbeans irections:Press the “time” button. “manual” bar will light up and “00:01” will bemulti 1fishgrainflashing. This indicates that you can change the minutes.or decrease the minutes.2 Press the “ ” or “-” button to increasesteam/soupdelaymanualveggiesricepressthe “hours/minutes”button again. The “00” will bestart/stop3 To art/stopminutes4 Press the “ ” or “-” button to increase or decreasemultifish the eat/stewsteam/slowmanualveggiessearcookwarmbakeno
a)A short power-supply cord should be provided to reduce risks resulting from becoming entangled in or tripping over a longer cord. b)Longer detachable power-supply cords are available and may be used if care is exercised in their use. c)If a long detachable power-supply cord is used: 1)The marked elect