Transcription
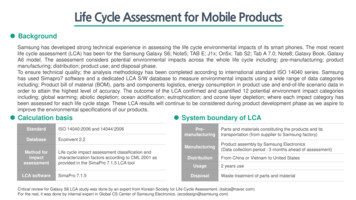
21 584359 ch18.qxd12/16/056:15 PMPage 547SSIS Software DevelopmentLife CycleSoftware Development Life Cycles play an important role in any type of application development.Many SQL Server database administrators and DTS developers have little experience withMicrosoft Source Control tools because the tools themselves have been less than “database projectfriendly.” Microsoft has responded with a more reliable version of Visual SourceSafe and a newsource control architecture called Team System.In addition, many SQL Server DBAs have not been involved with Software Development LifeCycles beyond executing scripts attached to change control documentation. Recent legislation inthe United States has changed the role of the SQL Server DBA in the enterprise. RegardingSoftware Development Life Cycles, DBAs now must participate in ever-earlier phases of the project development.In addition, SQL Server DBAs — especially SSIS developers — will realize greater productivity anddevelopment cycle fault tolerance as they employ source-controlled development practices. Thesepractices produce code that is auditable, an added benefit in the current corporate climate.This chapter provides an overview of some of the available features in Microsoft’s new offerings. Itincludes a brief description of how to store a project in Visual SourceSafe and a detailed walkthrough that describes creating a Team Project — using Visual Studio Team System — for SSIS. Inpractice, Team Projects will most likely be created by someone else in the software developmententerprise.A more detailed examination of Team System is beyond the scope of this book but may be found inProfessional Visual Studio 2005 Team System by Jean-Luc David et al. (Wrox, 2006).
21 584359 ch18.qxd12/16/056:15 PMPage 548Chapter 18Because the line between database administrator and software developer has blurred and blended overthe years, the Team Project walk-through is built in Visual Studio 2005. In the Team Project walkthrough, you are going to put together a project that uses the source control and collaboration functionality provided by Visual Studio Team System to demonstrate working with the tool and complying withyour SDLC process.This chapter also contains information about debugging and breakpoints — highlighting features new todatabase administrators and DTS developers in SSIS.Included is a discussion regarding development and testing with an admitted bias toward the agiledevelopment methodology. In the author’s humble opinion, there are two types of developers: thosewho use agile methodologies and those who will.The chapter concludes with a discussion about managing package deployment.Introduction to Software Development LifeCyclesSoftware Development Life Cycles (or SDLCs) are a systematic approach to each component of applicationdevelopment — from the initial idea to a functioning production application. A step (or phase) is a unit ofrelated work in an SDLC. A methodology is a collection of SDLC steps in action, applied to a project.Artifacts are the recorded output from steps.For example, the first step of an SDLC is Analysis. The methodology requires a requirements documentas an Analysis artifact.Software Development Life Cycles: A Brief HistorySoftware Development Life Cycles have existed in some form or other since the first software applications were developed. The true beginning of what is now termed “software” is debatable. For your purposes, the topic is confined to binary operations based on Boolean algebra.In 1854, mathematician George Boole published An Investigation of the Laws of Thought, on which arefounded the Mathematical Theories of Logic and Probabilities. This work became the foundation of what isnow called Boolean algebra. Some 80 years later, Claude Shannon applied Boole’s theories to computingmachines of Shannon’s era. Shannon later went to work for Bell Labs.Another Bell Labs employee, Dr. Walter Shewhart, was tasked with quality control. Perhaps the pinnacleof Dr. Shewhart’s work is statistical process control (SPC). Most quality control and continuous improvement philosophies in practice today utilize SPC. Dr. Shewhart’s work produced a precursor to SoftwareDevelopment Life Cycles, a methodology defined by four principles: Plan, Do, Study, and Act (PDSA).Dr. Shewhart’s ideas influenced many at Bell Labs, making an accurate and formal trace of the historydifficult. Suffice it to say that Dr. Shewhart’s ideas regarding quality spread throughout many industries;one industry influenced was the software industry.548
21 584359 ch18.qxd12/16/056:15 PMPage 549SSIS Software Development Life CycleTypes of Software Development Life CyclesSQL Server Integration Services provides integrated support for many SDLC methodologies. This chapter will touch on a few of them. In general, SDLCs can be placed into one of two categories: waterfalland iterative.Waterfall SDLCsThe first formal Software Development Life Cycles are sequential or linear. That is, they begin with onestep and proceed through subsequent steps until reaching a final step. A typical example of linearmethodology steps is the following: Analysis: Review the business needs and develop requirements. Design: Develop a plan to meet the business requirements with a software solution. Development: Build the software solution. Implementation: Install and configure the software solution. Maintenance: Address software issues identified after implementation.These methodologies are referred to as waterfall methodologies because information and software “fall”one-way from plateau to plateau (step to step).Waterfall methodology has lots of appeal for project managers. It is easier to determine the status andcompleteness of a linear project: It’s either in analysis, in development, in implementation, or inmaintenance.A potential downside to the waterfall methodology is that the analysis and design steps are traditionallycompleted in a single pass at the beginning of the project. This does not allow much flexibility shouldbusiness needs change after the project starts. In addition, the development and implementation stepsare expected to be defined prior to any coding.Iterative SDLCsIterative methodology begins with the premise that it’s impossible to know all requirements for a successful application before development starts. Conversely, iterative development holds that software isbest developed within the context of knowledge gained during earlier development of the project.Development therefore consists of several small, limited-scope, feature-based iterations that deliver aproduct ever closer to the customer’s vision.The following are examples of iterative SDLCs: Spiral: Typified by ever-expanding scope in hopes of identifying large design flaws as soon aspossible. Agile: A collection of methodologies fall into this category, including Scrum, Feature-DrivenDevelopment, Extreme Programming, Test-Driven Design, and others. Microsoft Solutions Framework: Microsoft’s own practice gleaned from a sampling of bestpractices from different methodologies.549
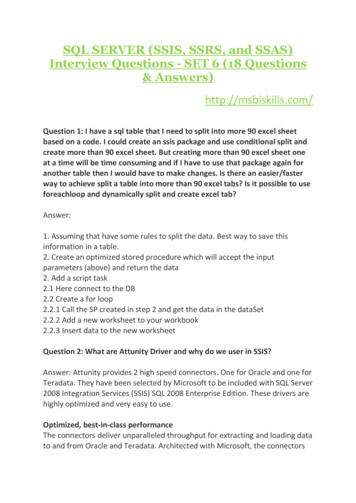
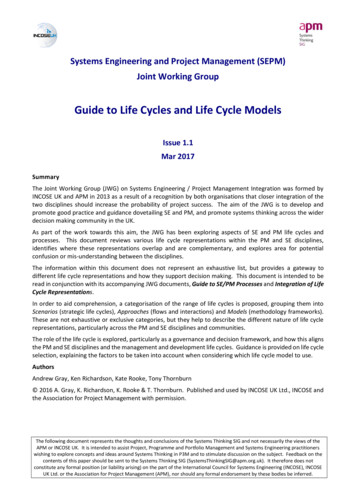
21 584359 ch18.qxd12/16/056:15 PMPage 550Chapter 18What happens if, hypothetically, an iteration fails to produce the desired functionality? The developer orDBA must remove the changes of the last iteration from the code and begin again. This is much easier toaccomplish if the developer or DBA has stored a copy of the previous version someplace safe, hence theneed for source control.Source control is defined as preserving the software source code in a format that allows recovery to aprevious state of development or version, and it is a basic tenet of all iterative Software DevelopmentLife Cycles.Versioning and Source Code ControlSQL Server 2005 and SQL Server Integration Services (SSIS) integrate with source control products suchas Microsoft Visual SourceSafe (VSS) and the new Team System. Visual SourceSafe is Microsoft’s currentsource control product. Team Foundation Server is Microsoft’s new suite of SDLC management tools —which includes a source control engine.Microsoft Visual SourceSafeVisual SourceSafe 2005, which ships with the 2005 developer product suites, is an upgrade to previousversions of the product. It boasts improved stability, performance, access, and capacity. In this section,you’ll create a project in SQL Server Business Intelligence Development Studio (BIDS) and use it todemonstrate integrated source control with Microsoft Visual SourceSafe.To configure SSIS source control integration with Microsoft Visual SourceSafe 2005, open the SQL ServerBusiness Intelligence Development Studio. You don’t need to connect to an instance of SQL Server toconfigure integrated source control.To configure Visual SourceSafe as your SSIS source control, click Tools Options. Click Source Controland select Microsoft Visual SourceSafe. Expand the Source Control node and click Environment fordetailed configuration, as shown in Figure 18-1.Figure 18-1550
21 584359 ch18.qxd12/16/056:15 PMPage 551SSIS Software Development Life CycleThe Source Control Environment Settings drop-down list contains three options that represent sourcecontrol environment roles: Visual SourceSafe, Independent Developer, and Custom.The Custom role is automatically selected if you begin customizing the source control behaviors in theenvironment. The following options are available for customization: Get everything when opening a solution or project: Checked: Retrieves all solution or project files from source control when a solution orproject is opened. Not checked: You must manually retrieve files from source control.Check in everything when closing a solution or project: Checked: Automatically checks in all files related to a solution or project on close. Not checked: Does not automatically check in all files related to a solution or project onclose.Don’t show Check Out dialog box when checking out items: Checked: Hides Check Out dialog box when checking out items. Not checked: Displays Check Out dialog box when checking out items.Don’t show Check In dialog box when checking in items: Checked: Hides Check In dialog box when checking in items. Not checked: Displays Check In dialog box when checking in items.Keep items checked out when checking in: Checked: Allows you to continue editing items that have been checked into sourcecontrol. Not checked: You must manually check out the file before editing it.Checked-in item behavior on Save: Prompt for checkout: You are prompted to check out the files after each Save. Check out automatically: Files are checked out automatically when you Save. Save as: When Save is clicked, a Save As dialog box appears.Checked-in item behavior on Edit: Prompt for checkout: You are prompted to check out the files when you begin editing. Prompt for exclusive checkouts: You are prompted to exclusively check out the fileswhen you begin editing. Check out automatically: Files are checked out automatically when you begin editing. Do nothing: When you begin editing, SQL Server Management Studio does nothing.551
21 584359 ch18.qxd12/16/056:15 PMPage 552Chapter 18 Allow checked-in items to be edited: Checked: When you begin editing a checked-in file, the Checkout on Edit dialog boxappears. This option allows you to check out the file or continue editing without checking out the file.This is not a best practice. The only situation where this has any useful application is if you intend tosave the contents as a new file. If this is the case, it is recommended that you open the existing sourcecontrolled version, save it as the other file, and then make your edits. Not checked: Edits to checked-in items are not allowed.The following predefined roles, and their settings, are available: Visual SourceSafe — A generic role with the following settings: Keep items checked out when checking in: Not checked. Checked-in item behavior on Save: Check out automatically. Checked-in item behavior on Edit: Check out automatically. Allow checked-in items to be edited: Not checked.Independent Developer — A role defined for stand-alone development with the followingsettings: Keep items checked out when checking in: Checked. Checked-in item behavior on Save: Check out automatically. Checked-in item behavior on Edit: Check out automatically. Allow checked-in items to be edited: Not checked.Check out automatically is the default behavior for checked-in items when saving or editing a project.By not requiring developers to manually check out code, this feature alone saves hours of developmenttime.One of the options for Source Control (or the Plug-in Selection) is Microsoft Visual SourceSafe(Internet). You can configure Visual SourceSafe for remote access through and intranet or the Internet.This allows you to store source files off-site. A detailed description is beyond the scope of this book, butyou can learn more by browsing the “How to: Enable the Internet Service for Remote Access” topic inthe Microsoft Visual SourceSafe Documentation.For the purposes of this demo, select Visual SourceSafe from the Source Control Environment Settingsdrop-down list and configure source control options as shown in Figure 18-1.Open the SQL Server Business Intelligence Development Studio by clicking Start All Programs Microsoft SQL Server 2005 SQL Server Business Intelligence Development Studio (BIDS). BecauseBIDS uses the Visual Studio Integrated Development Environment (IDE), opening SQL Server BusinessIntelligence Development Studio will open Visual Studio 2005 if you have Visual Studio 2005 installed.When the BIDS IDE opens, click File New Project to start a new project. Enter a project name inthe New Project dialog box. For now, do not check the Add to Source Control checkbox as shown inFigure 18-2.552
21 584359 ch18.qxd12/16/056:15 PMPage 553SSIS Software Development Life CycleFigure 18-2Click OK to proceed, and a new project is created in the BIDS IDE.Add the project to Microsoft Visual SourceSafe by right-clicking the project name in the SolutionExplorer and selecting Add to Source Control. You will be prompted to log in to Microsoft VisualSourceSafe. Enter your credentials and click OK as shown in Figure 18-3.Figure 18-3553
21 584359 ch18.qxd12/16/056:15 PMPage 554Chapter 18The Add to SourceSafe dialog box appears, as shown in Figure 18-4. SSISDemo1.root is the default VSSproject name assigned to your project. Accept the default by clicking OK.Figure 18-4Since an SSISDemo1 project does not currently exist in your instance of Visual SourceSafe, you will beprompted to create a project. Click Yes on the dialog box.After successfully creating a VSS project to maintain your source code, you are returned to the BIDSdevelopment environment. Notice the source control “lock” beside your project and Package file asshown in Figure 18-5. The lock icons indicate that the objects are checked in.Figure 18-5Manually check out Package.dtsx for editing by right-clicking Package.dtsx in the Solution Explorer andclicking Check Out for Edit. The Check Out for Edit dialog box appears as shown in Figure 18-6. Youmay enter a comment to identify why you are checking out the package. This is a good location forchange control documentation references, or at a minimum, good notes.554
21 584359 ch18.qxd12/16/056:15 PMPage 555SSIS Software Development Life CycleFigure 18-6Click Check Out to start the checkout process. A Microsoft Visual SourceSafe dialog box will appear,prompting you overwrite your local file or keep your changes. Select the Replace Your Local File withthis Version from SourceSafe? option and check the Apply to All Items checkbox. Click OK to begin editing. The Solution Explorer icon beside the Package.dtsx item will change to a red check mark to indicatethat the item is checked out exclusively to you, as shown in Figure 18-7.Figure 18-7Click View Pending Checkins to open the Pending Checkins window. The Pending Checkins windowdisplays checked-out files awaiting check-in, as shown in Figure 18-8.Figure 18-8555
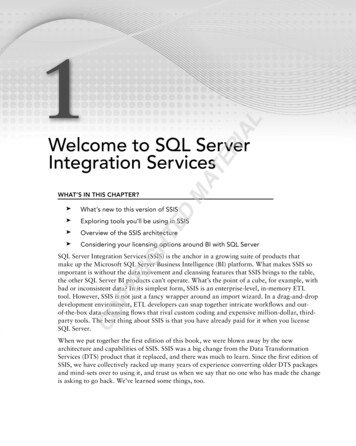
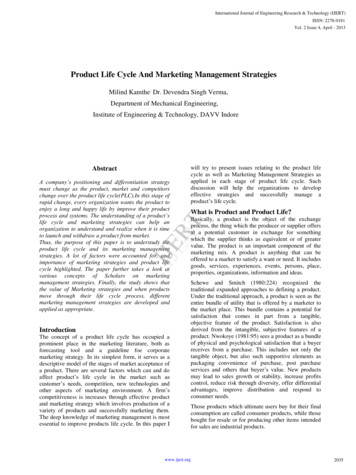
21 584359 ch18.qxd12/16/056:15 PMPage 556Chapter 18Click the Comments button to add any notes to your check-in operation. Again, this is an excellent placeto add change control documentation references and bug fixes. Click the Check In button to check yourcode back into source control. The Source Control confirmation dialog box appears.If you check the Don’t Show this Dialog Box Again (Always Check In) checkbox, you will not see thisdialog box on check-in operations. Click the Check In button to continue. Note that the PendingCheckins window is now empty, as no items are checked out for the project.Observe the Package.dtsx item in the Solution Explorer as you drag a Data Source task onto the ControlFlow workspace. A red check mark appears beside the Package.dtsx item. This is the “automatic checkout on edit” feature in action. The Pending Checkins window will now contain the Package.dtsx item, aswell as its parent items.Continue the package construction by right-clicking the Connection Managers workspace just below theControl Flow workspace. Click New ADO.Net Connection to launch the Configure ADO.NET ConnectionManager. Click the New button to open the Connection Manager editor. Type or select a server name inthe Server Name drop-down list. Select Use Windows Authentication to log on to the server, and selectAdventureWorks in the Database Name drop-down list, as shown in Figure 18-9.Figure 18-9Click OK to continue, and OK again to close the ADO.Net Connection Manager.556
21 584359 ch18.qxd12/16/056:15 PMPage 557SSIS Software Development Life CycleDouble-click the Data Flow task on the Control Flow workspace to edit it. Drag a DataReader Sourceonto the Data Flow workspace and double-click it to edit. On the Connection Managers tab, in theConnection Manager drop-down list, select the ADO.Net Connection Manager you just defined.The ADO.Net Connection Manager I defined shows up as AndyLTM.AdventureWorks because mymachine is named AndyLTM and the database is named AdventureWorks. Your ADO.Net ConnectionManager will be named something different.Click the Component Properties tab and enter the following SQL query in the SQLCommand property:SELECT * FROM Purchasing.vVendorYour Component Properties tab will look like Figure 18-10.Figure 18-10557
21 584359 ch18.qxd12/16/056:15 PMPage 558Chapter 18Click the Column Mappings tab, and then click OK to close the Advanced Editor for DataReader Source.Save your code, and then open the Pending Checkins window by clicking View Pending Checkins.Click the Comments button and enter Added Connection and DataReader in the Comment text box asshown in Figure 18-11.Figure 18-11Click the Check In button to add current changes to source control. Continue editing by dragging a FlatFile Destination onto the Data Flow workspace. Drag the DataReader Source output (represented by agreen arrow) from the DataReader Source to the Flat File Destination as shown in Figure 18-12.Figure 18-12Double-click the Flat File Destination to edit. Click the New button beside the Flat File ConnectionManager drop-down list. The Flat File Format dialog box will appear; select Delimited and click OK. TheFlat File Connection Manager appears. Enter File 1 in the Connection Manager Name text box. Click theBrowse button beside the File Name text box and enter C:\File1.txt in the File Name text box. ClickOpen to continue. Check the Column Names in the First Data Row check box and accept the remainingdefaults as shown in Figure 18-13.558
21 584359 ch18.qxd12/16/056:15 PMPage 559SSIS Software Development Life CycleFigure 18-13Click OK to close the Flat File Connection Manager Editor. This returns you to the Flat File DestinationEditor. Click the Mappings item from the list on the left to configure column mappings for the connection, as shown in Figure 18-14.Click OK to close the Flat File Destination Editor. Click View Pending Checkins to view the PendingCheckins window. Enter Added File1.txt destination in the Comments text box and click the Check Inbutton.You now have a functional version of a package in source control. Don’t take my word for it — click thePlay button (or press F5) to execute the package. After some validation completes, you should see theData Flow items turn green, as shown in Figure 18-15.559
21 584359 ch18.qxd12/16/056:15 PMPage 560Chapter 18Figure 18-14Figure 18-15560
21 584359 ch18.qxd12/16/056:15 PMPage 561SSIS Software Development Life CycleNote that the Package.dtsx item is read-only as it is now saved in VSS.Click the Stop button (or press Shift F5) to stop the debugger. You can view the resulting output byopening Windows Explorer and double-clicking the C:\File1.txt file, as shown in Figure 18-16.Figure 18-16You will now roll back to an earlier version of the package. To begin, click File Source Control Launch Microsoft Visual SourceSafe. Navigate to the SSISDemo1 folder containing Package.dtsx asshown in Figure 18-17.Figure 18-17View the history of the project by clicking Tools Show History (or Ctrl H). The Project History dialogbox displays as shown in Figure 18-18.561
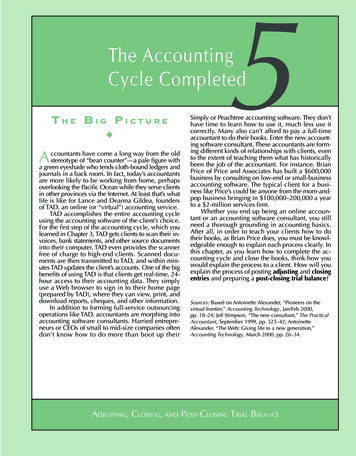
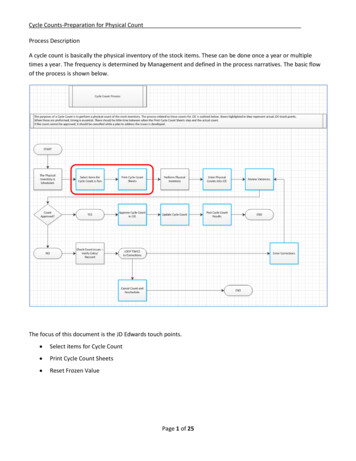
21 584359 ch18.qxd12/16/056:15 PMPage 562Chapter 18Figure 18-18For the purposes of this demo, click the OK button to accept the defaults. The History of Project dialogbox appears, showing all source control activity and items, as shown in Figure 18-19.Figure 18-19Click on the version of Package.dtsx that is the second newest and click the Get button. A dialog box asking if you wish to get the entire project with this version displays. Click the Yes button, and another dialog box prompts you for the location of the project files, as shown in Figure 18-20.Figure 18-20Clicking the OK button restores the previous version of code over your existing version. After clickingthe OK button, return to the SQL Server Business Intelligence Development Studio environment. Aprompt to reload displays as shown in Figure 18-21.562
21 584359 ch18.qxd12/16/056:15 PMPage 563SSIS Software Development Life CycleFigure 18-21Click the Yes To All button to reload all files in the project. Click the Data Flow tab to observe that theFlat File Destination and File1 Connection Manager are no longer part of this project, as shown in Figure18-22. They have been removed from the project due to your version rollback from source control.Figure 18-22Add another Flat File Destination to the Data Flow workspace. Configure this Flat File Destinationexactly like the first, except change the file and Connection Manager names from File1 to File2 as shownin Figure 18-23.563
21 584359 ch18.qxd12/16/056:15 PMPage 564Chapter 18Figure 18-23Open the Pending Checkins window and add the following comment: “Rolled back and added File2.txtdestination.” Click the Check In button to store this version in source control.Execute the package by clicking the Play button. Verify C:\File2.txt is created and populated withVendor data from the AdventureWorks database.Return to Visual SourceSafe and click Tools Show History to view the project history. As before, selectthe second Package.dtsx in the history list and click the Get button as shown in Figure 18-24.Figure 18-24564
21 584359 ch18.qxd12/16/056:15 PMPage 565SSIS Software Development Life CycleClick OK when the location confirmation dialog box displays and return to the BIDS environment.Click the Data Flow Task tab and confirm that you now see the original working version of the package.The File1 Connection Manager and Flat File Destination should now reflect this status, as shown inFigure 18-25.Figure 18-25This example has provided a rudimentary procedure for manually accomplishing branching — a topicthat will be covered in a section to come.Visual SourceSafe is a familiar source control tool to many with application development experience. Forthis reason, it has been updated and integrated into the 2005 integrated development environments. Thenew version addresses many complaints and shortcomings of previous versions of the product that werenot touched on in this section. One example of this is the native Internet connectivity functionality.The next section provides a brief introduction to Microsoft’s new source control (and so much more)server and client tools known collectively as Team System.Team Foundation Server, Team System, and SSISWith the coordinated release of SQL Server 2005 and Visual Studio 2005, Microsoft introduced TeamSystem and Team Foundation Server — a powerful enterprise software development life cycle suite andproject management repository consisting of collaborative services, integrated functionality, and anextensible application programming interface (API). Team System seamlessly integrates software development, project management, testing, and source control into the Visual Studio 2005 IDE.To configure Team Foundation Server as your SSIS source control, click Tools Options. Click SourceControl and select Visual Studio Team Foundation. Expand the Source Control node for detailed configuration, as shown in Figure 18-26.565
21 584359 ch18.qxd12/16/056:15 PMPage 566Chapter 18Figure 18-26This section discusses the relationship between Team System and SQL Server Integration Services. Thewalk-through is shown using Visual Studio 2005, but it can be completed in SQL Server BusinessIntelligence Developer Studio (BIDS).If Visual Studio 2005 is installed, opening BIDS will open Visual Studio 2005. If Team System is specifiedas the source controller for either environment, the environment, upon opening, will attempt to connectto a Team Foundation Server. Open Visual Studio 2005 to proceed.Once Visual Studio 2005 is open, press Shift Alt T or click the Team Explorer tab to view the TeamSystem properties. Click the Connect to the Team Foundation Server icon (as shown in Figure 18-27) toconnect to the Team System server.Figure 18-27Click the Servers button to browse for a Team Foundation Server or select a TF Server from the dropdown list as shown in Figure 18-28.566
21 584359 ch18.qxd12/16/056:16 PMPage 567SSIS Software Development Life CycleFigure 18-28Once you’ve connected to the Team Foundation Server, open the Team Explorer and click the New TeamProject icon, or right-click the Team Foundation Server and click New Team Project. The New TeamProject wizard starts. Enter a name and optional description for the new team project, and click Next tocontinue. Select a Process Template on the next step of the New Team Project wizard, as shown inFigure 18-29.Figure 18-29567
21 584359 ch18.qxd12/16/056:16 PMPage 568Chapter 18Click Next to continue. Here’s where Team System gets fun: The good people on the Team System teamat Microsoft automated the process of creating a project management Web site using WindowsSharePoint Services and Reporting Services.Click Next to proceed and enter a Team Project Portal title and description in the next step of the wizardas shown in Figure 18-30, and click Next to continue.Figure 18-30In the next step of the wizard, you’ll initialize source control and click Next to continue. The confirmation dialog box displays a summary of selections made. Click Finish to set up the new Team Project. Anew Team Project is defined according to the configuration you specified. Creation status is indicated bya progress bar as setup scripts execute. If all goes as expected, the wizard will display a Project CreatedSuccessfully dialog box as shown in Figure 18-31.At this point, you have created a Team System container for your SSIS projects. A Team Project is similarto a Visual Studio solution, in that you can add several SSIS projects (or any other type of project) to it.568
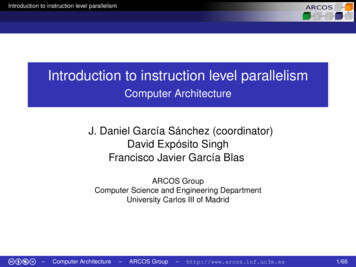
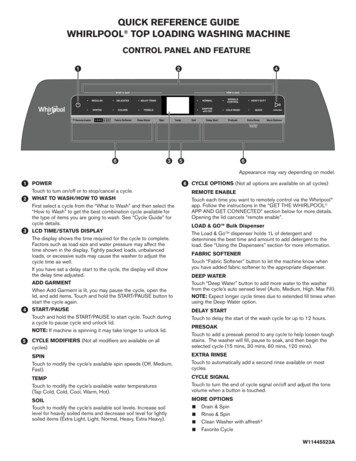
21 584359 ch18.qxd12/16/056:16 PMPage 569SSIS Software Development Life CycleFigure 18-31If this is your first Team Project, leave View Project Creation Log File checked, and click the Close buttonto complete the New Team Project wizard and view the log file. The project creation log file provides alot of information that is helpful in troubleshooting should the project creation fail. If the project is created successfully, there is no need to view the project creation log.View Process Guidance Page is checked by default. Team System provides a great overview of the process in the Process Guidance page as shown in Figure 18-32. These pages provide a wealth of information, useful to beginners and the experienced alike.“Why create a Team Project?” you ask? The short answer is, “The practice of database development ischanging.” Team development is becoming practical, even required for DBAs, in software shops of allsizes. It is no longer confined to the enterprise with dozens or hundreds of developers.Team System provides a mechanism for DBAs to utilize team-based methodologies, perhaps for the firsttime. The Team Project is the heart of Team System’s framework for the database developer.569
21 584359 ch18.qxd12/16/056:16 PMPage 570Chapter 18Figure 18-32MSF Agile and SSISMSF Agile is an iterative methodology template included with Team System. In a typical agile softwareproject, a time- and scope-limited project — called an iteration — is defined by collaboration with the customer. Deliverables are established, but they may be de-scoped in the interests of delivering a completedfeature-set at the end of the iteration. An important aspect of agile iterations is that features slip, buttimelines do not slip. In other words, if the team realizes that all features cannot be developed to completion during the time allotted, the time is not extended, and features that cannot be developed to completion are removed from the feature-set.The author advocates agile methodologies.No one uses a single methodology alone. There are facets of waterfall thinking in any iterative project. Inpractice, your methodology is a function of the constraints of the development environment imposed byregulatory concerns, personal style, and result
SQL Server Integration Services provides integrated support for many SDLC methodologies. This chap-ter will touch on a few of them. In general, SDLCs can be placed into one of two categories: waterfall and iterative. Waterfall SDLCs The first formal Software Development Life Cycl