Transcription
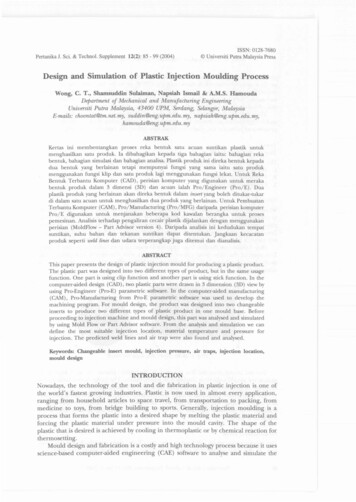
ISSN: 0128-7680Pertanika J. Sci. & Techno!. Supplement 12(2): 85 - 99 (2004) Universiti Putra Malaysia PressDesign and Simulation of Plastic Injection Moulding ProcessWong, C. T., Shamsuddin Sulaiman, Napsiah Ismail & A.M.S. HamoudaDepartment of Mechanical and Manufacturing EngineeringUniversiti Putra Malaysia, 43400 UPM, Serdang, Selangor, edu.my.napsiah@eng.upm.edu.my.hamouda@eng.upm.edu. myABSTRAKKertas ini membentangkan proses reka bentuk satu acuan suntikan plastik untukmenghasilkan satu produk. Ia dibahagikan kepada tiga bahagian iaitu: bahagian rekabentuk, bahagian simulasi dan bahagian analisa. Plastik produk ini direka bentuk kepadadua bentuk yang berlainan tetapi mempunyai fungsi yang sama iaitu satu produkmenggunakan fungsi klip dan satu produk lagi menggunakan fungsi lekat. Untuk RekaBentuk Terbantu Komputer (CAD), perisian komputer yang digunakan untuk merakabentuk produk dalam 3 dimensi (3D) dan acuan ialah Pro/Engineer (Pro/E). Duaplastik produk yang berlainan akan direka bentuk dalam inse:rt yang boleh ditukar-tukardi dalam satu acuan untuk menghasilkan dua produk yang berlainan. Untuk PembuatanTerbantu Komputer (CAM), Pro/Manufacturing (Pro/MFG) daripada perisian komputerProlE digunakan untuk menjanakan beberapa kod kawalan berangka untuk prosespemesinan. Analisis terhadap pengaliran cecair plastik dijalankan dengan menggunakanperisian (MoldFIow - Part Advisor version 4). Daripada analisis ini kedudukan tempatsuntikan, suhu bahan dan tekanan suntikan dapat ditentukan. Jangkaan kecacatanproduk seperti weld lines dan udara terperangkap juga ditemui dan dianalisis.ABSTRACfThis paper presents the design of plastic injection mould for producing a plastic product.The plastic part was designed into two different types of product, but in the same usagefunction. One part is using clip function and another part is using tick function. In thecomputer-aided design (CAD), two plastic parts were drawn in 3 dimension (3D) view byusing Pro-Engineer (Pro-E) parametric software. In the computer-aided manufacturing(CAM), Pro-Manufacturing from Pro-E parametric software was used to develop themachining program. For mould design, the product was designed into two changeableinserts to produce two different types of plastic product in one mould base. Beforeproceeding to injection machine and mould design, this part was analysed and simulatedby using Mold Flow or Part Advisor software. From the analysis and simulation we candefine the most suitable injection location, material temperature and pressure forinjection. The predicted weld lines and air trap were also found and analysed.Keywords: Changeable insert mould, injection pressure, air traps, injection location,mould designINTRODUCTIONNowadays, the technology of the tool and die fabrication in plastic injection is one ofthe world's fastest growing industries. Plastic is now used in almost every application,ranging from household articles to space travel, from transportation to packing, frommedicine to toys, from bridge building to sports. Generally, injection moulding is aprocess that forms the plastic into a desired shape by melting the plastic material andforcing the plastic material under pressure into the mould cavity. The shape of theplastic that is desired is achieved by cooling in thermoplastic or by chemical reaction forthermosetting.Mould design and fabrication is a costly and high technology process because it usesscience-based computer-aided engineering (CAE) software to analyse and simulate the
Wong, C.T., Shamsuddin Sulaiman, Napsiah Ismail & A.M.S. Hamoudaplastic parts, computer-aided design (CAD) software to design the complicated plasticproduct and computer-aided manufacturing (CAM) to do the programming fabricationto run the computer numeric control (CNC) for milling or latch. Advances in computertechnology have led to an increasingly favorable power to cost ratio for computers. Sothis advantageous and costly technology will improve productivity and process consistency.Thus, for this fast growing industry, new technologies are vital to ensure that thistechnology reaches perfection. S.o computer-aided engineering (CAE) is the assistant toprocess and calculate the plastic material flow inside the injection moulding.TheoryHow Plastic Fills a MouldThe injection moulding process can be broken into three phases:1. Filling phase2. Pressurization phase3. Compensating phaseFilling PhaseWhen designing plastic parts for the injection moulding process, the important elementto understand is how the plastic is filling in the mould. In the mould injection fillingphase, molten plastic is injected into the cavity until the cavity is just filled. As plasticflows into the cavity, the plastic in contact with the mould wall quickly freezes and thiswill create a frozen layer of plastic between the mould and the molten plastic.Plate 1 shows how the flow front expands as material from behind is pushed forward.The edge of the flow front comes into contact with the mould and freezes. Themolecules in the frozen layer are therefore not highly orientated, and once frozen, theorientation will not change.Plate 1: MolJ.en plastic flow inside the mouldThe red arrows show the flow direction of the molten plastic. The dark blue layersagainst the mould walls show the layers of frozen plastic. The green arrows indicate thedirection of heat flow from the polymer melt into the mould walls.The frozen layer gains heat as more molten plastic flows through the cavity, and losesheat to the mould. When the frozen layer reaches a certain thickness, equilibrium isreached. This normally happens early in the injection moulding process, after a fewtenths of a second.Pressurization PhaseThe pressurization phase will happen after the filling phase completely fills the cavityarea. At this stage, all the flow paths will be filled up by molten plastic, the edges and86Pertanika J. Sci. & Techno!. Supplement Va!. 12o. 2, 2004
Design and Simulation of Plastic Injection Moulding Processcorners of the filling area in the cavity may not contain plastic. To completely fill outthe geometry, extra plastic is pushed into the cavity during the pressurization phase.Plate 2 shows the difference between the end of the filling phase (left image) andthe end of the pressurization phase (right image). otice the unfilled corners (insidethe blue circles) that are left at the end of the filling phase. The yellow cone indicatesthe polymer injection location and the plastic is red.Pressurization PhaseFillinR PhasePlate 2: Difference between jiUing and pressurization phaseCompensating PhasePlastic material has a high volumetric shrinkage, form the melting plastic to solid, it willshrinkage average of 25%. Therefore after the pressurization phase, more material mustbe injected into the cavity to compensate for the plastic shrinking after it cools. This isthe compensating phase (MoldFlow Help Files).Mould Basic ConstructionMould design and mould making can be considered the most critical processes of theinjection moulding system. This is because the mould design and mould making havetremendous impact on productivity and product quality. Basically, the function of themould is two fold. The first is imparting the desired shape to the plasticized polymer,the second is cooling the injection moulded parts. The mould, which contains one ormore cavities, consists of two basic parts: A stationary mould half on the side where the plastic is injected A moving half on the closing or ejector side. The separation of the two moulds iscalled the parting line.The mould will determine the final product properties such as size, shape, dimensionand finishing surface. Usually, the melted plastic material is filled through the centralfeed channel called sprue to the cavity. The mould will coincide with the injectionmachine cylinder nozzle. Table 1 is the summary list for mould component and thefunction respectively.Mould DesignTo start up a new mould design, the designer should know some important points toavoid some mistakes before going further Le. product outlook design, material usage,correct shrinkage of the material, number of cavities and selection of the mould base.Making a mistake can cause an ill-fitting mould at the final assembly and also make theplastic product out of tolerance and be rejected by the customer. Fig. 1 shows the moulddesigner's chart.PertanikaJ. Sci. & Techno\. Supplement Vo\. 12 No.2, 200487
/Wong, C.T., Shamsuddin Sulaiman, Napsiah Ismail & A.M.S. HamoudaCreate a model in CADsoftware (convert in STL)J.l.Open the model inPart Advisor. Select a plastic materialand supplierIf a single injection location is required, go on to the next stepIf multiple injection locations wanted, skip the next step and goto the one afterIRun the gate locatorJ.IRun the analysis-LIICreate one or moreinjection locationsLook at the analysis result, decide if the model will fill easily and creategood quality partsIf the results are not satisfactory, go on to the next stepIf the results are acceptable, skip the next step and go to the one afterChange one of the parameters and thenre-analyzeThese parameters are:Position or number of injectionlocation MaterialMould temperature Melt temperature Injection time Part geometry··---.Create a report on theanalysis result, using thereport generatorJ.Send the report to thepeople who need to see itFig. 2: Procedure diagram for Part Advisor simulationMoldflow software. Plate 5 shows the solid model with gate location placing on top of themodel. The yellow colour cone shape shows the i ection location in this analysis.In injection and transfer moulding, the gate is considered the portion of themoulded piece that allows the molten resin to flow the runner or from the sprue intothe cavity. The gate may be the same size and shape as the runner, but generally it ismuch smaller. There is an optimum gate size. It should be large enough for suitable fillrate and small enough to seal off and prevent backflow or overpacking.Product Simulation ResultBefore starting the simulation process, some information has to be set up, such asmaterial supplier and material grade. This is normally already set in the Moldflowdatabase and the user just selects the specific material specification. Table 2 shows theelement used.for this analysis:90PertanikaJ. Sci. & Techno!. Supplement Vol. 12 No.2, 2004
Design and Simulation of Plastic Injection Moulding ProcessPlate 5: Solid model With gate locationTABLE 2Moulding process specificationPart NameTNG CLIP VERSIONABS 65050 deg.C235 deg.C60 MPaMaterial GradeMould TemperatureMelt TemperatureMax Injection PressureFill TimeFill time is the time taken to fill up the part inside the cavity, it is also to show how theplastic material flows to fill the mould. From that we know that the short shot (part ofthe model which did not fill) part will be displayed. From that result one can alsounderstand how the weld line and air trap will form. Plate 6 shows the material fillinginto the mould.filTMlltAJlIII."A2'D.31.,'!isttl JIII.JlIPlate 6: 100 % materials fill of plastic partConfidence of FillThe confidence of fill result displays the probability of the region within the cavity withplastic. This result is derived from the pressure and temperature results. The confidenceof fill will display in three colours: green, yellow, red and translucent. Showing in greenwill definitely fill, in yellow may be difficult to fill or may have quality problem, in redwill be difficult to fill or will have quality problem and in translucent will not fill (shortshot).PertanikaJ. Sci. & Techno!. Supplement Vo!. 12 No.2, 200491
Wong, C.T., Shamsuddin Sulaiman,apsiah Ismail & A.M.S. HamoudaIf the cavity does not fill, some changes must be made to either design, gate location,choice of plastic or processing conditions. However, to ensure the finished part is ofgood quality, the cavity must also be adequately packed with plastic. Plate 7 showsconfidence of fill in this analysis.udd.ceotlillPlate 7: Confidence of flUInjection PressureThe colour at each place on the model represents the pressure at the place on themodel. Two colours show the highest pressure (red) and lowest pressure (blue). Theinjection pressure can be used in conjunction with pressure drop result. For example,even if a section of a part has an acceptable pressure drop, the actual injection pressurein the same area may be too high. High injection can cause overpacking.To reduce the chance of this happening, follow these steps:1. Increase the maximum injection pressure2. Alter the polymer injection location3. Alter part geometry4. Select a different materialPlate 8 shows the result of injection pressure from 0 MPa to 47.02 Mpa. .1'UI'I.tIIl U1JI.l'IJUlJ1.I1., ,CUleTl2Plate 8: Injection pressurePressure DropPlate 9 shows the pressure drop result. When the place is filled, the pressure will dropfrom the injection location to the end of the filled part. The pressure drops result uses92PertanikaJ. Sci. & Techno\. Supplement Vo\. 12 No.2, 2004
Design and Simulation of Plastic Injection Moulding Processa range of colours to indicate the region of highest-pressure drop (coloured red)through to the region of lowest pressure drop (coloured blue). The pressure drop is onefactor used to determine the confidence of fill result.P J.D"',IMP-I., .JO""0n.5.21.2'32.9.31.8'U,31111":':,,001"Jl2Plate 9: Pressure drapAir TrapsPlate 10 shows the air traps result after analysis. The small blue bubbles are showing theair traps in the parts. Air traps result shows the regions where the melt stops at aconvergence of at least 2 flow fronts or at the last point of fill, where a bubble of airbecomes trapped. To prevent air traps occurring when converging flow fronts surroundand trap a bubble of air, balance flow paths by either:1. Using flow leaders / deflectors2. Changing part wall thickness3. Changing polymer injection locationsPlate 10: Air trapMould DevelopmentMter doing all the Moldflow simulation for the product, mould design will be precededbased on the simulation result. Only one mould base is used to produce two differentplastic parts; this is because almost 70% of the plastic product shapes are similar, sochangeable inserts are used in this case. Core insert will be as permanent insert andchange the slider and cavity insert for T G Clip version and T G Stick version. Plate 11shows the cavity and core insert for T G Clip and Stick version.PertanikaJ. Sci. & Techno\. Supplement Vo\. 120.2,200493
Wong, C.T., Shamsuddin Sulaiman, Napsiah Ismail & A.M.S. HamoudaCavity insertfor TNG stickPlate 11: Cavity, cure and slider insertMould Base SizeFor this project, three-plate type system mould base is used with pinpoint gating. Thesizes for the mould base are 250 mm x 250 mIll with FCI type, A-plate size 100 mm, Bplate size 70 mm, Spacer block size 100 mm and with striper plate (referred from LKM(Lung Kee Metal) mould base handbook). The function of the stripper plate is toremove the runner from the plastic part and the plastic part will be considered a goodproduct with no need to touch up.For this mould base just one cavity will be injecting each time, the molten materialof plastic will flow through sprue to the cavity. After cooling, the plastic parts will hardenand stick to the core and then be ejected by using the shoulder-type ejector pin.Three Plate MouldThree plate moulds are used in this project because the gating point to inject the moltenplastic is small and the runner system for a three-plate mould sits on a second partingplane parallel to the main parting plane. This second parting plane allows the runnersand sprue to be ejected when the mould is open. In this three-plate mould, the runnerswill be ejected separately from the cavities and the plastic part after injection does notneed to go through any touch up process (Rosato 1986).Slider CoreSlider core is used when the plastic parts are design undercut for example, side hole,side boss, etc. Slider core is stationary attached to plate B (refer to Plate 14) and twoangular pins are attached to plate A. When the mould opens, the angular pin will movethe slide core horizontally out from the mould position. The amount of the slide coremovement will depend on the angle and how far the slider moves on the angular pin.By the time the mould is opened, the slide core has moved enough so that the ejectorpin has been fully withdrawn from the plastic part.Cooling System (Water Channel)A water channel is to control the temperature of the mould surface and to chill up themolten plastic material to become rigid states that eject from the core side. For this94PertanikaJ. Sci. & Technol. Supplement Vol. 12 No.2, 2004
Design and Simulation of Plastic Injection Moulding Processproject the water channels are designed to be drilled along the length of cavities, coreand slider. The cooling system is vertically to the mould. Plate 12 shows the flow of thewater channel in the mould insert.Plate 12: Water channel flow inside mould insertGating SystemThe gate is the connection between the runner system and the moulded part. It mustpermit enough material to flow into the mould to fill out the part plus additionalmaterial as is required to overcome the normal thermal shrinkage of the part. In thisproject, pin point gates are used, when the mould is open the part will automatically beremoved from the runner and there is no need to touch up for the plastic product. Plate13 shows the pinpoint gate system.Plate 13: Pin point gate systemComplete Mould AssemblyPlate 14 shows the completed mould assembly for TNG Clip Version. Plates 15 and 16show the cross-section for mould close assembly and open assembly position.CAD/CAM for Mould DesignIn the plastic industry, CAD/CAM has emerged to the point where it now shows thepromise of being one of the most significant technological advances of the century.Pertanika J. Sci. & Techno!. Supplement Vo!. 12 No.2, 200495
Wong, CT., Shamsuddin Sulaiman, Napsiah Ismail & AM.S. HamoudaPlate 14: Completed mould assemblyPlate 15: Cross-section mould close assemblyCAD/CAM is enabling the creative energies of plastic part and mould designers to bespent in producing better designs in a shorter time period rather than in doingrepetitive mould design tasks.The Advantages of CAD/CAMThe advantages of the CAD/CAM in mould design are:a) CAD/CAM technologies are normally used for the numerically controlled ( C)machining technology to fabrication for the moulds and also its ability to createthree-dfmensional product models in the data base and to generate automatically.96PertanikaJ. Sci. & Techno\. Supplement Vo\. 12 No.2, 2004
Design and Simulation of Plastic Injection Moulding ProcessBottomClampPlatePlate 16: Cross-section mquld open assemblyb) CAD/CAM can help designers to speed up design for the plastic part and moulddesign process and reduce the long lead-time.c) CAD/CAM used in the repetitive and routine tasks of mould making will enhancethe quality of work life for those skilled mould makers by providing mOl"'e challengeand job satisfaction.d) Easy for users to redefine for part geometry; this means it can enhance quality in themould design by reducing in the number of errors.Application of CAD/CAM and the Methods for Mould DesignIn this project, the type of CAD/CAM software employed is Pro/Engineer 2000i. ProfMoldesign is an extension of Pro/Engineer to the mould manufacturing environment,covering all aspects of production mould design such as mould bases, runner systemcreation, waterlines, ejector-pin holes, shrinkage and hundreds of other features. ThePlate 14 for mould assembly is using Pro/Moldesign to create and design the mould.Prof C and Pro/MFG are the manufacturing extensions of Pro/Engineer into C Cproduction arena, .and have a wide breadth of capabilities covering from 3 to 5 axismilling, 2 and 4 axis wire EDM, turning, laser, flame, etc.After designing all the moulds, Pro/NC and Pro/MFG for the manufacturing willplay an important role again in the process of creating the detail drawing needed andgenerating C toolpaths to machine the actual mould. The C toolpaths are derivedfrom the product model database. Product paths completed in 3-D model will be directlyextracted from the mould design database for manufacturing, for example, core insertsfrom the mould database that want to do some manufacturing. Before starting CAD/CAM some of the important features have to be considered like tool feed rate, spindlespeed, step depth, material to mill, Plunger speed, coordinate system, and what kind ofend mill used.To start CAD/CAM, dimension of work piece has to be decided first and then settingthe coordinate system to the work piece. The work piece coordinate must be of the samesetting with the coordinate in the CNC machine. The wrong setting will cause themachine to crash with the work piece. Decide what kind of manufacturing process touse, for example profiling, volume, pocketing, hole-making and conventional surface.After selecting the manufacturing process, Prof C will convert computer code toPertanikaJ. Sci. & Techno!. Supplement Vo!. 12 No.2, 200497
Wong, C.T., Shamsuddin Sulaiman, Napsiah Ismail & A.M.S. Hamoudamachining code by using ICAM (Intelligence computer-aided manufacturing) software.Machining codes like G-code and M-eode will be stored in the CNC and then themanufacturing is run.Plate 17 shows the solid model simulation before running the actual manufacturingand Plate 18 shows wire frame simulation and the red line in Plate 18 is the tool runningpoint to point position.Plate 17: Solid rrwdel simulationPlate 18: Wire frame simulationPro/MFG will create the data necessary to drive an NC machine tool to machine aPro/Moldesign part. It does this by providing the tool to let the manufacturing engineerfollow a logical sequence of steps to progress from a design model to ASCII CL data filesthat can be post-processed into NC machine data. The CAD/CAM illustration in Fig. 3can basically be summarized the Pro/MFG process (Pro/MFG, RI8).DISCUSSION AND CONCLUSIONThe conceptual design on the plastic parts is based on the need of the car driver. Theplastic parts holder casing is to place the Touch N' Go card or PLUS hi-way ticket forthe driver to have easy access to it when he/she reaches the toll. In this project theplastic parts were designed into two different types of product but design in onechangeable insert mould base. Just using one mould base will reduce the cost and timein manufacturing. Pro/Moldesign, Pro/MFG and Pro/NC from Pro/ENGINER are usedto design the mould and fabricate the plastic parts. In the mould-making industries,accuracy and tolerance are the important issues; so using CAD/CAM will enhancequality of the work in the mould design and reduce the number of errors inmanufacturing.From the analysis simulation, Moldflow provides sufficient information results suchas fill time, injection pressure and pressure drop. With this result, users can avoid thedefect of the plastic in actual injection such as sink mark, hesitation, air traps, andoverpacking. The analysis will also help the mould designer to design a perfect mouldwith minimum modifications and it will also reduce the mould setup time. With thisanalysis and simulation it will help to reduce time and cost.98PertanikaJ. Sci. & Techno!. Supplement Va!. 12 No.2, 2004
Design and Simulation of Plastic Injection Moulding ProcessI--1IIDesign ModelWorkpieceManufacturing Modelj.---/IFixture SetupIMachine Tools(Workcells)Set Up Manufacturing DatabaseTools1.1IISet Up Operation111Pro/MFGDefine NC Sequences1I1ICreate CL Data FilesI1IPost-ProcessProduce InProcess ModelI1I1Drive NC Machine ToolIFig. 3: Summarizes the Pro/MFG processREFERENCESFRADos, J. 1976. Plastic Engineering Handbook (The Society oj the Plastic Industry). Fourth edition. VanNostRand Reinhole Company.Moldflow Help Files.CAMPBELL,P.D.Q. 1996. Plastic Component Design. First edition. New York, USA: Industrial Press Inc.Pro/MFG and Pro/NC-CHECK Users guide, Release 18.ROSATO, D.Y. 1986. Injection Molding Handbook. Applied Publisher Ltd. Essex.BECK,R.D. and V. NOSTRAND. 1980. Plastic Product Design. Second edition. Reinhold Company.PertanikaJ. Sci. & Techno!. Supplement Vo!. 12 No.2, 200499
The injection moulding process can be broken into three phases: 1. Filling phase 2. Pressurization phase 3. Compensating phase Filling Phase When designing plastic parts for the injection moulding process, the important element to understand is how the plastic is filling in t