Transcription
ADDING SHADOWS IN SKETCHBOOKETCHBOOK DESIGNERAutodesk Design Suite 2012Autodesk SketchBook Designer 20122012– Tip GuidesAdding Shadows inSketchBook DesignerIn this section you will learn the following: How to create a shadow for an object How to duplicate a layer How to convert a vector layer into a paint layer How to invert a selectionwww.autodesk.com/ads1
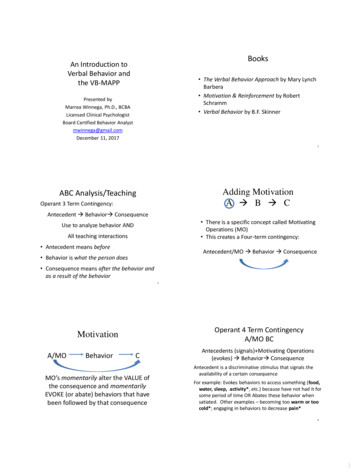
ADDING SHADOWS IN SKETCHBOOK DESIGNDESIGNER1.Building on the last example, let’s now add some shadows to the tables.2.First of all, let’s duplicate the layer that containcontains the tablesbles (assuming we kept a layer with the outline ofthe tables).3.Using Transform in Sketchbook Designer, we will move the duplicated layer to the desired location forthe shadow.www.autodesk.com/ads2
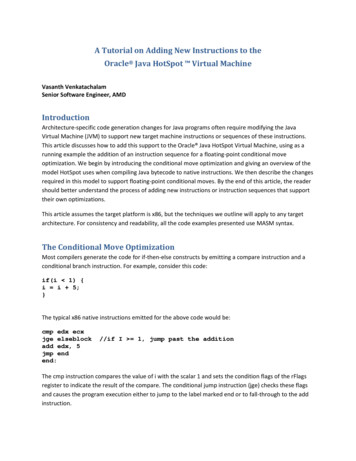
ADDING SHADOWS IN SKETCHBOOKETCHBOOK DESIGNER4.We’ll now select all the vectors, and change their properties into a very thin size with almost nointensity. We can eventually uncheck Show Stroke, and it will be hidden. But for now, we still need tosee the boundary, so let’s make it really thin.5.In order to work more easily, we’ll now hide the layer with the tables, and leave only the one with verythin outlines. Theyey can barely be seen in the image below.6.By having the layer with the outlines current and using the Solid Fill tool, we can quickly add color.colorwww.autodesk.com/ads3
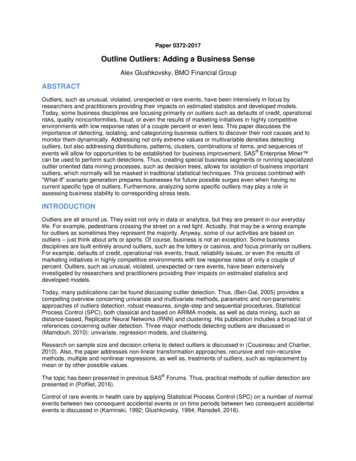
ADDING SHADOWS IN SKETCHBOOKETCHBOOK DESIGNER7.It’s time to add transparency to this layer. Use Multiply as Blend in order to get the bestbes results.8.The image below shows the final result. We have nice textures in the floor, the tables (with the glassand transparency), and their shadows. This was all done very fast, using the data in AutoCAD.www.autodesk.com/ads4
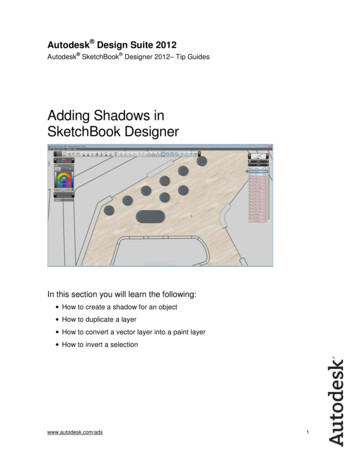
ADDING SHADOWS IN SKETCHBOOKETCHBOOK DESIGNER9.There are a couple more steps if you want to eliminate the shadow directly under the table. We’ll needto use the Magicc Wand, so to make things more easyeasy,, we’ll convert the AutoCAD layer for the tablesinto a Paint layer.10. Then we’ll use the Magic Wand, sampling only the current layer, so we will select everything that’s not atable. The next step is to invert the selection ((Shift Ctrl I,, or go to Edit menu), and then simply moveinto the layer that contains the shadows, and delete.Autodesk, AutoCAD, SketchBook, and DWG are reregisteredgistered trademarks or trademarks of Autodesk, Inc., and/or its subsidiaries and/or affiliates inthe USA and/or other countries. All other brand names, product names, or trademarks belong to their respective holders. AutodeskAutodreserves theright to alter productroduct and services offerings, and specifications and pricing at any time without notice, and is not responsible for typographicaltypograporgraphical errors that may appear in this document. 2011 Autodesk, Inc. All rights reserved.www.autodesk.com/ads5
Building on the last example, let’s now add some shadows to the tables. 2. First of all, let’s duplicate the layer that contain the tables). 3. Using Transform in Sketchbook Designer, we will move the du