Transcription
GEN 7 R2 Cherwell ITSM Integration ModuleNNT CHANGE TRACKER GENERATION 7 R2June 2019 New Net Technologies
Change Tracker Gen 7 R2 Getting Started GuideContentsPositioning . 3Installation Pre-Requisites . 4Installing NNT ITSM Integration Module . 5Standard Operation . 7File Locations. 7The Gen7SyncService.exe.config File . 8Retry Attempts and Retry Interval . 8Start Time Filter . 8Gen 7 Hub URL and API Access Credentials . 8ServiceNow Change Request ‘Category’ Filter. 9ServiceNow Integration Module Poll Period. 9ServiceNow API URL and Credentials. 9SunView Software Change Gear Settings . Error! Bookmark not defined.Creating ServiceNow Incidents from Gen 7 Change Tracker . 10Overview . 10Step 1 – Configure Email service within ServiceNow . 10Step 2 – Configure InBound Email Action within ServiceNow . 10Step 3 – Ensure Change Tracker Gen 7 is configured to use an SMTP Email service . 10Step 4 –Change Tracker Gen 7 user alert setup. 112NNT Change Tracker Gen 7 R2June 2019
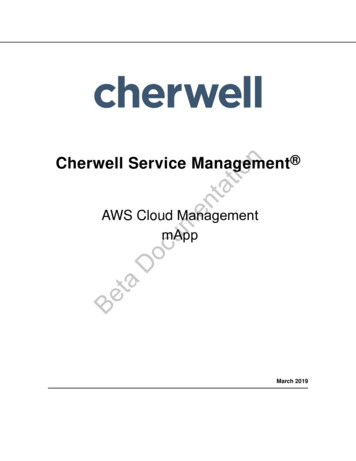
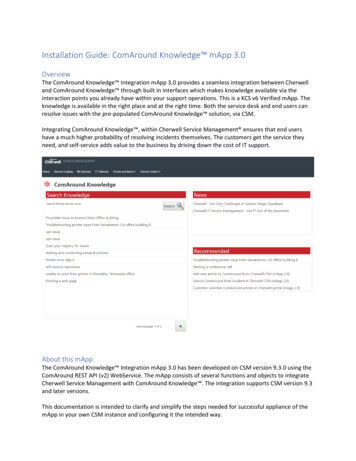
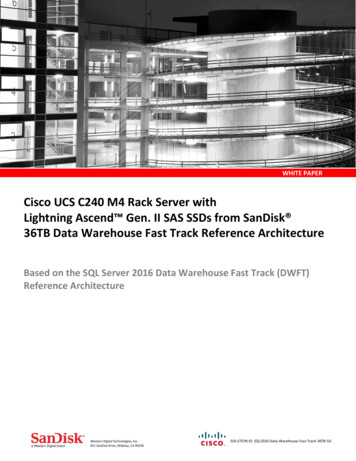
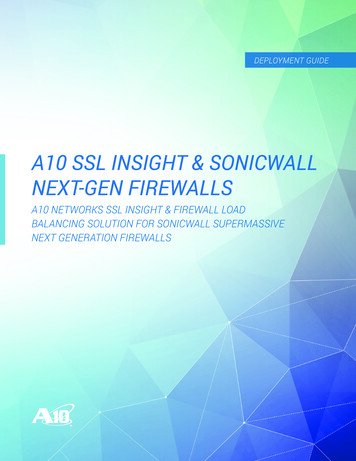
Change Tracker Gen 7 R2 Getting Started GuidePositioningCherwell is a leader in the Service Management space but it still suffers from one of the major changemanagement blindspots – what changes have actually been implemented?By integrating Change Tracker with Cherwell your capability for change control is transformed.Figure 1: Change Request raised and approved in CherwellApproved changes are validated automatically,with a full audit trail of what actually changedprovided and reconciled with your ChangeRequests. By leveraging Change TrackerIntelligent Change Control , repeated orrecurring change patterns can be modelled andre-used to segregate pre-approved changesfrom the unexpected and genuinely suspiciouschanges. This reduction of change noiserevolutionizes breach detection, clearlyexposing insider and zero day malware activity.How else can you accurately ensure that intended changes were delivered as requested and approved?Human error has long since been held as the biggest source of unplanned downtime – mistakes are made andsystems end-up misconfigured, not just affecting service delivery but leaving the organization more vulnerable toattack. The danger in todays’ IT environment is that ironically, the better the change management process, themore a false sense of security can develop andthe more easily bad changes can exist. With theemphasis on the approval and review processprior to changes being made, bad changes canbe left hiding in plain sight.Change Tracker puts a spotlight on all changesmade. Changes made during a prescribedplanned change window get validated againstthe expected change profile - any exceptions,such as misconfigurations or additional nonscoped changes are exposed for review andremediation where required.Figure 2: New and updated Change Requests are synced with Change Tracker toprofile corresponding Planned ChangesAll Unplanned Changes are also recorded in full –ho made the change, with before and after exposure of changesclearly reported. These are prioritized as Cherwell incidents – changes will be automatically analyzed usingcontinuously updated Threat Intelligence – NNT F.A.S.T. Cloud . In reality, in a well-run secure IT environment,most unplanned changes will be emergency changes or unexpected-but-benign changes such as automaticsoftware updates. They may not be dangerous changes or breach activity but as a non-approved changes, theymust be reviewed. The beauty of this approach is that it also ensures that the most suspicious, potentiallydangerous unexpected changes are also clearly categorized as critical.Note: As of June 2019 ServiceNow and Sunview ChangeGear are both supported and support for other ITSMsystems will be added over time, please contact support@nntws.com for updates3NNT Change Tracker Gen 7 R2June 2019
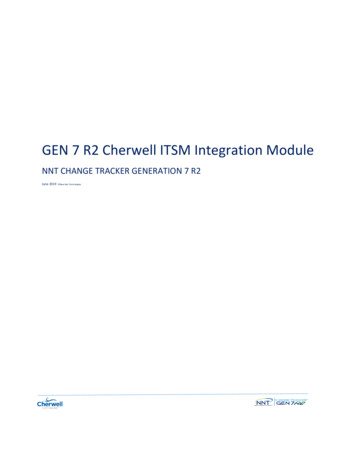
Change Tracker Gen 7 R2 Getting Started GuideInstallation Pre-RequisitesThe NNT ITSM Integration module is a Windows Service and interacts with your Change Tracker Gen 7 R2 Hub andyour ITSM product via https API operations. As such the ITSM Integration Module may be installed and run fromthe Hub server itself or from any other suitable Windows platform with network connectivity to both Gen 7 R2 Huband ITSM Product.SYSTEM ELEMENTRECOMMENDEDCPUDUAL CORE CPU OR 2 VCORESMEMORY4GBDISK FREE10GB*OPERATING SYSTEM – 64BIT ONLYWINDOWS SERVER 2016MICROSOFT .NET FRAMEWORKVERSION .NET 4.7.2**DATABASESQL Lite (Pre-Packed with Installer)*10GB Minimum based on base requirements but storage requirements are directly related to Change Requestvolume for your ITSM system** Download details: Microsoft .NET Framework 4.7.2 (missing components will be downloaded automatically,provided the server has internet access)Please run a Windows Update to ensure all above components are fully up to date.To download the software go to / and use theusername and password provided to you in your ‘Welcome to NNT’ email, or contact us at info@nntws.com if youstill need your account details.4NNT Change Tracker Gen 7 R2June 2019
Change Tracker Gen 7 R2 Getting Started GuideInstalling NNT ITSM Integration ModuleInstallation is provided by a standard Windows setup.exe installer file, please make sure you execute the setupusing ‘Run As Administrator’. Select which ITSM Integration is required, either Cherwell, ServiceNow or Sun ViewChangeGear, more ITSM Integrations are continually being added so please check with support@nntws.com forthe latest developments.The NNT ITSM Integration module interacts with both your Change Tracker Gen 7 R2 Hub and your ITSM productvia secure API operations. As such, it is necessary to provide the ITSM Integration Module with the Hub URL andusername and password.NNT best practice is to allocate a dedicated user account with ‘Change Approver’ role and use this for all ITSMIntegration functions.Use these account credentials when prompted by the installer and use the ‘Test my hub connection’ option whenavailable.5NNT Change Tracker Gen 7 R2June 2019
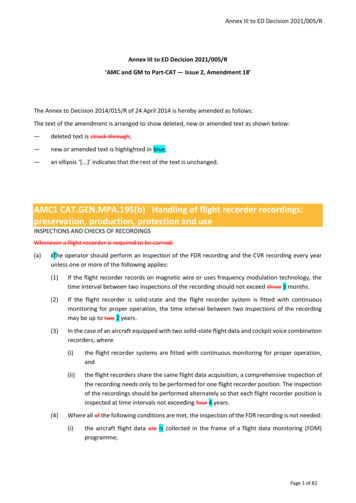
Change Tracker Gen 7 R2 Getting Started GuideSimilarly for the ITSM Product access, a dedicated account should be established with a Cherwell ITSM Client keywith API access.See https://help.cherwell.com/bundle/cherwell rest api 950 help only/page/oxy ex1/content/system administration/rest api/csm rest obtaining client ids.htmlIn the event that the credentials and/or the URL for the Gen 7 Hub or ITSM Product are incorrect, the automatedtest will report this as in the example below.Finally – Please contact NNT Support if you need help at any stageIf you still are experiencing issues please contact support@nntws.com6NNT Change Tracker Gen 7 R2June 2019
Change Tracker Gen 7 R2 Getting Started GuideStandard OperationThe ITSM Integration module default operation is to request a list of all open and updated Change Requests every30 seconds. The requests are filtered so that only Change Requests assigned a Category of ‘Software’ or ‘Network’(Cherwell) or ‘Software' or 'Network:Install/configure' (ChangeGear).These parameters and others are controlled via the Gen7SyncService.exe.config configuration file, locatedby default in the C:\Program Files\NNT Change Tracker Suite\Gen7SyncService folder.See later section for syntax and structure.File LocationsNote that all program files will be installed by default to Program Files\NNT Change TrackerSuite\Gen7SyncService. In addition, there is also a local SQL Lite database file and log file written to theProgramData\NNT\gen7syncservice folder.Please contact NNT Support if you need help at any stageIf you still are experiencing issues please contact support@nntws.com7NNT Change Tracker Gen 7 R2June 2019
Change Tracker Gen 7 R2 Getting Started GuideThe Gen7SyncService.exe.config FileThese defaults are controlled via the Gen7SyncService.exe.config configuration file, located by default inthe C:\Program Files\NNT Change Tracker Suite\Gen7SyncService folder.Significant sections of the ‘appSettings’ config file are as follows:Retry Attempts and Retry Interval appSettings add key "restSyncProvider.retryTimes" value "3" / add key "restSyncProvider.retryMilliseconds" value "250" / Retry attempts and retry interval are controlled here. Should be left as default.Start Time Filter add key "restSyncProvider.startSyncTimeUtc" value "2018-03-09T14:22:26" / This setting acts as a filter for Change Requests with only CRs with a Start Time later than the defined value beingprocessed by the ITSM module. The default value is set as the time of installation but could be manually defined toan earlier point in time if it was desirable to process older Change Requests.Gen 7 Hub URL and API Access Credentials add key "changeTrackerRestSyncProvider.baseUrl" value "https://localhost/api" / add key "changeTrackerRestSyncProvider.userName" value "ITSM-Integration" / URL for the Gen 7 Hub being used, along with the username to be used for API operations. This works inconjunction with the later key E.changeTrackerRestSyncProvider.password, which is an encrypted record of thepassword provided during installation.If it is necessary to reset the username or password for the Gen 7 Hub API access, you can re-run the installer andenter the new values, or alternatively, entries can be edited here after stopping the service. For the password key,it is necessary to change the notation from Encrypted to plain text as below, the new password will be encryptedas soon as the service is started.Change add key "E.changeTrackerRestSyncProvider.password" value "AQAAANCMnd8BfdERj d9Zps6eoT" / to add key "changeTrackerRestSyncProvider.password" value "password" / 8NNT Change Tracker Gen 7 R2June 2019
Change Tracker Gen 7 R2 Getting Started GuideCherwell Change Request ‘Category’ FilterThis setting provides a filter for Cherwell Change Requests. Any API operation argument values added here will beused by the ITSM Integration Module to filter results. The value is transposed to the sysparm query parameter ofthe request, for more information see https://developer.servicenow.com/app.do#!/rest api doc?id r TableAPI-GET add key alChangesFilter"value "categoryINSoftware,Network" / Cherwell Integration Module Poll PeriodThis setting defines the poll time period in milliseconds. The default value of 30,000 ms results in Change Requestsbeing processed every 30s. add key "CherwellImportJob.intervalMilliseconds" value "30000" / Cherwell API URL and CredentialsSimilar to the Gen 7 Hub URL and API Access Credentials settings explained earlier, these can be edited directlywithin the config file or just re-run the setup.exe and enter updated values when prompted. add key "CherwellRestSyncProvider.baseUrl" value " https://CherwellITSM/CherwellAPI" " / add key "CherwellRestSyncProvider.userName" value "NNT" / add key "cherwellRestSyncProvider.clientId" value "xxxxxxxxxxxxx" / Finally – Please contact NNT Support if you need help at any stageIf you still are experiencing issues please contact support@nntws.com9NNT Change Tracker Gen 7 R2June 2019
Change Tracker Gen 7 R2 Getting Started GuideCreating Cherwell Incidents from Gen 7 R2 Change TrackerAn additional common requirement for users of Cherwell with Change Tracker Gen 7 R2 is the need to create anew ITSM Incident for any Unplanned Changes. By definition, any changes detected by Change Tracker that are notpart of a scheduled, approved Change Request should be investigated as security incidents. This approach is a keyfoundational security control and a critical aspect of the SecureOps approach to embedding security within ITSM.Overview1.2.3.Ensure InBound Email Action (CSM) is enabled within your Cherwell instance to create new Incidents fromreceived emailsEnsure Change Tracker Gen 7 is configured to use an SMTP Email serviceEnsure a suitable user account is created within Change Tracker for Cherwell incidents, using a suitableemail account for the Cherwell instance and with User Notifications set for Unplanned ChangesStep 1 – Configure Email monitoring within CherwellPlease contact your Cherwell Support Team or queryhttps://help.cherwell.com/bundle/csm administration 960 help only/page/content/shared/configure global e-mail accounts.htmlStep 2 – Configure InBound Email Action within ServiceNowPlease contact your Cherwell Support Team or queryhttps://help.cherwell.com/bundle/csm administration 960 help only/page/content/suite features/email/define monitor item action options.htmlAn email monitor item action open to Add/Create new incident)Step 3 – Ensure Change Tracker Gen 7 R2 is configured to use an SMTP Email serviceYour Change Tracker Gen 7 R2 system will already be configured to use your SMTP server if you worked throughthe Change Tracker Getting Started and Admin Guides. Log in to your Gen 7 R2 instance and go to Settings - System Settings - Primary EmailAfter entering SMTP details, test that emails/messages are being sent OK by using the Test ces/HELPDESK/pages/13579393/9. Alerting - Being Notified of Events10NNT Change Tracker Gen 7 R2June 2019
Change Tracker Gen 7 R2 Getting Started GuideStep 4 –Change Tracker Gen 7 user alert setupCreate a new user to act as your ServiceNow instance – this can be the same user used for the ITSM IntegrationModule to interact with the Gen 7 R2 API. Most important for Incident Creation is that the email address of yourServiceNow instance POP3 service is assigned to the user.Finally you need to assign a User Notification Email for Unplanned Changes to this user. This will ensure that anyUnplanned Changes are alerted using the email address configured for your ServiceNow instance user. In turn, theInBound Email Action will process the email to create an paces/HELPDESK/pages/13571293/g. Gen 7 Settings Page User AdministrationFinally – Please contact NNT Support if you need help at any stageIf you still are experiencing issues please contact support@nntws.com11NNT Change Tracker Gen 7 R2June 2019
Cherwell API URL and Credentials Similar to the Gen 7 Hub URL and API Access Credentials settings explained earlier, these can be edited directly within the config file or just re-