Transcription
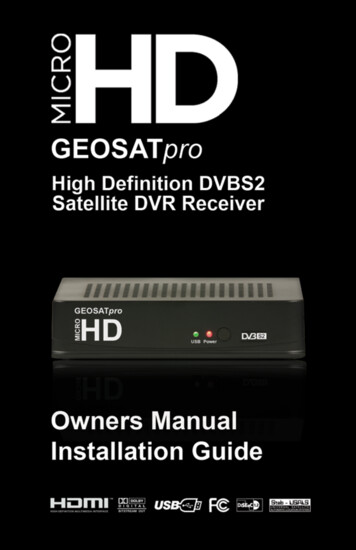
Owners ManualInstallation GuideVersion 2012.07.12microHD - Digital Video Recorder ReadyCongratulations on your purchase of a quality GEOSATpro product, themicroHD! This manual contains basic operation and installation instructions forthe microHD satellite receiver with digital video recording capability. If you haveany programming or operation questions, please contact your reseller for primarysupport.GEOSATpro stands behind our resellers and their customers to offer a one yearwarranty against any factory defect on retail purchases provided with originaldated proof of sale invoice or receipt. All warranty issues are to be processedthrough your reseller.Optional telephone technical support for your satellite system may be availableby GEOSATpro. Single satellite, fixed dish system owners are offered a telephonetechnical support option for 19.95 per year for same satellite reception. Motorizedor multi-satellite systems owners are offered an advanced support option for 29.95per service event with event expiration 30 days from the service initiation.Note: Save all original boxes, manuals, accessories and packagingmaterials in case it is necessary to return the merchandise.Before unpacking or assembly of any item, review the warranty,exchange and refund policies provided by your reseller.Materials contained in this installation manual are the property of:GEOSATpro8801 Washington Blvd., Suite 101Roseville, CA 95678888-483-4673http://www.GEOSATpro.com 2012 Satellite AV, LLC
Table of ContentsPageFCC Notice and ComplianceImportant Safeguards23microHD Features and SpecificationsReceiver Front / Rear PanelRemote Control LayoutBasic Remote Operation5898Installation GuideParts ListSite SurveyDish Mounting OptionsLNBF InstallationDish AimingConnect Receiver to a TVmicroHD Install Menu SetupLocate and Peak Satellite SignalCompleting the Install and Grounding11121215171819212326microHD FeaturesMenu ItemsChannel ManagerInstallationSystem Set-upToolsMedia Manager27323237535963FAQ - Frequently Asked Questions69Satellite Elevation Finder - Cut-out71www.geosatpro.comToll Free 888-483-4673
FCC NoticeDTV Transition Notice: After June 12th, 2009, a television receiver with only an analogbroadcast tuner will require a converter box to receive full power over-the-air broadcastsoriginating from a United States broadcaster with an antenna because of the Nation’stransition to digital broadcasting. Analog-only TVs should continue to work as before toreceive low power, Class A or translator television stations, cable, satellite TV services,gaming consoles, VCRs, DVD players, and similar products.Information about the DTV transition is available from www.DTV.gov or 1-888-CALLFCC, and from www.dtv2009.gov or 1-888-DTV-2009 for information about subsidizedcoupons for digital-to-analog converter boxes.This notice does not affect any programming received by this satellite set-top box. Yourdigital satellite receiver will continue to receive the digital satellite signals and provide theprogramming for display on both Analog Televisions and new DTV compatible monitorswith composite, Component YUV or S-Video input connections.This notice complies with Parts 15 and 54 of Title 47 of the Code of Federal Regulations:15.124 DTV Transition Notices by Manufacturers of Televisions and Related Devices.Warning: Changes or modifications to this unit not expressly approved by the partyresponsible for compliance could void the user’s authority to operate the equipment.NOTE: This equipment has been tested and found to comply with the limits for aClass B digital device, pursuant to Part 15 of the FCC Rules. These limits are designedto provide reasonable protection against harmful interference in a residential installation.This equipment generates, uses and can radiate radio frequency energy and, if notinstalled and used in accordance with the instructions, may cause harmful interferenceto radio communications. However, there is no guarantee that interference will not occurin a particular installation. If this equipment does cause harmful interference to radio ortelevision reception, which can be determined by turning the equipment off and on, the useris encouraged to try to correct the interference by one or more of the following measures: Reorient or relocate the receiving antenna Increase the separation between the equipment and receiver Connect the equipment into an outlet on a circuit different from that to which thereceiver is connected Consult the dealer or an experienced radio/ TV technician for helpNotice: Shielded cables must be used to ensure compliance with Class B FCC limits.Important Installation Notice: The Federal CommunicationsCommission (FCC) has ruled that local government zoning andhomeowner’s associations may not prevent the installation ofsatellite antennas one meter (39”) or smaller in diameter withina resident’s private use area, unless legitimate safety restrictionssuch as fire codes are in effect.For More information: http://www.fcc.gov/cgb/satellite.htmlFCC Part 15 CompliantB. GohlManufactured under License GEOSATpro
Important Safeguardswww.geosatpro.comToll Free 888-483-4673
Example of Antenna GroundingNEC, ANSI/NFPA 70Replacement Parts When replacement parts are required, be sure the servicetechnician has used replacement parts specified by the manufacturer or have thesame characteristics as the original part. Unauthorized substitutions may resultin fire, electric shock, or other hazards. Modification to the hardware or softwarewithout authorization by the manufacturer the will result in voiding any warranty.Service assistance may be arranged by contacting your reseller.Safety Check Upon completion of any service or repairs to this product, askthe service technician to perform safety checks to determine that the product is inproper operating condition.B. Gohl GEOSATpro
microHD Features Full HD 1080PFully compliant MPEG-2 MP@HL & MP@MLFully compliant MPEG-4 H.264/AVC Main Profile Level 3 & High Profile Level 4.1Fully compliant MPEG-1 Layer I & II & IIIVCM / MIS CapableSCPC & MCPC from C/Ku Band SatellitesUSALS/DiSEqC 1.2 Motor Control22KHz/DiSEqC 1.0/DiSEqC 1.1 Switch ControlFull Screen Signal Meter with Selectable Audio Signal AlertChannel Technical Parameter ScreenDigital Video Recorder (DVR) with Connected USB 2.0 Drive2TB FAT/NTFS Single Partition Drive SupportSimultaneous Recording of 2 Channels on Transponder, Watch a 3rd or PlaybackAutomatic Time Shift with Ability to Convert and Save to a DVR File30 Event Timers for Record and Channel ChangeTimers support Once, Daily, Weekly, Monthly16 Day EPG - Electronic Program GuideAuto Time Setting via SatelliteManual Time SettingVideo/Photos/Music Multi-Media Player: Slide Show, Music Lists, Repeat and FavoritesFirmware Upgrade Through USB2.0 PortChannel List Upgrade Through USB2.0 PortManual/Automatic Firmware Upgrade Via G19 KU @97W SatelliteManual/Automatic Channel List Upgrade G19 KU @97W Satellite Closed Caption Supported on HDMI: EIA-608/EIA-708 via OSDClosed Caption Supported on Composite Video Output: EIA-608 via VBIMulti-Lingual DVB Subtitle/TeletextTeletext/Subtitle Out Through OSD - Teletext Filter Conforms with ETS 300 472 StandardBlind Scan with Parameter LimitsManual Transponder ScanSingle and Multi-Satellite ScanDirect Channel PID EntryAutomatic Service ScanParent Lock for Channels and Menu Settings ZOOM In/Out FunctionPicture-In-Graphics FunctionOSD Languages: English, Spanish, RussianInternal Satellite/ Transponder/Channel - Add/Edit/Delete/SortTwo Free PC Based Channel Editors - 1. ALI Editor 2. Mediabox Editor StudioAuto Sleep Shut Offwww.geosatpro.comToll Free 888-483-4673
microHD SpecificationsSheet1Chipset and MemoryMain ProcessorCPUFlashRAMOperating ritesTimersElectronic Program Guide (EPG)Front PanelLED StatusIR SensorRear PanelLNB INHDMIRCA VideoAudioUSB 2.0DC INSerial InterfaceType:BitratePlug Connector TypeTunerInput FrequencyInput LevelSignal-to-Noise LevelAFCInput ImpedanceLNB PowerDemodulationSupported Modulation TypesSymbol rate QPSKSymbol rate 8PSKSymbol rate 16APSKRoll Off FactorReed SolomonCoding (FEC)QPSK Viterbirate8PSK16APSKB. GohlALI3601S SolutionDual Core 396MHz MHz MIPS Processor32MbytesDDR2 1G BitTDS12830005000103016 daysPower: Red, Green, USB: Connected, Recording50 Degree Beam Width @ 15 feetF-Type Female, 13VDC - Vertical, 18VDC - Horizontal 500mA,Current Protection (Thermal Reset)Version 1.3(Yellow), 1Vp-p @ 75 ohmsLeft (White) / Right (Red) , Unbalanced1.8V rms, Crosstalk -60dB via 3.5mm Jack500mA, File system: FAT, NTFS (support first partition)12VDC, 2000mA Max Current, 30mA Standby,6.3mm / 2.0mm JackRS-232 Serial bidirectional115,2 kBit/s max.4 Pin Connector - Internal PCB Mount950 2150MHz-65 -25dBm12 dB max /- 5 MHz75 OhmAuto / 14v / 18v / OFF, Max Current 500mAQPSK / 8PSK / H8PSK / 16APSK1 MSPS 45MSPS1 MSPS 45MSPS1 MSPS 45 MSPSDVB-S rolloff 35%, DVB-S2 rolloff: 20%, 25%, 35%188B 16BCCM1/4, 1/3, 2/5, 1/2, 3/5, 2/3, 3/4, 4/5, 5/6, 8/9, 9/10, Automatic3/5, 2/3, 3/4, 5/6, 8/9, 9/102/3, 3/4, 4/5, 5/6, 8/9, 9/10Page 1 GEOSATpro
Sheet1Switch / Motor Control22K Tone FrequencyDiSEqC ControlDiSEqC 1.2 PositionsUSALS Calculation RangeSatellite Video DecodingVideo Compression SupportAspect RatioVideo Resolutions - HDMIVideo Resolutions - CompositeSatellite Audio DecodingAudio Compression SupportAudio ModesSample Rates22KHz; 0.4 - 0.9VDiSEqC 1.0, 1.1, 1.2, USALS99 /- 70 degreesMPEG-1㸪MPEG-2㸪H.264/AVC4:3 / 4:3 LB / 4:3 PB / 16:9 / Auto480i, 480p, 576i, 576p, 720p, 1080i, 1080P@30, 1080P@60,Source, Native Monitor480i (continuous)MPEG Layer I, MPEG Layer II, MPEG1 Layer III㸪MP3Left, Right, Stereo, Mono44kHzMedia Player Video DecodingVideo Compression SupportVideo Formats and CodecsBMP, JPEG, AC3, AAC, AVI, MKV, MP4MPEG1/2/4 (M1V, M2V, M4V); MPEG1/2 PS (M2P, MPG);MPEG2 Transport Stream (TS, TP, TRP), VOB㸦free), AVI (free);Matroska, (MKV), MOV (H.264), MP4, MPEG1, MPEG2 MP@HL,MPEG4 SP@L3 to ASP@L5, H.264 HP@L4.1, H.263, XvidImage SupportAudio Formats and CodecsJPEG, BMPAAC, AAC , HE AAC, MPEG audio (MP1, MP2, MP3, MPA),WAV, OGG, Dolby Digital, LPCM, Dolby Digital (Pass-Through)Remote Control UnitIR Carrier FrequencyBatteriesEnvironment38Khz2 x 1.5V AAAAC Adapter InputAC Adapter OutputAC Adapter Max Power DrawAmbient Operational Temperature100 240VAC, 50 / 60Hz12Vdc, 2000mA24W Operation / 0.3 W Standby0 40 CHumidity Max Operational 95%Physical SpecificationSTB SizeSTB Weight5.5 in / 130mm (W) x 4.3 in / 110mm (D) x 1.3 in / 33mm (H)10.6oz / 0.3KgsCertification & LicensesFCC Part 15 ComplianceDolbyHDMIETL SafetyPage 1www.geosatpro.comToll Free 888-483-4673
Front Panel1 Power Indicator LED: Green - Operation / Red - Standby mode2 USB Indicator LED: Green - Connected / Red - Recording3 IR Sensor - Remote Control Signal ReceptorRear PanelConnect the satellite dish LNBF coax cable to Satellite INConnects composite VIDEO and L/R Audio to TV or other equipmentConnects HDMI Video Audio to TV or other equipmentConnects USB 2.0 memory device for DVR / multi-media / upgrade ofFirmware or Channel List 5V/500ma5 DC power plug connection (12VDC, 2000mA)1234B. Gohl GEOSATpro
Remote Control Unit151617181920212223242526272829301Select Standby or Operation Mode2345678Display Signal MeterSelect the Favorite Channel List ModeDisplay Electronic Program GuideDisplay the Main Menu ScreensChange Channels or Navigate the MenuIncrease / Decrease the VolumeSelect Alternative Language / Audio Modeor Sound Tracks91011121314Select Closed Caption On/OffReturn to Last ChannelMagnify an Area of the ScreenMute or Enable AudioSelect Satellite for Channel AvailabilityDisplay the Information Program Banneror 2x for Channel InformationReturn to the Previous Menu Screen or Exit to Channel Viewing ModeDisplay the Channel List or to Accept an Item in the MenuAdjust Volume, Navigate the Menu CursorChange Channels Selection Up / DownDisplay DVR Recordings ListSelect Media Player Mode for Videos, Photos, MusicDisplay Event Timer ListSelect to View TV or Listen to Radio ChannelsDVR: Scan Rewind in 2x, 4x, 8x, 16x, 32x speedsDVR: Scan Forward in 2x, 4x, 8x, 16x, 32x speedsList Page Up and DVR:List :Page Down and DVR:Freeze Video and DVR PauseDVR: Start Record FunctionDVR: Stop Playback or Stop Record FunctionDVR: Play Recording or Play File Functionwww.geosatpro.comToll Free 888-483-4673
10Basic Remote OperationTurn the microHD On or Off using thePOWER button.Change channels by entering thechannel on the numeric keypad or bypressing UP/DOWN keys. Press thePREVIOUS CHANNEL key to returnto the last channel.Select to view TV or to listen to Radioby pressing the TV/Radio key.Adjust the volume by pressing theVOLUME UP/DOWN key. Volume isalso controlled by the TV.Mute the volume by pressing the MUTEkey. Return to normal volume setting bypressing MUTE or the VOLUME UP/DOWN key.View a Programming Guide (if availableby the broadcaster) with program listingsand descriptions by pressing the EPG(ELECTRONIC PROGRAMMINGGUIDE) button.View the Channel Banner displaying thechannel name, channel number, programinformation, by pressing the INFObutton. View a list of available channels by pressing the LIST/OK button.View a full screen meter by pressing the SIGNAL button.RecordingConnect an USB drive to provide the DVR recording and Timeshift feature.Start recording by pressing the RECORD key, PAUSE keyTo set up a future recording using the TIMER key. If the channel provides EPG,press the EPG key, highlight the desired program and press the GREEN recordbutton. The program record date, start and duration times will be automaticallyset.Stop recording by pressing the STOP key.To watch a previously recorded program,press the DVR List. Select the program toview and press the OK key.B. GohlNavigationButtons GEOSATpro
11Installation GuideSave all original boxes, manuals, accessories and packagingmaterials in case it is necessary to return the merchandise.Before unpacking, assembly or operation of any item, reviewthe reseller’s warranty, exchange and refund policy.This guide is intended for an individual experienced in performing the varioustasks described, including: Determining an antenna location with a view of the satellites positions. Climbing a ladder and working on your roof. Observing safe working practices around heights and electrical hazards. Determining if water pipes, gas lines or wires are hidden before drilling. Using a power drill to drill holes into your house. Routing cable through walls, crawl spaces or attics. Safely lifting and securing the 25 lb. antenna assembly. Grounding the system as recommended in the National Electric Code.If you don’t feel completely comfortable with these tasks, you may considercontracting the installation with a local satellite technician.Web site http://www.FTAinstall.com provides a free referral service for localinstallers. Please visit today!To simply a first-time install, do not use pre-wire or previously usedcoax cables and unknown switches. Do not attempt to use splitters forsimultaneous viewing on multiple receivers. Splitters typically do notsupport multiple FTA receivers.www.geosatpro.comToll Free 888-483-4673
12Free To Air System Parts ListInstallation KitSatellite ReceiverTools RequiredSocket SetDrill and Bits90cm Dish and LNBFPhillips ScrewdriverHammerTape MeasureSite SurveyIf you feel comfortable with drilling holes in the wallsand/or roof of your home, climbing ladders, attachingwires to the ground according to NEC and local codesand following step-by-step instructions, you mightconsider installing your own system.The installation does require precise tuning and a greatdeal of patience to correctly install.Have you recently installed a light switch, ceiling fan,basketball hoop and programmed a VCR? If not, thisproject might not be a good time to hone your mechanicaland electrical skills!To contract a local installer visit: www.FTAinstall.comB. Gohl GEOSATpro
13Where Are The Satellites?Before assembling any equipment it is important to verify that the installationlocation has a suitable area to safely and securely mount the satellite dish and havea clear line of site to receive the satellite signal. The satellite dish must be pointeddirectly at the satellite, with NO obstructions between the two. This means NOtrees and NO buildings. Satellite signals will not pass through leaves, limbs, soconsider future tree growth, house remodeling or additions and new constructionin your area. The dish cannot be installed indoors!In North America, the satellite dish will be pointed towards the South, Southeast orSouthwest. Satellites are located directly over the equator and are approximately23,000 miles away! Before you start, you will need to decide what satellite thatyou wish to receive and if it possible to “see” the satellite from your location.If you wish to receive a specific channel, often the broadcaster’s web site willprovide the satellite information.If you are unsure what satellite to aim at, use a web site such as www.lyngsat.comor other satellite channel list to find channels that you are interested in receiving.Many satellite systems are installed to receive channels from Galaxy 19 KU atorbital position 97W. This is the most popular satellite in North America withhundreds of free TV and Radio channels from around the world.www.geosatpro.comToll Free 888-483-4673
14Please note: 97W is not the compass reading! 97W is the assigned orbital slotwhich corresponds with the earth’s Longitude. The Galaxy 19 satellite is just eastof DirecTV’s main satellite at 101W.Target Satellite Compass (Azimuth) Reading:How High Up in the Sky are the Satellites?Depending on where you live, most NorthAmerican satellites will be at an elevationangle between 30 and 60 degrees in NorthAmerica. Northern Canada and Hawaiianelevations can be as low as 10 degrees, butin Central American and the Caribbean, thedishes are often aimed almost straight upbetween 70 - 90 degrees!Target Satellite Dish Elevation Angle:Where to Mount the Dish?Use the aiming coordinates included with this system or found at http://www.GeoSatFinder.com along with a compass and the Site Check Angle Finder foundon the last page of this manual to locate a suitable area for mounting the dish.While facing south, hold the compass levelin the palm of your hand. With the red needlepointed exactly at North, reference thecompass reading for your target satellite. Arethere any obvious obstructions? If the line ofsight appears clear, continue to the check theelevation angle.CompassB. Gohl GEOSATpro
15Sight along the top edge of the elevationangle finder with the weighted stringregistering the correct elevation angle foryour target satellite. Is the line of sight clearwith no branches, limbs or tall buildings?Elevation Angle FinderIf you are mounting your dish on a motor,consult with the motor installation manualfor recommendations on dish placementand mounting.Be sure to perform a site survey to determine the best location to see as manysatellites as possible. The satellites are in an arc that begins at the easternhorizon reaching to the highest point directly south then extending to the westernhorizon.Dish Mounting OptionsWe recommend ground mounting a fixed satellitedish on a 1 5/8” heavy wall galvanized post setin cement. Attach a bolt or muffler clamp tothe bottom of the post to prevent the post fromtwisting in the hardened cement. These itemsare readily available at any hardware store.Filling the post with a wet cement mixturewill provide greater rigidity. The post mustbe perfectly plumb, level on all sides. Postsstanding higher than 7 feet should be stabilizedto prevent movement during high winds. Thepost should be installed in advance of the installas the cement can take 24 - 48 hours to set. DONOT install the dish on a wooden 4” x 4” postor
Single satellite, fixed dish system owners are offered a telephone technical support option for 19.95 per year for same satellite reception. Motorized or multi-satellite systems owners are offered an advanced support option for 29.95 per service event with event expiration 30 days from the service init