Transcription
5 July 2018HOW TO CONFIGURE ISPREDUNDANCYIN NGX R65 - R77.30VERSIONS
2018 Check Point Software Technologies Ltd.All rights reserved. This product and related documentation are protected by copyright anddistributed under licensing restricting their use, copying, distribution, and decompilation. No partof this product or related documentation may be reproduced in any form or by any means withoutprior written authorization of Check Point. While every precaution has been taken in thepreparation of this book, Check Point assumes no responsibility for errors or omissions. Thispublication and features described herein are subject to change without notice.RESTRICTED RIGHTS LEGEND:Use, duplication, or disclosure by the government is subject to restrictions as set forth insubparagraph (c)(1)(ii) of the Rights in Technical Data and Computer Software clause at DFARS252.227-7013 and FAR 52.227-19.TRADEMARKS:Refer to the Copyright page http://www.checkpoint.com/copyright.html for a list of ourtrademarks.Refer to the Third Party copyright notices http://www.checkpoint.com/3rd party copyright.htmlfor a list of relevant copyrights and third-party licenses.
Important InformationLatest SoftwareWe recommend that you install the most recent software release to stay up-to-datewith the latest functional improvements, stability fixes, security enhancements andprotection against new and evolving attacks.More InformationVisit the Check Point Support Center http://supportcenter.checkpoint.com.Latest Version of this DocumentDownload the latest version of this document in PDF tation download?ID 12314.To learn more, visit the Check Point Support Check Point is engaged in a continuous effort to improve its documentation.Please help us by sending your commentsmailto:cp techpub feedback@checkpoint.com?subject Feedback on How ToConfigure ISP Redundancy .Revision HistoryDateDescription05 July 2018Improved formatting and document layoutAdded Gaia OS to Supported Operating Systems (on page 5)15 February 2017Improved format and layout29 September 2015Clarification on Additional VPN Considerations (on page 17)14 August 2014 To see some related documents you must log in to the User Center("Related Documents and Assumed Knowledge" on page 6) The location of the ISP Redundancy configuration page inSmartDashboard depends on the release ("Initial Configuration" onpage 7)22 April 2012First release of this document
ContentsImportant Information. 3How To Configure ISP Redundancy in NGX R65 - R77.30 versions . 5Objective . 5Supported Versions . 5Supported Operating Systems . 5Supported Appliances . 5Before You Start . 6Related Documents and Assumed Knowledge . 6Impact on Environment and Warnings . 6Configuring ISP Redundancy . 7Initial Configuration . 7Adding ISP Links . 11Configuring DNS Proxy . 12Tracking . 13VPN . 14Registering the Domain and Obtaining IP Addresses. 14Allowing Incoming and Outgoing Connections . 15Alternative Deployment Options . 16ISP Redundancy Script . 17Additional VPN Considerations . 17Completing the Procedure . 18Verifying the Procedure . 18Traffic Behavior . 18Index. 19
How To Configure ISP Redundancy in NGX R65 - R77.30 versionsHow To Configure ISP Redundancy inNGX R65 - R77.30 versionsObjectiveThis document describes how to configure ISP Redundancy.Supported Versions R77.XX R76 R75.XX R71.XX R70.XX NGX R65Supported Operating SystemsISP Redundancy is supported on these operating systems: Gaia (only R75.40 - R77.30) SecurePlatform (NGX R65 - R77.30) Red Hat Linux 7.2 or above (only for NGX R65) IPSO 3.8.2 or above (NGX R65 - R77.30)Note - Consult the Release Notes of your installed version(s) before you configure ISPRedundancy.Supported AppliancesAll Check Point appliances that support Security Gateway.How To Configure ISP Redundancy 5
Before You StartBefore You StartRelated Documents and Assumed KnowledgeNote - To see Advanced access documents, you must have a valid Support contract and sign in tothe User Center https://usercenter.checkpoint.com. General access documents are public. sk25129 http://supportcontent.checkpoint.com/solutions?id sk25129 (General access) –Supported platforms for ISP Redundancy sk23630 http://supportcontent.checkpoint.com/solutions?id sk23630 (Advanced access) –Advanced configuration options for ISP Redundancy sk32225 http://supportcontent.checkpoint.com/solutions?id sk32225 (Advanced access) –Configuring ISP Redundancy so that certain traffic uses specific ISP sk31530 http://supportcontent.checkpoint.com/solutions?id sk31530 (General access) –ISP Redundancy Link Interface cannot be created sk40958 http://supportcontent.checkpoint.com/solutions?id sk40958 (Advanced access) –How to verify the status of ISP Redundancy links on command line sk25152 http://supportcontent.checkpoint.com/solutions?id sk25152 (Advanced access) –Static NAT fails for outgoing connections through gateway with ISP Redundancy in LoadSharing mode A general knowledge of Gateway and Security Management Server management, includingcreating and modifying gateway objects, updating interface topology, and static and hide NATconfiguration. A working knowledge of DNS is also recommended.Impact on Environment and Warnings None specifically, but care should be taken when one ISP link offers significantly higherbandwidth than the other. If this is the case, the FWDIR/bin/cpisp update script on theSecurity Gateway or each Cluster Member should be modified to prevent the low bandwidthISP from being overwhelmed by normal traffic levels.How To Configure ISP Redundancy 6
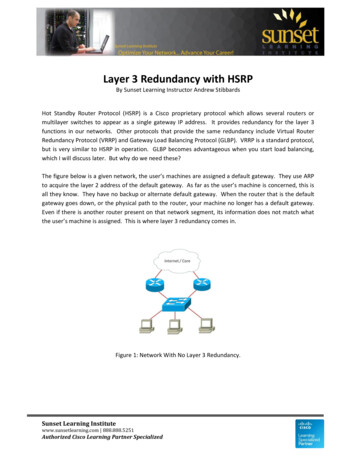
Configuring ISP RedundancyConfiguring ISP RedundancyISP Redundancy ensures reliable outbound Internet connectivity for a single Check Point SecurityGateway or Check Point Cluster. It enables connection through redundant ISP connections.Before you begin to setup up ISP Redundancy, configure the Security Gateway or Cluster objectwith two external links defined, one for each of the ISPs. This is the simplest deployment option.Other options are discussed later.Initial Configuration1. Connect with SmartDashboard to the applicable Security Management Server or DomainManagement Server.2. Open the Security Gateway or Cluster Object.3. Go to the ISP Redundancy settings based on your version of the SmartDashboard:SmartDashboard versionLocationR76 and R77.XOther ISP RedundancyR65, R70, R71 and R75Topology ISP Redundancy4. Select Support ISP Redundancy.Example for R76 and R77.X SmartDashboard:How To Configure ISP Redundancy 7
Configuring ISP RedundancyExample for R65, R70, R71 and R75 SmartDashboard:5. Select the ISP Redundancy mode, which controls the behavior of outgoing connections. Thereare two options available: Load Sharing: New outgoing connections are distributed randomly between the ISP linksand remain with the assigned link until completion. Should one of the ISP links fail, all newconnections are assigned to the link that remains.Incoming connections also benefit from the Load Sharing method. In the case of returnedpackets for a connection initiated outbound, the traffic uses the same ISP link that is usedto initiate the connection. Connections that are initiated inbound can use either link toaccess resources. The Check Point Security Gateway or Cluster can answer DNS requestsfor internal servers with addresses from both ISPs due to order alternation.How To Configure ISP Redundancy 8
Configuring ISP RedundancyExample for R76 and R77.X SmartDashboard:Example for R65, R70, R71 and R75 SmartDashboard:How To Configure ISP Redundancy 9
Configuring ISP Redundancy Primary/Backup: New connections use the Primary link as its ISP. In the event of Primarylink failure, connections switch to the Backup link, and any new connections use theBackup link as well. Upon recovery of the Primary link, any new outgoing connections beginto use it again while the existing connections on the Backup link continue to use it untilcompletion.Example for R76 and R77.X SmartDashboard:Example for R65, R70, R71 and R75 SmartDashboard:How To Configure ISP Redundancy 10
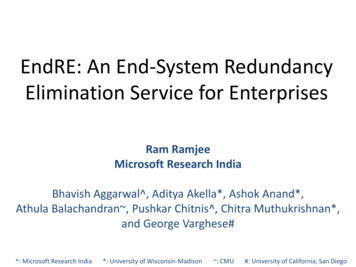
Configuring ISP RedundancyAdding ISP LinksOnce the ISP Redundancy mode is selected, add the ISP links.1. In the ISP Links in order of priority section, click Add.The ISP Link window pops up.Click the General tab.a) In the Name field, enter the name for the ISP link of your choice. For example: ISP1.b) From the Interface pull down menu, select the external interface that connects to that ISP.c) In the Next Hop IP address field, enter the IP address of the gateway for the selected ISP. Ifthe interface is a point-to-point interface, leave this field blank.Example:2. Click the Advanced tab.Here you can define hosts used to perform status checks for this ISP link. Security Gatewaysends ICMP Echo Requests to the selected hosts. Failure to respond results in link downstatus for this ISP. If no hosts are selected, then by default, Security Gateway sends ICMP EchoRequests to the next hop IP address to confirm link status.3. Click OK.4. Repeat Step 1-3 to add the second ISP link.How To Configure ISP Redundancy 11
Configuring ISP RedundancyConfiguring DNS ProxyIf behind the Security Gateway there are internal servers that accept inbound traffic, then youneed to enable and configure the DNS proxy feature. This lets the Security Gateway intercept DNSqueries to your internal servers that arrive at the Security Gateway's external interfaces, andrespond to them: In the Primary/Backup Redundancy mode, the Security Gateway responds to DNS queries withthe IP address of the interface connected to the active ISP link. In Load Sharing Redundancy mode: If both ISP links are active, the Security Gateway responds with IP addresses of theinterfaces connected to both ISP links. If one ISP link is down, the Security Gateway responds with the IP address of the interfaceconnected to the active ISP link.Note - For external access to your internal resources to work, each internal server (that isaccessible externally) requires an external IP address assigned for each ISP. Static NAT entriesmust be configured to translate the external IP address to the real IP address of the internalserver.Procedure:1. In the DNS Proxy section, select Enable DNS proxy.2. Click Configure.The DNS Proxy window pops up.How To Configure ISP Redundancy 12
Configuring ISP Redundancy3. Click Add.The Host's Addresses window pops up.a) In the Host Name field, enter the host name of your internal server. For example:www.example.comb) In the Address in ISP 'ISP1' field, enter the IP address of your internal server for thecorresponding ISP link.c) In the Address in ISP 'ISP2' field, enter the IP address of your internal server for thecorresponding ISP link.d) Click OK.4. In the DNS TTL field, enter the expected time it takes for the Security Gateway to reply. Thissetting specifies how long the information in the DNS reply may be cached.5. Click OK.TrackingIn the Tracking section, you can select how ISP Redundancy link failures and recoveries arereported. The default is a Popup Alert in the SmartView Monitor for failures and a log entry whenthe link recovers.Default options:Menu options:How To Configure ISP Redundancy 13
Configuring ISP RedundancyVPNThe selection of Apply settings to VPN traffic carries over the configuration on this page to theIPSec VPN Link Selection page.Important - The ISP Redundancy settings override any existing VPN Link Selection setting whenthis option is enabled.Example:Registering the Domain and Obtaining IP AddressesThe Security Gateway, or a DNS Server behind it, must respond to DNS queries and resolve IPaddresses that belong to your internal servers that are publicly accessible. A dedicated DNSserver is not required, because the Security Gateway can be configured to intercept the DNSqueries ("Configuring DNS Proxy" on page 12).To Register the Domain and Obtain IP Addresses:1. Obtain one external IP address from each ISP for the DNS Server, or the Security Gateway thatintercepts DNS queries. If external IP addresses are not available, make the DNS Serveraccessible with Manual NAT.2. Register your domain with both ISPs.3. Inform both ISPs of the two IP addresses of the DNS Server that respond to DNS queries foryour domain.4. To allow incoming connections, obtain one external IP address from each ISP for each internalserver that is publicly accessible.How To Configure ISP Redundancy 14
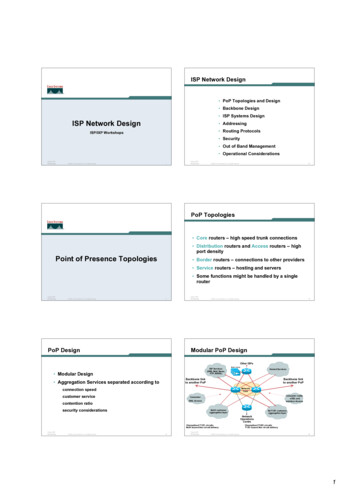
Configuring ISP RedundancyAllowing Incoming and Outgoing Connections1. Define Automatic Hide NAT on network objects that initiate the outgoing connections:a) Edit the Network Object that represents your internal network, on which your internalservers are connected.b) In the General tab of the Network Properties window, select Add Automatic AddressTranslation Rules.c) Select the Hide Translation Method and then the Hide behind Gateway option.Example:2. To allow incoming connections through both ISP links to your internal servers and the DNSServer, define Manual Static NAT rules.If you have only one external IP address from each ISP, and those external IP addressesbelong to the Security Gateway, you can allow specific services for specific servers.How To Configure ISP Redundancy 15
Configuring ISP RedundancyIn the example below, incoming HTTP connections from both ISPs reach the internal webserver 10.0.0.2 (accessible publicly at 192.168.1.2 and 172.16.2.2), and the DNS connectionsfrom both ISPs reach the DNS server 10.0.0.3 (accessible publicly at 192.168.1.2 and172.16.2.2):OriginalPacketTranslated PacketSourceDestination ServiceSourceDestinationServiceAny192.168.1.2 http10.0.0.2Incoming Web ISP A OriginalAny172.16.2.210.0.0.2Incoming Web ISP B OriginalAny192.168.1.2 domain udp10.0.0.3Incoming DNS ISP A OriginalAny172.16.2.210.0.0.3Incoming DNS ISP B Originalhttpdomain udpIf you have an external IP address from each ISP for each publicly accessible server (inaddition to the IP addresses that belong to the Security Gateway), you can allow any service toreach your internal servers, if you give each internal server an internal IP address. In the NATrulebase, configure: Use the external IP addresses in the Original Packet Destination column. Use the internal IP address in the Translated Packet Destination column. Select Any as the Original Packet Service column.Note - If when you use Manual NAT, automatic ARP does not work forthe NATed addresses. On Gaia, SecurePlatform, and Linux OperatingSystems, use the local.arp file as described in the ons?id sk30197. On IPSOOperating System, configure the Proxy ARP.Alternative Deployment Options The simplest and most common ISP Redundancy deployment is with two external interfacesdefined, one for each ISP. If only one external interface is available, different subnets can beconfigured for each ISP. With this deployment, both ISPs are connected to the same interface,but with different next hops, usually through a switch. If there is one main ISP and a dial-up connection for the backup, connect one externalinterface to each ISP. Use the Primary/Backup Redundancy mode to specify that the dial-upconnection should only be used, if the Primary link is down. In a cluster, each cluster member requires a corresponding external link for each ISP. Followthe cluster configuration guidelines and ensure the physical external interfaces belong to thesame subnet as the Cluster VIP address.How To Configure ISP Redundancy 16
Configuring ISP RedundancyISP Redundancy Script The ISP Redundancy script ( FWDIR/bin/cpisp update) on the Security Gateway isexecuted whenever a Security Gateway starts, or an ISP link state changes. The primarypurpose of this script is to change the default route for the Security Gateway according towhich ISP links are currently available. The ISP Redundancy script can also be used to define advanced options, such as to change linkstatus of a backup dial-up connection when the Primary ISP link becomes active again, or SAMrules to block non-essential traffic when the Primary ISP link is down.Important - Before you modify this script, make a backup copy. Run the cpstop command beforeyou modify the script (in cluster, this can cause a failover), and the cpstart command after yousave the changes.Additional VPN Considerations The ISP Redundancy script ( FWDIR/bin/cpisp update) must be present on the SecurityGateway. In a Primary/Backup Redundancy mode configuration, the interface connected to the PrimaryISP must be defined as the Primary IP address. When ISP Redundancy is configured, the default setting in the IPSec VPN Link Selectionpage of the Security Gateway object uses the ongoing probing. However, link selection onlyprobes the ISPs configured in the ISP Redundancy page. This feature enables connectionfailover of the VPN tunnel, if connectivity to one of the Security Gateway's interfaces fails. The ability of a third party VPN to recognize ISP link failures depends on its configuration.Problems can arise when the third party is unable to recognize traffic from the Secondary ISPlink as traffic that originates from the Check Point Security Gateway, or cannot detect linkfailure and continues to send encrypted traffic to the failed link.Refer to the Link Selection chapter of the VPN Administration Guide for more information.How To Configure ISP Redundancy 17
Completing the ProcedureCompleting the Procedure1. Save the changes you made in SmartDashboard.2. Install the policy.Verifying the ProcedureISP Redundancy link status can be manually changed with the fw isp link command.On the Security Gateway, run:fw isp link Name of ISP Link {up down}On the Management Server, run:fw isp link IP Address of Security Gateway Name of ISP Link {up down}The c
5 july 2018 how