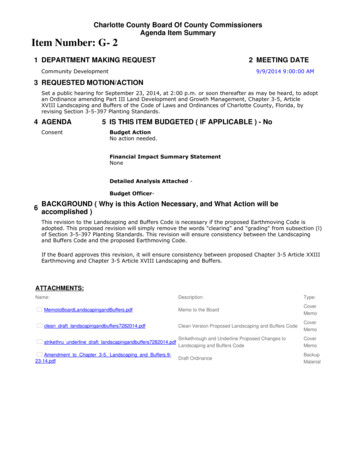
Transcription
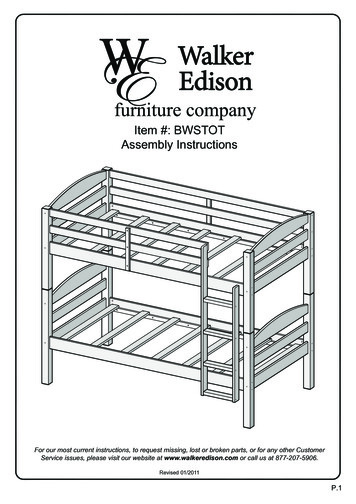
Item #: BWSTOTAssembly InstructionsFor our most current instructions, to request missing, lost or broken parts, or for any other CustomerService issues, please visit our website at www.walkeredison.com or call us at 877-207-5906.Revised 01/2011
Instruction ManualIMPORTANT INFORMATIONREAD BEFORE ASSEMBLING THIS PRODUCTFollow the information on the warning labels found on the bunk bed and on the packaging.Do not remove the warning label from the bed.Use only a mattress with the dimensions 74-75 in. L x 37.5-38.5 in. W x 6 in. H on the upperbunk. A mattress with the same dimensions is also recommended for the lower bunk.The surface of the mattress must be at least 5 in. (127mm) below the upper edge of theguardrails. Mattress must not exceed the maximum thickness of 6 in.Always use the recommended size of mattress or mattress support, or both, to help preventthe likelihood of entrapment or falls.The use of a water or sleep flotation mattress is prohibited.Replacement parts, including additional guardrails, may be obtained from any of WalkerEdison Furniture Company’s dealers or by contacting us online at www.walkeredison.com.DO NOT use substitute parts. Contact the manufacturer or dealer for replacement parts.Always use guardrails on the upper bunk. If the bunk bed will by placed next to a wall, theguardrail running the full length of the bed should by placed against the wall to prevententrapment between the bed and the wall.Periodically check that the guardrails, ladders and other components of the bed are in theirproper position, free from damage, and that all connectors are tight.Always use the ladder to access the upper bunk.DO NOT allow children under 6 years of age to use the upper bunk.DO NOT allow horseplay on or under the bed. Prohibit jumping on the bed.Prohibit more than one person on the upper bunk.The use of a night light may provide an added safety precaution for a child using the upperbunk.STRANGULATION HAZARD – Never attach or hang items to any part of the bunk bed thatare not designed for use with the bed; including but not limited to hooks, belts and jumpropes.Keep these instructions for future reference.
Parts List
Hardware ListWood joint connectorWood joint connectorFlat head wood screwFlat head wood screwWood dowelWood dowelHex key
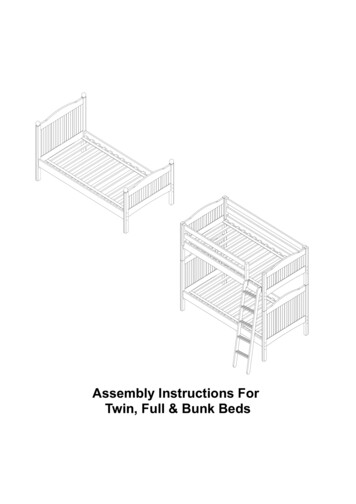
Assembly OptionsTwin over Twin Bunk BedConversion intoTwo Single Twin Beds
Insert wood dowels (7) into slats (F,S,G).Insert wood dowels (7) into guardrails (M,N) and ladder rungs (Q).
Attach legs (A,B) to slats (F,S,G) using wood joint connectors (3). Attach legs (A,C) to slats (F,S,G) using woodjoint connectors (3). Only two wood joint connectors (3) will be used at each leg.Attach first set of legs (D,E) to slats (F,S,G) using wood joint connectors (3). Attach second set of legs (D,E) toslats (F,S,G) using wood joint connectors (3). Insert wood dowels (6) into both sets of legs (D,E).
IInsert barrel nuts (8) into crossbeams (I,K). Attach crossbeams (I,K) to first set of legs (D,E) using jointconnectors (1). Joint connectors (1) will screw into barrel nuts (8).IInsert barrel nuts (8) into crossbeams (I,K). Attach second set of legs (D,E) to crossbeams (I,K) using jointconnectors (1).
Secure mattress supports (L) to the bed assembly from the previous step using flat head wood screws (4).Use spacers (U) as guides to space mattress supports (L) evenly.Insert barrel nuts (8) into crossbeams (H,J). Attach crossbeams (H,J) to legs (A,C) using joint connectors (1).Joint connectors (1) will screw into barrel nuts (8). Secure guardrails (M) to leg (A) using wood joint connectors(3). Wood dowels (7) will be in the bottom holes of guardrails (M) and wood joint connectors (3) will screw intothe top holes of guardrails (M).
Insert barrel nuts (8) into crossbeams (H,J). Attach legs (A,B) to crossbeams (H,J) using joint connectors (1).Secure guardrails (M) to leg (B) using wood joint connectors (3).Secure mattress supports (L) to the bed assembly from the previous step using flat head wood screws (4).Use spacers (U) as guides to space mattress supports (L) evenly.
JMMHAttach guardrails (N) to leg (A) using wood joint connectors (3). Attach first guardrail support (R) to crossbeam(H) and guardrails (N) using flat head wood screws (5). Attach second guardrail support (R) to crossbeam (J)and guardrails (M) using flat head wood screws (5).To build the ladder, attach ladder side rails (O,P) to ladder rungs (Q) using wood joint connectors (2).
6666Carefully lift and place the upper bunk assembly onto the lower bunk assembly using wood dowels (6) asguides.
IAttach the ladder to the bunk bed assembly using wood joint connectors (2).Option AFinal Assembly
Option BConversion into Two Single Twin Beds
Loosen the appropriate hardware and remove the ladder from the bunk bed assembly.
Carefully lift the upper bunk off of the lower bunk.
BAACLoosen the appropriate hardware of the upper bunk so that the guardrails and leg assemblies are no longerconnected to the bed assembly.
Insert barrel nuts (8) into either end of crossbeams (H,J). Attach legs (A,B) and legs (A,C) to crossbeams (H,J)using joint connectors (1). Joint connectors (1) will screw through the bottom set of holes on each leg and intobarrel nuts (8).Option BFinal Assembly
Instruction Manual IMPORTANT INFORMATION READ BEFORE ASSEMBLING THIS PRODUCT Follow the information on the warning labels found on the bunk bed and on the packaging. Do not remove the warning label from the bed. Use only a mattress with the dimensions 74-75 in. L x 37.5-38.5 in. W x 6 in. H on the upper bunk.File Size: 2MBPage Count: 18