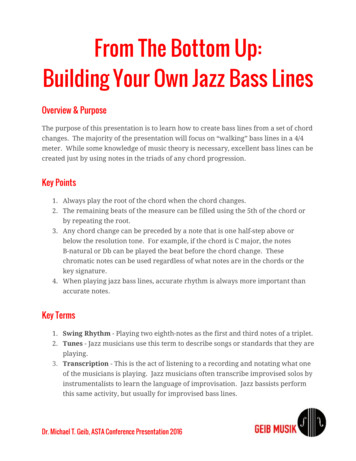
Transcription
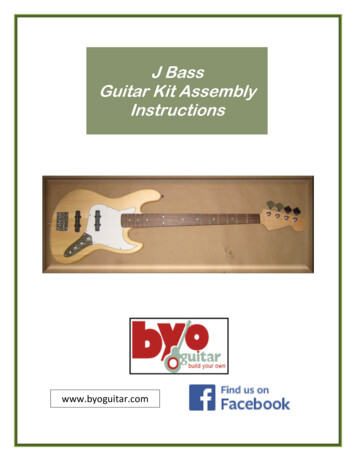
J BassGuitar Kit AssemblyInstructionswww.byoguitar.com
IntroductionWARNINGSome dust created by power sanding, sawing, grinding, drilling, and other construction activities containschemicals known to the State of California to cause cancer, birth defects or other reproductive harm.Some examples of these chemicals are: Lead from lead-based paints. Crystalline silica from bricks, cement, and other masonry products. Arsenic and chromium from chemically treated lumber.Your risk from these exposures varies, depending on how often you do this type of work. To reduce yourexposure to these chemicals: work in a well ventilated area, and work with approved safety equipment,such as those dust masks that are specially designed to filter out microscopic particles.WarningAlways wear safety glasses or goggles when operating equipment. Everyday glasses or reading glasses arenot safety glasses. Be certain the safety glasses you wear meet the appropriate standards of the AmericanNational Standards Institute (ANSI). Because there are various ways to cut and join wood, you can makesubstitutions for the methods stated in this manual. We try to suggest the easiest methods possible.However, only you know your skills with each piece of machinery. Never compromise your safety by usinga cutting method with which you are not comfortable. Instead, find an alternative approach that will yieldthe same result.WarningThese instructions assume that you are familiar with the safe operation and use of woodworking machineryand woodworking tools, and understand the techniques used to assemble this project. If you do not qualifyfor both of these criteria, STOP building this project for your own safety. Read and understand the owner’smanual for the machinery you intend to use, take a woodworking class or visit your local library for moreinformation. Woodworking machinery and tools are inherently dangerous because they use sharp edgesthat can and will cause serious personal injury including amputation and death. Do not underestimate theability of these tools and machinery to cause injury. Never operate any tool without all guards in place andalways wear approved safety glasses. For your own safety, please heed this warning.J Bass Intro - 1 -
IntroductionContents . Error! Bookmark not defined.12Introduction . - 3 1.1Material Check List . - 5 -1.2Additional tools/materials required: . - 7 -Mockup and Fit Check . - 1 2.1Check Guitar Body & Neck mounting holes. - 1 -2.1.1Drilling the Mounting Holes in the Guitar Body . - 1 2.2Checking the Mounting Holes in the Neck . - 2 2.2.1Drilling Mounting Holes in the Neck . - 2 2.3Check the Neck to the Body Fit . - 2 2.4Fit check & alignment of the Pickguard and the Audio Controls (items 2 & 3 onmaterials list) . - 3 -32.5Fit check the Bridge . - 3 -2.6Check Strap Pins . - 4 -2.7Check Tuner Alignment . - 4 -2.8String Tee Position . - 4 -2.9Mockup and Fit Check complete! . - 4 -Finish . - 1 3.1Finish Application Steps . - 1 -3.1.1Solid Color finish: . - 1 3.1.2Pigmented Translucent, Gel stain or alcohol dye finish:. - 2 3.1.3Penetrating Stain or water based dye finish: . - 2 3.2Explanation of Sequence Steps: . - 2 3.2.1Sanding the Body and Neck . - 2 3.2.2Appling Grain Filler . - 3 3.2.3Applying Sanding Sealer . - 3 3.2.4Solid Color Primer . - 3 3.2.5Burst and Translucent finishes . - 3 3.2.6Clear Top coats. - 4 3.2.7Buff finish . - 4 4.1Attach the Neck to the Body . - 1 4.2Installing Component Wiring & Installation. - 1 -4.2.1Preparation & Installation of the Pickups and Audio Panel . - 2 4.2.2Bridge & Frame Ground Wire Installation . - 3 4.3Installing the Nut. - 3 J Bass Intro - 2 -
Introduction5.4.4Installing the Tuners. - 4 -4.5Install the Strings. - 4 -4.6Installing the Strap Pins. - 4 -4.7Installing the String Retainer. - 5 -Setup . - 1 5.1Adjust the Guitar Neck: Truss Rod . - 2 -5.1.1Adjustment Check . - 2 5.1.2Adjustment. - 2 5.2Bridge Saddle . - 2 5.2.1Checking String Height . - 3 5.2.2Bridge Saddle Adjustment. - 3 5.3Nut Action . - 3 5.3.1Measurement. - 3 5.3.2Nut Adjustment . - 3 5.4Pickup Height . - 4 5.4.1Treble (G string) adjustment: Neck pickup . - 4 5.4.2Bass (E string) adjustment: Neck pickup . - 4 5.4.3Adjustment of the Bridge Pickup . - 4 5.5Intonation . - 4 5.6String Lubrication . - 5 -5.7 Other Hints . - 5 -1 IntroductionThank you for purchasing a BYOGuitar.com guitar kit. This kit includes everything you need to build acomplete custom guitar. In addition to the construction of your guitar, you will need to consider thefinish – natural, solid color and possibly a design that will make your guitar unique. We suggest you dosome research to determine your finish preferences. Procuring the required finishing materials,TIP: Get some finishing ideas by visiting BYOGuitar.com and BYO Guitar on ml)especially if they have to be ordered, will allow expedite your guitar project.We carry a full line of finishing products that give you the beautiful finish you are looking for, whether aclear natural finish or a bold, colorful finish. We also carry an instructional DVD made by Behlen that willgive you step by step instructions to help you achieve the look you want for your custom guitar.J Bass Intro - 3 -
IntroductionThese instructions assume you are familiar with the anatomy of a guitar. Refer to Figure 1 for many ofthe terms used in the assembly of your guitar.Fig 1 Major Components in Your J Bass Guitar KitJ Bass Intro - 4 -
Introduction1.1 Material Check ListIn preparation for the building of your guitar, all required material should be checked both for type andquantity. Use the following check list to ensure all piece parts are included. If you customized yourorder (ex. different tuners), ensure that these parts are accounted for. Please contact BYOGuitar if thereare any discrepancies.J Bass Material ListItemComponentQuantityDescription 1 J BassBody 1 J Bass1Neck Miscellaneousmaterials (seebelow)BYO J BassGuitar KitTIP: use small interior packingbox to inventory and organize piece parts 1 Pickguardwithmountingscrews forPickguard &Audio Panel2J BassPickguard Partially wiredAudio Panelw/output jack,volume &tone controls3J Bass Intro - 5 -J BassAudio Panel
Introduction 4 mounting4screws, 1 ½” 4 springs 1 Neck pickup 1 Bridge5PickguardmountingmaterialJ Basspickupspickup Bridge 7 mounting6screws, 7/8”Bridgecomponents 1 mountingplate 1 plasticmountinggasket 4 screws, 1¾”7 4 Tuners 4 Tuner hole8collars/inserts 16 screws,3/8” 2 Holders 2 plastic9washers 2 screws, 1”J Bass Intro - 6 -NeckMountingmaterialTunersStrapHoldermaterials
Introduction 1 String “Nut” 1 string tee10String Nut &Guidew/mountingscrew, ½”11 4 stringsStrings Output Cable 2 Allenwrenches (1for adjustingbridge, 1 foradjustingneck)121.2 Additional tools/materials required:Drill & drill bits#1 & #2 PhillipsscrewdriverWood glueMasking/painters tapeFinishing/paintingmaterialSand paper 220 &320 gritGuitar strapSoap or candleFeeler gaugerulerJ Bass Intro - 7 -Other
IntroductionThe remainder of the assembly instructions is divided into four sections:Section 2 – Mockup & Fit check: in this section, all components will be checked for properalignment and ensure that all holes have been drilled.Section 3 – Finishing the Body and Neck: after fit check, the components are removed from theneck & body to allow the selected finish to be applied. This will allow you to customize your guitars’color(s). As the finishing will likely require several coats with sanding between each coat, ensure thatthe finish is completely dry.Section 4 – Assembly: the final assembly is the next step - once the finish has been applied andcompletely dried. In this section, all of the components are installed, internal wiring connected andstrings attached – your guitar will ready to go!Section 5 – Setup: in this section, initial adjustments are made to your guitar, such as the heightof the pickups.Again, we thank you for your purchase of a BYO Guitar and we look forward to seeing pictures of yourunique guitar! We also look forward to providing you with the guitar for your next project from ourCustom Shop where you can select the wood for the body and neck as well as customizing all of theother components.Let us know if your music, school, church or scouting organization would like to undertake a groupproject – BYO Guitar can supply m
J Bass Intro - 1 - Warning These instructions assume that you are familiar with the safe operation and use of woodworking machinery and woodworking tools, and understand the techniques used to assemble this project. If you do not qualify for both of these criteria, STOP building this project for your own safety. Read and understand the owner’s manual for the machinery you intend to use, take .