Transcription
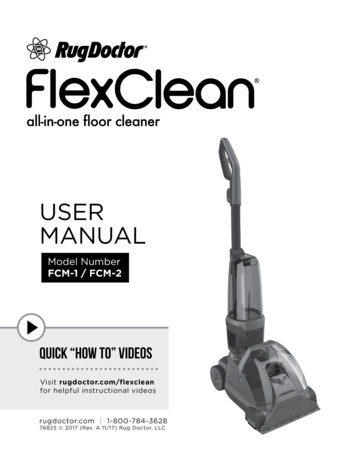
USERMANUALModel NumberFCM-1 / FCM-2Quick “How To” VideosVisit rugdoctor.com/flexcleanfor helpful instructional videosrugdoctor.com 1-800-784-362876825 2017 (Rev. A 11/17) Rug Doctor, LLC
THANK YOU FOR BUYING THE FLEXCLEAN BY RUG DOCTORThe Rug Doctor FlexClean All-In-One Floor Cleaner makes deep cleaning carpet ANDhard floors as easy as vacuuming. Its added versatility allows you to go “beyond carpet,beyond clean.”We are excited to share our latest innovation with you and want to make sure you haveall of the important information you need to operate your machine. To help you achievethe best cleaning results, please use this easy-to-navigate user manual.Happy Cleaning!Manual ContentWHAT’S IN THE BOXMain Handle(not assembled)ScrewMachineSoft SurfaceNozzleHard SurfaceNozzleFor household use only2F L E X C L E A N A L L - I N - O N E F L O O R C L E A N E R User Manualr u g d o c t o r. c o m 1-800-784-36284Important Safety Instructions6Product Overview8Assembly Instructions9How To Use Your Flow Control Dial10Operations14Maintenance and Care16Indicator Lights17Cleaning and Storing19Troubleshooting20Warranty21Servicing Your Machine22Registration & Key Tips3
IMPORTANT SAFETY INSTRUCTIONS›› The use of an extension cord is not recommended. Failure to follow this instruction may expose theuser to the possibility of electric shock, personal loss or injury and/or death.›› Do not operate without tanks or in any manner inconsistent with the above warnings or the operatingUSER MUST READ AND UNDERSTAND ALL INSTRUCTIONS BEFORE USING THIS TOOL ANDMACHINE. WHEN USING TOOL AND MACHINE, BASIC PRECAUTIONS SHOULD ALWAYS BEFOLLOWED, INCLUDING THE FOLLOWING:instructions included in this manual.›› The attachment hose is to be used only for indoor household cleaning applications using only RugDoctor recommended cleaning solutions.›› Always ensure float is properly installed before any wet pick-up operation.›› Product contains chemicals known to the state of California to cause cancer, birth defects and otherreproductive harm.WARNING›› Connect to a properly grounded outlet only. See “Grounding Instructions”TO REDUCE RISK OF FIRE, ELECTRIC SHOCK OR INJURYTO PERSONS OR PROPERTY DAMAGE:›› Use the machine only as described in this manual. Use manufacturers recommended attachments.›› For indoor use only.›› Do not leave machine unattended when plugged in or while it is powered on. Unplug the machine whennot in use and before cleaning or servicing. Do not unplug by pulling on the cord. Unplug by pulling onthe plug.›› Use only Rug Doctor cleaning products in this machine. Refer to cleaning product section of thismanual.›› Do not allow this machine to be used as a toy. Close attention and adult supervision is necessary whenused by or near children. This machine is not intended to be used by children age 12 and under. Do notallow children to place their body parts in or near openings or moving parts.›› Do not immerse. Use only on sealed hard floor surfaces (stone, tile, laminate, vinyl), and only onsurfaces moistened by the cleaning process. Do not use on unsealed hardwood floors.›› Do not use machine as a vacuum.›› Use caution when using hot tap water. Do not boil or microwave water to be used in this machine.›› Do not allow this machine to run dry. When the solution tank runs out, stop using and follow directionsto refill.›› Do not use with damaged cord or plug. If this machine is not working as it should, has been damagedby dropping or has been left outdoors; stop using and take it to a service center.›› Do not pull by the cord, carry by the cord, use the cord as a handle, close a door on the cord, nor pullthe cord around sharp edges or corners.›› Do not run machine over cord. Keep cord away from heated surfaces.›› Do not handle the plug or use this machine with wet or sweaty hands.›› Do not put any objects into the opening. Do not use the machine if any opening is blocked. Keepopenings free of dust, lint, hair and anything that could reduce air flow.›› Keep hair, loose clothing, fingers and all parts of the body away from openings and moving parts.›› Turn off all controls before unplugging.›› Use extra care when cleaning on stairs.›› Do not use to pick up flammable or combustible liquids or liquids or materials such as gasoline, orWARNINGImproper connection of equipment-grounding conductor can result in therisk of electric shock. Check with a qualified electrician if you are in doubt asto whether the outlet is properly grounded. Do not modify the plug providedwith the machine. If the plug will not fit the outlet, have a proper outlet installedby a qualified electrician. This machine is for use on a nominal 120 volt circuitand has a plug that looks like the plug in Figure A. Make sure the machine isconnected to an outlet having the same configuration as the plug. No adaptershould be used with this machine.GROUNDING INSTRUCTIONSThis machine must be grounded. If the machine should malfunction orbreak down, grounding provides a path of least resistance for electriccurrent, to reduce the risk of electric shock. This machine is equippedwith a cord having an equipment grounding conductor and groundingplug. The plug must be inserted into an appropriate outlet that isproperly installed and grounded in accordance with the local codes andordinances.Figure AGroundedOutletGrounding PinSAVE THESE INSTRUCTIONS FOR FUTURE USEcertain paints. Do not use in areas where they may be present.›› Do not use to pick up anything that is burning or smoking, such as cigarettes, matches or hot ashes.›› Do not place in or pick up anything with this machine that is caustic or toxic material, such as bleach,ammonia, toilet bowl cleaners or drain cleaners.›› Do not clean over floor electrical outlet.4F L E X C L E A N A L L - I N - O N E F L O O R C L E A N E R User Manualr u g d o c t o r. c o m 1-800-784-36285
CLEANING FORMULAS Rug Doctor FlexClean All-In-One Floor Cleaner is engineered to easilydeep clean carpet and sealed hard floors such as stone, tile, laminate andhardwood.1Two innovative floor cleaning solutions have been scientifically formulated togive you the best results when using the Rug Doctor FlexClean machine.218193410115Rug Doctor All-In-One Concentrated Floor Cleaning SolutionNew Rug Doctor All-In-One floor cleaning solution is a revolutionary formula that12deeply cleans and deodorizes carpets, area rugs and sealed hardwood, tile, vinyl,laminate and stone. This Dual Action formula is tough on ground-in dirt, grime,grease, stains and odors, but gentle on ALL floors. Residue-free, safe for all floorsand for use around kids and pets.2120226137148156Main HandleSoap & Scrub TriggerHandle BaseClean Water Tank ReleaseClean Water TankTank HandleDirty Water TankNozzle Releasecleaning solution permanently removes pet stains and odors at the source on bothsoft surfaces and hard floors. Pro-Enzymatic Technology eliminates urine, vomit, feces,blood, food, perspiration and more. Residue-free, safe for all floors, and for use aroundkids and pets.1791.2.3.4.5.6.7.8.Rug Doctor Pet All-In-One Concentrated Floor Cleaning SolutionWhen pet accidents happen, time is of the essence. Rug Doctor Pet All-In-One floor169.10.11.12.13.14.15.16.NozzleHandle ScrewHandle ConnectorPower Cord WrapDirty Water CapEasy Lift HandleFlow Control DialPower Switch17. Handle Release18. Brushroll Jam Indicator19. Low Solution Indicator20. Brushroll21. Brushroll Cover22. Brushroll LockF L E X C L E A N A L L - I N - O N E F L O O R C L E A N E R User ManualWARNINGTo reduce the risk of fire and electric shock due to internal component damage,use only Rug Doctor cleaning products intended for use with the appliance.Always use RUG DOCTOR cleaning solutions with your FlexClean All-In-One Floor Cleaner.Other cleaning solutions may harm the machine and void the machine warranty.r u g d o c t o r. c o m 1-800-784-36287
AssemblyWARNING!FLOW CONTROL DIALDO NOT plug in your FlexClean All-In-One Floor Cleaner until you arefamiliar with all instructions and operating procedures.Your Rug Doctor FlexClean All-In-One Floor Cleaner comes in 4 easy-to-assemble components: Main Handle FlexClean All-In-One Floor Cleaner Soft Surface Nozzle (carpet/rug) Hard Surface Nozzle (hard floor)2Remove ScrewInserttheHandle.Use #2 Phillipsscrewdriver to removescrew in HandleConnector.The three different FLOW CONTROL DIAL settings and usage information arelisted as follows:ATTENTION! DO NOT use DEEP CLEAN mode on hard floors as it will over-wet hard floors*A #2 Phillips screwdriver is required for Steps 1 and 4.1The FlexClean All-In-One Floor Cleaner is equipped with a Flow Control Systemdesigned to address all of your cleaning needs with one machine.3Insert theMain Handleinto theHandleConnector.CARPET DEEP CLEANUSE ONLY FOR SOFT SURFACE CLEANING (carpet/area rugs).Line up the HoleDeep Clean mode delivers a traditional deep clean to your soft surfaces and is recommendedto achieve the best deep cleaning results.Align the hole in the MainHandle with the hole on theHandle Base. Insert the Screwand use a#2 Phillipsscrewdriverto tightenthe Screwby turningclockwise.IMPORTANT!The Deep Clean Mode dispenses three times the solution of the Hard Floor Clean Mode.QUICK DRYUSE ONLY FOR SOFT SURFACE CLEANING (carpet/area rugs).Quick Dry mode provides a lighter clean by applying less water and cleaning solution andreduces the drying time after cleaning (when compared to DEEP CLEAN mode).4Great for use on carpet, area rugs, upholstery, and spot cleaning.Choose OneAttach Carpet Nozzle orHard Floor Nozzle as perdesired area to clean.HARD FLOORCarpet NozzleDelivers the perfect amount of solution and water on sealed hard floors such as stone, tile,laminate, vinyl, and sealed hardwood.56Attach the NozzleSecure The Cord1. Align the nozzle tabs withthe slots in the base(in front of the brushroll).322. Rotate toward machine.3. Latch the nozzle by pressingdown on the top of the nozzleuntil you hear a “click.”8USE ONLY FOR SEALED HARD FLOOR CLEANING.Hard Floor NozzleWrap the cord aroundthe Power Cord Wrap.Now you are ready toclean.1F L E X C L E A N A L L - I N - O N E F L O O R C L E A N E R User Manualr u g d o c t o r. c o m 1-800-784-36289
Operations:Operations:FILLING THE CLEAN WATER TANK1cleaning your carpet2Locate theClean Water TankIMPORTANT CLEANING TIP:Remove theClean Water TankThe CLEAN WATER TANKis the top tank located onthe front of the machine.CleanWaterTankCAUTIONPush the CLEAN WATER TANKRELEASE BUTTON and lift theCLEAN WATER TANK in anoutward motion.Vacuum area with dry vacuum cleaner thoroughly before deep cleaning.Before plugging in machine, check the POWER SWITCH to make sure it is inthe “off” position.12Attach Carpet Nozzle If the CARPET NOZZLE is not attached:DirtyWaterTank1. Align the nozzle tabs with the slots in the base ofthe machine.2. R otate NOZZLEtoward machine23. Latch theNOZZLE bypressing downon the top of thenozzle until youhear a “click.”3Fill the CleanWater Tank3REMEMBERAlways use Rug Doctor cleaning solutions.Other cleaning solutions may harm themachine and void the machine warranty.Fill with hot tap water.DO NOT USE BOILING WATER! DO NOTHEAT WATER OR TANK IN MICROWAVE!4Plug In The MachinePosition The MachineUnwrap the POWER CORDand insert plug into a properlygrounded outlet.Position the MACHINE onto thedesired area to clean.545Add Cleaning SolutionFill the tank with HOT tap wateruntil it reaches the “Fill” line. AddRug Doctor All-In-One CleaningSolution as directed.(CLEAN WATER TANK holdsapproximately 1 gallon of water.)Screw the cap back onto the CLEAN WATERTANK by turning clockwise until completelytightened.106Place the CleanWater TankNowYou AreReadyTo CleanTurn CLEANWATER TANKright sideup. Securelyplace onto themachine. Youwill hear a “click”sound when thetank is lockedinto place.F L E X C L E A N A L L - I N - O N E F L O O R C L E A N E RTurn the FLOWCONTROL DIAL tothe DEEP CLEAN orQUICK DRY settingbased on desiredcleaning. Refer to“Flow Control Dial”instructions on PG 9.13Turn the CLEAN WATERTANK upside down.Unscrew the CLEANWATER CAP by turningcounter clockwise.Remove CLEAN WATERCAP from the tank andset aside.SelectCleaningMode6Turn Machine OnRelease The HandlePush the POWER SWITCH to“FLOOR CLEANING” position.Step on the HANDLE RELEASEPEDAL to pull back/release theMAIN HANDLE.78Cleaning Your CarpetsLeave The Machine OnFor 15 SecondsPress the SOAP & SCRUB TRIGGERto apply solution.Make 2 wet passes. (1 forward,1 back) over each area.* For heavily soiled areas, makeup to 4 wet passesHandleReleasePedalPressSoap &SprayTriggerLeave the machine on for 15 secondsafter cleaning to allow for all of thedirty solution to be collected intothe DIRTY WATER TANK.Release SOAP & SCRUB TRIGGER approximately 6inches from stop point to ensure solution is removed. User Manualr u g d o c t o r. c o m 1-800-784-362811
Operations:Operations:cleaning your HARD FLOORSIMPORTANT CLEANING TIP:CAUTIONGreat to use on Upholstery, Stairs, Mattresses and Spot Cleaning.Sweep area thoroughly before deep cleaning.CAUTIONBefore plugging in machine, check the POWER SWITCH to make sure it is inthe “off” position.11. Align the nozzle tabs with the slots in the base ofthe machine.2. Rotate NOZZLEtoward machine.3. Latch theNOZZLE bypressing downon the top ofthe NOZZLEuntil you hear a“click.”32Remove The NozzleSelectCleaningMode1. Press the NOZZLERELEASE BUTTONto unlock the NOZZLE.NozzleRelease34Selecting Cleaning Mode4Plug In The MachinePosition The MachineUnwrap the POWER CORDand insert plug into a properlygrounded outlet.Position the machine onto thedesired area to clean.5Turn the FLOWCONTROL DIAL tothe DEEP CLEAN orQUICK-DRY settingbased on desiredcleaning.(Refer to “FLOWCONTROL DIAL” instructions foradditional details if needed, Page 9).6Turn Machine OnRelease The HandlePush the POWER SWITCH to“FLOOR CLEANING” position.Step on the HANDLE RELEASEPEDAL to pull back/release theMAIN HANDLE.76HandleReleasePedalLeave The Machine OnFor 15 SecondsPress the SOAP & SCRUB TRIGGERto apply solution.Make 2 slow wet passes(1 forward, 1 back) over each area.Release SOAP & SCRUB TRIGGERapproximately 6 inches from stoppoint to ensure solution is removed.PressSoap &SprayTriggerF L E X C L E A N A L L - I N - O N E F L O O R C L E A N E R Position theUPHOLSTERY TOOLin front of the area orstain you want to deepclean.Plug In TheMachineTurn TheMachine OnUnwrap thePOWER CORDand insert pluginto a properlygroundedoutlet.Push the POWERSWITCH to theUPHOLSTERYCLEANposition.Step 1 - How To CleanSqueeze the SPRAY TRIGGER onthe UPHOLSTERY TOOL to begincleaning.9Step 2 - How To CleanWhen You Are Done CleaningRelease the SPRAY TRIGGERLeave the machine on for 15 secondsafter cleaning to allow for all of thedirty solution to be collected into theDIRTY WATER TANK.Move the tool back and forth overthe same area to suck up dirty water.User Manual5Move the tool back and forth over the area you wantto deep clean. Make sure to press the top (suction)nozzle down into the surface.8Leave the machine on for 15 secondsafter cleaning to allow for all of thedirty solution to be collected intothe DIRTY WATER TANK.UpholsteryPorts7Position TheUpholstery Tool8Cleaning Your Hard FloorsInsert theUPHOLSTERYTOOL CONNECTOR in theUPHOLSTERY TOOL PORT,located behind the NOZZLE.2. R otate the NOZZLEaway from the base ofthe machine to remove.13Attach TheUpholsteryToolIf attached, remove the Nozzle from the machine:Turn the FLOWCONTROL DIAL tothe HARD FLOORsetting.2Before plugging in machine, check the POWER SWITCH to make sure it is inthe “off” position.12To Attach HARD FLOOR NOZZLE12THE UPHOLSTERY TOOLr u g d o c t o r. c o m 1-800-784-362813
Maintenance and Care:Maintenance and Care:EMPTYING THE DIRTY WATER TANKREMOVING UPHOLSTERY TOOL1IMPORTANT:2Turn TheMachine OffUnplugThe MachineTurn the machine off bypressing the POWERSWITCH down to thecenter “OFF” position.Unplug thePOWER CORDfrom the outletand wrap itaround thePOWER CORDWRAP.31Attach NozzleRemove theUPHOLSTERY TOOLby squeezing on thesides of theconnector andpulling from theUPHOLSTERY TOOLPORT.1. Align the nozzle tabs2with the slots in thebase, just in front of theBRUSH ROLL.2. Rotate NOZZLE towardmachine.13. L atch the NOZZLE bypressing down on the top of thenozzle until you hear a “click.”14Turn TheMachine OffUnplug ThePower CordPress the POWERSWITCH to the “OFF”position.Unplug the POWERCORD from the outletand wrap it around thePOWER CORD WRAP.34Remove TheDirty Water TankAttach SOFT SURFACE OR HARDSURFACE NOZZLE by:3Unscrew the DIRTY WATER CAPcounter-clockwise and set aside.Pour out the dirty water.Rinse out the DIRTY WATER TANKthoroughly with warm water.Replace DIRTY WATER CAP.NOTE: DO NOT pour into sink ortub. Dirty water should be pouredinto toilet or outside.65You Are Ready ToDeep Clean Or StoreThe Machine.F L E X C L E A N A L L - I N - O N E F L O O R C L E A N E REmpty The Dirty WaterRemove the DIRTYWATER TANK bygrasping the TANKHANDLE and liftingstraight up.Empty TheWater TanksEmpty the CLEAN WATERTANK and DIRTY WATERTANK as necessary. Rinse,dry and replace on themachine as directed inSTORAGE INSTRUCTIONS.24Remove TheUpholsteryTool5Empty the DIRTY WATER TANK before the dirty water reaches the “FULL LINE.” User Manual6Secure The DirtyWater TankFor A Deeper CleanPlace the DIRTYWATER TANK backonto the machine bysetting it straightdown on the base.1. Turn the DIRTY WATER TANK upside down tolocate the FLOAT CAP.2. U nscrew the FLOAT CAP turningcounterclockwise.3. Remove the FLOAT ASSEMBLY. Clean inside thetank with a towel or a cleaning brush.4. Replace the FLOAT ASSEMBLY. Firmly tighten theDIRTY WATER CAP by turning clockwise untiltightened.r u g d o c t o r. c o m 1-800-784-3628To clean the DIRTY WATER TANK more thoroughly:15
INDICATOR LIGHTSCLEANING AND STORINGTOP VIEWThe FlexClean All-In-One Floor Cleaner is equipped with a helpfulindicator light system designed to quickly alert you of issues whilecleaning. The FlexClean All-In-One Floor Cleaner is equipped with twodifferent indicator lights: BRUSH JAM and LOW SOLUTION. The twodifferent indicator lights are located behind the DIRTY WATER TANK.The BRUSH JAM INDICATOR LIGHT is triggeredwhen everyday items (such as socks, small toys etc.)become lodged into the BRUSH ROLL, jamming andpreventing the BRUSH ROLL from spinning. When themachine detects a jam, the brush motor will shut offand the BRUSH JAM INDICATOR LIGHT will illuminate.The BRUSH JAM INDICATOR LIGHT system protects themachine and prevents belt burn-out.1BrushRoll JamIndicatorLightLowSolutionIndicatorLight2Turn The Machine OffUnplug The Power CordPush the POWER SWITCH to the “OFF”position.Unplug the POWER CORD from the outlet and wrap itaround the POWER CORD WRAP.The LOW SOLUTION INDICATOR LIGHT willilluminate if the machine detects the CLEAN WATERTANK is depleted or empty. The LOW SOLUTIONINDICATOR LIGHT system protects the machine andprevents pump burn-out that could occur if themachine runs dry/without solution.Low Solution Indicator LightRemoving Brush Roll Jam1The LOW SOLUTIONINDICATOR LIGHTwill illuminate if themachine detectsthe CLEAN WATERTANK is empty.The BRUSH JAMINDICATOR LIGHTwill illuminate if themachine detectsa BRUSH ROLL jam.2Access the Brush RollTurn off the machine and unplug the machine from thepower outlet.3Add Cleaning SolutionRefer to “Fill the CleanWater Tank” Instructionson Page 10.Empty The Dirty WaterPress the CLEAN WATERTANK RELEASE button andremove the CLEAN WATERTANK from the machine.Remove the DIRTY WATER TANKusing the TANK HANDLE.Rinse the inside of the DIRTYWATER TANK thoroughly withwarm water.Allow tank to dry thoroughly toprevent odor when stored.Replace on the machine whenready.Refer to “Emptying the DIRTYWATER TANK” instructions on Page 15for additional deep cleaning details.53Store The MachineGently remove jammed itemfrom the BRUSH ROLL.16Rinse The Clean Water TankAllow tank to dry thoroughlyto prevent odor whenstored. Re
› Use only Rug Doctor cleaning products in this machine. Refer to cleaning product section of this manual. › Do not allow this machine to be used as a toy. Close attention and adult supervision is necessary when used by or near children. This machine is File Size: 2MB