Transcription
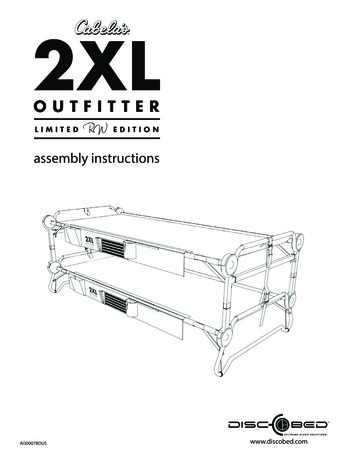
TREK DOMANE DISCSUPPLEMENT TO OWNER’S MANUALThis supplement is available in electronicformat at www.trekbikes.comDenne information er også tilgængelig ielektronisk format på www.trekbikes.comDiese Ergänzung gibt es in elektronischerFassung zum Download auf www.trekbikes.comThis supplement gives instructions onthe use and maintenance of the wheelattachment and braking system on theTrek Domane Disc bicycle. Please alsoread the Trek Bicycle Owner’s Manual;it provides important use and safetyinformation.This supplement is written for the owner. Ifyou need more information, consult yourdealer.Este anexo está disponible en formatoelectrónico en www.trekbikes.comTämä liite on löydettävissä elektronisenaversiona myös osoitteessa www.trekbikes.comCe supplément est disponible au formatélectronique sur www.trekbikes.comQuesto materiale integrativo èdisponibile in formato elettronico al �ますTABLE OF CONTENTSSPECIAL FEATURESCondition 1 bicycle .2Carbon fiber fork .2Disc brakes .2WHEEL ATTACHMENT TYPES이 추가자료는 www.trekbikes.com 에서확인할 수 있습니다Dit document is digitaal beschikbaar opwww.trekbikes.comDette tillegget er tilgjengelig elektroniskpå www.trekbikes.comTen aneks jest dostępny w formieelektronicznej na www.trekbikes.comOver-center cam .3DT RWS .3Optional attachment types .3Esse complemento está disponível emformato eletrônico em www.trekbikes.comWHEEL INSTALLATIONDenna info finns tillgänglig i elektronisktformat via www.trekbikes.comTo install a front wheel .4To install a rear wheel ��可以提供下载 Trek is a registered trademark of the Trek BicycleCorporation Copyright Trek Bicycles 2014J1
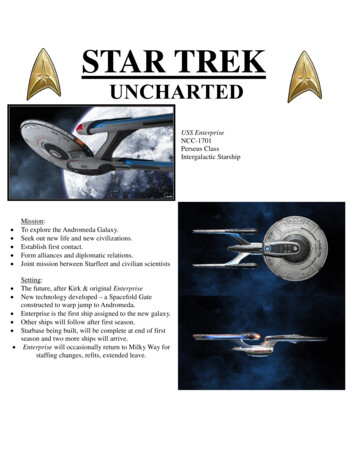
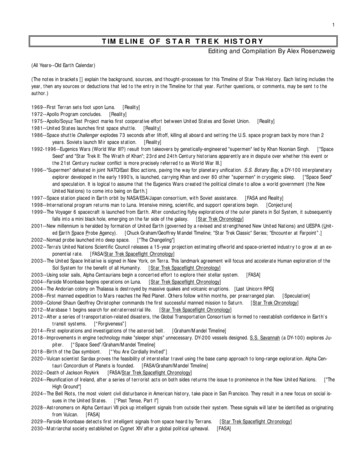
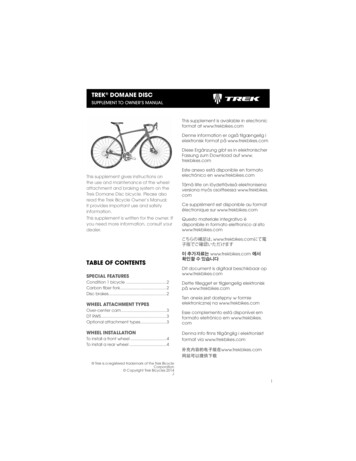
SPECIAL FEATURESThe Domane Disc is a road bike witha unique combination of features:Condition 1, carbon fiber fork, discbrakes, and thru-axles. Before ridingthis bike, you should familiarize yourselfwith these features by reading thissupplement and the Trek Bicycle Owner’sManual.FIGURE 2 Disc brakeCONDITION 1 BICYCLEDISC BRAKESThis bicycle is equipped with disc brakesand thru-axles. In the past, these featureswere associated with mountain-bikeequipment, but this bicycle is designedfor Condition 1 riding, which is on pavedsurfaces only.The Domane Disc uses disc brakes(Figure 2). The disc brake system requiresspecial care:r 5IFSF BSF TFWFSBM TJ[FT PG EJTD PS rotor, available for bicycles. With thisframe and fork, use only 160mm rotors.Changing rotor size requires adding orremoving spacers to correctly locatethe brake. Changing the spacers on thisbicycle may cause damage to the fork.r 8IFO UIF XIFFM JT PVU PG UIF GSBNF EP not operate the brake lever. Some discbrakes automatically adjust clearancewhen you apply the brake. If thedisc is not there, the brake will set theclearance to the other pad, so you willnot be able to insert the disc betweenthe pads.FIGURE 1 Domane Disc carbon fiber forkCARBON FIBER FORKThis bicycle has a fork made from carbonfiber composite (Figure 1). Carbon fibercan be affected by extreme heat, anda disc brake during heavy use gets veryhot. To prevent heat from affecting thefork, this bicycle has insulating spacersbetween the fork and the brake. Do noremove these spacers.2r 'PS NPSF JOGPSNBUJPO BCPVU EJTD CSBLFT read the owner’s manual.
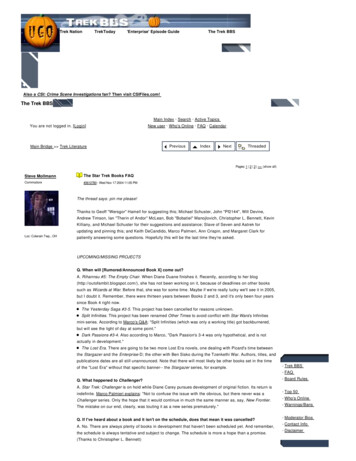
CAUTION: A disc brake and discget very hot during use and couldburn skin. Also, the disc edges canbe sharp and could cut skin. Do nottouch the disc or disc brake whenhot or when the disc turns.FIGURE 3 Closing an over-center cam thru-axleafter adjustingOVER-CENTER CAMThis type of thru-axle works like atraditional quick-release, without theadjusting nut (Figure 3).THRU-AXLESThis bicycle uses one of two types ofa thru-axle wheel attachment system,where a removable axle is threaded intoone side of the fork or frame. Each typeof thru-axle requires a different method ofoperation to correctly secure a wheelTo secure a wheel: With the lever inthe adjustment position, tighten theaxle until snug. Then flip the lever to theCLOSE position, just like a quick-release.Like with a quick-release, you should feelsome resistance about half way betweenthe OPEN position and CLOSE position.If the closed lever is not in a goodlocation, do not adjust the closing force.Instead, reposition the lever: take thebike to your dealer for service.WARNING: A thru-axle that isnot correctly adjusted and closedcan cause the wheel to be loose orcome off, decrease your control,and cause you to fall. Make surethe wheels are correctly attachedbefore you ride your bicycle.3
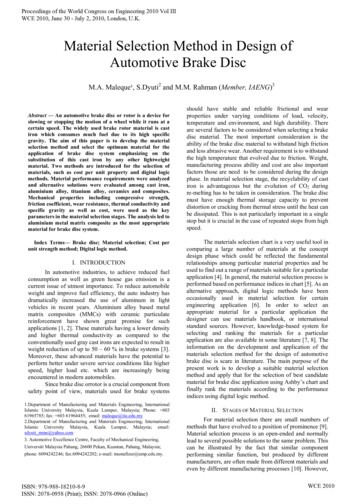
DT RWSThis type of thru-axle has a handle, nota lever; it is not a quick-release. The axleworks like a screw, and the handle workslike a wrench to tighten the screw.To secure a wheel: Instead of flippingthe lever to close, you simply rotatethe handle until fully tight (Figure 4), aminimum of 15 Nm.FIGURE 4 Tightening a DT RWS thru-axleAfter the wheel is secure, you can pullthe handle out on the axle (Figure 5) androtate the handle to reposition it in yourpreferred position.OPTIONAL ATTACHMENT TYPESThis bicycle can be modified to use adifferent type of wheel attachment. Seeyour dealer for more information.FIGURE 5 Pull handle out to reposition4
WHEEL INSTALLATIONBe careful not to rub or scrape the forkor frame with the disc. The disc candamage the paint or even removeframe material.TO INSTALL A FRONT WHEELFIGURE 6 Inserting the thru-axle through the forkand hub1. Remove the thru-axle from the hub(Figure 6).2. While guiding the disc past the brakepads inside the disc caliper (Figure 7),slide the wheel into the fork tips frombelow.3. With the wheel fully in the fork tips, passthe axle through the right side of the fork(opposite the disc) and then the hub(Figure 8).4. Gently engage the threads in the left sideof the fork and secure the wheel.FIGURE 7 Inserting the disc5. Follow the wheel inspection proceduresin the owner’s manual to make sure thewheel is properly attached.FIGURE 8 Thru-axle in fork5
TO INSTALL A REAR WHEEL1. Remove the thru-axle from the hub(Figure 6).2. While guiding the disc past the brakepads inside the disc caliper (Figure 7),slide the wheel into the frame from below.3. With the wheel fully in the frame, passthe axle through the left side of the frame(same side as the disc) and then the hub.FIGURE 6 Inserting the thru-axle through the forkand hub4. Gently engage the threads in the left sideof the fork and secure the wheel.5. Follow the wheel inspection proceduresin the owner’s manual to make sure thewheel is properly attached.TO REMOVE A WHEEL (FRONT OR REAR)Perform the steps in reverse, supportingthe wheel as you remove the thru-axle.FIGURE 7 Inserting the disc6
1. Remove the thru-axle from the hub (Figure 6). 2. While guiding the disc past the brake pads inside the disc caliper (Figure 7), slide the wheel into the fork tips from below. 3. With the wheel fully in the fork tips, pass the axle through the right side of the fork (opposite t