Transcription
“SMARTLINK COMPANION”(Voice Pendant)SLC14(14 button)SLC3(3 button)USER MANUALSmartLink Companion User Manual Version 1.1
Table of Contents1.The SMARTLINK COMPANION 22.KIT CONTENTS 23.HOME SET-UP 33.1Setting up your SMARTLINK COMPANION 33.2SMARTLINK COMPANION Registration with a DECT/GAP base station 43.3Saving Phone Numbers on Your SMARTLINK COMPANION 44.HOW TO USE SMARTLINK COMPANION 44.1Placing calls with speed-dial 44.2Answering incoming calls 44.3Adjusting volume 54.4Ending a call 54.5Recharging your SMARTLINK COMPANION HANDSET 54.6Placing calls on the SMARTLINK COMPANION keypad 5CUSTOMIZING YOUR SMARTLINK COMPANION handset 55.5.1Adjusting the ring tone 55.2Selecting ring tones on your SMARTLINK COMPANION 65.3Selecting receiver volume 66.INDICATORS 66.1Out-of-range indicator 66.2Low POWER INDICATOR 76.3LED color indicators 77.DECT Base Station 77.1Page Key 77.2LED - In use LED 78.MAINTENANCE TIPS 89.SPECIFICATIONS 810.COMPLIANCE 911.APPENDIX - 1 1012.APPENDIX - 2 10--1--SmartLink Companion User Manual Version 1.1
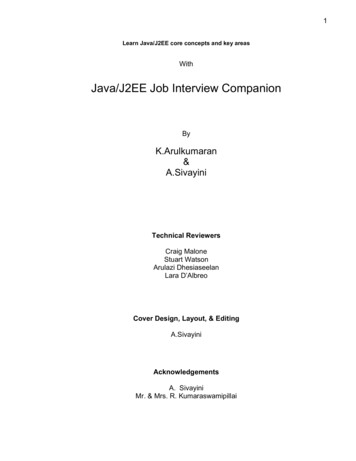
1. THE SMARTLINK COMPANIONThe SMARTLINK COMPANION is a handy digital enhanced cordless phone youcan wear around your neck, tuck into a back pocket or leave beside your bedlamp at night. It goes wherever you go Just press the ONE-TOUCH button whenever you want to do any of the following:-Place a call any time of the day or night,Answer incoming calls, andHang up.MicrophoneTouch buttonVisual IndicatorHands free loudspeakerFront view2. KIT CONTENTSYour kit contains the following: 1111SMARTLINKCOMPANIONSMARTLINK COMPANION handsetSMARTLINK COMPANION AC adaptor/Chargerdeluxe collar strapuser manualSMARTLINKCOMPANION ChargerSmartLink Companion User Manual Version 1.1--2--
3. HOME SET-UPAll you need to do is to set up the SMARTLINK COMPANION and subscribe to aDECT/GAP base station.3.1SETTING UP YOUR SMARTLINK COMPANIONPerform the following three steps to set up your SMARTLINK COMPANION: Flip the power switch to the left using a ballpoint pen.Micro switchPlug for chargerand optionalheadset Plug the SMARTLINK COMPANION AC adaptor into a wall socket.Power supply forCOMPANION charger Allow six hours for your SMARTLINK COMPANION to charge thebatteries. Leave the power switch in the ON position after setting up yourSMARTLINK COMPANION.When the SMARTLINK COMPANION is on, you will see an orange LED light flashingthree times per second. The orange light means your SMARTLINK COMPANION ison but has not yet registered with a base station.The SMARTLINK COMPANION LED light will flash green once every 10 seconds assoon as it connects to a base station, enabling you to place and receive calls.Battery life is up to 144 hours in standby mode.However you should recharge your SMARTLINK COMPANION daily.Your SMARTLINK COMPANION will beep as soon as battery power is low.--3--SmartLink Companion User Manual Version 1.1
3.2SMARTLINK COMPANION REGISTRATION WITH A DECT/GAP BASE STATION ConnectionPerform the following to connect your SMARTLINK COMPANION to a DECT/GAP base station:Preset the base station to REGISTRATION MODE(Refer to Installation Manual of Base Station being used)Dial the numbers below: º # 1 0000 1 is the number of the base station and 0000 is the PIN code for the base station.Your SMARTLINK COMPANION will register with a maximum of four different DECT/GAPbase stations. Selecting a Base StationWhen your SMARTLINK COMPANION is registered with two or more base stations,perform the following to select which one you want to use: º 8 1 1 is the number of the base station you want. Please Refer to Appendix 2 for details on registering 3 button versions.SAVING PHONE NUMBERS ON YOUR SMARTLINK COMPANION3.3SMARTLINK COMPANION has a speed-dial memory feature. Just press the ONETOUCH button to dial the number stored in memory.Key in the following to store a new phone number:(Up to 4 outgoing numbers and 3 Auto-Answer numbers with Caller-ID enabled) 1 the number you want to save 2 the number you want to save 3 the number you want to save Your SMARTLINK COMPANION handset is now fully installed and connected to a base station.You can now place and receive calls.NB: If more than one number is programmed into unit, then multiple presses of theOne-Touch button will rotate between numbers when call is in progress. Please Refer to Appendix 1 for more detail on programming keys.4. HOW TO USE SMARTLINK COMPANION4.1PLACING CALLS WITH SPEED-DIALAll you need to do is: 4.2Press the ONE-TOUCH button to place a direct call to the number yousaved in the SMARTLINK COMPANION handset memory.ANSWERING INCOMING CALLSWhen your SMARTLINK COMPANION rings, all you need to do is: Press the ONE-TOUCH button once.SmartLink Companion User Manual Version 1.1--4--
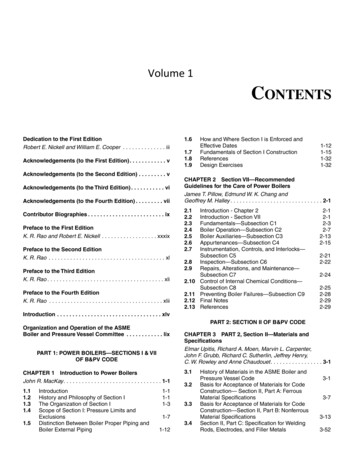
4.3ADJUSTING VOLUMEIf you can’t hear your conversation partner comfortably, you will need to raise orlower the volume on your SMARTLINK COMPANION handset as follows: 4.44.5ENDING A CALL Press thekey until you find the right volume.Hold down the ONE-TOUCH button on the front of your SMARTLINKCOMPANION handset until you hear a beep.RECHARGING YOUR SMARTLINK COMPANION HANDSETYou should recharge your SMARTLINK COMPANION handset daily as follows: Connect the handset to the AC adaptor.Your SMARTLINK COMPANION will beep as soon as recharging starts. A red LEDlight will flash once every two seconds to confirm that recharging is in progress.4.6PLACING CALLS ON THE SMARTLINK COMPANION KEYPADPerform the following to place an individual call using your SMARTLINK COMPANIONkeypad: Pressto obtain a dial tone. Dial your number. Pressto hang up at the end of your call.5. CUSTOMIZING YOUR SMARTLINK COMPANION HANDSETYou can customize your SMARTLINK COMPANION using the keypad on the back ofthe handset.SLC14Back viewSLC3Please refer to SmartLink forprogramming of SLC3 (3 button)(In-house programming required)5.1ADJUSTING THE RING TONEFor greater hearing comfort, perform the following to adjust the ring tone volume onyour SMARTLINK COMPANION handset:--5-- Press Then pressand 4Now press 0, 1, 2 or 3 (you will hear each tone as you press each key).The 0 key is for silent mode. Pressto validate your choice. You will then hear a beep to confirmyour selection.ºSmartLink Companion User Manual Version 1.1
5.2SELECTING RING TONES ON YOUR SMARTLINK COMPANIONPerform the following to personalize you ring tone:5.3 Press Then press Now press 1, 2, 3, 4 or 5 (you will hear each tone as you press each key) Pressto validate your choice. You will then hear a beep to confirmyour selection.º and 3SELECTING RECEIVER VOLUMEPerform the following to adjust the volume of the SMARTLINK COMPANION built-inspeaker: Press Now pressonce.again to adjust the volumeYour SMARTLINK COMPANION has six volume settings (0-1-2-3-4-5). You accessthem by repeat pressing of thekey. You will hear a beep whenever you havereached the minimum and maximum settings.Example: Press the several times and your SMARTLINK COMPANION will show:3-4-5-(Beep)-4-3-2-1-0-(Beep)-1-2-3-4 and so on.6. INDICATORS6.1OUT-OF-RANGE INDICATORIf you move out of range of the base station, your SMARTLINK COMPANIONtransmission and reception will suffer. A beep and LED light will alert you wheneveryou stray too far. Maximum Range IndicatorsYour SMARTLINK COMPANION handset will beep twice whenever it is almost out ofrange. Beeping will continue until you are comfortably back within operating rangeagain.When you hear the double beep, move back towards the base station. If you continuemoving away from it, you will go offline. The LED on your SMARTLINK COMPANIONwill then blink in orange three times per second to show that you can no longer placeor receive calls. Disconnection from Base StationIf your SMARTLINK COMPANION is out of range, you will hear the beeps and see theLED blink in orange three times per second. All you need do is move your SMARTLINKCOMPANION closer to its base station.SmartLink Companion User Manual Version 1.1--6--
6.2LOW POWER INDICATORYour SMARTLINK COMPANION needs adequate battery power to function properly.When the battery runs low, you will hear and see the following: 6.3One beep every three seconds when power is low, andThe LED light blinks in red once every 5 seconds.LED COLOR INDICATORSHandset StatusColourBlink RateOnlineGreenOnce every 10 secondsCall in progressGreenSteady lightLow batteryRedOnce every 5 secondsRecharge underwayRed2 times per secondOfflineOrange3 times per second7. DECT BASE STATIONThe base may be any DECT/GAP Base station. Simply ensure the nominated basestation is plugged into your phone line and mains power. Then check your SmartLinkCompanion into the base station to instantly start making calls on your SmartLinkCompanion. (Refer to Installation Manual of the Base Station being used)You may locate your SmartLink Companion anytime by pressing the “Page” buttonfound on your Base Station.7.1PAGE KEYThe Page key on the Base may be used to send a page to the SmartLinkCompanion. The handsets will ring for 1 minute unless the page key is pressed againon the base or a key is pressed on any locked handset.Usual operation of existing base stations in the market:Key actionShort press ( 5 s)Long Press ( 5s)7.2SMARTLINK COMPANION actionSend a page to handsetsEnter subscription mode (in use LED will flash)LED - IN USE LEDThe LED on the Base unit usually indicates different modes of operation.ActionStandby modeIn callKey pressed ( 5s)Subscription modeLED stateONFlashingONFlashingTo change the ringer melody or volume of your Base, please refer to Installationmanual of the Base Station being used.--7--SmartLink Companion User Manual Version 1.1
8. MAINTENANCE TIPS Clean your SMARTLINK COMPANION with a soft damp cloth only. Do not useaerosol sprays. Avoid contact with any liquids. It is normal for batteries to warm up during recharge. Do not use any recharging device except the AC adaptor supplied in yourSMARTLINK COMPANION kit. Never try to open your SMARTLINKCOMPANION handset to avoid creating an electrical hazard to your health.Return it to our after-sale support service for any needed repairs. Do not use the handset in any room or area that presents a risk of combustionor explosion.9. SPECIFICATIONS Standard : DECT ( Digital Enhanced Cordless Telecommunications )GAP ( Generic Access Profile ) Frequency range: 1880 MHZ to 1900 MHz Number of channels: 120 duplex channels Modulation: GFSK Speech coding: 32 kbit/s Emission power: 10 mW ( average power per channel ) Range: Up to 300 metres in open space Base power supply: 220-240 V / 50 Hz for the base Handset power supply: rechargeable battery 37AAAM, Ni-mH 370mAh Battery capacity: Up to 6 days standby, up to 3.5 hours talk time Charge up time: Approx 6 hours Temperature range: 5 C to 45 C Dimensions: 57*19 mm (diameter*thickness)SmartLink Companion User Manual Version 1.1--8--
10. COMPLIANCEThe phone complies with the following standardsPartDECT RadioDECT acousticsDECT GAPStandardTBR 6TBR 10 – 3rd editionTBR 22SMARTLINK COMPANION complies with relevant EC standardsFOR FURTHER DETAILED INFORMATION PLEASE REFER TOSMARTLINK REGARDING TECHNICAL INSTALLATION MANUAL.WARNING:This voice pendant is not designed for making emergency telephone calls during apower fail unless some form of battery back up is available at the base station.--9--SmartLink Companion User Manual Version 1.1
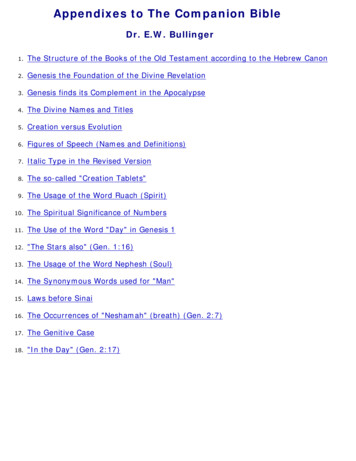
11. APPENDIX - 1KEY 1KEY 2KEY 3KEY 4KEY 5KEY 6KEY 7KEY 8KEY 9KEY STARKEY 0KEY HASHPHONEMENU/VOLUMEFigure 1 : keypad layoutSome keys have more than one usage depending on the SmartLink Companion’sstate (standby, in call, menu mode). The following table gives all the possible actionsfor each key.KEYKey nameKEY PHONEKEY MENU/KEY VOLKEY 0KEY 1KEY 2KEY 3KEY 4KEY 5KEY 6KEY 7KEY 8KEY 9KEY PAUSEKEY STARKEY RKEY HASHKEY INTStandby ModeActionMenu ModeGo in talk modeSettingsValidateDuring CallHang upDial 0Dial 1Dial 2Dial 3Dial 4Dial 5Dial 6Dial 7Dial 8Dial 9IntercomSpeaker Volume ( in call)Dial 0Dial 1Dial 2Dial 3Dial 4Dial 5Dial 6Dial 7Dial 8Dial 9 (short press)Pause (long press)Dial * (short press)R (long press)Dial # (short press)Intercom (long press)Figure 2 : Keypad descriptionShort press is less than 3 seconds. Long press is more than 3 seconds.12. APPENDIX - 2To register a 3 button SmartLink Companion, use the following steps: Preset the base station to registration mode.Press and hold down “-“ (minus key) and switch ON the SmartLink Companion.Press “ ” (plus key) and then press the Phone symbol button 5 times, each timeholding the key down for more than three seconds until a beep is heard.(The handset number is automatically defined by the base.)SmartLink Companion User Manual Version 1.1--10--
Copyright SmartLink International Pty LtdAugust 2005475 Nepean HighwayBrighton VIC 3186 AUSTRALIATel: 61 3 9596 0770 Fax: 61 3 9596 8195Email: smartlink@smartlink.com.auWeb Site: www.smartlink.com.auTo the best of our knowledge, the information contained in this manual is correct at the time of print.SmartLink International Pty Ltd reserve the right to make changes to the features and specifications atany time without prior notice in the course of product development.--11--SmartLink Companion User Manual Version 1.1
COMPANION handset to avoid creating an electrical hazard to your health. Return it to our after-sale support service for any needed repairs. Do not use the handset in any room or area that presents a risk of combustion or explosion. 9. SPECIFICATIONS Standard : DECT ( Digital Enhanced Cor