Transcription
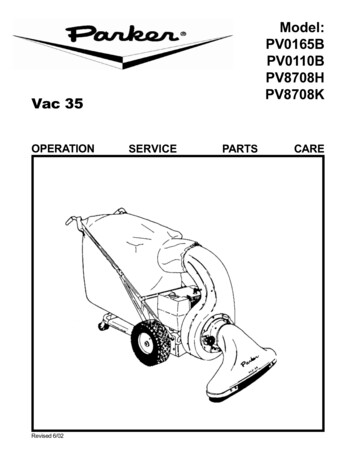
Model:PV0165BPV0110BPV8708HPV8708KVac 35OPERATIONRevised 6/02SERVICEPARTSCARE
TABLE OF CONTENTS1, 23General Safety InstructionsWarning Decal Replacement4, 5Assembly Instructions6Operating Instructions7Safety Interlock System8, 9Handle Assembly10 - 13Engine Assemblies14, 15Housing AssemblyModel #Serial #
IMPORTANT SAFETY INSTRUCTIONSREAD ALL INSTRUCTIONS BEFORE USINGWARNING To prevent personal injury or property damage, do not attempt to start engine until all assemblysteps are complete and you have read and understand the safety and operating instructions in thismanual. Under California law, and under laws of several other states, you are not permitted to operationinternal combustion’s engine using hydrocarbon fuels on any forest covered, brush covered, orgrass covered land, or on land with grain, hay, or other flammable agricultural crop, without anengine spark arrester in continuous effective working order. The engine on your power equipment,like most outdoor power equipment, is an internal combustion engine that burns gasoline, ahydrocarbon fuel. Therefore, your power equipment must be quipped with a spark arrester mufflerin continuous effective working order. The spark arrester must be attached to the engine exhaustsystem in such a manner that flames or heat from the system will not ignite flammable material.Failure of the owner/operator of the equipment to comply with this regulation is a misdemeanorunder California law, and may also be a violation of other state and/or federal regulations, laws,ordinances, or codes. Contact your local fire marshal or forest service for specific informationabout what regulations apply in your area. Wear approved safety glasses when operating this equipment. The operation of any poweredmachine can result in foreign objects being thrown by high-speed rotating parts. Wear work gloves, sturdy footwear, and hearing protection when operating this equipment. Remove hearing protection and watch for traffic when operating near, or when crossing roadways. Before inspecting or servicing any part of equipment, shut off engine, disconnect spark plug wirefrom spark plug, and make sure that all moving parts have come to a complete stop. Be aware thatrotating blades slow down gradually after engine is shut off. Exercise extreme caution on slopes and avoid excessively steep slopes. Never leave equipment unattended when engine is running. Shut off engine and disconnect sparkplug wire from spark plug before leaving equipment. Turn off fuel shut-off if equipped. Do not vacuum any burning or smoldering materials such as cigars, cigarettes, ashes, or cinders. Do not vacuum areas that have been recently treated with fertilizers, pesticides, or herbicides.Follow chemical manufacturer’s safety instructions regarding contact with treated areas. Thoroughly inspect the areas where the equipment is going to be used, and remove all objects thatmay be a hazard when thrown. Walk, never run. Never allow children or untrained adults to operate this equipment. Keep the area of operation clear of all persons, particularly small children, and pets. Keep bystandersat least 25 feet away from the area of operation. Do not operate this equipment on paved, gravel, or hard surface unless the collection bag is installed.Discharged material may bounce from a hard surface. Do not vacuum flammable liquids such as gasoline, kerosene, diesel fuel, paint thinner, etc. Avoid operating equipment on wet grass where feasible. Use extreme caution when pulling towards you or reversing the equipment. Before removing or installing collection bag, shut off engine, disconnect spark plug wire from sparkplug, and allow all moving parts to come to a complete stop.1
Do not run engine in an enclosed area. Engine exhaust contains carbon monoxide gas, a deadlypoison that is odorless, colorless, and tasteless. Do not operate this equipment near buildings, windows, or air conditioners. Do not allow hands or any other part of the body or clothing inside the vacuum inlet. Do not start engine or operate this equipment with any safety guards or housing removed. Operate machine in daylight or good artificial light. Do not change the engine governor settings or overspeed the engine. If equipment jams or becomes clogged, immediately shut off engine, disconnect spark plug wirefrom spark plug, and allow all moving parts to come to a complete stop. Use only a wooden stik toclear away debris. Empty collection bag after each use. Decomposing debris could generate enough heat to catchfire. Before emptying collection bag, shut off engine, disconnect spark plug wire from spark plug,and allow all moving parts to come to a complete stop.DANGERGasoline is highly flammable and its vapors are explosive. To prevent personal injury or propertydamage: Do not add fuel if engine is running or still hot from recent operation. Allow engine to cool for at leastthree minutes. Do not fill fuel tank indoors. After filling, wipe up any spills and move away from gasoline fumesbefore starting engine. Do not allow open flame, matches, or smoking in area. Fill fuel tank with fresh, clean unleaded regular automotive gasoline, (leaded regular and unleadedor leaded premium grades of gasoline are acceptable substitutes). Do not mix oil with gasoline. Clean the area around the fuel fill cap and remove the cap from the fuel tank. Insert a clean funnelinto the fuel tank. Fill the tank to 1/2 inch below the bottom of the filter neck to provide space for any fuel expansion. Reinstall the fuel fill cap securely and wipe up any spilled gasoline. Store fuel in containers specifically designed for these purposes.MAINTENANCE AND STORAGE Keep all nuts, bolts, and screws tight to be sure the equipment is in safe working condition. Never store the equipment with fuel in the tank inside a building where fumes may reach an openflame or spark. Allow the engine to cool before storing in any enclosure To reduce the fire hazard, keep the engine, silencer, battery compartment, and fuel storage areafree of grass, leaves, or excessive grease. Check the catcher frequently for wear or deterioration. Replace worn or damaged parts for safety. If the fuel tank has to be drained, this should be done outdoors.SAVE THESE INSTRUCTIONS2
SAFETY DECALS3
ASSEMBLY INSTRUCTIONSThe VAC 35 covered in this owner’s guide is shippedcomplete in one box. Follow all instructions onassembly very carefully.1. Unpack all items from carton.2. Tip box over so wheels are toward floor. Pull unitout of box and stand upright.3. DO NOT discard the carton or any of the insertsuntil the unit is completely assembled.4. All hardware is on the unit in its proper location. Ifsomething is missing, notify the dealer/distributorwhere unit was purchased. If unable to purchaseparts locally, contact the Parker SweeperCompany.5. Whenever the terms left or right hand, or “L” and“R” are used, it means from a position standingbehind the unit facing forward. NOTE: Beforecontinuing with instructions in this Owner’sManual, unpack items from small carton.Assemble those items as outlined in InstructionSheet included in that package.THROTTLE HOOKUPHANDLE ASSEMBLY1. Remove throttle control (13) from the rightNOTE: See Figure 1 Handle Assembly on Page 7 oflower handle (4).this owner’s guide for reference to numbers used in2. Straighten the throttle cable out and run it upthe following instructions.the left hand handles (3) and (4).1. Remove hex head bolts (15) and hexagon lock3. Attach the throttle control (13) to the uppernuts (21) from the bottoms of the upperleft hand handle (3) with the two oval headhandles (2) and (3).screws (14) and hexagon nuts (20) furnished.2. Place upper handles (2) and (3) over the ends4. Attach snap-on clamps (11) to handles toof the lower handles (4).secure throttle cable.3. Align the lower holes in both upper and lower5. Make sure no bends are less than 8" radius.handles. Replace hexagon head bolts (15)(removed in Step 1) to each of the lowerholes.4. Lift handles until the back braces (5) can beassembled to bolts (15) assembled in Step 3Assemble hexagon lock nuts (21). DO NOTTIGHTEN.5. Align the upper holes in both upper and lowerhandles. Assemble the remaining twohexagon head bolts (15) and hexagon locknuts (21). DO NOT TIGHTEN. NOTE: Checkalignment of handle. The hexagon lock nutshave been left loose to allow movementbetween the holes and the bolts. Do not bendtubing to accomplish proper alignment.6. Once handles are aligned, tighten all hexagonlock nuts (21). NOTE: Nuts should betightened enough that at least two of the boltthreads extend through the nut. It may benecessary to collapse the tubing SLIGHTLYto accomplish this.4
ASSEMBLY INSTRUCTIONS (Cont’d)TO ASSEMBLE SPIN-PAK NOTE: See Item 2 Housing Assembly on Page 12 of this owner’s guide for reference to numbers used inthe following instructions.1. Remove hex head bolts (38), flat washers (31), and lock nuts (29) from the three upper holes usedto secure retaining ring (23) to housing assembly (16). DO NOT remove the bottom bolt or retainingring from housing assembly.2. Align the holes in Spin-Pak (24) with three upper holes in retaining ring and housing assembly.3. Replace hardware removed in Step 1 and tighten.ATTACHING INTAKE HOUSING1. Insert hinge bosses on collar of intake housing (522) behind the hinged extension on front cover assembly(15).2. Swing intake housing (52) to lie flat against front cover assembly (15).3. Secure by placing flat washer (32) and adjusting knob (19), on pivot bolt, over the collar of intakehousing and tighten adjusting knob.ATTACHING DUST BAG1. Place large loop in upper bag straps over the upper handles.2. Place neck of dust bag over Spin-Pak until tie strap can be pulled tight around neck of housing, justover bead on retaining ring. Bead must be covered.3. Place bag hooks onto loops in lower bag straps and hook to lower cross bar.WARNING: Failure to attach bag hooks to lower cross bar can cause premature wear of bag and neck atthe Spin-Pak . The Spin-Pak may also break prematurely due to excessive weight from the bag.WARNING: The engine contains NO OIL. Read the Engine Instruction Manual carefully before operatingthe VAC 35. Be sure you know how to start and stop the engine before proceeding further. Do not start theengine until all assembly is finished.WARNING: Make a thorough inspection to see that all fastenings are tight and all parts are properly installed.DO NOT start engine without intake housing and dust bag in place. If engine is started without intakehousing attached, serious injury may result by drawing clothing or parts of the body into the fan. If engine isrun without Spin-Pak or dust bag, small stones or other objects may be picked up and propelled atoperator or bystanders through the unprotected opening causing serious injury.5
OPERATING INSTRUCTIONSREAD SAFETY OPERATING INSTRUCTIONS BEFORE OPERATING EQUIPMENT1. Heavy concentration of sand and gravel shouldbe avoided. These materials are extremelyabrasive, and while the VAC 35 will handlemoderate amounts of these materials, it is notdesigned for heavy applications. Treat yourVAC 35 with reasonable care and it will repayyou with long, trouble-free service.2. The VAC 35 will handle most common kindsof debris found around industrial plants,commercial buildings, homes, and farms. Acidcontaminated materials, magnesium, dust,and other DANGEROUS DEBRIS that isconsidered hazardous should not be handledwith the VAC 35.3. The efficiency of this unit depends on thebreathing capacity of the dust bag. Underextremely dusty conditions the bag should beemptied and cleaned frequently. Always emptyand clean bag before storing after use. Debrisallowed to remain in the bag may causespontaneous combustion, resulting in anexplosion or fire. See instructions suppliedwith dust bag.3. When clean, turn bag right side out and reattachto unit.4. Bag can be washed if extremely dirty.TO START UNITIMPORTANT: Read the Engine Manual CAREFULLYbefore operating the VAC 35. Before starting theengine read and understand the following:1. Be sure the engine crankcase is filled with theproper type and amount of oil.2. Spin-Pak is in place.3. Dust bag or discharge hose is in place.4. Intake housing or hose kit is attached to the fanhousing.TO STOP ENGINETo stop the engine, Briggs & Stratton equipment,move the Engine Throttle Control to the STOPposition. For Honda equipment, reduce engine speedto slow, turn engine STOP control to off, on side ofengine. Remove any hearing protection and listen forall moving parts to come to a complete stop.LUBRICATIONAdd a few drops of oil to the throttle control cable andwire to help keep it operating smoothly.DUST BAG CARE1. To clean dust bag, turn the bag inside out andreattach to unit.2. Start engine and run at full throttle. Lightly tapbag to release dirt trapped in the weave.Clearing the Machine of Clogs and JamsA clog or jam in the machine can cause the vacuuming operation to decrease or even stop completely. Ifthis occurs, take the following steps:STOP THE ENGINE IMMEDIATELY and disconnect the spark plug wire from the spark plug. Wait for allmoving parts to come to a complete stop.Check (and clean, if necessary) the following areas in this order: Check that the collection bag is not overfilled. Remove and empty bag. While the bag is removed, check that the discharge deflector is not clogged or jammed. Use a stick toclear away any debris. Check that the vacuuming attachment is not clogged or jammed. Remove the attachment and thoroughly clean the opening. While the attachment is removed, check the inlet opening to the machine. Usea stick to clear away any debris.6
SAFETY INTERLOC SYSTEMThis equipment incorporates two safety interloc systems. Figure 1 below is for the front vacuumHousing Assembly. Figure 2 is for the Cloth Bag Assembly. Both interlocs must be engaged forengine to start.Lanyard and ClipPart # 3501387
HANDLE ASSEMBLY8
HANDLE ASSEMBLYParts 627282930313233343535A36Part 4282226622222111114Chassis WeldmentUpper HandleUpper HandleLower HandleHandle Back BraceCross Brace, UpperCross Brace, LowerWheel AssemblyHandle GripInsertClamp, Snap-OnRoll Pin, .199/.194 Dia. x 1 1/2 Lg.Throttle Control AssemblyScrew, RHMS 10-24 x 1 1/4Bolt, HH 1/4-20 x 1 1/2Bolt, HH 5/16-18 x 1.5Washer, Fl. Plain 5/16Bolt, HH 5/16-18 x 2Washer, Plain 3/4Nut, Hex Lock 10-24Nut, Hex Lock 1/4-20Nut, Hex Lock 5/16-18Cotter PinBolt, Contour Hd. 1/4-20Nut, Hex 1/4-20Washer, Helical 1/4Washer, Helical 5/16Bolt, Hex 5/16-18 x 1.0Washer, SpecialEnd Cap, TubingSpacerCaster & Plate Assy.Frame& Bag PlatformBag Platform CompleteVacuum Dust Bag, StandardVacuum Dust Bag, OptionalBolt, Contour Hd. 1/4-20 x 1 3/49
HONDAItemPart ionSpacer8 HP Honda Engine3/8-16 Nyloc Nut.44 x 1.00 Flatwasher3/8 Helical Washer3/8-16 x 1.75 Hex Bolt (Grd. 5)3/8-16 x 2.25 Hex bolt (Grd. 5).406 x .75 x 1.38 SpacerMuffler Decal1/4 x 1/4 x 2 1/2 Key10
KOHLERItemPart 04711124444441411411211Description3/8-16 Nyloc Nut.44 x 1.00 x .06 Flatwasher1/4 Helical Washer3/8-16 Hex Bolt (Grd. 5)3/8-16 Hex Bolt (Grd. 5)Muffler DecalSpacerSpacer8 HP Kohler EngineWSR-Flat .44 x .87 x .071/4 x 1/4 x 2 1/2 KeyMuffler Cover#10 Self-Tapping Screws
BRIGGS & STRATTON 10 HPParts ListItemPart 4DescriptionSpacer, .359 x 1.125 x 1.078Engine, 10 HP Intek B/SSpacer, 1 x 2 x 1Nut-Nloc 5/16-18WSR-5/6 STPLWSR-Helical 3/8BLT-HH 5/16-18 x 2.75 #5BLT-HH 3/8-16 x 2 1/4 #5Decal, Burn Warning (not shown)Key, 1/4 x 1 3/4Spacer, .406 x .75 x 1.5BRIGGS & STRATTON 6.5 HPParts ListItem12345678910Part , 6.5 HP B/S IntekNut-Nloc 5/16-18WSR-5/16 STPLWSR-Helical 5/16WSR-Flat .75 x 1.375 x .09SSBLT-HH 5/16-18 x 1 1/2 #5BLT-HH 5/16-24 x 1.00 #5Key, 3/16 x 1 3/4Spacer, 3/4 ShaftSpacer, .327 x .495 x .28012
13BRIGGS & STRATTON6.5 HP/10 HP
-81673-89-B73-94-A936-816350850Part No.212111111Qty.3/4 Jam NutCotter PinCasterAxle Support WeldmentHex NutMount PlatePivot PinInt. Tooth Lock WSRVacuum Dust BagDescriptionOPTIONAL MA-644-D DUAL CASTER TURF PACKAGE
PARTS 24252627282930313233Part 75164-71-A154-227-A260-716-24 160-516-20 38-B-3 ItemDescriptionStrain ReliefRubber GrommetHex Jam NutCaster BracketSwitch BracketHeat ShieldStem Type CasterSpacerBLT-HH 7/16-20 x 1.25 #5Bolt HH 5/16-24 x 1 #5O-Ring GasketFront PlatePivot BoltAnti-Wrap SegmentSpin Pak DecalCable ClipHousing AssemblyFan Wheel, 10 HPFan Wheel, 6.5 HP1/4 x 2.50 Fan KeyAdjusting Knob7/16 Flat Washer 10 HPCaution DecalBack Plate and GasketRetaining RingSpin-Pak DeflectorWarning DecalAnti Vibration Sponge 6.5 HP Only8-32 x .62 MCH Screw8-32 Nyloc Nut1/4-20 Nyloc Nut#10 Washer1/4 Flat Washer1/2 Flat Washer1/4 Lock A50B5151A51B52535454A54B555657585960Part No.Qty.82-138-B-1 17115451DescriptionSpecial Washer 6.5 HP OnlySpring Pin10-24 x .62 MCH Screw1/4-20 x .63 Hex Bolt1/4-20 x 1.00 Hex Bolt1/4-20 x 1.25 Hex Bolt1/4-20 Serrated Hex Lock NutWarning DecalSafety Interlock DecalGray Safety Switch1/4-20 x .75 Hex BoltWire Lead (Briggs)Wire Lead (Kohler)Wire Lead (Honda)1/4-20 Lock NutGuardXmas Tree FastenerCollarSkirt (24" intake)Skirt (30" intake)Skirt (36" intake)24" Intake Housing30" Intake Housing36" Intake Housing30" IntakeSwitch NutSafety Switch (Briggs)Safety Switch (Honda)Safety Switch (Kohler)Safety Switch BracketHousing Support1/4-20 x .50 Threaded Cutting BoltDecal, Burn Warning (6.5 HP B/S)Belleville WSR-7/16 10 HP OnlyWSR-Helical 5/16 6.5 HP Only
LIMITED WARRANTYThe Parker Sweeper Company warrants to the original purchaser/user that this product is free from defects in workmanshipand materials under normal use and service for a period of two years from date of purchase. In addition, Parker SweeperCompany will, at its option, honor labor warranty claims for the first 12 months from date of sale, provided such claims aresubmitted through and approved by factory authorized repair stations. Parker Sweeper Company will, at its option, repair orreplace without charge, except for transportation costs, parts that fail under normal use and service when operated andmaintained in accordance with the applicable operation and instruction manuals.This warranty does not apply to normal wear, or to items whose life is dependent on their use and care, such as belts, cords,switches, hoses, rubber parts, electrical motor components or adjustments. Parts not manufactured by Parker SweeperCompany such as engines, batteries, battery chargers, hydraulic pumps, and tires are covered by and subject to the warrantiesand/or guarantees of their manufac
Do not operate this equipment near buildings, windows, or air conditioners. Do not allow hands or any other part of the body or clothing inside the vacuum inlet. Do not start engine or operate this equipment with any safety guards or housing remove

