Transcription
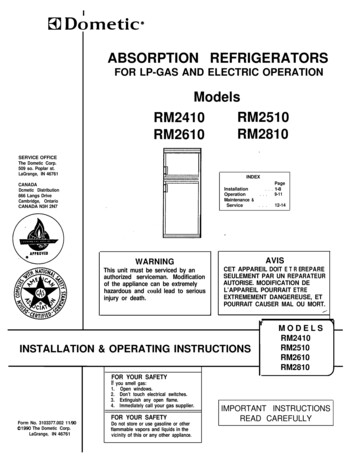
ABSORPTION REFRIGERATORSFOR LP-GAS AND ELECTRIC OPERATIONModelsRM2510RM2410RM2810RM2610SERVICE OFFICEThe Dometic Corp.509 so. Poplar st.LaGrange, IN 46761INDEXPageCANADADcmetic Distribution866 Langs DriveCambridge, OntarioCANADA N3H 2N7InstallationOperationMaintenance &Service. . . 1-8. . . 9-11. . .I12-14WARNINGAVISThis unit must be serviced by anauthorized serviceman. Modificationof the appliance can be extremelyhazardous and could lead to seriousinjury or death.CET APPAREIL DOIT E T R EREPARESEULEMENT PAR UN REPARATEURAUTORISE. MODIFICATION DEL’APPAREIL POURRAIT ETREEXTREMEMENT DANGEREUSE, ETPOURRAIT CAUSER MAL OU MORT.fINSTALLATION & OPERATING INSTRUCTIONSMODELS RM2410RM2510RM2610RM2810FOR YOUR SAFETYIf you smell gas:1. Open windows.2. Don’t touch electrical switches.3. Extinguish any open flame.4. lmmediately call your gas supplier.FOR YOUR SAFETYForm No. 3103377.002 11/9001990 The Dometic Corp.LaGrange, IN 46761Do not store or use gasoline or otherflammable vapors and Iiquids in thevicinity of this or any other appliance.IMPORTANT INSTRUCTIONSREAD CAREFULLY
SECTION A. INSTALLATIONsystem kits, see separate list. The ventilation kits mustbe installed and used without modification. An openingtoward the outside at floor level in the refrigeratorcompartment must be provided for ventilation of heavierthan-air fuel gases. The lower vent of the recommendedkits is provided with proper size openings. The flow ofcombustion and ventilation air must not be obstructed.1. GENERAL INSTRUCTIONSThis appliance is deslgned for storage of foods andstorage of frozen foods and making ice.The refrigerators outlined herein have been designcertified by A.G.A. under the ANSI 221.19 RefrigeratorStandard for installation in a mobile home or recreationalvehicle and are approved by the Canadian GasAssociation.The certifications are, however, contingent on theinstallation being made in accordance with the followinginstructions as applicable.The lower side vent is fitted with a panel which providesan adequate access opening for ready serviceability ofthe burner and control manifold of the refrigerator.3. CERTIFIED INSTALLATIONIn the U.S.A, the installation must conform with:1. National Fuel Gas Code ANSI 2223.1 -(latest edition)2. Manufactured Home Construction and SafetyStandard, Tile 24 CFR, Part 32803. Recreational Vehicles ANSI Al 19.2-(latest edition).Certified installations require one roof vent and one lowerside vent.For Certified vent system kits, see separate list.For further information, contact your dealer or distributor.The unit must be electrically grounded in accordancewith the National Electric Code ANSI/NFPA 70-(latestedition) when installed if an external alternating currentelectrical source is utilized.4.4. METHODS OF INSTALLATIONAny applicable local code.The methods of installation are shown in FIG. 1. It isessential that all maximum or minimum dimensions arestrictly maintained as the performance of the refrigeratoris dependent on adequate flow of air over the rear of therefrigerator.FIG. 1In Canada, the installation must conform with:1. Current CGA B 149 Gas Installation Codes2. Current CSA Standard Z 240.4 GAS-EQUIPPEDRECREATIONAL VEHICLES AND MOBILE HOUSING3. Any applicable local code.The unit must be electrically grounded in accordancewith the CANADIAN ELECTRICAL CODE C 22 Parts 1and 2.VENTILATION2. VENTILATIONThe installation shall be made in such a manner as toseparate the combustion system from the living space ofthe mobile home or recreational vehicle. Openings for airsupply or for venting of combustion products shall havea minimum dimension of not less than 1/4 inch.Proper installation requires one lower fresh air intake andone upper exhaust vent. The ventilation kits shown in thisinstruction manual have been certified for use with therefrigerator models listed in the table. For certified vent1
7. INSTALLING REFRIGERATOR INENCLOSURE5. VENTILATION HEIGHTSRefer to FIG. 1, Page 1.NOTE: DO NOT install the appliance directly onlnstallation wlth roofvent and lower side ventMinimum ventilationheights 5882884lo8714221575carpeting. Carpeting must be removed orprotected by a metal or wood panel beneaththe appliance, which extends at least the fullwidth and depth of the appliance.The refrigerator must be installed in a substantialenclosure and must be level. When installing therefrigerator in the enclosure, be certain there is acomplete seal between the front frame of the refrigeratorand the top, sides and bottom of enclosure. A length ofsealing strip is applied to the rear surface of the frontframe for this purpose. Also apply a sealing strip to theforemost floor of the enclosure and apply a second6. CLEARANCESMinimum clearances in inches to combustible materialsare:G:Top0K:Side0L: Bottom 01/2M: RearN: Ventilation HeightNOTE: Clearance ‘M’ is between the rearmostpart of the refrigerator and the wall behind therefrigerator.sealing strip to the bottom of the trim strip on the frontbase as shown in FIG. 3. The sealing should providecomplete isolation of the appliance’s combustion systemfrom the vehicle interior.NOTE: Clearance ‘N’ is the distance between thebottom of the lower vent to the roof material. Forventilation height, refer to Section A. Installation, Item 5.Ventilation Heights. See FIG. 2.rip appliedof trim stripFIG. 2Gingg strip placed onfront of compartment floor-KBe careful not to damage the sealing strip applied to thefloor of the enclosure when the refrigerator is put inplace.The refrigerator is secured in the enclosure with sixscrews and they must be installed in the following order:First two screws installed on front base, Second twoscrews installed in the top frame; Third two screwsinstalled in the rear base. Failure to follow the sequencein securing refrigerator in enclosure can cause leakagebetween the frame and cabinet. The plastic caps aresnapped in the front base to cover the screw heads andthe decoration strip is secured to the top frame. (SeeFIG. 4, Page 3).Any space between the counter, storage area or ceilingand top of the refrigerator should be blocked. The heatproduced at the rear of the refrigerator will becometrapped in this space, making the top of the refrigeratorhot and reduce the efficiency of the refrigerator.2
8. GAS CONNECTIONFIG. 4Hook up to the gas supply line accomplished at themanual gas shutoff valve, which is furnished with a 3/8"SAE (UNF 5/8" - 18) male flare connection. All completedconnections should be checked for leaks with a noncorrosive leak detector. (See FIG. 6 & 6A)WARNINGDO NOT USE A FLAME TO CHECKFOR GAS LEAKS.The gas supply system must incorporate a pressureregulator to maintain a supply pressure of not more than11 inches water column.The dimensions shown in the Table below will give youadequate space for service and proper installation. SeeFIG. 5.PRESSUREREGULATORLP GASCYLINDERREFRIGERATORFIG. sionsDepth HeightDHWidthWDepthDDistance betweentop of condenserand top ofrefrigeratorEinch33-1/222-53/6424-1/232-7/3221-1 7/3223-19/3232-7/1621-1 3/1l 40-29/3222-53/6424-1/240-3/3221-1 7/3223-19/3240-5/1 621-13/1l /221-13/1l nch58-1/3224-23/322 4 - 61057-7/3223-7/1 623-1 9/3257-7/1623-1 1/16RM2810145359559931458601
FIG. 6MODELSRM2410RM2510FIG. 6AMODELSRM2610RM2810BURNERCOVERPLATE12 VOLT DTERMINALBLOCK FORREIGNITOR/BLOCK FORHEATINGELEMENTTERMINAL BLOCK FORREIGNITORWhen testing the gas supply system at test pressures inexcess of 1/2 psig the refrigerator and its individualshutoff valve must be disconnected from the gas supplypiping system.B.Check that the gas flame is lit. This can beobserved through reflector ‘ E ' . (See FIG. 7).C.Close the gas valve by turning the knob ‘A’ back to‘OFF’ position. (See FIG. 7).When testing the gas supply system at pressures lessthan or equal to 1/2 psig the appliance must be isolatedfrom the gas supply piping by closing its individualmanual shutoff valve.FIG. 7REFRIGERATORS WITH PIEZOIGNlTORS (MODEL RM2410)In case detailed instructions on the installation andconnection to the gas supply are required, contact yourdealer or distributor.9. GAS SAFETY SHUTOFFThe gas safety shutoff must be tested after therefrigerator is connected to the LP Gas supply.To test the gas safety shutoff, proceed as follows:nRefrigerator with Piezo lgnitor(RM2410)A.Start the refrigerator according to the instructionsfor gas operation with piezo ignitor. See Section. B.Operating Instructions, Item 3. Gas Operation.4D.Wait one (1) minute.E.Remove burner cover plate. (See FIG. 6A). Open thegas valve by turning knob 'A’ to position ‘GAS’without pushing the buttons 'C' and ‘D’. (See FIG.7). Apply commercial leak check bubble solution tothe burner jet. (See FIG. 8, Page 5). Be careful notto damage the burner jet.
Clear Blue Color of FlameFIG. rmocoupleISpring RM2410RM2510aF.G.No bubble should appear at the opening of theburner jet. Bubbles indicate a defective gas safetyshutoff and service is required.If no bubbles were present at the burner jet, rinsethe orifice with water. Replace the burner coverplate. Start the refrigerator by following theinstructions for gas operation with piezo ignitor. SeeSection B. Operating Instructions, Item 3, GasOperation.Normal gas operation should occur. Allow theburner to operate for a minimum of five (5) minutes.nRefrigerators with Automatic Reignitors(RM2510, RM2610 & RM2810)A.Start the refrigerator according to the instructionsfor Gas Operation with Automatic Reignitor. SeeSection B. Operation Instructions, Item 3, GasOperation.Check that the gas flame is lit and the lamp ‘E' isout. (See FIG. 9).B.WARNINGFIG. 9DO NOT USE A FLAME TO CHECKFOR GAS LEAKS.5
Close the gas vatve by turning the knob ‘A'. back tothe ‘OFF’ position. (See FIG. 9).C.D.Wait one minute, then disconnect the 12 volt DCpower. (See FIG. 6 and 6A).E.Remove burner cover plate. (See FIG. 6 and 6A).Open the gas valve by turning knob ‘A’ to the‘GAS’ position without pushing button ‘C’. (SeeFIG. 9). The reignitor should not be sparking. Applycommercial leak-check bubble solution to theburner jet. (See FIG. 8). Be careful not to damageburner jet.F.No bubbles should appear at the opening of theburner jet. Bubbles indicate a defective gas safetyshutoff and service is required.G.If no bubbles were present at the burner jet, rinsethe orifice with water. Replace the burner coverplate. Reconnect the 12 volt DC power supply to therefrigerator. See Section A. Installation, Item 11, 12Volt DC Connection. Start the refrigerator byfollowing the instructions for gas operation withautomatic reignitor. Normal gas operation shouldnow return. Allow the burner to operate a minimumof five minutes.FIG. 10l6”11.12 VOLT DC CONNECTIONn P-WAY REFRIGERATOR MODELSOn 2-way refrigerator Models RM2510, RM2610 andRM2810, 12 volts DC must be connected to therefrigerator to provide power for operation of theautomatic reignitor. On these units there is one terminalblock marked 12 volts, located on the back of therefrigerator cabinet. (See FIG. 6 & 6A).The reignitor must be connected to the batterycircuit with a maximum fuse size of 3 amps and aminimum wire size of 14 gauge.WARNINGDO NOT USE A FLAME TO CHECKFOR GAS LEAKS.n3-WAY REFRIGERATOR MODELS WITHAUTOMATIC REIGNITOROn 3-way refrigerator models with automatic reignitors,there are two terminal blocks for 12 volt DC. The 12 voltDC terminal block on the back of the refrigerator cabinetis for the reignitor; and the 12 volt DC terminal blocklocated under a plastic cover on the back of therefrigerator is for the refrigerator heater. See FIG. 6 and6A).The refrigerator must be connected by a separatecircuit to the battery with two wires of adequate capacityto avoid voltage drop when the 12 volt DC heater isbeing operated. The wire gauge should be chosen withconsideration to the length, refer to the above Table forwire size. The 12 volt DC circuit must be fused; refer tothe Table, on Page 7, for fuse size.L10.120 Volt AC ConnectionThe refrigerator is equipped with a three prong(grounded) plug for protection against shock hazardsand should be plugged directly into a properly groundedthree-prong receptacle. DO NOT cut off or remove thegrounding prong from this plug. The free length of thecord is 2 feet and therefore recommended that thereceptacle be located to the left side of the refrigerator(viewed from the rear) and approximately 6 inches fromthe floor. (See FIG. 10). This allows easy accessibilitythrough the vent door. The cord should be routed toavoid contacting the burner cover, flue cover, or anyother components that could damage the cordinsulation.NOTE: The refrigerator Model RM2410 does nothave an automatic reignitor. The 3-way model hasonly one 12 volt DC terminal block located underthe plastic cover on the back of the refrigerator.-DO NOT- use the body or chassis of the vehicle as asubstitute for either of the two conductors. DO NOTconnect any other electrical equipment or lighting tothe refrlgerator circuit6
MAXIMUM TOTAL CONDUCTOR WIRE LENGTH IN FEET/METERSRM2410149 ft.2.7 m7 ft.2.1 m1215 ft.4.6 m12 ft.3.6 m1025 ft.7.6 m19 ft.5.8 m17 ft.5.1 m17 ft.5.1 m640 ft.12.2 m31 n9.5 m27n8.1 m27 ft.8.1 m20 amps25 amps25 ampsMaximumFuse Size15 ampsRM2610RM2810AWGRM25106.5 tt2m10.5 n3.2 m6.5 n2m10.5 ft.3.2 mRefrigerator Circuit Maximum Fuse / Minimum Wire Size3 amps / 14AWGCAUTIONDO NOT operate the refrigerator on 12 volt DC whenthe vehicle is parked. The amperage draw of the 12volt DC heating element can discharge a battery in avery short time. The installation of a 12 volt DCoperated refrigerator requires a relay to be installedon the tow vehicle or in the caravan. The relay willautomatically shut off the 12 voit DC power to therefrigerator when the ignition is turned off. (See FIG.11).FIG. 11BREAKERPOINTBATTERYBATTERY12.CHANGING DOOR HINGESFROM ONE SIDE TO THEOTHER(Refer to FIG. 12) Open the top door (or door on singledoor models) and remove the two screws holding the topdecoration. The screws are accessible from beneath.Remove the top hinge pin and lift out the lowerdoor. Remove center hinge pin (on two door models)and lift out the lower door. Unscrew the bottom hingepin. Remove the plastic cap from the opposite lowerhinge and place it in the hole just left by the lower hingepin. Screw the lower hinge pin in the hole from which theplastic cap was removed.Before replacing the door(s) on the refrigerator,remove the catch(es) and move it (them) to the otherside of the cabinet. Plastic caps for the empty holes arein the pans bag. Remount the door(s) and the hingepin(s) in the reverse order of their removal. Unscrew thehandle(s) and re-fasten it (them) on the opposite side ofthe door. insert the plastic caps (from the pans bag) intothe holes left open on the door(s). Before the topdecoration is refitted, check that the door closes easilyand the gasket seals well on all sides.FIG. 12
13.INSTRUCTIONS FORMOUNTING THE DOOR PANELFIG. 13\The refrigerator is normally delivered without doorpanel(s). Before starting the mounting work, check thepanel dimensions for compliance with those given in theTable below, and read the instructions thoroughly.(See FIG. 13). When mounting the panel, proceed asfollows:A.The decoration strip(s) are taped inside the door; ifinstalled on the door. Remove the door decorationstrip (2) by removing its two screws (1).B.Insert one of the vertical edges of the panel into thegroove of the door frame (3).C.Bend the panel gently so that the free side of thepanel can be slipped into the corresponding grooveof the door frame (4).D.Slide the panel down into the groove of the bottomframe (5).E.Between the upper edge of the panel and the doorframe there is a gap which should be covered bythe decoration strip.F.Put the decoration strip across the door so that thegap is covered and push upward (6). The tabs onthe inside of the strip should fit in behind the flangeof the door frame. Secure the decoration strip withthe two screws removed in Step A(1).PANEL DIMENSIONSMAX. THICKNESS 5/32" hRM261089735-5/1669535-15/6451520-9/3251320-1 3/64uppermminchmminch30612-3/6481932-1/43041 489535-15/6456322-11 /6456322-11 8
SECTION B. OPERATING INSTRUCTIONS1. IMPORTANCE OF LEVELING A REFRIGERATORsevere cases, completely block it, resulting in a loss ofcooling. Any time the vehicle is parked for several hourswith the refrigerator operating, the vehicle should beleveled to prevent this loss of cooling.The vehicle needs to be leveled only so it iscomfortable to live in (no noticeable sloping of floor orwalls).When the vehicle is moving the leveling is notcritical, as the rolling and pitching movement of thevehicle will pass to either side of level - keeping theliquid ammonia from accumulating in the evaporatortubing.In an absorption refrigerator system, ammonia is liquifiedin the finned condenser coil at the top rear of therefrigerator. The liquid ammonia then flows into theevaporator (inside the freezer section) and is exposed toa circulating flow of hydrogen gas, which causes theammonia to evaporate, creating a cold condition in thefreezer.The tubing in the evaporator section is specificallysloped to provide a continuous movement of liquidammonia, flowing downward by gravity, through thissection. If the refrigerator is operated when it is not leveland the vehicle is not moving, liquid ammonia willaccumulate in sections of the evaporator tubing. This willslow the circulation of hydrogen and ammonia gas, or in2. CONTROLSRefrlgerators with Piezo lgnitors (RM2410):ABCDE-Refrigerators with Automatic Reignitors(RM2510, RM2610 & RM2810)ON/OFF SwitchThermostat Gas/ElectricSafety Push-buttonPiezo lgnitorFlame View PortABC-ON/OFF SwitchThermostat, Gas/ElectricSafety Push-buttonFIG. 14EE3. GAS OPERATIONnRefrigerators with Piezo lgnitor (RM2410)A.To start the refrigerator, turn knob ‘A’ to the ‘GAS’position. (See FIG. 14).Turn the thermostat knob ‘B’ one quarter (1/4) of aturn from the ‘OFF’ position. (See FIG. 14).Push button ‘C’ in until it bottoms out - and hold.While holding button ‘C’, push button ‘D’ for thepiezo ignitor several times to light the burner. Thiscan be observed through the flame view port, ‘E',on the refrigerator. (See FIG. 14).B.C.D.E.9After the flame lights, continue to hold button ‘C’ foran additional ten (10) seconds. Release the button‘C’ and check the flame view port ‘E' to make surethe burner does not go out. If the burner goes out,repeat the lighting procedure Steps A. through D.To shut off the refrigerator, turn Knob ‘A’ to the‘OFF’ position.
nRefrigerators with Automatic Reignitors(RM2510, RM2610 & RM2810)A.To start the refrigerator, turn Knob ‘A’ to the ‘GASposition. (See FIG. 15)Turn the thermostat Knob 'B’ one quarter (1/4) of aturn from the ‘OFF’ position. (See FIG. 15).Push button ‘C’ in until it bottoms out - and hold.When lamp ‘E’ stops flashing, hold push-button ‘C’an additional 15 seconds. Release button ‘C’. If thelamp ‘E’ starts to flash again, repeat Steps A.through C. (See FIG. 15). If flame blows out, thereignitor will automatically relight the flame.B.C.When the thermostat reaches the set temperature, it willcut the burner back to bypass or, in electric operation,shut off the heating element.The setting of the thermostat is not critical, but werecommend it be adjusted to maintain a dry frost on thecooling fins. Adjus
The Dometic Corp. 509 so. Poplar st. LaGrange, IN 46761 CANADA Dcmetic Distribution 866 Langs Drive Cambridge, Ontario CANADA N3H 2N7 Form No. 3103377.002 11/90 01990 The Dometic Corp. LaGrange, IN 46761 ABSORPTION REFRIGERATORS FOR LP-GAS AND ELECTRIC OPERATION Models RM2410 RM2610 RM2510