Transcription
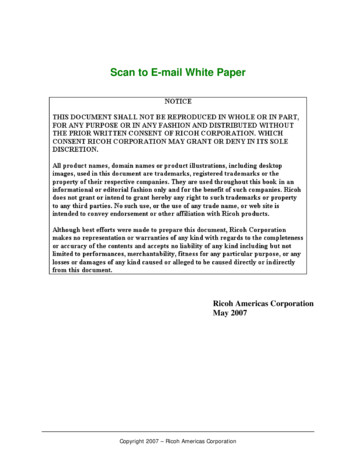
Revision BADP QuickPunch Plus Finger Scan DeviceInstallation Guide for the ADP InTouchOverviewThe ADP QuickPunch Plus finger scan device enables your organization to require biometric verification or identificationwhen employees use the InTouch. The system administrator configures the biometrics settings on the host system and themanager uses the biometrics features on the InTouch to enroll employees in the system.PartsBefore you begin If you are installing the InTouch and the power is already off, skip to Step 1. If the InTouch is assembled and running:a. Use the security wrench to remove the cover.b. Disconnect the power and the optional backup battery.For more information, see the InTouch installation guide.
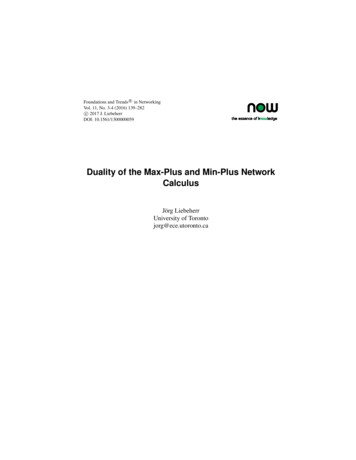
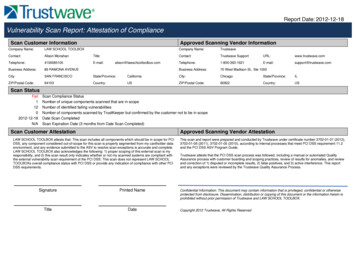
Step 1: Remove the blank plate from the front cover of the InTouchStep 2: Insert the finger scan plate into the slot on the front coverEnsure that the two tabs on either side of the finger scan plate line up with the slots on the front cover. The finger scan platesnaps into place.tabs2
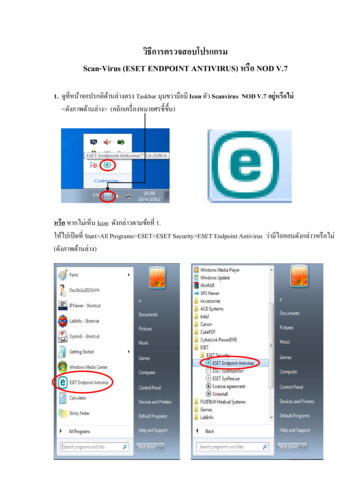
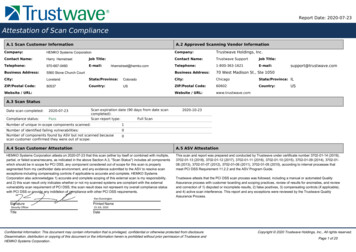
Step 3: Attach the cable to the micro-USB connectorNote: If you plan to install the Wi-Fi option, first complete the ADP QuickPunch Plus installation. The cable (asshown in the following illustration) must be in place before you fasten the Wi-Fi assembly to the CPU board.That is, the cable lies beneath the Wi-Fi assembly.Route the cable underneath the badge reader wires (if installed), and attach it to the micro-USB connector.micro-USB connector3
Step 4: Complete the installation If the InTouch is not fully installed, or if there are other options to install, go back to the InTouch installation guide orto the installation guide for the next option. If the InTouch is installed, see the InTouch installation guide and do the following:a. Reconnect the power and optional backup battery.b. Re-attach and secure the cover.Step 5: Configure the device and the host serverAfter the finger scan device is installed, you must configure settings on both the host application server and the InTouch.4 See the Device Manager system administrator guide to configure the host application server to support biometricson the InTouch. See the InTouch user guide to set up and use the finger scan device to enroll employees for verification oridentification, to unenroll employees, or to generate biometric reports.
Legal StatementThe information in this document is subject to change without notice and should not be construed as a commitment by ADP, Inc. ADP is not responsible for any technicalinaccuracies or typographical errors which may be contained in this publication. Changes are periodically made to the information herein, and such changes will be incorporatedin new editions of this publication. ADP may make improvements and/or changes in the product and/or the programs described in this publication at any time without notice.This document or any part thereof may not be reproduced in any form without the written permission of Kronos Incorporated. All rights reserved. 2014 Kronos Incorporated.ADP provides this publication "as is" without warranty of any kind, either express or implied, including, but not limited to, the implied warranties of merchantability or fitness for aparticular purpose. The ADP Logo and QuickPunch are registered trademarks of ADP, Inc.CardSaver, Kronos, Kronos InTouch, Kronos Touch ID, the Kronos logo, TeleTime, Timekeeper, Timekeeper Central, Workforce Accruals, Workforce Central, Workforce Genie,and Workforce TeleTime are registered trademarks of Kronos Incorporated or a related company. "Experts at Improving the Performance of People and Business," HyperFind,Kronos 4500 Touch ID, Kronos 4500, Schedule Assistant, Smart View, Workforce Activities, Workforce Attendance, Workforce Central Portal, Workforce Connect, WorkforceEmployee, Workforce Leave, Workforce Manager, Workforce Record Manager, Workforce Scheduler, Workforce Task Management, Workforce Timekeeper, and WorkforceWorksheet are trademarks of Kronos Incorporated or a related company.The source code for Equinox is available for free download at www.eclipse.org.When using and applying the information generated by Kronos products, customers should ensure that they comply with the applicable requirements of federal and state law,such as the Fair Labor Standards Act. Nothing in this Guide shall be construed as an assurance or guaranty that Kronos products comply with any such laws.Published by ADP, Inc.Automatic Data Processing, Inc.One ADP BoulevardRoseland, New Jersey 07068For more information, see the following ADP, Inc. Web page: http://www.adp.com.Note: To view or print other language versions of this guide, contact your representative.Nota: Para ver o imprimir versiones de esta guía en otro idioma, comuníquese con su representante.Remarque : Pour afficher ou imprimer ce guide en d'autres langues, contactez votre représentant.FCC Compliance—After testing, this equipment complies with the limits for a Class A digital device pursuant to Part 15 of FCC Rules. These limits provide reasonableprotection against harmful interference when this equipment is operated in a commercial environment. This equipment generates, uses, and can radiate radio frequency energy.If it is not installed and used in accordance with the instruction manual, it can cause harmful interference to radio communications. Operation of this equipment in a residentialarea is likely to cause harmful interference, in which case, the user, and not Kronos Incorporated, is required to correct the interference. In order to maintain compliance withFCC regulations, shielded cables must be used with this equipment. Operation with non-approved equipment or unshielded cables is likely to result in interference to radio andtelevision reception.FCC Notice (for U.S. Customers) - This device complies with Part 15 of the FCC Rules. Operation is subject to the following conditions:1. This device may not cause harmful interference, and2. This device must accept any interference received, including interference that may cause undesired operation.Caution: Changes and Modifications not expressly approved by the manufacturer or registrant of this equipment can void your authority to operate this equipment underFederal Communications Commission rules.Canadian DOC Compliance—This digital apparatus does not exceed the Class A limits for radio noise emissions from digital apparatus set out in the Radio InterferenceRegulations of the Canadian Department of Communications. This device complies with Industry Canada license-exempt RSS standard(s). Operation is subject to the followingtwo conditions: (1) this device may not cause interference, and (2) this device must accept any interference, including interference that may cause undesired operation of thedevice. Cet appareil numerique respecte les limites de rayonnement de bruits radio electriques applicables aux appareils numeriques de classe A, prevues au Reglement sur lemateriel brouilleur du ministere des Communications du Canada. Ce dispositif est conforme aux normes RSS sans licence d’Industrie Canada. Son utilisation est soumise auxdeux conditions suivantes : (1) ce dispositif ne peut pas provoquer d'interférence et (2) ce dispositif doit accepter toute interférence, y compris les interférences pouvantprovoquer un mauvais fonctionnement du dispositif.EN 55022 (CISPR 22)—This product is a Class A product. In a domestic environment, it may cause radio interference in which case the user may be required to take adequatemeasures.RoHS Directive—This equipment is designed in accordance with the European Union Restriction of the Use of Certain Hazardous Substances in Electrical and ElectronicEquipment ("RoHS") Directive (2002/95/EC), taking effect July 1, 2006. The RoHS directive prohibits the sale of electronic equipment containing certain hazardous substancessuch as lead, cadmium, mercury, hexavalent chromium, polybrominated biphenyls ("PBB") and polybrominated diphenylethers ("PBDE") in the European Union. Themanufacturer has a program in place to address the requirements of the RoHS Directive in respect to the various categories of electronic products.5
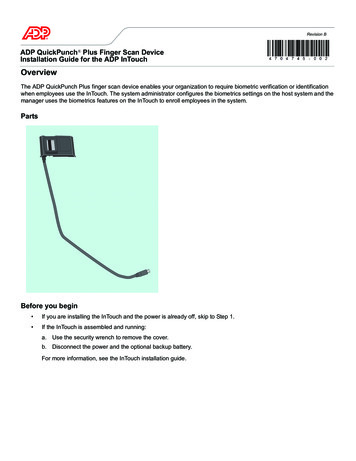
SJ/T11363-2006 遵循信息SJ/T11363-2006 ��根据 ��包含超出以下最大浓度值的物质 (如下表详述): (a) �醚的含量不超过 0.1% (按重量)或 (b) 镉含量不超过 0.01% (按重量)。 除非 Kronos 另有书面说明,否则此信息表示 Kronos 了解的全部信息 (根据第三方供应商向 Kronos ��量均低于 SJ/T11363-2006 中的限制要求X: �质均高于 SJ/T11363-2006 中的限制要求InTouch 指纹扫描设备PBB/PBDE(Br)汞 (Hg)铅 (Pb)铬 (Cr)镉 (Cd)印刷电路板OOOOO电缆OOOOO包装OOOOO6
3 Step 3: Attach the cable to the micro-USB connector Note: If you plan to install the Wi-Fi opti on, first complete the ADP QuickPunch Plus installation.The cable (as shown in the following illustration) must be in place before you fasten the Wi-Fi assembly to the CPU board. That is, the cable lies beneath the Wi-Fi assembly. Route the