Transcription
Configuration for SonicWall TZSeries6300-CX
ConfigurConfiguraation fforor SonicWSonicWallall TTZZ SeriesOvOverervieviewwThe Accelerated 6300-CX LTE Router provides a reliable, high-speed cellular connection that is compatible withexisting wireline infrastructure. While its 4G LTE speeds are capable of operating as a primary WAN uplink, the6300-CX can also be configured as a backup. This network redundancy solution delivers the ultimate flexibility tominimize expenses when it comes time for upgrading equipment to the latest wireless standards.Business continuity depends on the seamless integration of failover-connectivity solutions to prevent serviceinterruptions. Now more than ever, contingency networks play a strategic role in sustaining business operations.Unplanned outages can cost companies significant time and money, frustrating employees and clients alike, whichcreates a negative perception that is difficult to overcome.Cellular data (4G LTE) bypasses wireline Internet service providers (ISPs) to facilitate the best redundancy possible.Additionally, in some situations it may be a challenge to acquire access to wired circuits or an event may call fortemporary online access. For these reasons SonicWall and Accelerated Concepts have teamed up to offercomprehensive security and flexibility for small businesses, retail, government, remote sites, and branch offices.SonicWall’s TZ Series of firewalls consolidates enterprise security measures into a single Unified Threat Management(UTM) device. It optimizes and fortifies networked environments thanks to a robust suite of administrative utilitiesranging from content filtering to malware and intrusion prevention though this functionality hinges upon an activeWAN connection. A TZ-Series UTM Firewall paired with the Accelerated 6300-CX LTE Router will ensure your enterprisenetwork remains secure and operational should its primary ISP go offline. Running a cellular backup via an Ethernetcable preserves the full security functionality of the TZ-Series device (DPI-SSL inspection), which isn’t the case forUSB-connected Aircards.For additional information, please refer to SonicWall’s TZ-Series dadattasheeasheett and the SonicOS AdminisAdministrtraation guideguide.Configuration for SonicWall TZ SeriesPagagee 2
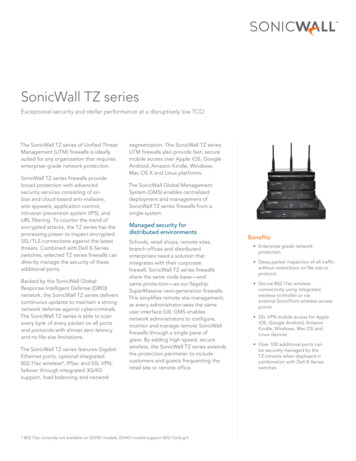
IntIntereroperoperabilityability MaMatrixtrixThis section covers interoperability information of the hardware tested for this solution. It includes the firmwareversions of both devices as well as the date of testing.DaDatteSonicOS RReleeleasease6300-C6300-CXX FirmwFirmwararee10/20165.9.X & 6.2.X16.10.13CavCaveeatsThe delivery of wireless services varies depending on the carrier and may lead to differences in the area of coverage,type of service (3G, 4G, LTE, etc.), available bandwidth, and IP address designation (Private or Public) among otherfactors. The interoperability test designed for this solution guide included LTE service, maximum coverageavailability, and a public IP address assigned to each device.Using the 6300-CX as a secondary connection assumes that a primary WAN Ethernet cable is plugged into the X1 porton the SonicWall device. Connect the 6300-CX’s backup Ethernet cable to port X2 and proceed to the configurationdescribed herein. (Compatible with all Gen 6 Firewalls, including TZ, NSA, and SuperMassive series.)AcAcccelereleraated 6300-C6300-CXX LLTETE RRoutouterer SeSetuptupInitial SeSetuptupAffix both antennas to the router and insert an activated SIM card before deploying the device. Be sure to select alocation with optimal signal strength. For detailed instruction, refer to the tables that follow. Subsequent sectionswill outline site selection, powering options, and other device functionality.Step-by-Step Guidance: Initial Setup1. Insert the activated 2FF SIM card provided by your cellular network operator (putting the cut corner in firstwith metal contacts facing down). The card clicks into place when completely inserted.2. Attach the two included antennas; both should be installed for optimal operation. Do this by gripping themetal connector section with your thumb and forefinger, tightening until secure. Do not tighten the antenna byholding any part of the plastic antenna housing.3. To determine the optimal location for the 6300-CX, please see the “Site Survey” section.4. Refer to the section(s) for Remote or Direct Power Installations when ready to connect the 6300-CX to thepermanent power supply unit.Configuration for SonicWall TZ SeriesPagagee 3
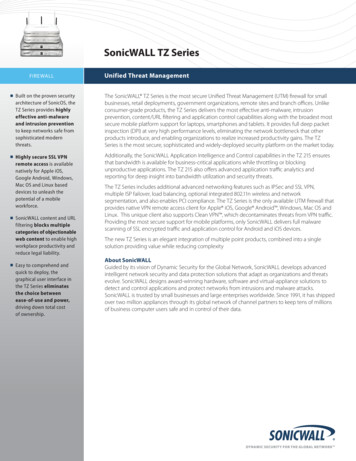
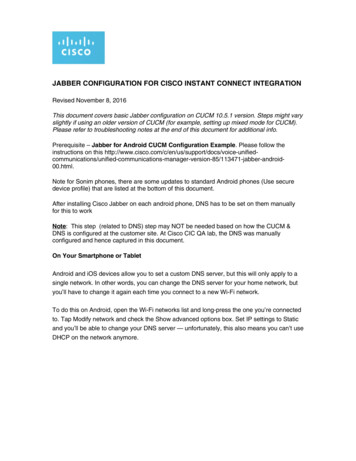
5. The 6300-CX uses DHCP with IP passthrough by default, which satisfies the setup requirements for mostenvironments. If required, please use Accelerated View or the 6300-CX local GUI to configure the 6300-CX forrouter mode.SitSitee SurSurvveyIf you are unsure of the available cellular signal strength, or are choosing between several locations, please follow theinstructions to identify the ideal installation site.Step-by-Step Guidance: Site Survey1. After following steps 1 and 2 in the “Initial Setup” section, connect the battery pack to temporarily power theAccelerated 6300-CX. The charge lasts two to four hours – it is not rechargeable and should be properlydisposed of after use.2. Move the 6300-CX to different locations within your site to determine the best compromise between signalstrength and installation constraints. Since cellular signal strength may fluctuate, it is important to wait aatt eeachachloclocaation fforor 1 minutminutee while obserobservingving the signal sstrtrengthength indicindicaator on the frfrontont of the dedevicvice.e. Minimum cellularsignal strength for operation is 2 bars (3 is preferred).3. After determining the optimal location, remove the battery pack and connect the main power supply unit orEthernet cable connected to the PoE injector (per the power option outlined below).Remoemotte PPoower InsInsttallaallationtion – PPoower OpOptiontion #1The included Power-over-Ethernet (PoE) injector allows the device to be positioned away from power outlets tosimplify its installation needs. The adaptor consolidates the DC power and Ethernet connections so that both can beConfiguration for SonicWall TZ SeriesPagagee 4
run to the 6300-CX via a single Ethernet cable. Distances of 300 ft have been tested on CAT6 and 250 ft on CAT5e. Notethat cable conditions and the number of splices will impact actual distance.Step-by-Step Guidance: Remote Power Installation1.2.3.4.Plug the 6300-CX’s power supply unit (PSU) into an AC power outlet.Connect the end of the PSU into the DC input (4 pin connector) of the PoE injector.Insert the male RJ45 connector of the PoE injector cable into the SonicWall.Connect an Ethernet cable from the RJ45 socket on the PoE injector cable to the Ethernet port of the 6300-CX. (See diagDirDirecectt PPoower InsInsttallaallationtion – PPoower OpOptiontion #2If you plan to collocate the 6300-CX with the MX device, you can directly power the 6300-CX without the PoE cable.Step-by-Step Guidance: Direct Power Installation1. Use an Ethernet cable to connect the 6300-CX to the security appliance using port Internet 1 (to use the cellularnetwork as the primary connection) or port Internet 2 (to configure a failover).2. Plug the 6300-CX power supply unit (PSU) into an AC power outlet.3. Connect the PSU into the 4-pin power connector of the 6300-CX. (See diagram.)Configuration for SonicWall TZ SeriesPagagee 5
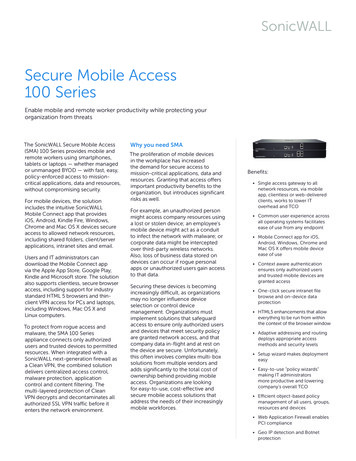
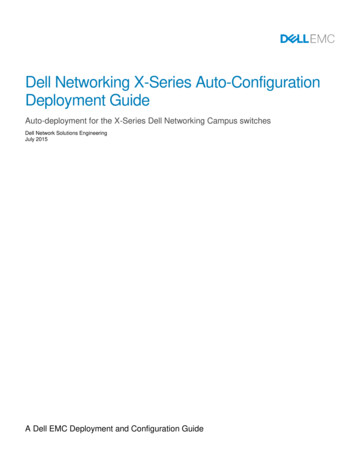
UnderUndersstanding the 6300-C6300-CXX LEDsOnce power has been established, your device will initialize and attempt to connect to the network. Deviceinitialization may take 30-60 seconds. Indicator lights on the WirWirelesseless SStrtrengthength IndicIndicaator show you the cellularnetwork signal strength. The NeNetwtworkork SSttatus Light on the front left of the device displays connectivity information.Please visit acacccelereleraated.ed.ccom for additional information and troubleshooting tips.Configuration for SonicWall TZ SeriesPagagee 6
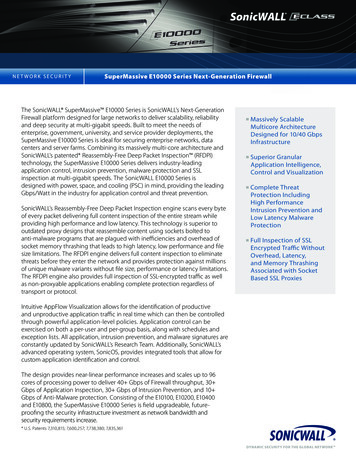
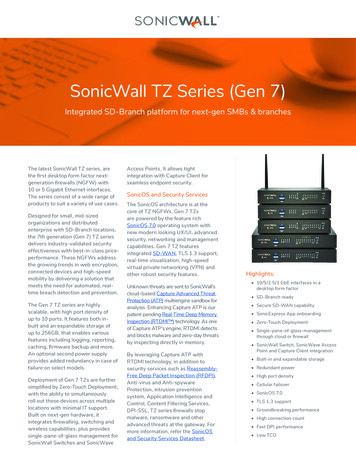
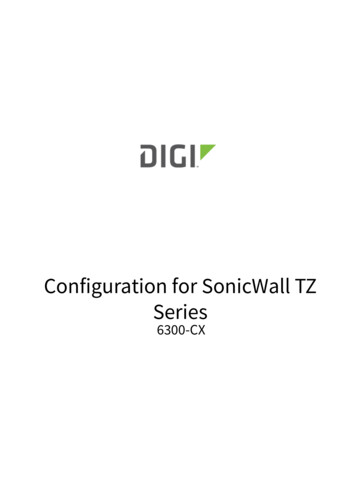
SonicWSonicWallall ConfigurConfiguraation with the AcAcccelereleraated 6300-C6300-CXXMultiple WAN (MWAN) ConfigurConfiguraationMore than one network must be assigned to the SonicWall’s WAN Zone to create a contingency solution. Onceassigned to a zone, configure the connection’s IP assignment, group membership, and any other relevantspecifications. MWAN functionality automatically assigns the primary WAN interface from the X1 port. All other portscan be manually allocated for WAN network routing aside from X0, which must remain dedicated to localadministration (LAN).Access the SonicWall admin portal at 192.168.168.168Please refer to the SonicWSonicWallall knoknowledgwledgee article for an in-depth walkthrough of the Interfaces Screen.Step-by-Step Guidance: MWAN ConfigurationNONOTE:TE: X0 is reserved for the default LAN and X1 is predefined as the default WAN, making X2 the first availableinterface for a failover WAN.1. From the Interfaces tab of the admin portal, click on the edit icon under configure.2. Choose WAN from the Zone pull-down menu.3. Unless otherwise specified, select DHCP from the IP Assignment pull-down menu.4. Assign reference labels to entries using the comments field.5. Click the OK button to finalize any changes.6. The new interface is now configured for WAN, X2 in the image above.Configuration for SonicWall TZ SeriesPagagee 7
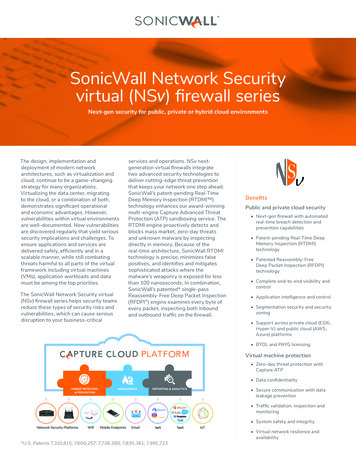
Failoailovver & LB ManagManagementementTZ-Series Firewalls feature customizable, load-balancing (LB) automation that reroutes traffic to contingencynetworks when triggered by outages or user-defined limits. SonicWall recommends that load balancing remainsenabled at all times, even when a single-WAN solution is in use. (It is activated by default.)Groups respond to specific network conditions depending on their assigned type: Basic Failover, Round Robin, Spillover, and Ratio. To set a backup connection so it takes over for the primary line in the event of a service outage, addboth interfaces to the “Default LB Group” (the firewall’s basic failover grouping) and confirm that the main interface(X1) is listed above the auxiliary WAN (X2).The “preempt and failback to preferred interfaces when possible” checkbox appears only for the “Basic Failover”type. Selected by default, it enforces the preferences established by the sort order of the interface list. These optionschange contextually depending on the group type, including options to set ratio or spill-over thresholds. Use theProbing tab to modify parameters for failback detection via Logical probes, which verify whether or not connectivityhas been restored to an inactive interface before reestablishing it as the primary WAN.Please refer to the SonicWall knowledge article for an in-depth walkthrough of the Failover & LB Screen.Step-by-Step Guidance: Failover & LB Management1. After setting up the WAN from the Accelerated 6300-CX LTE, navigate to the Failover & LB page of the SonicWalladmin portal.2. Next to “Default LB Group,” click the configure button to add a new member.Configuration for SonicWall TZ SeriesPagagee 8
3.4.5.6.7.8.The Group Members column on the left lists all available interfaces.Select X2.Use the Add button to move the chosen interface(s) to the Selected column.The Probing tab specifies how test packets are sent and received to verify WAN path availability.Click OK to finish editing the group’s settings.The X2 interface is now set as a failover for the primary network.NONOTE:TE: Interface priority within a group is established by list position, which can be adjusted using the Up/Downbuttons or the Final Back-Up field. The member listed first takes precedence over subsequent members; the finalback-up is always considered last.Configuration for SonicWall TZ SeriesPagagee 9
SonicWall recommends that load balancing remains enabled at all times, even when a single-WAN solution is in use. (It is activated by default.) Groups respond to specific network conditions depending on their assigned type: Basic Failover, Round Robin, Spill-over, and Ratio. To set a backup connection so it takes over for the primary line in .