Transcription
Macro PhotographyBeyond Flowers and ButterfliesAn introduction to the fascinating world of close-up and macro photographyReinier Munguíaemail: rmung@wildstockphotos.comwww.wildstockphotos.com
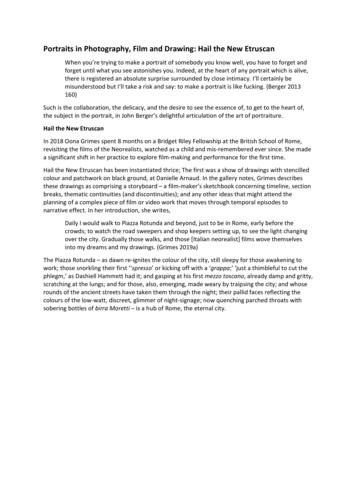
INTRODUCTIONThis publication will help you getstarted in the amazing world ofmacro photography, its challengesand the techniques I use to overcome some of these challenges.Although not a complete guide, itprovides you with the knowledgerequired to take beautiful images.You’ll learn useful techniques that Ihave learned over the years, saving you time and frustration whenshooting small creatures.Most people entering this fascinating field of photography thinkthere’s only one way of doingthings, but in reality you can accomplish the same effect usingdifferent techniques. Problemsolving in the field will depend onmany factors including the weather,your equipment limitations andyour subject. That’s the reason whythere isn’t a single and specific solution to most macro photographyquestions. My best advice is tofamiliarize yourself with your gear,learn as much as possible aboutyour subject, even before you getEastern Tiger Swallowtail, Florida. Nikon D70, 105mm, 1/250 sec. at f82 Introductionout the door. Research plays a bigrole in successful photography.Preparing yourself to what youmight encounter will increase yourchances of capturing that uniqueimage.Obviously, equipment is a limiting factor in how close you can getand the quality of the image youobtain. We’ll discuss some of themost commonly used equipment,their advantages and how to properly use them to get the best theycan provide. Basic photographictechniques such as depth of field,focusing and exposure will bediscussed in terms of their applications in macro photography. I havealso covered few things that we cando to make our photography moreaffordable by building simple gadgets that will improve our photography with a minimal investment.Finally, I’ll emphasize the importance of learning about yoursubject and the environment inwhich it lives. How to approachthose skittish subjects and how todeal with nature’s obstacles willalso be discussed. In order to bea successful nature photographer,you must first become a naturalist.Only through direct observationof the subject, one can learn aboutthe natural world and that leads tobetter images. One final thought:practice makes perfect, and allgood nature photographers are theresult of many years of experience.Frustration is part of the equation,and without it, we can’t learn.
DEFINING MACROFirst, lets define macro photography, as there are several interpretations, but only one correct. Thiswas caused in part to the marketinghype of many manufacturers thatclaim the macro capabilities oftheir lenses, in which cases weremerely lenses that allowed forcloser focusing, but not real magnification. While the term macro andclose-ups have been used interchangeably over the years, there’s adifference that sets them apart. Themain difference is on the magnification rate. Macro photographyfalls in a category of the so calledclose ups in which the subject ismagnified or enlarge to about 1X, aterm also expressed as 1:1 that represents the size of the subject overthe size of the image on film. Thetypical example is the macro photoof a coin. On 35mm photography,we reach 1X when the image produced on film matches the actualsize of the coin. Twenty years back,a lens with a maximum magnification of .25X also expressed as 1:4 was considered a macro lens.Nowadays, a true macro lens is onethat allows you to achieve at leasta 1:1.To further explain the conceptlets start by defining the termmagnification as the ratio betweenthe image on film and the actualsize of the subject. To give you anexample, an image of a ladybugabout 1/4 inch at 1X, will renderan image of the bug of about 1/4inch on the film. The followingtable will help you understand howmagnification ratios work and thetwo ways of expressing them asratios and magnification power.For a subject that is 1 in. long.Actual Sizeon FilmMagnificationRatio1/8 in.1/4 in.1/2 in.3/4 in.1 in.2 r instance, an image capturedat 1:2 is called half life-size whileone captured at 1:1 is called lifesize. Take, for example, the nickelcoin below. If we shoot the coin at1X or 1:1 ratio, the image producedon the 35mm frame will be thesame size of the actual coin.When looking for a macro lens,you’ll find that those that can reacha 1:1 magnification ratio withoutany attachments are considered truemacros.Once the image size on the filmexceeds the actual size of thesubject, then we’re talking abouthigh magnification macro photography. This should not be confusedwith microphotography that coversmagnifications of 100X and more.For most nature photographers, themagnification ratios and the calculations involved are irrelevant.They’re happy with what they seethrough the viewfinder and payno attention to the actual magnification, but for a photographerinvolved in research of insects orother small creatures knowing itcan be a plus.On this book, we’ll cover notonly how to shoot real macro images, but also how to get good closeup shots. As I mentioned before,most images considered macroaren’t real macro shots, but merelyclose-ups. Most nature photographers are more interested onclose-ups than true macro images,due to several causes including thedifficulty of working at such closerange with subjects in the wild, theweather and the light conditionsthat dictate your shutter speed.The closer you get to the subject,the more light you’ll be blockingfrom it, plus you run the risk of thesubject fleeing the scene. Extrememacro shots require additionalequipment that can be cumbersomefor field work or too heavy to carryfor prolonged walks.Nevertheless, there are situationsin which you would love to get really close to tiny subjects, in whichcase you can use alternative methods to achieve the extra magnification. Some of these methods I willdiscuss in more details later in thisbook.Defining Macro 3
EQUIPMENTThe basic and most recommended equipment for macro photography is the 35mm SLR (Single LensReflex) camera with TTL capabilities. With an SLR system, you seethrough the viewfinder exactlywhat will be captured by yourcamera when you press the shutterrelease. TTL stands for (ThroughThe Lens) metering, a system inwhich the amount of light deliveredby a flash or ambient light can bemetered as the light passes throughthe lens. This system ensures better exposures without the guessingwork. Before TTL systems hit themarket, photographers had to usespecial exposure calculators to getthe right exposure for the subjectand to compensate for the magnification being used. Digital SLR(DSLR) offers the same advantagesand, in some cases, larger magnification due to the cropping factor produced by the fact that theirCCDs are smaller than the 35mmframe. Besides, they offer a handful of tools for the digital photographer, including instant previews,histograms and highlight warnings. Most SLRs provide you withthe flexibility of interchangeablelenses, and an array of attachmentsfor macro photography. Even today’s compact digital cameras canproduce impressive images, andthe live previews through the LCDcan help on framing the subject andovercome the parallax error foundin non-slrs cameras.Almost any SLR or DSLRsystem will do just fine for closeup work as long as you have theproper lenses and/or attachments.The brand of the camera is irrelevant, but its ruggedness, reliabilityand available accessories are veryimportant points when selecting a4 Equipmentsystem. The lens is probably themost important factor to consider.Buying good glass means sharperimages, less distortion and bettercolor rendition. For most of usit’s better to save the money onthe camera and invest it in a betterlens. One other thing to consideris the weight of your setup. If youdo more than just closeups, you’llprobably carry few lenses in yourbackpack to cover all the focallengths, then you know how heavythat can be. Since the quality ofan image depends on the glass, Iprefer to have a lighter camera andsave the weight for the quality lens.Most of my close-up photography was created while scouting asite for bird or wildlife photography. Being prepared can save youa lot of aggravation and frustration.Many times I’ve walked through anature preserve full of macro andclose-up opportunities to suddenlyrealize that I have left my heavymacro lens at home. But a knowledgeable photographer can actuallysolve this problem without havingto come back later. If you plan tocome back later, chances are yoursubject will not longer be there.Among the things you want tohave on your camera is the ability of shooting manual mode orat least, some way to override aprogrammed mode such as aperture or shutter priority. Being ableto control the aperture settingswill help you control the depth offield. Meanwhile, having controlof the shutter speed ensures properexposures and balanced exposuresbetween your subject illuminatedby flash and the ambient light overthe background. Most macro andclose up work requires the use ofartificial light to compensate for thelow light levels around the subject and to avoid blur due to slowshutter speeds. A flash unit is anessential tool that should be carefully selected to ensure total TTLcapabilities. Let’s discuss in detailthe basic gear to get you started.Camera BodyAny SLR or DSLR body willwork as long as macro lenses orattachments are provided for thepurpose of close focusing on thesubject. Things to consider whenbuying a camera system and especially the body include:-Interchangeable lens capability.-Manual exposure mode.-Exposure compensation.-Depth of field preview.-Flash synch of at least 1/250 sec.-Ergonomic design.-Mirror-lockup.-Light weight.-Full range of accessories.LensesI recommend using lenses thatwithout any attachment or extension tubes can achieve at least a1:2 magnification ratio. Theultimate lens for macro work isthe true macro lens that gives youa 1:1 ratio without any attachment. Three basic focal lengthsare available in the market: 50mm,90mm and 105mm. Each onehas a particular advantage overthe others, even when they offer the same maximum apertureof f2.8. The main difference theyall have is the minimum focusingdistance at which they achieve the1:1 magnification. The 50mm hasthe shortest focusing distance with
EQUIPMENTonly 7.4 in., followed by the 90mm at 11.40 in. andfinally the 105mm at 12.3 in. This distance is important especially when working with skittish subjects.Having to focus down to barely 7.4 inches from ajumpy grasshopper will prove to be an impossible taskusing the 50mm lens. The 105mm is the best choiceto tackle this job as it offers you a better working distance. Most true macro lenses are heavy due to theirconstruction and numerous elements incorporated intothe barrel. You can achieve magnification ratios of 1:1 even without owning one of these lenses by usingextension tubes.Extension TubesExtension tubes are similar to a teleconverter without the glass elements. They create magnificationby separating the prime lens from the focal plane.They’re usually sold as a set of three different lengths:12mm, 20mm and 36mm. They can be used individually or combined, and produce similar quality as thatof a macro lens, as long as the prime lens is of goodquality glass. Nowadays, these extension tubes comeequipped with electronic contacts that allow you tocorrectly meter the exposure. In the past, this wasn’tpossible, and the macro photographer relied on calculations to get the exposure right. Combined with theTTL capability for flash photography, extension tubescan be an affordable way to get into quality macrophotography, with prices ranging from 100.00 US to 200.00 US for a set of three. We’ll discuss them inmore details later in this book.as 1, 2 and 3. The magnification obtained willdepend on the diopter power and the lens being used.Most of these supplementary lenses are made of a single element lens that works by shortening the effectivefocal length of the lens in which they are used, thusallowing you to focus closer to your subject. They canbe used singly or combined, but let me warn you aboutthe degraded quality when combined. These lenses areinexpensive and easy to use, and can be a good way toget started.BellowsA bellows is simply avariable length extension tube. Magnification can be changedby how much thebellows is extendedand the focallength of theprime lens used. They are placed between your camera body and the lens. Extremely powerful magnification can be obtained from this setup, but unfortunatelythey’re too bulky to carry into the field. Besides,they’re not TTL capable and the aperture needs to bestopped down physically by moving the diaphragm orusing a double cable release. Focusing can also be achallenge and requires to be mounted on a tripod at alltimes for effective use.Macro lensThe macro lens is definitely the best way to do macro in the field. These lenses are especially designed toobtain maximum magnification with minimal distortion. A true macro lens can yield a 1:1 magnificationwithout any attachment. Most of today’s macro lensesSupplementary lensesThese are the so called close-up lenses or dioptersthat can be attached to the front of the lens in thesame way filters do, andindeed many people callthem close-up filters. Theycome in different strengths,measured in diopters suchSigma Macro 105 mm f2.8Equipment 5
EQUIPMENTare autofocus and work perfectlywith modern TTL technology.Unfortunately, using autofocus onthese lenses can be very frustratingat high magnification, as they tendto be slow and erratic. I personallydo most of my macro work focusing manually anyway, so this doesnot bother me that much. The mostcommon focal length of true macrolenses are 50mm, 90mm, 105mmand 180mm. While they all giveyou the same magnification, it’s theworking distance that varies. Interms of prici
market, photographers had to use special exposure calculators to get the right exposure for the subject and to compensate for the magni-fication being used. Digital SLR (DSLR) offers the same advantages and, in some cases, larger magni-fication due to the cropping fac-tor produced by the fact that their CCDs are smaller than the 35mm frame. Besides, they offer a hand-ful of tools for the .

![[MS-OFFMACRO]: Office Macro-Enabled File Format](/img/3/5bms-offmacro-5d-130211.jpg)
![[MS-OFFMACRO2]: Office Macro-Enabled File Format Version 2](/img/3/ms-offmacro2.jpg)