Transcription
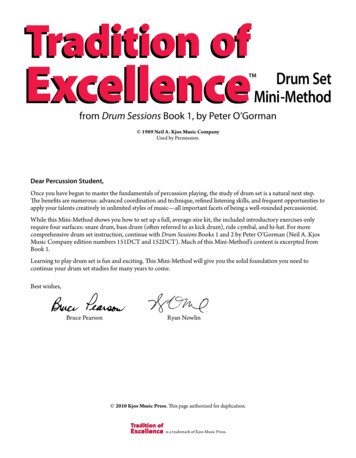
Tradition ofExcellenceDrum SetMini-MethodTMfrom Drum Sessions Book 1, by Peter O’Gorman 1989 Neil A. Kjos Music CompanyUsed by Permission.Dear Percussion Student,Once you have begun to master the fundamentals of percussion playing, the study of drum set is a natural next step.The benefits are numerous: advanced coordination and technique, refined listening skills, and frequent opportunities toapply your talents creatively in unlimited styles of music—all important facets of being a well-rounded percussionist.While this Mini-Method shows you how to set up a full, average-size kit, the included introductory exercises onlyrequire four surfaces: snare drum, bass drum (often referred to as kick drum), ride cymbal, and hi-hat. For morecomprehensive drum set instruction, continue with Drum Sessions Books 1 and 2 by Peter O’Gorman (Neil A. KjosMusic Company edition numbers 151DCT and 152DCT). Much of this Mini-Method’s content is excerpted fromBook 1.Learning to play drum set is fun and exciting. This Mini-Method will give you the solid foundation you need tocontinue your drum set studies for many years to come.Best wishes,Bruce PearsonRyan Nowlin 2010 Kjos Music Press. This page authorized for duplication.Tradition ofExcellenceis a trademark of Kjos Music Press.
2 – Tradition of Excellence Drum Set Mini-MethodDrum Set (Drum Kit)Set-Upcrash cymbalcrash cymbal standsmall tom medium tom(rack tom) (rack tom)ride cymbalride cymbal standtoms mountmusic standlarge tom (floor tom)hi-hat cymbalshi-hat standsnare drumsnare drumstandhi-hat pedalbass drum(kick drum)thronebass drum pedal(kick drum pedal)1) Set up the kit roughly as shown in the photograph (set-up varies between drum kits). Begin by positioning the bassdrum and attaching the pedal, then position the snare drum, toms, cymbals, hi-hat, and throne in relation to oneanother. To prevent the kit pieces from moving when you play, set up on a rug or carpeted surface.2) Adjust the throne height so that a) when seated, your thighs are almost parallel to the floor and b) when your feet areresting on the bass drum and hi-hat pedals, your lower legs are angled away from your body.3) Adjust the tension of the bass drum pedal sothat it can support your relaxed foot but still Hi-Hat Cymbals and StandBass Drum and Pedalmove easily.rimclutch4) Adjust the snare drum stand so that the drum’sfeltsbeatertop rim is approximately waist high when youare seated on the throne.pedal boardheel plate 5) Adjust the hi-hat cymbals so that a) the bottomtiltercymbal is six to ten inches above the top rimspurof the snare drum and b) the cymbals areapproximately one inch apart when the pedalis at rest (up).6) Adjust the rest of the kit elements so that every drum and cymbal surface is within comfortable reach and is easy toplay. You want to be able to move around the kit without unnecessary motion and be able to play in a relaxed fashion.7) Place the music stand near the hi-hat and adjust the height so that you can see both the music and your director. Youmay need to rotate the entire kit to allow for a comfortable sightline. 2010 Kjos Music Press. This page authorized for duplication.
Tradition of Excellence Drum Set Mini-Method – 3Terms &Symbolscymbal/hi-hat¿DRUMKIT) NOTATION- p.1bass drum, hi-hat with foot, and otheron the staff (toms,œ SET (DRUMsnare drumãdrum set notation – each surface is assigned to a line or spacecymbals are assigned to other lines and spaces)Drum Set Technique¿œã œride – a steady, repetitive pattern usually played on a ride cymbal or hi-hat with either hand; for now, keep the hi-hat cymbals closedwhen riding by depressing the pedal with your left footCymbal RideHold the stick with your normal grip and rotate your forearm so that your thumb is facing up. Strike thecymbal with the tip of the stick halfway between the bell and edge. You may also ride with your palmdown.Right Hand Hi-Hat RideCross your right hand over your left, keeping your left hand in position to strike the snare drum. Strikethe top hi-hat cymbal with the tip of the right stick, about halfway between the bell and edge. You mayalso ride with your thumb facing up.Left Hand Hi-Hat RideStrike the top hi-hat cymbal with the tip of the left stick, about halfway between the bell and edge.1. QUARTER NOTE RIDE– combiningmusicalelements played bythe hands and feet to create a single, more complex musical element2. coordinationBASIC NS1. Quarter Note Rideu Practice first with your right hand on ride cymbal or closed hi-hat, and then with your leftnotation,ride hand on closed hi-hat. Sit up straight on the throne, but remain relaxed.u Also try riding on hi-hat with the shoulder of the stick striking the edges ofcymbals simultaneously.¿4ã4¿¿n right hand riden left hand ridecoordination¿¿¿u Practice both �Ó¿¿4ŒC. ã �Œ¿œ¿Œn right hand ride, left hand snaren left hand ride, right hand snare¿¿œ¿Œ¿Ó¿¿œ¿Œ.¿4ÓD. ã 4¿¿Œ¿œ¿Ó¿¿Œ¿œ.¿4ã4 Œ¿œ¿Œ¿œ¿Œ¿œ¿Œ¿œ.B.F.¿4Óã4.u Repeat each pattern several times at differenttempos. Use a metronome.E.¿More Practice: Tradition of Excellence Percussion Book 1p. 44, #1-20 — play rhythms on ride cymbal or hi-hat to build your chops.Once mastered,check the boxes.2. Basic Quarter Note Ride/Snare Coordination PatternsA.both hi-hat 2010 Kjos Music Press. This page authorized for duplication.
DRUM SET (DRUM KIT) NOTATION - p.23. ADVANCED QUARTER NOTE RIDE/SNARE COORDINATION PATTERNS4 – Tradition of Excellence Drum Set Mini-Method4. EIGHTH NOTE RIDE5. BASIC EIGHTH NOTE RIDE/SNARE COORDINATION PATTERNS3. Advanced Quarter Note Ride/Snare Coordination Patterns¿œ4ã4¿œ¿Ó¿¿œ¿œ¿Ó¿.B.¿4ã4 Ó¿¿œ¿œ¿Ó¿¿œ¿œ.¿œ4C. ã 4¿Œ¿Œ¿œ¿œ¿Œ¿Œ¿œ.¿4D. ã 4 œ¿œ.¿œ4G. ã 4¿œ¿Œ¿œ¿œ¿œ¿Œ¿œ.¿4H. ã 4 Œ¿œ¿œ¿œ¿Œ¿œ¿œ¿œ.A.E.n right hand ride, left hand snaren left hand ride, right hand snare4. Eighth Note RideA.ãc¿ ¿ ¿ ¿More Practice: Tradition of Excellence Percussion Book 1 p. 44, #1-20—play rhythms on snare with one hand, and add a quarter note ride withthe other; first practice snare alone, then add ride.¿ ¿ ¿ ¿ ¿ ¿ ¿ ¿ .n right hand riden left hand rideB.ãc¿ ¿ ¿ ¿ ¿ ¿ ¿ ¿ ¿ ¿ ¿ ¿ ¿ ¿ ¿ ¿ .More Practice: Tradition of Excellence Percussion Book 1 p. 45,#21-40—play rhythms on ride cymbal or hi-hat to build your chops.5. Basic Eighth Note Ride/Snare Coordination PatternsRepeat each pattern several times at differenttempos. Use a metronome.A.¿ ¿ ¿ ¿ ¿ ¿ ¿ ¿ ¿ ¿ ¿ ¿ ¿ ¿ ¿ ¿œ Œ œ Œ .cã œ Œ œ ŒB.u¿ ¿ ¿ ¿ ¿ ¿ ¿ ¿ ¿ ¿ ¿ ¿ ¿ ¿ ¿ ¿cã Œ œ Œ œ Œ œ Œ œ .¿ ¿ ¿ ¿ ¿ ¿ ¿ ¿ ¿ ¿ ¿ ¿ ¿ ¿ ¿ ¿œ œ Óœ œ Ó.cC. ã¿ ¿ ¿ ¿ ¿ ¿ ¿ ¿ ¿ ¿ ¿ ¿ ¿ ¿ ¿ ¿œ œœ œ .cÓD. ã Ó¿œ ¿ ¿ ¿ ¿ ¿ ¿œ ¿ ¿œ ¿ ¿ ¿ ¿ ¿ ¿œ ¿ .cŒ ŒŒ Œ.ã¿ ¿ ¿œ ¿ ¿œ ¿ ¿ ¿ ¿ ¿ ¿œ ¿ ¿œ ¿ ¿ ¿ .cŒŒŒ .ã ŒE.F.n right hand ride, left hand snareW61Fnleft hand ride, right hand snare 2010 Kjos Music Press. This page authorized for duplication.
DRUM SET (DRUM KIT) NOTATION - p.36. ADVANCED RIDE/SNARE COORDINATIONTraditionPATTERNSof Excellence Drum Set Mini-Method – 5Drum Set TechniqueTo help you learn more complex coordination patterns, gradually add notes to the pattern. For example, to learn #6A below:¿¿Œ Œ Œ4.ã4 œStep 1¿¿¿ Œ Œ4.ã4 œ œStep 2¿œ ¿ œ¿ ¿œ ¿œ ¿ Œ .4.ã4Step 5¿¿¿¿Œ Œ4.ã4 œ œ œStep 3¿œ ¿ œ¿ ¿œ ¿œ ¿ ¿œ .4.ã4Step 6¿¿¿¿¿ Œ4.ã4 œ œ œ œStep 4¿œ ¿ œ¿ ¿œ ¿œ ¿ œ¿ ¿œ .4.ã4Step 7Repeat each step several times until you are comfortable with it, being sure to count though the entire measure (including the rests oneach repeat). Practice slowly at first, and add a measure of rest to each step if desired.6. Advanced Ride/Snare Coordination Patternsu Repeat each pattern several times at different tempos.Use a metronome. If you prefer, practice the leftcolumn first, followed by the right column.A.4 ¿œ ¿ ¿œ ¿œ ¿œ ¿ ¿œ ¿œ ¿œ ¿ ¿œ ¿œ ¿œ ¿ ¿œ ¿œ .ã4B.4 ¿œ ¿œ œ ¿œ œ¿ œ ¿œ ¿œ œ ¿œ ¿œ œ .ã4¿ ¿ ¿ ¿ ¿ ¿ ¿ ¿ ¿ ¿ ¿ ¿ ¿ ¿ ¿ ¿4œ œ œ œ œ œ œ œ œ œ œ œ .C. ã 4¿œ ¿ ¿ ¿4œ œ œ œ œD. ã 4œ¿ œ ¿œ ¿œ œ ¿œ .4 ¿œ ¿ ¿œ ¿œ ¿œ ¿œ ¿œ ¿ ¿œ ¿ ¿œ ¿œ ¿œ ¿œ ¿œ ¿ .ã44 ¿œ ¿œ œ ¿œ œ ¿œã4¿ ¿ ¿ ¿œ œ œ œ œ œ .E.4 ¿œ ¿œ ¿œ ¿ ¿œ ¿ ¿œ ¿œ ¿œ ¿œ ¿œ ¿ ¿œ ¿ ¿œ ¿œ .G. ã 4I.K.¿ ¿ ¿ ¿ ¿ ¿ ¿ ¿ ¿ ¿ ¿ ¿ ¿ ¿ ¿ ¿4œ œ Œ œ œ Œ .ã4 œ œ Œ œ œ Œ4 ¿Œ ¿ ¿œ ¿œ ¿Œ ¿ ¿œ ¿œ ¿Œ ¿ ¿œ ¿œ ¿Œ ¿ ¿œ ¿œ .ã4¿ ¿ ¿ ¿ ¿ ¿ ¿ ¿ ¿ ¿ ¿ ¿ ¿ ¿ ¿ ¿4œ œ Œ œ œ œ œ œ Œ œ œ œ .M. ã 44 ¿œ ¿ ¿œ ¿œ ¿œ ¿œ ¿Œ ¿ ¿œ ¿ ¿œ ¿œ ¿œ ¿œ ¿Œ ¿ .O. ã 4n right hand ride, left hand snaren left hand ride, right hand snareF.4 ¿œ œ ¿œ ¿œ œ¿ œ œ¿ œ ¿œ ¿œ ¿œ œ .H. ã 4J.L.¿œ ¿ ¿ ¿4ã4 œ Œ œ œ Œœ¿ œ ¿Œ ¿œ œ ¿Œ .4 ¿Œ ¿œ œ ¿Œ ¿œ œ Œ¿ œ¿ œ ¿Œ ¿œ œ .ã4¿œ ¿ ¿ ¿¿ ¿ ¿ ¿4œœœœœœ Œ œ œ œ .ŒN. ã 4P.4 ¿œ ¿œ œ ¿œ œ ¿Œã4 2010 Kjos Music Press. This page authorized for duplication.¿ ¿ ¿ ¿œ œ œ œ œ Œ .W61F
6 – Tradition of Excellence Drum Set Mini-MethodTerms &Symbols¿œã œbass drum (kick drum)cymbal/hi-hatsnare drumdrum set notation – each surface is assignedto a line or space on the staff (toms,hi-hat with foot, and other cymbals areassigned to other lines and spaces)Drum Set TechniqueThe bass drum (kick drum) is played by your right foot. Use either heel down or heel up (ball of foot) technique when playing. It isrecommended that you learn both techniques. Heel down makes it easier to play softly and with more control. Heel up makes it easierto play faster and with more power.Heel Down Technique1) Place your right foot flat on the pedal board. Your heelshould be on the heel plate and the beater should be ina rest position off the head.2) Using your heel as a fulcrum (pivot point), quickly movethe ball of your foot in a down/up motion causing thebeater to strike the head and rebound. Both the ball ofyour foot and your heel should remain on the pedal boardthroughout the entire stroke.Heel Up (Ball of Foot) Technique1) Place the ball of your right foot on the pedal board, two tofour inches above the heel plate. Your heel should be raisedoff the plate and the beater should be in a rest position offthe head.2) Raise your leg slightly and allow it to drop back down,causing the beater to strike the head and rebound. The ballof your foot should remain on the pedal board and yourheel should remain off the heel plate throughout the entirestroke. 2010 Kjos Music Press. This page authorized for duplication.
8. CHOP BUILDERS7. BASS DRUM PATTERNSTradition of Excellence Drum Set Mini-Method – 77. Bass Drum PatternsPractice first using the heel down technique, and then withthe heel up (ball of foot) technique. Use a metronome.A.ã 44 œC.ã 44 œ œ Œ ÓE.u.B.ã 44 œœ œ Œ Ó.D.ã 44 œ œ Œ œ œ Œœ œ Œ œ œ Œ .ã 44 œ œ œ Óœ œ œ Ó.F.ã 44 œ œ œ œ œ œœ œ œ œ œ œ .G.ã 44 œ œ œ œ Óœ œ œ œ Ó.H.ã 44 œ œ œ œ œ Œ.œ œ œ œ œ Œ .I.ã 44 œ œ œ œ œœ.J.ã 44 œ œ œ œ .K.ã 44 œ œ œ œ œ œJœ.œ J.L.ã 44 œ .ŒœŒœŒœŒœœœœœœœœ œ œ œ Jœ œ œJœ.œ œ œJ.More Practice: Tradition of Excellence Percussion Book 1pp. 44-46—play rhythms on bass drum.n heel downn heel up (ball of foot)u Play each Chop Builder for at least one minute without stopping.8. Chop BuildersPractice at different tempos and dynamics. Use a metronome.A.ã 44 œ œ œ œ¿ ¿ ¿ ¿4C. ã 4 œ œ œ œn C and D: right hand riden C and D: left hand rideœ œ œ œ œ œ¿ ¿ ¿ ¿ ¿ ¿œ œ œ œ œ œã 44 œ œ œ œ œ œ œ œ œ œ œ œ .B.¿ ¿ ¿ ¿ ¿ ¿ ¿ ¿ ¿ ¿ ¿ ¿ .4D. ã 4 œ œ œ œ œ œ œ œ œ œ œ œ .More Practice: Tradition of Excellence Percussion Book 1pp. 44-46—play rhythms on ride cymbal or hi-hat combinedwith bass drum (as in C and D above).W61F 2010 Kjos Music Press. This page authorized for duplication.
8 – Tradition of Excellence Drum Set Mini-MethodDRUM SET (DRUM KIT) NOTATION - p.59. PATTERNSPatternsu Repeatpattern severaltimesCOORDINATIONat different tempos. Usea10. eachSNARE/BASSDRUMPATTERNSmetronome. Apply the step-by-step technique on Mini-Methodpage 5 to help you learn patterns that are difficult.A.¿ ¿ ¿ ¿ ¿ ¿ ¿ ¿ ¿ ¿ ¿ ¿ ¿ ¿ ¿ ¿ .4ã4 œ Œ œ Œœ Œ œ Œ .B.¿ ¿ ¿ ¿ ¿ ¿ ¿ ¿ ¿ ¿ ¿ ¿ ¿ ¿ ¿ ¿ .4ã4 Œ œ Œ œ Œ œ Œ œ .¿ ¿ ¿ ¿ ¿ ¿ ¿ ¿ ¿ ¿ ¿ ¿ ¿ ¿ ¿ ¿ .4.C. ã 4 œœ Óœ œ Ó¿ ¿ ¿ ¿ ¿ ¿ ¿ ¿ ¿ ¿ ¿ ¿ ¿ ¿ ¿ ¿ .4D. ã 4 Óœ œœ œ .ÓE.F.¿ ¿ ¿ ¿ ¿ ¿ ¿ ¿ ¿ ¿ ¿ ¿ ¿ ¿ ¿ ¿ .4ã4 œ Œ Œ œ œ Œ Œ œ .¿ ¿ ¿ ¿ ¿ ¿ ¿ ¿ ¿ ¿ ¿ ¿ ¿ ¿ ¿ ¿ .4ã4 Œ œ œ ŒŒ œ œ Œ .¿ ¿ ¿ ¿ ¿ ¿ ¿ ¿ ¿ ¿ ¿ ¿ ¿ ¿ ¿ ¿4G. ã 4 œ .œ œ œ œ.œ œ œ .JJ¿ ¿ ¿ ¿ ¿ ¿ ¿ ¿ ¿ ¿ ¿ ¿ ¿ ¿ ¿ ¿4.H. ã 4 œ .œ œ.œ JJI.J.¿ ¿ ¿ ¿ ¿ ¿ ¿ ¿ ¿ ¿ ¿ ¿ ¿ ¿ ¿ ¿ .4.ã 4 œ œ œ.œ œ œ Jn right hand riden left hand ride¿ ¿ ¿ ¿ ¿ ¿ ¿ ¿ ¿ ¿ ¿ ¿ ¿ ¿ ¿ ¿ .4.ã 4 œ.œ œ.œ œ.œ JJJ10. Snare/Bass Drum Coordination Patternsu Repeat each pattern several times at different tempos. Use ametronome. Apply the step-by-step technique on Mini-Methodpage 5 to help you learn patterns that are difficult.A.C.E.G.Œã 44 œœœŒœœœŒœœœŒœœœ.ŒŒŒŒã 44 œ œœ œ œ œœ œ œ œœ œ œ œœ œ .ŒŒã 44 œ . œ œœ œ œœJŒ œ œ Œ œœ.œ œ œJB.D.F.ŒŒŒŒã 44 œ . œ œ œ œœ œ œ . œ œ œ œœ œ .JJH.n left hand snaren right hand snareŒã 44 œœŒŒœœŒŒœœŒŒœœŒ.Œ œ œ Œ œœ.œ œ ŒJ.ŒŒŒŒã 44 œ œŒ œ œ œŒ œ œ œŒ œ œ œŒ œ .ŒŒã 44 œ . œ œœ œ œŒJŒŒŒŒã 44 œ . œ œ œ œ œ . œ œ œ œ .JJ 2010 Kjos Music Press. This page authorized for duplication.W61F
Tradition of-ExcellenceDrum Set Mini-Method – 9DRUM SET (DRUM KIT) NOTATIONp.6Drum Set Techniquegroove – the foundation upon which a pop, rock, or jazz tune is builtTo help you learn grooves, first play each combination of two limbs (hands and/or feet), then combine all limbs, as shown in thesteps below. Repeat each step several times until you are comfortable, then move on to the next step. When you reach Step 4, playthe groove for two minutes without stopping. Use a metronome.11. GROOVES!groove11. GroovesA.B.Step 1Step 2Step 3Step 1Step 2Step 3Step 1Step 2Step 3Step 1Step 2Step 3Step 1Step 2Step 3Step 1Step 2Step 3Step 1Step 2Step 3Step 1Step 2Step 3¿ ¿ œ¿ ¿ ¿ ¿ œ¿ ¿ . . ¿ ¿ ¿ ¿ ¿ ¿ ¿ ¿ . . Œ4. .œ œ œ œ . .œã4œœŒœœœ.¿ ¿ œ¿ ¿ ¿ ¿ œ¿ œ¿ . . ¿ ¿ ¿ ¿ ¿ ¿ ¿ ¿ . . Œ œ Œ œ œ .4. .œ Œ œ Œ . .œ Œ œ Œ.ã4¿ ¿ œ¿ ¿ ¿ ¿ œ¿ ¿ . . ¿ ¿ ¿ ¿ ¿ ¿ ¿ ¿ . . Œ œ Œ œ .4. .œ œ Œ œ œ Œ . .œ œ Œ œ œ Œ .C. ã 4¿4D. ã 4E.F.œ¿¿œ¿. ¿œ œ ¿ œ¿ œ ¿ . . œŒ œ œ Œœ œ œ .ŒŒŒŒ¿ ¿ œ¿ ¿ ¿ ¿ œ¿ ¿ . . ¿ ¿ ¿ ¿ ¿ ¿ ¿ ¿ . . Œ œ Œ4. . œ Œ œ œ Œ . . œ Œ œ œ œŒ .ã4¿4ã4œ¿¿œ¿. ¿œ ¿ œ¿ œ ¿ . . Œœ œ œŒ œ œ .ŒŒŒŒ¿ ¿ œ¿ ¿ ¿ ¿ œ¿ œ¿ . . ¿ ¿ ¿ ¿ ¿ ¿ ¿ ¿ . . Œ œ Œ œ œ .4. . œ. œ . . œ. œ .G. ã 4JJ¿ œ¿ ¿ œ¿ œ . . ¿ ¿ ¿ ¿4. . œ. œ H. ã 4Jn right hand ride, left hand snaren left hand ride, right hand snareW61F. Œœ œ œ Œ œ œ .J 2010 Kjos Music Press. This page authorized for duplication.Step 4 (Groove)¿ ¿ œ¿ ¿ ¿ ¿ œ¿ ¿ .4ã4 œ œ œ œ .Step 4 (Groove)¿ ¿ œ¿ ¿ ¿ ¿ œ¿ œ¿ .4ã4 œ Œ œ Œ .Step 4 (Groove)¿ ¿ œ¿ ¿ ¿ ¿ œ¿ ¿ .4ã4 œ œ Œ œ œ Œ .Step 4 (Groove)¿ œ¿ ¿ œ¿ .4ã4 œ œ Œ œ œ Œ .Step 4 (Groove)¿ ¿ œ¿ ¿ ¿ ¿ œ¿ ¿ .4ã4 œ Œ œ œ Œ .Step 4 (Groove)¿ œ¿ ¿¿4œã4 œ Œ œ œ Œ.Step 4 (Groove)¿ ¿ œ¿ ¿ ¿ ¿ œ¿ œ¿ .4.ã 4 œ.œ JStep 4 (Groove)¿ œ¿ ¿ œ¿ œ .4.ã 4 œ. œ J
require four surfaces: snare drum, bass drum (often referred to as kick drum), ride cymbal, and hi-hat. For more comprehensive drum set instruction, continue with Drum Sessions Books 1 and 2 by Peter O'Gorman (Neil A. Kjos Music Company edition numbers 151DCT and 152DCT). Much of this Mini-Method's content is excerpted from Book 1.