Transcription
\Ir Veatia HVlB'1''''smochin*-FA60T1N«
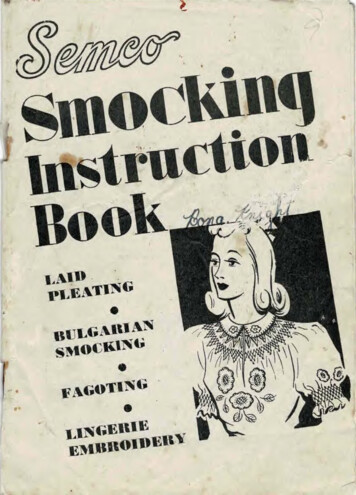
SMOCKINGSmocking is a form of embroidery which is always in demand because of itssimplicity and beauty, and the opportunity it affords for originality of design.Its popularity is no longer confined to children’s garments, and we showattractive ways of trimming dresses and lingerie with this stitch.Semcosmocking transfers ore obtainable for all types of plain and fancy designs,both as loose transfers, and in packets containing patterns of blouses andchildren's frocks (see page 20). The following pages show all the switchesused in smocking, and various combinations of these stitches in beaufifu'and effective designs.SMOCKINGMETHODIf deep close pleats are desired, allow three times in finished length whenstamping the transfer. That is, if the smocking is to be three inches, stampnine inches of material. Take a plain smocking transfer in the size required,and stomp in the following manner. Lay the material to be stamped on aslightly padded surface, with the wrong side uppermost.Fin the transfercarefully in position and stomp with a quick downward stamp’ of the iron(never press slowly and heavily). The iron should just reach sizzling pointfor stlk. For cotton or other materials, use a hotter iron.The material should then be gathered on the wrong side, commencing at theright hand side with 6 double stitch to hold the knot. If gathering threadsof a contrasting color are used, they car. be more easily seen os a guide forthe embroidery.Use a separate gathering thread for each row, of dots,being careful to take up only as much material as is covered by the dot.The gathering threads should then be drawn up to the required fullness andheld in place. This should be done carefully as the beauty and evenness ofthe finished work depends upon the evenness of the foundation. The bestmethod of securing the drawn up gathering threads is to wind each threadacross and round a pin as shown in Fig. I, The right side upon which thesmocking stitches are worked, now presents a succession of tolds,Semco Stranded Cotton is ideal for working the smocking, and Semco RayonEmbroidery thread for a silk finish.When the embroidery is completed, the gathering threads should be loosenedand the work pressed in the following manner.Place a moderately wetpiece of muslin over an edge of a hot iron. Then pull the wrong side of theembroidery over the edge as you would in steaming velvet.Removegathering threads and press again lightly.Page Two
SMOCKING STITCHESAlways in commencing the embroidery, tie a large firm knot in the threadand pass the needle up through the first pleat from the back of work to theright side. Take a small stitch in the top of pleat to prevent the knot frompulling through. Jhe first stitch of the smocking pattern will cover this.When fastening off the thread at the end of each row, bring the needlethrough to the wrong side of work and finish with two back stitches in thefold between first and second pleats. These stitches should be coveredfrom the right side by the line of smocking. To ensure evenness in theembroidery, always gather an extra row at the top and bottom of thepattern you are working. If the pattern requires 10 rows, gather 12.OUTLINE STITCHFIG. 2.OUTLINE STITCH.Work from left to right.Secure the thread ‘irmly onthe wrong side of the work.Bring the thread up in thefirst pleat on the right sideof the material, and takeone stitch from right toleft on top of each pleat,keeping the thread belowthe needle, and each stitchdirectly over the gatheringthread. For double outlinestitch work a second rowclose to the first, keepingthethreadabovetheneedle instead of below.CURVED OUTLINETo form the outline stitch Into el wave, workfour outline stitches diagonally up to the lineslightly, three stitches are worked above thedown again to the first line, then three stitchesline. Repeat.from a gathering threadabove, then curving veryfine. Work four stitchesin a curve just below thoCABLE STITCHFIG. 3.CABLE STITCH.This is worked from left toright and is very similar tooutline stitch. Beginning atthe first pleat, take a backstitch In each pleat, with thethread above the needlefor OH0 stitch and belov*for the next, worked alter nately,For double cablework a second row close tothe first, reversing the orderofthe thread above or belowthe needle. As the first rowbegins with thethread abovetheneedle,thesecondshould begin with the threadbelow the needle. The threelower rows show the effectof single cable worked inseveral rows,Page Thro*'
SMOCKING STITCHESWAVE STITCHThe wave proper consists i fthree stitches worked upand three stitches workeddown again, in the outlinesrtitch, using the gatheringthreads as a guide to keepthe work straight. Start atthe first pleat on the lefthand side, with the threadbelow the needle, and worktwo back stitches, each alittle higher than the last,to the line above on FIG. 4. WAVE STITCH.stitch in each pleat. Nowwith the thread abovethe needle, take one stitch in the next pleat on a level with the last stitch(Fig. 4). With the thread still above the needle, work two stitches downto the line below. Then with the thread below the needle take one stitchnext to the last stitch on the line, and work to the line above. Continuein this way to the end of row. always keeping the thread abovo the needlewhen working down the wave and below the needle when working up thnwove.More stitches can be used to make deeper waves, or the waves may beujid to form diamonds (Fig. 4 .ONE STEP WAVE ANDDIAMOND STITCHWork from left to right.Bring the needle through tothe riqbt side above thegathering thread at the firstpleat, then take a stitchthrough the second pleatbeside the first with thethread above the needle.Next pass down to theqathering thread below andtake a stitch in the thirdpleat with the threadFIG. 5. ONE STEP WAVE AND DIAMONDabove the needle (Fig. 5fSTITCH.and another stitch in thefourth pleat beside thethird, with the threadbelow the needle. Then pass up to the row above and take a stitch »nthe fifth pleat with the thread below the needle and so on.To form the diamonds, another row of one step wave is worked as shownin Fig.Page Four
SMOCKING STITCHESVANDYKE STITCHThis is one of .the fewstitches worked from rightto left.Brinq the needlethrough to the right sidein the second pleat abovethe oatboring thread, andtake the first and secondpleatstogether withastitch. Then come down tothesecondgatheringthread and take the secondand third pleats togetherandtake another stitchover in the same place asFIG. b. VANDYKE STITCHin Fig, 6.Then up tothe first gathering threadtaking the third and fourth pleats together in the same way. and so on.This stitch looks particularly attractive if worked in rowsbetween each row.leaving a spaceFor double Vandyke start on the third gathering thread and work up to,and down from the second gathering thread.FEATHER STITCHThis is worked from rightto left,or alternativelyfrom top to bottom of thework.Secure thread atfirst gathering row on rigtthand side of work.Turnwork so that you are work ing towards you across thepleats.Always keep thethread before the pleatstogether,then halfway between th*FIG 7. FEATHER STITCH.two gathering rows, takethesecondandthirdpleats together.Next take the third and fourth pleats together justabove the second gathering row. With the thread still before the needle,hake the fourth and fifth pleats together, back halfway between the twogathering rows, and the fifth and sixth pleats together on he first gather ing row.Repeat to end of row.For feathered diamond begin working on the thirdwork up to the second.(Fig. 7.)gatheringrow andPage Five
SMOCKING PATTERNSPATTERN No. I.This pattern is worked onnine rows of gathering, butlooksequallyattractiveifrepeated for a wider pattern.1st Row — Single Cable.2nd, 3rd and 4th RowsDiamond Stitch.5th Row — Single Cable.6th,7th and8th RowsDiamond Stitch.9th Row —Single Cable.PATTERN No. 2This shows two patternswhich can be repeated inany number of rows to fthin a whole yoke or bodicefront.Attractivecolorcombinations can be usedinmany different ways,either in several color: ortwo colors alternating.TOP PATTERN. 3 rows ofwave stitch workedbe tween 4 gathering rows.Miss one gathering rowand repeat.BOTTOM PATTERN. RowsI, 2 — Wave stitch up anddown, connected by anylength of cable desired.Rows 2, 3 — repeat firstrev/ will- wave stitch i*reverse.For repeat ofpattern, work diamonds ineachsucceedingrowbelow centre of doublecoble in previous row.PAITERNPage SixNo. 2.
SMOCKING PATTERNSPATTERN No. 3This pattern is worked onrows of gathering.2, 3 —4,Single5 — Wave15RowsCable.StitchI,Rows(threestitches up and three down).Rows 5, 6—Repeat WaveStitch.Rows6,7 — WaveStitch in reverse.8 — Repeat WaveRows 7,Stitch 'nreverse.10,Rows 9.II —Single Cable.Wave Stitch.Rows 12, 13 —Rows 13, 14Wave Stitch.Wave Stitch.Rows 14, 15If a narrower band ii desired,perhaps for a matching sleeve,leave out one row of Cableand one row of Wave Stitchabove and be’ow the Wavediamond.PATTERN No. 3.PATTERN No. 4This pattern is worked on12 rows of qathering.Row I — Cable. Work a2nd row cf Cable directlybelow first. Row 3—Outline. Rows 4, 5, 6. 7 — 3rows of Diamond Stitr.h.Row 8—Outline. Row 10— Cable.Work a 2nd row of Cabledirectly above 1st. WedWave Si itch from row 12to haltway between 10 andII — 4 stitches up and 4down. The pattern can bedeepened by working xt arows of Wave Stitch atbottom.PATIERN No. -t.Page Seven
SMOCKING PATTERNSPATTERN No. 5This pattern is worked on 16rows of gathering. Row I—Outline.Row 2—SingleCable.Row 3—Outline.Halfway between Rows 4and 5 — Curved Outline.' Work 2 stitches just belowRow 4, 2 stitches betweenand 2 stitches Just aboveRow 5.)Halfway betweenRows6andPATTERN No. 5.Curved outline.Dots —Work between rows ofCurved Outline, catchinq2pleats together anamissing 2 alternatelyRow 8—Ou line.Row9 — Single Cable.Row10 — Outline.Rows II.12, 13 — Diamond Stitch.Rows 14. 15. 16 — De crease Diamond Stitchesto form points.For adeeper band, work a rowof Featherstitch in placeof the Single Cable be tweenthebandsofstraight Outline and in crease the :lepM- of Dia mond point.PATTERN No.Page Eigh*t.7 — Repea"
SMOCKING PATTERNSPATTERN No. 7.PATTERN No. 6This pattern is worked onRow 2 — Double Outline.18 rows of gathering.Row 3—Outline.up to half way between Rows 4 and 5.RowI—Outline.Row 6—Four Step WaveRow 7— Four Step Wave up tobetween Rows 5 and 6.Row 8 — Four Step Wave up to between Rows6 and 7.Miss Row 9.Row 1C—Repeat 3 rows of Wave ending onRow 12.Miss Row 13.working down toRowRow 14—Repeat I row wove.16 to formdiamonds.RowRepeat Wove,18 — Completediamonds and work a small diamond in the centre of each.Page Nine
SMOCKING PATTERNSTo make a more elaborate pattern, work Rows I and 2 In Double Outlineand fill in an extro row of Wave Stitch above and below the centre row/in each band.PATTERN No. 7I—Outline.Rows 2. 3. 4 — 2 rows of Vandyke Stitch forming diamonds. Row 5 —Thispatternis workedon18 rows of gathering.RowRows 6, 7, 8 — 2 rows of Feather Stitch forming diamonds.Outline.Row 9 — OutlineRows 10, II, 12 — 2 rows Vandyke Stitch forminq arow of diamonds straight across.Rows 12. 13—Work a row of VandykeStitch missing one point in every 6.For the remaining rows, decreasethe number of points on eithe" side until the pattern is complete.For a more elaborate pat tern, work double outlineinstead of single outline,and add two more rowsof Feather Stitch.PATTERN No. 8This pattern is worked on17 rows of gathering.Row I. — Outline.Row 4 — Outline.Work2 rows of Cable and Dia mondStitchbetweenRows I and 4.Rows 5, 6, 7, 8 — 3 rowsof Three Step Wave.Rows9,10 — 3 rowsCable worked closely.Rows II. 12, 13. 14. 15 —4 rows Feather Stitch.Rows16,17 — 3Cable workedrowsclosely.For a deeper band, workextrarowsStitch, orWaveFeather Stitch,or increaseboth.ofthe rows ofThe rows of cablecan also be increased.PATTERN No. 8.
HONEYCOMB SMOCKINGThis is the only smocking stitch which can be satisfactorily worked with out first gathering the material.Stamp the smocking on the right sideof the material if the gathering is to be omitted.Figs. 2 and 3 show twoof the many excellent* patterns of fancy honeycomb obtainable in theSemco Transfer range.If, however, you wish to design your own pattern,the transfer should be stamped on the wrong side and gathered in theusual way. so that the dots not worked will not show on the right sideLess material can be allowed For honeycomb than for any other smockingstitch.If worked ona transfer based on asquare,if will drawthematerial up to half the length.The stitch itself is worked from left to right. Bring needle to the rightside of the material at first dot on top line and catch first and seconddots together, - lake a second stitch over the same place, drawing theneedle through to the wrong side; next bring the needle through to theright side on the second dot on second lino and catch second and thirddots together.Take a second stitch in the same place, drawing theneedle through to the wrong side; next bring needle through to rightside ar the third dot or the first line, and catch third and fourth dotstogether take a stitch in the same place, drawing needle through to thewrong side, and so on across.Page Eleven
FANCY HONEYCOMB SMOCKINGFIG. 2.SEMCO DESIGN No. 24SFWe have been accustomed tothinking of honeycomb smock ing in terms cf plain Tiled inbands, but the patterns pic tured here show the unusualand attractive effect of fancyhoneycomb. The effect is ob tained by leaving out some ofthe stitches, and the remain ing stitches form the pattern.It is particularly suitable forembroidering on frocks and3 SEMCO DESIGN No. 242Flingerie for adults, and looks,.,.very luxurious on wools end velvet, os well as the finer silks and -a i Fig. 3 shows a fascinating Utile border worked in shallow honeycombsmocking. Fig. 2 is an example of the deep honeycomb smocking m abond design which looks very smart end flattering worked round thewaist of a frock. This design is also obtainable in she low honeycomb.Other designs include motifs for the centre of waists and bodices, and aplain transfer for deep honeycomb.All of the Semco Honeycj,rT]iJ!Transfers have directions printed on the transfers. See pages lb and \bfor smocking ideas.Poge Twelve
FLOWER SMOCKINGThis is ordinary smockingcombined with some ofthe embroidery stitchesshown on the followingpages.It is very sweetand dainty worked onbabydresses.Justsmocksomesimplestitches in the usual wayand add the flowers anddots as you please. Uselazy daisy stitches, fibroneroses or French knots.5 -fPaQQ Thirtean
EMBROIDERY STITCHESLAZY DAISYTheneedleisbroughtuptotheright sideofthemateriel at the centre end of the petal, and a button*hole stitch thelength of thepetalis taken.A shortstitch catches the buttonhole sii ch down to the materialat the point of the petal.FIG.I.STEM STITCH OR OUTLININGBring the thread up at end of stem or line.asmalluprightstitch,bringingtheagain at the beginning of threadTokoneedleFig. 2.outCon tinue to work along the line with straight h.evenlength,upalwaysat thesidebringingendshouldoflookthelikethelastback This stitch, if closely worked in lines withone strand, makes a most effective filling in stitch.FIG. 2.FEATHER STITCHThis stitch looks delightful as a trim for children'sfrocks orbabywear.Bringthethreadright side on the line to be followed.Hold thethread down with the- leftthumb and take a slantingstitch from the right handside bock to the line Fig.3.FtG. 3.Take the next stitch onthe left side, inserting theneedleof the last stitch(seeFig. 4)ooDOsiteand takingtheenda slant ing stitch back to the line, each stitch coming just9 little lower than the previous stitch.Page Fourteento theFIG. 4.
EMBROIDERY STITCHESFRENCH KNOTSBring thread up to right side of materialand hold under left thumb.Twistthroad round needle (see Fig. 5) andinsert needle into almost the sameplace (see Fig. 6), still holding threadunder thumb until all thread is drawnthrough.In double French knot thethread is twisted round neealetwice and theneedle insertedand drawn through as in singleFrench knot, using two strands ofStranded Cotton or one strand cfPearl Cotton.FIG. 6.CHAIN STITCHThis stitch is used for outlining, paddingand often os a filling stitch.Bring thethread up from the under side of materialcn the line To be follosved; hold the threaddown with the thumb, ond insert the needlein the same hole where the thread began:the thumb thus holds the thread in a loop:take a stitch downward, bring the needle upcn the stamped line and inside the loop,and d raw through; always insert the needleir.side the loop where the last thread comesout—to ensure good work the stitchesmust be kept of an even length (seeFig. 7).FIG. 7.FIBRONE ROSEUsing two or three strands of SemcoStranded Cotton, commence by makinga satin stitch centre well raised. Buildround this with stitches, loose at firstso that they lie close to fhe lop ofcentre then gradually make them tighterand tighter until the last stitches areclose to the material. With each stitchbring theneedleback halfway tostarting point cf lest stitch.Prrgn Fifteen
IIUSE SMOCKING IN PL ACE OF GATHERING ONSmocking controls the fullnessin a very clever way on thisafternoon frock of wool jerse .Cut full length and worn witha more elaborate belt, thisstyle is lovely for a dinnerfrock or house coat. *A9. SiAjejiuFancy Smockingmakes th ssimple frock interesting andsmart.Leave ruffles al thesmocking edges and band thepockets Torneatness.Useplain or printed silk, linen,or fine woollen materialYOURDRESSPATTERN.A gay little dirndl style wit*smocking at the waist anjsleeves and cross-stitch em broidery on the yoke. Try itwirh beaded smocking—threadthe bead on the needle beforetaking Ihe second honevcombstitch.
A new idea for a charmingbedroom. Smock the drop onthe Bedspread to match. Eventhe valance and the tie-bacMtor the window droperies canbe smocked. Work pink dottedSwiss Muslin with blue, orblue Chintz with rose.ASmocked collars and cuffs are soft andflalteffng.Smartest in white—to wear wi*-hprint or plain frocks.Wear them on yourwoollen jumpers too.Use fine Pique orOrgandie, gather a straight strip of materialto the shape required, and smock in theusual way.A lovely smocked nightdressand an adorable little oedjacket.The nightdress stylemakes acharmingeveningfrock in printed silk or velvetfor luxury. Honeycomb smock ing looks best on these.Page Sever tee*.
SMOCKING PATTERN No. IWITH DETAILED INSTRUCTIONSRemember, each stitch a pleat.Cotton below needle when workingupwards.Keep cctlon up when working the level stitch on top ordiamonds and wave stitches.Cotton above needle when working down wards.Keep cotton dowr for level lower sti ch on diamond and wave.This pattern requires 13 rows of gathering.1st Row: Outline stitch.2nd Row: Begin halfway between No. I and No. 2 gathering lines and.work single cable row.3rd Row; Begin on 2nd gathering line- work single coble row.4th Row: Begin on 4th gathering lino. Do a wave by taking fou/ stitchesup to No. 3gathering line, one stitch on same level, then four down to4th gathering line one stitch on the same level.Repeat.5th Row: Begin halfway between 4th and 5th gathering lines and repeat4th row.6th Row: Begin on 5th gathering row and repeat 4th row.7th Row: Begin on 6th gathering row and repeat 4th row.8th Row: Begin on 6th gathering row and work downwards, repealingprevious rows.9th Row: Begin on 5th pleat on 7th gathering lino, take one stitch onlevel (with cotton above needle], working downwards for four stitchesthen one stitch on level, then four stitches upwards, another stitch onlevel and a diamond is formed. Repeat on third diamond.For the Smaller Inserted Diamonds—Take 2nd pleat in diamond with the3rd pleat, make a level stitch, then,going up half the height of diamond,take 3rd pleat: another level stitchon to 4th Dleot, next stitch down togathering line or levei of 1st stitch,then a level stitch: turn your workeround(halfway down large dia mond) back on to the two centrepleats with a level stitch, then towhore you started your small diamond.Finish carefully.IOth Row: Begin on 9th gatheringrow and work halfway between 8thand 9th gathering lines, a stitch beingtaken from 1st pleat up to halfwayon the 2nd pleat; next stitch on level,then down to gatherinq line, 5th stitchbeing on level with 4th. Repeat.Nth Row: Begin on 10th gatheringrow and work halfway between 9thand 10th gathering lines as last row.12thline.Row: Begin on NthRepeat last row.13thline.Row: Begin on 12th gatheringRepeat last row.14thline.Row: Begin on 13th gatheringRepeat last row.Poge Eighteengathering
SMOCKING PATTERN No. 2WITH DETAILED INSTRUCTIONSThis pattern requires 11rows of gathering.1st Row is outline stitch.2nd Row: Beginning on 2nd gathering line, bring needle up on 1st pleattake a stitch (with cotton below needle) on 2nd pleat halfway between1st and 2nd gathering lines, take 3rd pleat with cotton above needle onlevel with last stitch, take 4th pleat (with cotton above needle) on 2ndgathering line, keeping cotton below needle, take 5th pleat on level withlast stitch. Repeat.3rd Row: Begin on 5th gathering line*Three outline stitches on threepleats along the gathering line. With cotton below the needle, take 4thpleat halfway between 5th and 4th gathering lino. 5th pleat on 4th line,6th pleat halfway between 4th and 3rd, 6th pleat on 4th line of gather ing, 6 outline stilches on 4th line of gathering, then with cotton aboveneedle work four stitches down to 5th gathering line (each stitch apleat). 3 outline stitches.Repeat.4th Row: Begin just below last row.Four outline stitches then follow lastrow, doing four outline stitches at top pattern and five on 5th gatheringline.5th Row: Begin third of the way between 5th and 6th gathering lines.Do three outline stitches and merelywork as previous row. onlv downwardsto form lower half of diamond.6th Row is same as No, 3, workingcloseto 5throw,keepingstitcheslevel.7thRow:Bogin on 8th gatheringrow, working downwards to halfwaybetween 8th and 9th gathering linerepeating 2nd row.flth row:and 9th7th row.Begin halfway between 81hgathering row and repeat9th Row:Begin on I Oth gatheringrow, work upwards halfway between9th and tOth, repeating the 7th row.10th Row:Begin halfway betweenI Oth and llth. work upwards, re peating 7th row.llth Row: Begin on halfway I Othand llth gathering line, work down wards the same as previous rows,thuscompleting the lastrow asdiamond.PageNineteen
PEASANT BLOUSESAND CHILDREN'SSMOCKED FROCKSTheillustrationshowshow charming embroi dery looks on a smockedblouse.This is one ofthethreeattractiveSemco desiqns tor em broidered blouses. Thepackets contain trans fers for the embroidery,andthepatternforcuttingtogether withleafletinstructions.Children's SmockedFrock packets are alsoobtainableinvariousstyles. Cross stitch alsolooksdelightfulcom binedwithsmocking,and separate transfersare obtainable of de signs suitable for frocksand blouses.V77 *“ SEMCO SMOCKED BLOUSECROSS STITCHTo give a uniform and pleasingeffect, all top stitches should lie inthesame direction.It willbefound oasier (where possible)tomake the stitches in one direclionentirelyacross the row. then goback, putting in the top stitchesrather than completing each cross separately.Where single crossesare of different colors, those of course must be completed one at atime.In lines care must be taken that all crosses meet as in Fig. 9.Page Twenty
BULGARIAN SMOCKINGThis Is really a very simple form of embroidered gathering.Insteadof pulling out the preliminary gathering threads as in ordinary smocking*the rows of gathers are worked in strong embroidery thread and -efl In,and the pattern worked over them in simple outline stitch, It is veryfirm and does not stretch like ordinary smocking.Used in place ofmachine gathering, it gives a beautiful and unusual finish to rrocks, eitheron the bodice or at the waist. Attractive collars and cuffs can be workedin this stitch, and are very easily laundered and pressed.Gatheredpockets look fashionable and interesting. Almost any mateilal is suitableexcept very heavy woollens. Silk, linen, cotton or light weight woollenscan be used.For the embroidery itself, us S&ftico Stranded Cotton in sin strands, orwoo! may be used on woollen material.Angora wool looks love /ernbroide red on light woollen materia). The same thread should be used,both for the gathers and the surface embroidery.Figures five, six end seven show the finished effect of three designstogether with the working details. The designs can of course be varied,or made wider or narrower, according to the number of gathering rowsworked. If the smocking is to be worked on a straight piece of material,use a plain smocking transfer, and stamp on the wrong side of thomaterial, A transfer with the dots a quarter of an inch apart is a goodaverage size for silks, and three-eights of an inch for heavy linen orwool.When running In the gathering threads, the stitches and the spacebetween thorn should be of equal length. Alternate the stitches and spacesin rows, I he stitches of one row corresponding to the spaces of the next. Fig, I, If smocking on a curve, mark the spacing for the stitches onthe wrong side of the material.The length of the stitches must beadjusted to fit then curve, those of each succeeding row being a littlelonger than those of the previous row. The gathering threads should thenbe drawn up to the required fullness, and held in place.Care must botaken to have eachgatheringexactlythreadthesametension.After aM the leandthethreadto the right side oftheFIG,material at leftI.hand end of gather ing rows, and beginPage Twenty-ene
BULGARIAN SMOCKINGtoworkthepattern.Useabluntpointedtapestry noedle to avoid catching the material,as the design is worked by passing the need1--*andthread under the gathering thread only.Figs. 2, 3 and 4 show how this is done.Whenworking the Zig-Zag lines, care must be takentoFIGholdthematerialalways in the same posi 2.tion,withoutand workturningthet,points ofthe Zig-Zag to and awayfrom the body while thethread is held well to theleft, under the thumb ofthelefthand.Fig.3shows the position of theneedle andFIG. 3.FIG. 4.workingawaythefromZig-Zagthebody.Fig. 4 shows the mannerof working towards thebody.Whenstraight fineshold theworking(Fig. 2),threaddownwhile passing the needloupwardundergathering thread.Page Twenty-twoIlt2FIG vthread when
BULGARIAN SMOCKING\ A A* A A'\/ V V V \/A /\ ‘ A * A ‘ A/ \/ V V \/A*A* A A* Af \/ V V \i\ /\ /\ /\ * A *\/\\t/\\f/\\//\\//\v V \/ V V/\ /\ A ' A * A/ V \/ \/ \/' *FIG 7.The patterns 5, 6 and 7, ore pictured with worked details.Two coloursare used in the embroidery of each of these patterns.Page Twenty*fhrse
LAID PLEATINGThis methodof putting in fullness by the decoration of flat pleats,deserves to bemore widely known.It has certain advantages oversmocking: the pleated material lies flatter, it is firmer, and particularlyeasy mbroidery looks lovely on little frocks and rompers, either in s Ik orlinen.Lingerie is fascinating trimmed in this way, and it may be used in placeof gathering on either silk or woollen dresses.The size of the pleat ortuck varies from -incb to -inch according to the weight cf the materialused.An easy method of pleating the material is to stomp a plainsmocking transfer of the size required, on the wrong side of the material,and fold the material on the dots.into pleats, tack firmly andpress.When the material has been foldedNow catch the pleats down withrunning slitches in rows, an even distance apart, working over one tuckand under the next.Alternate rows of stitches must go ovor the tucksthe preceding row went under.When the rows of running stitches arecomplete, remove the tacking threads, as the tucks are new secure, endwork over the runring stitches or between the rows according to thepattern.The illustration and diagrams show the type of design that issuitable for embroidery.Poge Twenty-four
LAID PLEATINGI. This shows I he runningstitchestakeninrowsacross the pleats.2, Showinghowtoworkthe trellis pattern over therunning stitches.3. Amaybandbedesignusedinwhichplace ofthe one shown at the topandbottomofthetrellispatte-n ip the illustration.Thisshowsworkedrunninganother varietyofpattern.ThestraightlinesAcanbe n back or chain stitches: B in lazy daisy stitch: C shows running stitches: and E. the stem, can be worked in back stitch or chainstitch.Page Twenty-five
LINGERIE EMBROIDERYDesigns for every type of embroidery for lingerie ere obtainable in theSemco Transfer Range; enchanting florals in tiny sprays, delicate appliqueand shadow embroidery designs, and smart monograms. These designs arepractical and simple to embroider, and bring glamorous and flattering lingeriewithin the reach of the most inexperienced needlewoman.MONOGRAMS AND INITIALSFIG. 2.Simplicity and style in monograms, make theperfect finish to hand-made lingerie.Youran buy your :wn monogram in rwo or three letters or purchase the letters.separaTely, Choose from classic and script styles for your tailored pyjamasand undies, delicate designs with floral motifs for gregile lingerie,or monograms in the modern style without capitals. There are larger sizesfor house iinens and styles for decorating your sports wear and dresses.Your Needlework Supplier will show you the full rango ol Semco lni?*aiTransfers.PADDING A MONOGRAMFirst outline* the design with running stitches o give a firm edge to themonogram. Then pad the centre with chain-stitch (Fig. I). Finally, coverthe padding with satin stitch, worked straight across the letter, as shown ir.Fig. 2.Page Twe
Stitch. Rows 6, 7 — Wave . Stitch in reverse. Rows 7, 8 — Repeat Wave Stitch 'n reverse. Rows 9. 10, II — Single Cable. Rows 12, 13 — Wave Stitch. Rows 13, 14 . Wave Stitch. Rows 14, 15 . Wave Stitch. If a narrower band ii desired, perhaps for a matching sleeve, leave out one row of Cable and one row of Wave Stitch above and be'ow the .
