Transcription
Cupping MassageMASTERYCupping for Massage TherapistsUsing Silicone CupsMorgan Sutherland, L.M.T.
Cupping Massage MasteryCupping for Massage Therapists Using Silicone CupsCopyright 2019 Morgan Sutherland, L.M.T.All rights reserved.No part of this book may be reproduced in any form withoutpermission in writing from the author. Reviewers may quote briefpassages in reviews. The information contained in this book iscurrent at the time of this writing. Although all attempts have beenmade to verify the information provided in this publication, neitherthe author nor the publisher assume any responsibility for errors,omissions, or contrary interpretations of the subject matter herein.This book is for educational purposes only. The views expressedare those of the author alone and should not be taken as expertinstruction or commands. The reader is responsible for his or herown actions.At times links might be used to illustrate a point, technique, or bestpractice. These will reference products I have found useful, butplease do your own research, make appropriate comparisons, andform your own decisions as to which products will work best foryou. Links to products are used to illustrate points, because theyare the examples with which I am most familiar.Photos: Copyright Morgan SutherlandIllustrations: Online images, labeled for reuseCover image: Copyright Morgan Sutherland
ContentsChapter 1: Introduction . 1Cupping Massage Mastery (Video Course) . 3Chapter 2: A Brief History of Cupping . 4Chapter 3: A Word about Cupping Marks . 15Chapter 4: Cupping Contraindications . 19Chapter 5: Supplies and Room Setup . 20Recommended Silicone Cupping Set . 21Chapter 6: Safety and Sanitation of Cups . 22Chapter 7: Applying and Removing the Silicone Cups . 23Chapter 8: Light Friction without Suction . 27Chapter 9: Single Paraspinal Release . 28Chapter 10: Double Paraspinal Release . 31Chapter 11: Single Cup Lift and Twist . 33Chapter 12: Double Cup Lift and Twist . 34Chapter 13: Reverse Cross-Fiber Friction . 36Chapter 14: Trigger Point Release . 39Chapter 15: Suction Release . 42Chapter 16: Plunger Method . 44Chapter 17: Popping Method . 46Chapter 18: Rib Release with Breath . 48Chapter 19: Reverse Pin and Stretch (for the Neck) . 52Chapter 20: Reverse Pin and Stretch (for the Shoulders) . 55Chapter 21: Reverse Pin and Stretch (for the Pecs) . 56Chapter 22: Reverse Pin and Stretch (for the Biceps) . 58
Chapter 23: Reverse Pin and Stretch(for the Subscapularis). 60Chapter 24: Reverse Pin and Stretch(for the Hamstrings) . 61Part 1 . 61Part 2 . 64Chapter 25: Active Cupping . 71Chapter 26: Lymphatic Cupping for Back . 75Chapter 27: Flash Cupping . 77Chapter 28: Stationary Cupping . 81Chapter 29: Cupping in Side-Lying Position . 84Paraspinal Glide . 85Lift and Twist . 86Reverse Cross-Fiber Friction . 87Popping Method . 88Chapter 30: Cupping for the Rotator Cuff. 89Part 1 . 89Part 2 . 95Part 3 . 97Part 4 . 99Chapter 31: Cupping for the Hips . 101Chapter 32: Reverse Pin and Stretch for theHamstrings and the IT Band . 108Chapter 33: Cupping for the Calves . 111Chapter 34: Cupping for Plantar Fasciitis . 116Chapter 35: Cupping for the Quads . 120Chapter 36: Cupping for the Adductors . 125Chapter 37: Cupping for Knee Pain . 128
Chapter 38: Cupping for Shin Splints . 134Chapter 39: Cupping for the Forearms . 141Golfer’s Elbow . 141Carpal Tunnel . 145Tennis Elbow . 151Bonus Chapter: Facial Cupping . 154Contraindications for Facial Cupping . 155Recommended Glass Facial Cupping Set . 156Caring for Your Facial Cupping Set . 157Facial Cupping Sequence. 158Step 1: Lymphatic Drainage . 160Step 2: Jawline . 162Step 3: Cheeks . 165Step 4: Around the Mouth . 169Step 5: Plump the Lips . 172Step 6: Sides of Nose . 174Step 7: Around the Eyes . 181Step 8: Frown Lines and Forehead. 191Step 9: Eyebrows . 197Step 10: Finishing Strokes . 198Helpful Tips . 206About the Author . 209Other Books by Morgan Sutherland, L.M.T. . 211
Chapter 1: IntroductionWelcome to Cupping Massage Mastery, where you will learnhow to integrate the modern adaptation of cupping therapyusing silicone cups into a massage session.Performing advanced bodywork techniques, such asmyofascial release and trigger point therapy, has never beensimpler, thanks to cupping massage.My name is Morgan Sutherland, and I've been a certifiedmassage therapist since the year 2000. For the past 13years, I've been successfully combining deep tissuemassage and cupping to treat chronic pain and sportsinjuries.My clients rave about how much cupping has enhanced theeffectiveness of my massages, so much so that they'rerebooking appointments and writing five-star reviews.Currently I have over 450 reviews, so you can feel confidentyou'll be learning from a seasoned cupping massagetherapist.I designed this cupping course for massage therapists,bodyworkers, and other health professionals seeking to learna versatile healing modality. This knowledge will allow themto expand their current practices and work much deeperwithout causing their clients pain or straining their ownbodies.1
By the end of this book, you will be able to integrate siliconecupping therapy into a massage session, work with a greaterrange of clients and wider variety of conditions, explaincupping marks to clients, and apply safety precautions byknowing about contraindications.I'll be teaching over a dozen cupping massage techniques(such as paraspinal release and reverse pin and stretch) thathave allowed me to go deeper and get even faster resultswith less pain than just deep tissue massage alone.Follow along as you'll learn step-by-step cupping treatmentsfor a variety of chronic pain conditions, such as rotator cuffstrain, tennis elbow, low back pain, sciatica, in addition to anumber of sports injury protocols for the lower extremitiesthat keep my athletic clients performing better and injuryfree.The ideal student for this course is a massage therapist,bodyworker, or other health professional who wants to learna versatile healing modality, which will allow them to dodeeper work; get excellent results without causing discomfortto their clients; and save their hands from strain, injury, andfatigue while still having fun and growing their practices.2
Cupping Massage Mastery (Video Course)Take your cupping skills to the next level with the CuppingMassage Mastery video training.Go to CuppingMassageMastery.com to learn more.I look forward to seeing you inside the course.In good health,Morgan Sutherland, L.M.T.Instructor, Cupping Massage MasteryCuppingMassageMastery.com3
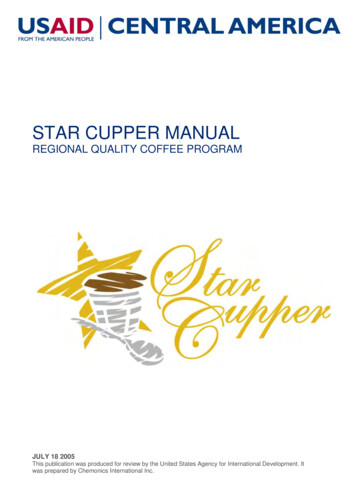
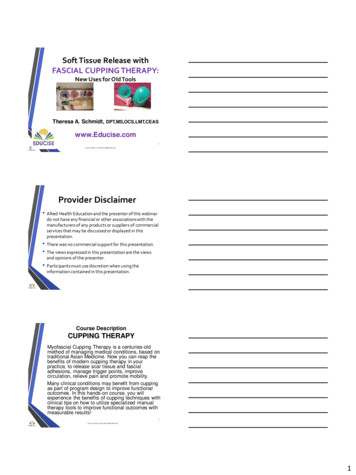
Chapter 2: A Brief History of CuppingCupping therapy, commonly referred to as cupping, hasbeen around for thousands of years. It developed over timefrom the original use of hollowed-out animal horns (the hornmethod) to treat boils and suck the toxins out of snakebitesand skin lesions.4
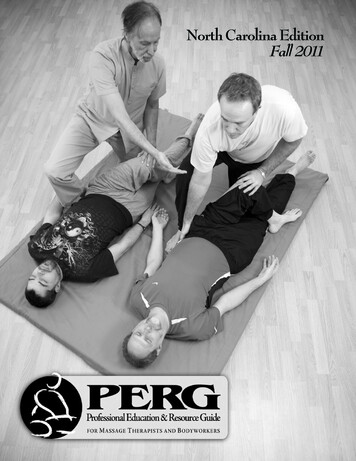
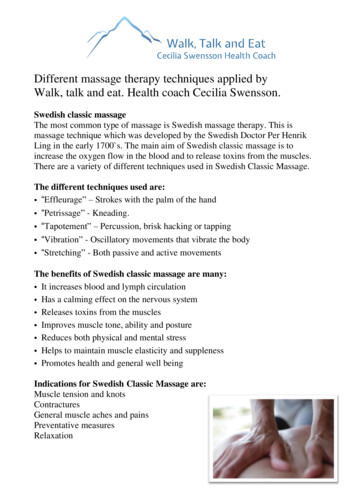
Horns slowly evolved into bamboo cups, which wereeventually replaced by glass.Therapeutic applications evolved with the refinement of thecup itself and with the cultures that employed cupping as ahealthcare technique.5
The true origin of cupping still remains uncertain to this day.Some consider the Chinese to be responsible for cupping,however, the earliest pictorial records date back to theancient Egyptians about 1500 BC.Translations of hieroglyphics in the Ebers Papyrus, theoldest medical textbook, detail the use of cupping for treatingfever, pain, vertigo, menstrual imbalances, weakenedappetite, and helping to accelerate the healing crisis.6
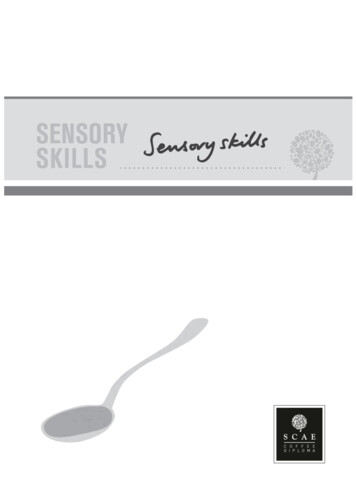
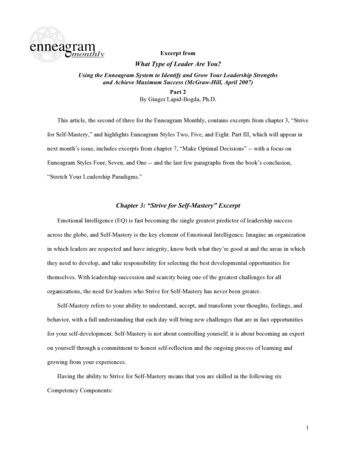
From the Egyptians, cupping was introduced to the ancientGreeks, where Hippocrates, the father of modern medicineand cupping advocate, viewed cupping as a remedy foralmost every type of disease.7
In fact, other Greek physicians used the strong suction ofcupping to restore spinal alignment by reducing dislocatedvertebrae from protruding inward.The earliest recorded use of cupping came from the famousalchemist and herbalist Ge Hong (281–341 BCE), whopopularized the saying, “Acupuncture and cupping, morethan half of the ills cured.”The Chinese expanded the utilization of cupping to includeits use in surgery to divert blood flow from the surgery site.In the 1950s, after much extensive research, a collaborativeeffort between the former Soviet Union and China confirmedthe clinical efficacy of cupping therapy.8
Since then, cupping has become a mainstay of governmentsponsored hospitals of traditional Chinese medicine.Eventually, cupping spread to ancient cultures in manycountries of Europe and even the Americas.Throughout the 18th century, European and Americandoctors widely used cupping in their practices to treatcommon colds and chest infections, often in the form of wetcupping.Wet cupping, also known as artificial leeching and hijamah inMuslim societies, is where the practitioner makes tinyincisions in the skin to dredge the blood or poisons out of thebody.9
By the late 1800s, cupping lessened in popularity and wasseverely criticized and discredited by the newly establishedscientific model of medicine.The new model defined medicine by making the bodytransparent, focusing on and treating the inside, inpreference to the outside. Because cupping was a surfacetreatment, it was inconsistent with this new medicalparadigm, which had shifted away from hands-onmanipulative therapies.10
Decades flew by as cupping therapy gradually becamereduced to a mere curiosity of the past, collecting dust onpractitioners’ shelves.In 2004, cupping re-emerged as a hot new celebrity trend inthe limelight of a New York film festival, where actressGwyneth Paltrow’s back revealed her fresh cupping marks.Countless celebrities, such as Jennifer Aniston, VictoriaBeckham, Justin Bieber, and Kim Kardashian, followed suitand became fast adopters of this hot new cupping trend.11
In the 2016 Olympics, swimmer Michael Phelps’ multitude ofeye-catching purple circles made countless headlines. Andno, he was not in a bar fight!Neither did he fall asleep on his 22 gold medals!Michael Phelps’ trainers proudly claimed that cupping was afavored recovery modality that helped reduce soreness andsped up the healing of overworked muscles.Phelps wasn’t the only Olympian who sported cuppingmarks. World champion tennis star Serena Williams is also abig believer in the benefits of cupping.12
“It feels like an octopus, although I don’t know what anoctopus feels like . . . It looks weird, the cupping. Yeah, Ialways do it, but I just did it for fun . . . so it just feels like it’ssuctioning and it just feels good.”A 2015 systematic review and meta-analysis in the journalPLoS One concluded that cupping could be effective intreating the pain and disability associated with chronic neckpain and chronic low back pain in the short term.In 2016, Leonid Kalichman, a senior lecturer at Ben-GurionUniversity of the Negev in Israel, coauthored a commentaryreviewing cupping research in the Journal of Bodywork andMovement Therapies.13
"There is initial scientific evidence that dry cupping is able toreduce musculoskeletal pain. Since cupping is aninexpensive, noninvasive and low-risk (if performed by atrained practitioner) therapeutic modality, we believe that itshould be included in the arsenal of musculoskeletalmedicine.”One thing is certain: cupping is a powerful healing techniquethat can complement many healthcare modalities rangingfrom spa treatments to medical massage and physicaltherapy.14
Chapter 3: A Word about Cupping MarksThe most common misunderstandings concerning cupping isthe misinterpretations of the marks that sometimes result.These marks are not bruises!Bruising is the result of a physical trauma where thecapillaries are broken, causing a reactionary rush of fluids tothe injured tissue.There is no compression in correctly performed cupping.When circulation is sluggish or compromised in an injured ordiseased area of the body, insufficient oxygen gets to thecells.This results in a local buildup of waste products, such asdead, static blood, lymph, cellular debris, and toxins.Cupping can leave marks, which indicates that thestagnation or disease has been moved from the deeper15
tissue layers to the surface, allowing fresh oxygenated bloodto nourish and heal the underlying areas.Any suction device left long enough in one place will loosenand pull these agents out and up to the skin surface.How long do these marks last?The color and pattern of the marks depend on the level ofstagnation in the area. They range from a bright red to adark purple, usually lasting three days to a week—sometimes longer if the person is extremely sick orsedentary.If there is no stagnation present, there will be only a lightpink mark, which disappears in a few minutes to a couple of16
hours. Sites where there is an old trauma or injury mightrequire multiple cupping treatments to remove all thestagnation.You will find that with follow-up treatments, the marks willbecome visibly lighter as the pathogens are systemicallyremoved from the body.As treatments accumulate and as the stagnation getsreleased, dispersed, and drained—(sometimes as quickly asthe second treatment), no discoloration is likely to occur atall—even though each time the cupping might have beenfocused on the same area, for the same duration, and withthe same amount of suction.17
This action is clearly the result of having internal unwantedtoxins systematically purged.According to Ilkay Zihni Chirali, author of Traditional ChineseMedicine Cupping Therapy, the full benefits of cupping areachieved between 5 and 10 visits. Some benefits areimmediately noticeable, but short-lived, when dealing withmusculoskeletal conditions. In this case, Chirali highlyrecommends 10 sessions as one course of treatment.18
Chapter 4: Cupping ContraindicationsPlease read the following contraindications before you begincupping your clients. Always remember, when in doubt, don’tcup! Avoid excessive heat, cold, or exercise for at leastfour to six hours post cupping. Do not perform cupping on broken bones,dislocations, hernias, herniated discs, or on anyoneundergoing cancer therapies. Do not cup over sunburned skin or skin that isruptured, ulcerated, or inflamed. Avoid moving cups over the jugular or carotid artery. Only perform cupping on pregnant clients in theirsecond trimester. When cupping pregnant clients, avoid moving cupsover the abdomen or sacrum. Avoid strong cupping or lengthy cupping on energydepleted clients. Perform only light cupping on the elderly, children,and when going over the kidneys. Do not perform cupping on people with kidney or liverdisease, cardiomyopathy, varicose veins, or overrecent surgical incisions. Avoid strong cupping or prolonged cupping on clientswho are on blood thinners, hemophiliacs, have high orlow blood pressure, or are diabetic.19
Chapter 5: Supplies and Room SetupWhen it comes to setting up your office, so you can easilyintroduce cupping into your bodywork sessions, it’s essentialthat you have the following supplies. Four or more sets of silicone cups (recommended set SiliconeCuppingSet.com). A small table or counter space to place the cups. A mat to place the cups on top of. Massage oil or oil-based massage cream. A small, plastic container to place the used cups intoand transport to the sink to wash.20
A spray bottle filled with a 50/50 blend of plainListerine and water. Liquid dish soap to wash and clean the cups. A roll of paper towels to dry the cups.Recommended Silicone Cupping SetGo to SiliconeCuppingSet.com to see my recommendedsilicone cupping set.21
Chapter 6: Safety and Sanitation of CupsWhen it comes to cleaning your silicone cups, take yourplastic container filled with used cups to the sink.Use a combination of hot water and liquid dish soap to cleanthe cups and kill germs and bacteria.Make sure to rinse the cups well and dry them with papertowels.If water is not available, a spray bottle filled with a 50/50combination of plain Listerine and water should do the trick.Just make sure to properly wash the cups at the end of theday with dish soap and hot water!22
Chapter 7: Applying and Removing theSilicone CupsStart with your client on their stomach in a prone position.Apply an oil or oil-based massage cream to your client’sentire back. This will make the cups glide easier and makefor a more enjoyable cupping experience.Then massage your client’s back to identify the tight spotsand problem areas.Once you’ve identified the areas you’d like to treat, take outthe silicone cups.When working on my clients, I’ve had the most successusing the large-size cups, but if your hands are small, oryour client’s back is small, then choose the next size cup.23
Grip the cup with your dominant hand, keeping your palm ontop of the cup and fingers curled under the lip while thethumb of your nondominant hand assists in pushingdownward until you’ve created suction.24
To release the cup, slowly pull upward as your nondominanthand’s finger or thumb slips under the lip of the cup,breaking the seal.25
An alternate way to release the cup is to pinch the cup andpop it off like a bottle cap.26
Chapter 8: Light Friction without SuctionSome clients are extra sensitive to the pressure of the cups,so doing a light frictioning first, without the suction, can helpstimulate and desensitize the skin.After a few minutes, test the client’s sensitivity levels andsuction the cups to the area you’d like to treat. If they reportthat the suction is comfortable, then you can resume thetreatment.27
Chapter 9: Single Paraspinal ReleaseWhen performing the single paraspinal release, you caneither move up the paraspinals, starting from the lumbarspine, or move down, starting at the upper thoracic spine.Grab the large-size cup and suction down.Slightly lift the cup and glide it down the back toward thelumbar spine.When you reach the lower back, you can contour downtoward the obliques as you drag the cup down and release.28
Quickly re-suction and move up the paraspinals until youreach the upper traps. Then slowly twist the cup clockwise,counterclockwise, or both, and release it.29
When coming up the back, circle the scapula a few timesand then release toward the armpits.Tip: If you stand at the head of the table when moving thecups up the paraspinals, you can simply pull the cup up theback slightly pinching the cup if you wish to narrow thesuction space and be more specific in targeting theparaspinals.30
Chapter 10: Double Paraspinal ReleaseWhen doing the double paraspinal release, I like to start atthe sacroiliac joint or around the lumbar vertebra 4 or 5.Suction the two cups down and then slowly drag them up theback, making sure to not arch your back too much as youlean over the table.You’ll want to have a wider stance and make sure to bendyour knees.When moving the cups up the back, try and make themovement a graceful flow.31
As you suction, pull up, turn the cups inward and thenoutward, and then release. Or you can drag the cups towardthe armpits and release.Try using a smaller-size cup if your hands are smaller. Makesure to check in with the client and then ask how it feels.32
Chapter 11: Single Cup Lift and TwistWhen doing the single cup lift and twist method, try andimagine you’re turning a doorknob back and forth. Suctionand lift the cup, twisting it up and down the back.33
Chapter 12: Double Cup Lift and TwistTo do the double cup lift and twist, place two cups on eitherside of the spine and then lift and quickly twist them inopposing directions.34
Then you can do what I call lift and twist and drag. The dragpart is created by pinching the cups, as you twist them, andthen drag them away from the midline toward the table.35
Chapter 13: Reverse Cross-Fiber FrictionReverse cross-fiber friction is done by suctioning the cupparallel to the spine and then slightly pinching, lifting, thenshaking the cup, as you slightly tug it away from the spine.Then release the cup.36
Repeat this up and down the back along the lamina groove.When you’re gripping the cup, you can use one hand or twohands.37
You can also pinch, lift, and drag the cup laterally from theclient’s spine toward the table.38
Chapter 14: Trigger Point ReleaseCupping creates negative pressure suction over triggerpoints, which breaks up the adhesions, painlessly andwithout the discomfort of static pressure.When performing cupping over trigger points, place the cupover a tight spot, lightly lift and rotate the cup in a circularfashion for approximately 10–30 seconds.Release the cup and reapply until the trigger point pain hasdecreased and the muscle tension has softened. Then moveto a new area and repeat the process.Trigger point cupping for the rotator cuff muscles is effectivein releasing stubborn knots that are hidden deep underneaththe shoulder blades.39
To access these muscles, gently place the client’s armbehind their back and then place the cup over the rhomboidsand medial scapular border.If the client cannot put their arm behind their back, positiontheir arm to their side and put a rolled towel under the frontof their shoulder so that the scapula pops up.Then reposition the arm off the side of the table.40
If you want, you can multitask and work another area for 30seconds while the cup is doing its lifting magic. That’s thebeauty of cupping.41
Chapter 15: Suction ReleaseWhen performing the suction release method, place the cupover the area, leave it on for two seconds, and then releaseand repeat. This rapidly increases blood flow to the muscles.42
You can suction down, using one hand or two hands.Use your palm to push down the cup. To release the cups,slip your fingers or thumb under the lip of the cup to breakthe seal.43
Chapter 16: Plunger MethodThe plunger technique is similar to the suction releasemethod, but without releasing the cup.Suction and then plunge the cup up and down withoutbreaking the seal. (“Breaking the seal” means withoutbreaking the suction of the cup.)44
Placing your other hand around the cup helps to control thecup from popping off and allows your cupping work to bemore focused and targeted.45
Chapter 17: Popping MethodSimilar to the suction release method, with the poppingmethod you suction down. Instead of breaking the seal withyour fingers or thumb, you rapidly pull the cups up off thebody creating a “popping” sound.46
While one hand is performing the popping, the other hand isstabilizing the skin.This method is great for chest congestion and clearing thebuildup of phlegm in the lungs.The popping method can be done for several minutes overthe entire back along the thoracic spine, specifically aroundthe rotator cuff and ribs.47
Chapter 18: Rib Release with BreathTo do a rib release with breath, begin by placing two largesize or medium-size cups on either side of the spine aroundthe thoracic vertebra 2 or 3.**In the video clip, I actually start at T5/6, but as long as youcover the whole thoracic vertebrae, you’re golden.48
Suction down and then prompt the client to take a “deepbreath.” As they do, pull up on the cups and then ask theclient to slowly “exhale.”49
As they exhale, slowly twist the cups away from the spine,spreading and dragging the cups laterally along the ribstoward the table and then release.Continue to move down the thoracic spine until you reachT10. You can go down to T12; I just tend to go a little aboveit. It’s your choice.50
Repeat 5–10 times.51
Chapter 19: Reverse Pin and Stretch(for the Neck)Reverse pin and stretch means you shorten the muscle,place a cup over it, and then slowly stretch the muscle to itsmaximum resting length.NOTE: Because of where the camera’s set up, I’mdemonstrating this technique on the right side of my client’sneck.Cradle the head with your left hand, turning it slightly to theleft. Then with your right hand, suction the cup over theupper trap/levator scapulae.If the neck muscles are extremely tight, you can soften theneck muscles first with your knuckles and soft fist kneadingup toward the occiput.52
You might have to move down to a small-size cup, as themedium-size cup might be too big.NOTE: Keep your cups close by, if you feel like you need toswitch sizes.With your left hand, turn the client’s head toward the cup andthen laterally flex the neck to the left.Hold the stretch for two seconds and then release the cup.Reapply the cup a little farther up the neck and then stretchagain for another two seconds.You can perform this up to 10 times.53
Gradually move up the neck until you’ve worked all the wayto the posterior neck just below the mastoid process.Try and avoid leaving a dark hickey on your client’s neck bylimiting how long you leave the cups on.The skin on the client’s neck is sensitive to cupping suction,so I recommend playing it safe in the beginning by letting thecups linger no longer than 10 seconds.Be mindful to never to use the silicone cups over the client’santerior neck. You want to keep your cups lateral to thesternocleidomastoid and not on it.NOTE: The glass cupping set with a rubber suction bulb is amore appropriate tool for working the sternocleidomastoid(SCM), temporomandibular joint (TMJ), and facial muscles.54
Chapter 20: Reverse Pin and Stretch(for the Shoulders)This image shows the reverse pin and stretch for theshoulder while the client is in a prone position.Start by pinning the cup (or suctioning the cup) down overthe medial border of the scapula. Then guide your client’sarm above their head, supporting both their elbow and wrist.Return the arm to the side of the table, release the cups, andsuction down again more lateral.Repeat this until you’ve treated the entire posterior rotatorcuff muscle group.Repeat on the opposite shoulder, if that’s also a problemarea.55
Chapter 21: Reverse Pin and Stretch(for the Pecs)Here I’ll be demonstrating how to perform the reverse pinand stretch for the right pectoralis major and minor while theclient is supine.With your left hand, take hold of the client’s right wrist. Thenwith your right hand, place a large-size or medium-size cupover their pectoralis major, pectoralis minor, and anteriordeltoid.56
Have the client take a deep breath. As they exhale, performa pec stretch for one to two seconds.Repeat the process, repositioning the cup over the pecs,working all the way to the anterior deltoid.Palpate the pecs and anterior deltoid to feel for softening.You can repeat this up to 10 times at your discretion.57
Chapter 22: Reverse Pin and Stretch(for the Biceps)Here I’ll be demonstrating revers
using silicone cups into a massage session. Performing advanced bodywork techniques, such as myofascial release and trigger point therapy, has never been simpler, thanks to cupping massage. My name is Morgan Sutherland, and I've been a certified massage therapist since the year 2000. For the past 13 years, I've been successfully combining deep .