Transcription
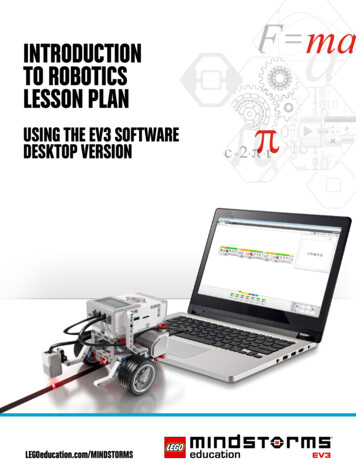
INTRODUCTIONTO ROBOTICSLESSON PLANUSING THE EV3 SOFTWAREDESKTOP VERSIONLEGOeducation.com/MINDSTORMSπr
Table of ContentsTable of ContentsIntroduction to Robotics Lesson Plan . . . . . . . . . . . . . . . . . . . . . . . . . . . . . . . . . . . . . . . . . . . . . . . . . . . .Lesson 1 - Building and Setup . . . . . . . . . . . . . . . . . . . . . . . . . . . . . . . . . . . . . . . . . . . . . . . . . . . . . . . . . . . .Lesson 2 - Curved Move . . . . . . . . . . . . . . . . . . . . . . . . . . . . . . . . . . . . . . . . . . . . . . . . . . . . . . . . . . . . . . . . . . .Lesson 3 - Move Object . . . . . . . . . . . . . . . . . . . . . . . . . . . . . . . . . . . . . . . . . . . . . . . . . . . . . . . . . . . . . . . . . . . .Lesson 4 - Stop at Object . . . . . . . . . . . . . . . . . . . . . . . . . . . . . . . . . . . . . . . . . . . . . . . . . . . . . . . . . . . . . . . . . .Lesson 5 - Stop at Angle . . . . . . . . . . . . . . . . . . . . . . . . . . . . . . . . . . . . . . . . . . . . . . . . . . . . . . . . . . . . . . . . . . .Lesson 6 - Stop at Line . . . . . . . . . . . . . . . . . . . . . . . . . . . . . . . . . . . . . . . . . . . . . . . . . . . . . . . . . . . . . . . . . . . .Lesson 7 - Switch . . . . . . . . . . . . . . . . . . . . . . . . . . . . . . . . . . . . . . . . . . . . . . . . . . . . . . . . . . . . . . . . . . . . . . . . . . .Master Challenge 1 - The Turntable Challenge . . . . . . . . . . . . . . . . . . . . . . . . . . . . . . . . . . . . . . . . .Master Challenge 2 - The LEGO Factory Robot Challenge . . . . . . . . . . . . . . . . . . . . . . . . . .Design Brief Challenges . . . . . . . . . . . . . . . . . . . . . . . . . . . . . . . . . . . . . . . . . . . . . . . . . . . . . . . . . . . . . . . . . . .Relevant Standards . . . . . . . . . . . . . . . . . . . . . . . . . . . . . . . . . . . . . . . . . . . . . . . . . . . . . . . . . . . . . . . . . . . . . . . . .Class Assessment Record . . . . . . . . . . . . . . . . . . . . . . . . . . . . . . . . . . . . . . . . . . . . . . . . . . . . . . . . . . . . . . . . .Appendix A . . . . . . . . . . . . . . . . . . . . . . . . . . . . . . . . . . . . . . . . . . . . . . . . . . . . . . . . . . . . . . . . . . . . . . . . . . . . . . . . . .Appendix B . . . . . . . . . . . . . . . . . . . . . . . . . . . . . . . . . . . . . . . . . . . . . . . . . . . . . . . . . . . . . . . . . . . . . . . . . . . . . . . . . .Appendix C . . . . . . . . . . . . . . . . . . . . . . . . . . . . . . . . . . . . . . . . . . . . . . . . . . . . . . . . . . . . . . . . . . . . . . . . . . . . . . . . . .Appendix D . . . . . . . . . . . . . . . . . . . . . . . . . . . . . . . . . . . . . . . . . . . . . . . . . . . . . . . . . . . . . . . . . . . . . . . . . . . . . . . . . .39111416182124262830313536373839LEGO, the LEGO logo, MINDSTORMS and the MINDSTORMS logo are trademarks of the/sont des marques de commerce du/sonmarcas registradas de LEGO Group. 2015, 2016 The LEGO Group. 062615.2
IntroductionIntroduction to Robotics Lesson PlanThis Lesson Plan provides educators with step-by-step instructions for how to usethe LEGO MINDSTORMS Education EV3 Software, with classroom-based lessons.Each lesson and challenge will give teachers the help they need to prepare, run, andassess the class. It is up to the teacher to select which, as well as how many of theprovided extra tasks and challenges will be used in the Robotics course.Within the program, teachers have the option to start the course by either focusingon some of the Design Brief Challenges, or by having students complete the tasksafter a more structured start, using the tutorials provided.Who Is It For?Robot Educator is a valuable tool for anyone who wishes to learn how to use LEGOMINDSTORMS Education EV3.What Is It For?The coursework for the LEGO MINDSTORMS Education EV3 Software focusesprimarily on engineering, technology, and computer science. However, it alsoprovides an opportunity to integrate cross-curricular activities, such as science andmathematics, when students complete the challenges.The engaging and motivating nature of the EV3 Software enables students toconstruct and program, as well as provide them with the scope to experiment,without prior knowledge or experience around programming or building.The featured Lesson Plans enable educators to take a step-by-step approach to thecourse or, if required, to use a more open-ended approach.The Lesson Plans are invaluable for equipping teachers with what they need toteach students how to use LEGO MINDSTORMS Education EV3 within a classroomsetting. They also serve as a learning guide for the EV3 programming language andthe hardware included within the set. The intuitive programming interface, combinedwith the supporting material, will enable students to make a quick and easy transitioninto robotics within a STEM context. Teachers who are already familiar with the EV3Software will find fresh inspiration within the educational package to further thebuilding and programming skills of their students.LEGO, the LEGO logo, MINDSTORMS and the MINDSTORMS logo are trademarks of the/sont des marques de commerce du/sonmarcas registradas de LEGO Group. 2015, 2016 The LEGO Group. 062615.3
IntroductionWhat Is in the Lesson Plan PDF? Step-by-step help on using six of the Robot Educator tutorials A range of ideas for lesson-specific challenges Two Master Challenges that provide solid opportunities for students to use EV3 in aSTEM context Four open-ended Design Brief Challenges References to relevant subject standards Suggestions on how to assess student learning A class assessment recordThe LEGO MINDSTORMS Education EV3 Software, Lessons, and Challenges aredesigned for use with the 45544 LEGO MINDSTORMS Education EV3 Core Set.LEGO, the LEGO logo, MINDSTORMS and the MINDSTORMS logo are trademarks of the/sont des marques de commerce du/sonmarcas registradas de LEGO Group. 2015, 2016 The LEGO Group. 062615.4
IntroductionClassroom Management TipsHow Much Time Do I Need?The time taken to complete each of the tutorials as well as the suggested activitiesin the Lesson Plan depends on a number of factors, including the level of complexity,the age of the students, and the students’ experience with LEGO MINDSTORMS andthe concepts covered in the relevant lesson. The following estimates are thereforebased on the time it would take an average student with no prior experience withLEGO MINDSTORMS to complete the following tasks:CategoryTutorialEstimated Completion Time IncludingBuilding (in minutes)45-90Tutorial and Lesson Challenge90-135Master Challenge 190-180Master Challenge 290-270Design Brief Challenge90-270Based on the estimates listed above, it should be possible for your students tocomplete the first tutorial within a 45-minute class period.Additional MaterialsTo complete the Lesson Plan, the following additional materials will be required:different-colored sticky tape or paper (at least black, blue, gray, and one other color),large sheets of paper, objects of different shapes and sizes, protractors, measuringtapes (minimum length 1 meter), and markers.LEGO, the LEGO logo, MINDSTORMS and the MINDSTORMS logo are trademarks of the/sont des marques de commerce du/sonmarcas registradas de LEGO Group. 2015, 2016 The LEGO Group. 062615.5
IntroductionChallenge-Based AssessmentThe LEGO MINDSTORMS Education EV3 Software concept includes several waysof assessing students’ work. The hands-on Challenge approach, which providesa simple method of observing a robot’s ability or failure to complete a task, is aneffective way of challenging a student’s problem-solving skills and integratingstudent and teacher assessment tools. When students have difficulty completing achallenge using their robot, they are motivated to improve their design or programin order to see something that they have built themselves succeed; this is a selfreinforcing process.In the “Test It” phase of the tutorials, students can record notes on the Canvas byadding a Comment Box from the menu. This process encourages students to reflecton the connection between the programming blocks and robot behavior.The “Modify It” tasks included in the tutorials help consolidate learning by askingstudents to make changes in the sample program to fulfill a given task.Lesson Challenges provided for teachers in the Lesson Plan enable students to showthat they can apply the skills gained via the tutorials. Each Lesson Plan includes adiscussion section which gives guidance on what kinds of questions to ask students,along with model answers. In the Design Brief Challenges, you can choose anapproach that, compared to the step-by-step tutorials, is more open-ended. Thisallows you to assess students’ innovation and collaboration skills.By using the Challenge-based assessment approach, students can apply their STEMlearning in an authentic context and show what they have learned.Where Can I Find the Assessment Materials?Assessment materials are provided for all seven Lessons and for the two MasterChallenges.You can find the Introduction to Robotics class assessment record on page 35. TheIntroduction to Robotics rubrics are provided as a separate PDF in the Lesson PlanCategory in the Teacher’s Support section.What Learning Goals Are Assessed?On the Introduction to Robotics rubrics PDF, students can evaluate their project workaccording to the learning goals. Each rubric includes four levels: Bronze, Silver, Goldand Platinum. The intention is to help students reflect on what they have done well inrelation to the learning goals and what they might do better. Students could mark anX to indicate the appropriate rubric level. You can also use the rubrics for your ownevaluation of the students’ work, marking your own X in the appropriate column, andadding optional comments in the Notes column.Class Assessment RecordLEGO, the LEGO logo, MINDSTORMS and the MINDSTORMS logo are trademarks of the/sont des marques de commerce du/sonmarcas registradas de LEGO Group. 2015, 2016 The LEGO Group. 041329.LEGO, the LEGO logo, MINDSTORMS and the MINDSTORMS logo are trademarks of the/sont des marques de commerce du/sonmarcas registradas de LEGO Group. 2015, 2016 The LEGO Group. 062615.Master Challenge 2Master Challenge 1SwitchStop at AngleStop at LineStop at ObjectClassMove ObjectNameBuilding and SetupIntroduction to Robotics Class Assessment RecordCurved MoveIf a more formative assessment approach is required, you can record grades onthe class assessment record provided on page 35. The students can retain theIntroduction to Robotics rubrics as a record of their progress.356
IntroductionStudent DocumentationWhen documenting, students will reflect on and consolidate what they have justlearned, as well as how to use appropriate language to communicate it. You can askstudents to: Write full descriptions of their working processesAdd images and videos of their robot in actionTake screenshots from the EV3 SoftwareShare their unique project with other studentsGuide the students on how to use the Edit Mode in the Content Editor whendocumenting what they have learned after each Lesson.LEGO, the LEGO logo, MINDSTORMS and the MINDSTORMS logo are trademarks of the/sont des marques de commerce du/sonmarcas registradas de LEGO Group. 2015, 2016 The LEGO Group. 062615.7
IntroductionBefore Starting the First LessonIf you have never worked with LEGO MINDSTORMS Education EV3 before, youshould ensure the following:1. Each computer has a preinstalled version of the LEGO MINDSTORMS EducationEV3 Software.2. Each EV3 Brick has the latest firmware and is fully charged.Firmware Update3. Before connecting computers and EV3 Bricks via Bluetooth in the classroom, werecommend renaming each EV3 Brick. This can be done in two ways:a. Update the name via the desktop EV3 Software using a USB cable.b. Update to firmware V1.07E or later and change the name via the EV3 BrickSettings Area (see the User Guide for more help).4. Check out the Quick Start Videos in the Lobby.You may want the students to understand the names and functions of the differentelements in the brick set. Discuss the naming and basic functionality of the keyhardware components and establish a set of brick management rules. Please referto the User Guide for the Core Set Elements List.LEGO, the LEGO logo, MINDSTORMS and the MINDSTORMS logo are trademarks of the/sont des marques de commerce du/sonmarcas registradas de LEGO Group. 2015, 2016 The LEGO Group. 062615.8
Lesson 1Lesson 1 – Building and SetupObjectiveAfter completing this lesson, students will be able to build the Driving Base, connectthe computer to the EV3 Brick, and download and run programs that control therobot’s behavior.Duration2 to 3 x 45 mins.PreparationUnderstand the process of connecting a computer to the EV3 Brick. Watch theProgramming Quick Start Video for guidance. Distribute one EV3 Core Set per two tothree students. Optional: cardboard, textiles, and other materials for personalizing therobots.Procedure1. Students build the Robot Educator Driving Base using the Building Instructionsbooklet (included with the 45544 Core Set) or the software-integrated BuildingInstructions available via the Driving Base link on page two of each tutorial.Note: Ensure that all students get to build part of the model during the activity.Optional: An effective way of allowing students to take ownership of their robot isto have them personalize it using additional LEGO elements and other materials.By doing this, they can turn their robot into a puppy, elephant, or even a fantasycreature.2. As a class, go through the process of connecting the computer with the EV3 Brickand running the first program, or direct the students to the Programming QuickStart Video, which will help them to connect the devices themselves.3. Students use the programming software to make simple programs that:a. Make their robot play a sound that is appropriate to their creatureLEGO, the LEGO logo, MINDSTORMS and the MINDSTORMS logo are trademarks of the/sont des marques de commerce du/sonmarcas registradas de LEGO Group. 2015, 2016 The LEGO Group. 062615.9
Lesson 1b. Make their robot display an image or their own text in the EV3 Brick Displayc. Make their robot flash the Brick Status Light.Discussion QuestionsRobot Behavior: What problems did you encounter when constructing theDriving Base? Might have used the wrong components in a step and had to go back andchange the model, or had difficulty finding parts, especially the smaller ones.Program Flow: What did you have to do to change either the Sound or BrickDisplay image? Click the top right hand corner of the programming block and select a file.Discovery: What did you find out when you connected the EV3 Brick to thecomputer? The EV3 Software asked for a firmware update. You must insert the USB cable the correct way up.AssessmentDuring the lesson, students can interact with the Introduction to Robotics rubrics,using peer or self-assessment, and can record their progress by marking the boxthat best reflects their level of work. Help your students to improve by writing acomment for each of them in the Notes column during the lesson cycle.LEGO, the LEGO logo, MINDSTORMS and the MINDSTORMS logo are trademarks of the/sont des marques de commerce du/sonmarcas registradas de LEGO Group. 2015, 2016 The LEGO Group. 062615.10
Lesson 2Lesson 2 – Curved MoveObjectiveAfter completing this lesson, students will be able to navigate their robot throughan obstacle course. By selecting the correct programming blocks and setting theirparameters, students will know how and when to use point turns, single-motor turns,and curved turns.Duration2 to 3 x 45 mins.PreparationFor task 5b you will need rubber bands to allow students to attach a pen to their robot.For task 5c you will need to prepare an obstacle course on the floor. You can use alarge sheet of paper and markers, or place sticky tape on the floor (see illustrationbelow).Procedure1. Introduce students to the Lobby of the LEGO MINDSTORMS Education EV3Software. Students need to know where to find the Robot Educator tutorials andhow to open them. Demonstrate the flow of one tutorial to ensure that studentsknow their way around the tutorials in combination with the Programming Canvasand Hardware Page (see also the Quick Start Videos).2. Students complete and test the Curved Move tutorial, which introduces the MoveSteering Block.3. In the “Test It” phase, the students will see a sample program to copy. Ensure thateach group takes the time to describe the robot’s behavior in their own words,while running the program. This encourages the students to reflect on what theysee and how it relates to the programming blocks. Students can record notes onthe Canvas by adding a Comment Box from the menu.The following sample program is provided for the students:Example of a robot behavior description:The robot performs a point turn, then a single-motor turn, and lastly, a curvedturn. Each action is separated by a pause, which allows the robot to settle beforeexecuting the next action.LEGO, the LEGO logo, MINDSTORMS and the MINDSTORMS logo are trademarks of the/sont des marques de commerce du/sonmarcas registradas de LEGO Group. 2015, 2016 The LEGO Group. 062615.11
Lesson 24. Students solve the “Modify It” task, which challenges them to add three MoveSteering Blocks to their program in order to make the robot drive backwards,following the same path back to the starting position.5. Lesson Challenge Ideas:a. Program the robot to trace out a figure eight, the first letter of your name, oranother letter or number.b. Attach a pen to the robot and program it to draw a cloverleaf, heart, flower,or another shape.c. To ensure that students know when to use the different kinds of turns(point turn, single-motor turn, or curved turn), make an obstacle course thatrequires different turning methods (see illustration below and/or AppendixA). The students must write a program that makes the left wheel of the robotfollow a path and parks the robot in the parking area.The obstacle course can besimplified for some studentsby allowing them not to drivethrough the curve. This willallow the robot to drive in astraight line and then park.For this path, use curved turns for the first section, followed by single-motor turnsfor the 90-degree turns, and finally, a point turn before reversing the robot into theparking area.LEGO, the LEGO logo, MINDSTORMS and the MINDSTORMS logo are trademarks of the/sont des marques de commerce du/sonmarcas registradas de LEGO Group. 2015, 2016 The LEGO Group. 062615.12
Lesson 2Discussion QuestionsRobot Behavior: What did you discover when using the different turn methods? The Steering Parameter Value was set to 50 to perform a single motor turn,and the Steering Parameter Value was set to 100 or -100 to perform a pointturn.Program Flow: What is the purpose of the Wait Block? The Wait Block makes your program wait for something before continuing tothe next block in the sequence. You can wait for a certain amount of time for asensor to reach a certain value, or for a sensor value to change.Discovery: Which method of turning worked the best for the curved line? Move Tank or Move Steering Blocks work best because they keep both motorsrunning in the same direction, with one motor running slightly slower.AssessmentDuring the lesson, students can interact with the Introduction to Robotics rubrics,using peer or self-assessment by marking the box that best reflects their level ofwork. Help your students to improve by writing a comment for each of them in theNotes column during the lesson cycle.LEGO, the LEGO logo, MINDSTORMS and the MINDSTORMS logo are trademarks of the/sont des marques de commerce du/sonmarcas registradas de LEGO Group. 2015, 2016 The LEGO Group. 062615.13
Lesson 3Lesson 3 – Move ObjectObjectiveAfter completing this lesson, students will be able to program their robot to moveand release objects of different shapes and sizes.Duration2 to 3 x 45 mins.PreparationFind several objects of different shapes and sizes that may or may not fit in the frameof the Medium Motor Module. For this Lesson Challenge you will need to prepare anobstacle course on the floor. You can use a large sheet of paper, markers, or stickytape (see illustration below).Procedure1. Students build and attach the Medium Motor Module to the Driving Base.2. Students build the Cuboid.3. Students complete the Move Object tutorial to understand how they can use theMedium Motor Module to grab the Cuboid.4. In the “Test It” phase, the students will see a sample program to copy. Ensure thateach group takes the time to describe the robot’s behavior in their own words,while running the program. This encourages the students to reflect on what theysee and how it relates to the programming blocks. Students can record notes onthe Canvas by adding a Comment Box from the menu.The following sample program is provided for the students:Example of a robot behavior description:Using the Medium Motor Module, the robot lowers the frame and grabs theCuboid. It then reverses before raising the frame to release the Cuboid.LEGO, the LEGO logo, MINDSTORMS and the MINDSTORMS logo are trademarks of the/sont des marques de commerce du/sonmarcas registradas de LEGO Group. 2015, 2016 The LEGO Group. 062615.14
Lesson 35. Students complete the “Modify It” task. The shape and size of different objectschallenges students to modify their program or make changes to the MediumMotor Module to enable the robot to grab the different objects. When modifyingthe program, students will have to change the number of degrees the MediumMotor turns in order to accommodate the varying dimensions of the objects.Note: Before modifying the Medium Motor Module, be aware that it is also requiredin Lesson 4 and Master Challenge 2.6. Lesson Challenge:Combine the optional challenge of Lesson 2 with moving the Cuboid (or anotherobject) from predetermined start and end positions (see illustration below and/or Appendix A). For an additional challenge, students can also use the UltrasonicSensor to help detect the Cuboid (see Lesson 4 for further details).Discussion QuestionsRobot Behavior: How did you overcome the problem of movinglarger sized objects? Modified the Medium Motor Module frame to fit the larger objects.Program Flow: What did you have to change in order to movedifferent sized objects? The number of degrees of the Medium Motor Block had to be changed.Discovery: What did you discover when using the Medium Motor Module? In order for the robot to lower the Medium Motor Module, the Medium MotorBlock Power setting must be set to a negative (-) value.AssessmentDuring the lesson, students can interact with the Introduction to Robotics rubrics,using peer or self-assessment by marking the box that best reflects their level ofwork. Help your students to improve by writing a comment for each of them in theNotes column during the lesson cycle.LEGO, the LEGO logo, MINDSTORMS and the MINDSTORMS logo are trademarks of the/sont des marques de commerce du/sonmarcas registradas de LEGO Group. 2015, 2016 The LEGO Group. 062615.15
Lesson 4Lesson 4 – Stop at ObjectObjectiveAfter completing this lesson, students will understand the difference between theChange and Compare Modes of the various EV3 sensors. This particular lessonfeatures the Ultrasonic Sensor.Duration2 to 3 x 45 mins.PreparationMake sure you understand the difference between Change and Compare Modes.When using Compare Mode, the program waits for a certain distance to be read bythe sensor. When using the Change Mode, the program reads the distance and thenwaits for a certain increase or decrease in distance. For this Lesson Challenge, you willneed to prepare an obstacle course on the floor. You can use a large sheet of paper,markers, or sticky tape (see illustration below).Procedure1. Students build the Ultrasonic Sensor Module and attach it to the Driving Base.2. Students complete the Stop at Object tutorial, during which they learn thatthe Ultrasonic Sensor measures distance to objects. Understanding this allowsstudents to program the robot to react to a detected object.3. In the “Test It” phase, the students will see a sample program to copy. Ensure thateach group takes the time to describe the robot’s behavior in their own words,while running the program. This encourages the students to reflect on what theysee and how it relates to the programming blocks. Students can record notes onthe Canvas by adding a Comment Box from the menu.The following sample program is provided for the students:Example of a robot behavior description:Measuring distance using the Ultrasonic Sensor, the robot moves forward until itdetects a decrease of 11 cm from the Cuboid and stops. The robot then reversesuntil it detects an increase of 6 cm from the Cuboid.LEGO, the LEGO logo, MINDSTORMS and the MINDSTORMS logo are trademarks of the/sont des marques de commerce du/sonmarcas registradas de LEGO Group. 2015, 2016 The LEGO Group. 062615.16
Lesson 44. Students also complete the “Modify It” task. They should realize that the robotwill always move forward 11 cm and then backwards 6 cm, regardless of the startdistance to the Cuboid; this is the essence of the Ultrasonic Sensor’s ChangeMode.5. Lesson Challenge Ideas:Students attach the Medium Motor Module and grab the Cuboid (see illustrationbelow and/or Appendix A). Remind students to use the Wait Block’s UltrasonicSensor in Compare Mode so that the robot moves close enough to the Cuboid.The following scenarios can be used:a. Cuboid in position 1 robot in start position make the robot move theCuboid to position 2 and return to the start positionb. Cuboid in position 1 robot in start position make the robot move theCuboid to position 3 and then park in position 4c. Cuboid in position 3 robot starts in position 4 make the robot move theCuboid to position 1 following the pathChange Mode:Compare Mode:Discussion QuestionsRobot Behavior: What happens if the speed of the Medium Motor Moduleis set too high? The Medium Motor Module knocks over or pushes aside the Cuboid before itcan take hold of it.Program Flow: What is the difference between the Change and CompareModes when using the Ultrasonic Sensor? Change Mode reads the distance and then waits for an increase or decrease.Compare Mode waits for a certain predefined distance.Discovery: What happens to the robot when it drives towards a round object? The Ultrasonic Sensor does not always recognize the shape, as it is unable toreceive a signal back.AssessmentDuring the lesson, students can interact with the Introduction to Robotics rubrics,using peer or self-assessment and can record their progress by marking the box thatbest reflects their level of work. Help your students to improve by writing a commentfor each of them in the Notes column during the lesson cycle.LEGO, the LEGO logo, MINDSTORMS and the MINDSTORMS logo are trademarks of the/sont des marques de commerce du/sonmarcas registradas de LEGO Group. 2015, 2016 The LEGO Group. 062615.17
Lesson 5Lesson 5 – Stop at AngleObjectiveAfter completing this lesson, students will be able to turn their robot based on inputfrom the Gyro Sensor.Duration2 to 3 x 45 mins.PreparationFamiliarize yourself with the Gyro Sensor to ensure that you can detect when it isdrifting and how to correct it. The Gyro Sensor chapter in the User Guide will helpfamiliarize you with the sensor. This topic is also covered in Step 4 of the procedurebelow. Using sticky tape and protractors, students can create different angles on thefloor to validate the turning angle of their robot. For tasks 5a and 5b, you will need toprovide rubber bands to allow the students to attach a pen to their robot. For task5c, you will need to prepare a maze on the floor. You can use a large sheet of paper,objects, markers, or sticky tape (see illustration below).Procedure1. The students build the Gyro Sensor Module and attach it to the Driving Base.2. The students complete the Stop at Angle tutorial to make the robot turn 45degrees based on Gyro Sensor angle readings.3. In the “Test It” phase, the students will see a sample program to copy. Ensure thateach group takes the time to describe the robot’s behavior in their own words,while running the program. This encourages the students to reflect on what theysee and how it relates to the programming blocks. Students can record notes onthe Canvas by adding a Comment Box from the menu.The following sample program is provided for the students:Example of a robot behavior description:Measuring rotational angle using the Gyro Sensor, the robot point turns until itdetects an angle increase of 45 degrees. The
Each EV3 Brick has the latest firmware and is fully charged . 3 . Before connecting computers and EV3 Bricks via Bluetooth in the classroom, we recommend renaming each EV3 Brick . This can be done in two ways: a . Update the name via the desktop EV3 Software using a USB cable . b . Update to firmware V107E or later and change the name via the .

