Transcription
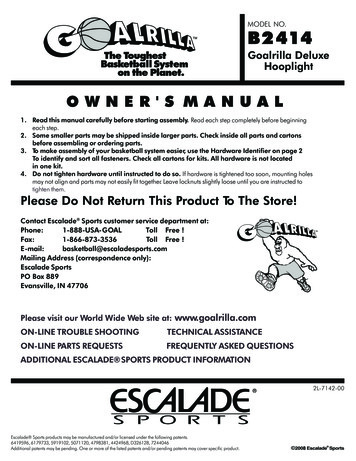
MODEL NO.B2 414Goalrilla DeluxeHooplightOWNER'S MANUAL1. Read this manual carefully before starting assembly. Read each step completely before beginningeach step.2. Some smaller parts may be shipped inside larger parts. Check inside all parts and cartonsbefore assembling or ordering parts.3. To make assembly of your basketball system easier, use the Hardware Identifier on page 2To identify and sort all fasteners. Check all cartons for kits. All hardware is not locatedin one kit.4. Do not tighten hardware until instructed to do so. If hardware is tightened too soon, mounting holesmay not align and parts may not easily fit together. Leave locknuts slightly loose until you are instructed totighten them.Please Do Not Return This Product To The Store!Contact Escalade Sports customer service department at:Phone:1-888-USA-GOALToll Free !Fax:1-866-873-3536Toll Free !E-mail:basketball@escaladesports.comMailing Address (correspondence only):Escalade SportsPO Box 889Evansville, IN 47706Please visit our World Wide Web site at: www.goalrilla.comON-LINE TROUBLE SHOOTINGTECHNICAL ASSISTANCEON-LINE PARTS REQUESTSFREQUENTLY ASKED QUESTIONSADDITIONAL ESCALADE SPORTS PRODUCT INFORMATION2L-7142-00Escalade Sports products may be manufactured and/or licensed under the following patents.6419596, 6179733, 5919102, 5071120, 4798381, 4424968, D326128, 7244046Additional patents may be pending. One or more of the listed patents and/or pending patents may cover specific product.
HARDWARE IDENTIFIER18185 x 5 U-Bolt(2 Pieces)4 x 4 U-Bolt(2 Pieces)65M6FLAT WASHER(6 Pieces)M6 x 1.0NYLON LOCKNUT(6 Pieces)153/8”FLAT WASHER(6 Pieces)163/8”-16NYLON LOCKNUT(5 Pieces)124M6 x 1.0 x 25WASHER HEAD BOLT(6 Pieces)#10 x 3/4”SELF TAPPING SCREW(3 Pieces)202219M20 SERRATEDLOCKWASHER(1 Piece)186 x 6 U-Bolt(2 Pieces)186 x 8 U-Bolt(2 Pieces)3/8”-16HEX NUT(1 Piece)3/8” SPLITLOCKWASHER(1 Piece)213/8” - 16 X 3HH BOLT(1 Piece)3/8” - 16 X 1HH BOLT(1 Piece)
Note: This unit is equipped with U-Bolts to fit Goalrilla TM andGoaliathTM basketball units with 4 x 4, 5 x 5, 6 x 6, and 6 x 8poles. Select the U-Bolt by measuring your pole and referring tothe "Hardware Identifier" in this manual.1.Crank Actuator until unit is in it’s lowest position so that thelower arms are against stops. See Figure 1.2.Remove bolt and nut that attaches Actuator (B) to lower arms andplace cable stirrup (#23) over the top of the Actuator. Slide Pivottube (A) through Stirrup and Actuator until equal amounts stick outthrough both sides of Actuator. Re-attach with bolt and nut asshown in Figure 1.3.Attach mounting plate (#17) to pole with U bolts (#18) ,washers(#15) and nuts (#16). Top of plate should be even with top ofpole see Figure 2.LowerArmsA2324Figure 1B254. Identify Pole Sections “A” through “D” by their labels.5.Attach Pole Section “D” (#11) to Mounting plate (#17) with bolt(#21) and nut (#16) as shown in Figure 3.Figure 26.172116112Figure3Remove the wing nut, lock washer and screw at top of light thatholds frame together. The door frame assembly will swing down toopen. Using gloves or soft cloth insert one end of bulb into socketspecified on light. Gently apply pressure to the bulb and insertopposite end of bulb into other socket. Close door and secure withscrew, lock washer and wing nut. Repeat for other light unit.Note: Do not touch halogen bulb with your hand as oil inyour skin will cause damage to the bulb. Reverse thisprocedure to remove the bulb.
7.Attach Halogen Lamp Assembly (#1) to Lamp Mount Bar (#2)using four Washer Head Bolts (#4), four washers (#5) and fourlocknuts (#6) as shown in Figure 4.8.Mount the Wire Safety Cage (#7) to the frame on the front of theHalogen Lamp Assembly (#1). Squeeze the cage slightly so thewire ends fit into the inside four corners of the frame.Figure 49.Figure 5Install a Serreated Washer (#19) onto Lamp Base (#3) and screwthe threaded portion of the Lamp Base (#3) into the threadedend of Pole Section "A" (#8). Secure Lamp Base by tighteningjam nut on Lamp Base (#3) against end of Pole Section "A" (#8).See Figure 5.10. Attach Lamp Base (#3) and Light Junction Box to Lamp MountBar (#2) using two Washer Head Bolts (#4), two washers (#5)and two locknuts (#6). See Figure 5.Figure 611. Slide the swaged (crimped) end of Pole Section "B" (#9) into theunthreaded end of Pole Section "A" (#8). Align the holes andinsert a self tapping screw (#12) to secure. (You will need to usea wrench or a pair of pliers to firmly start the self tapping screw.)PoleSection APoleSection B12. Slide Pole Section "C" (#10) into the end of Pole Section "B" (#9)and secure with a self tapping screw (#12).Note: It is very important to evenly space out the six plasticties to keep the electrical cord secure.13. Secure the electrical cord to the pole with six plastic ties (#13) inthe locations shown in Figure 6. Cut off excess plastic tie.3PoleSection C
ATTACHING HOOP LIGHT TO POLE REQUIRESAT LEAST TWO CAPABLE ADULTS.When attaching the Hoop Light to the pole, stay clear of alloverhead power, electrical, telephone wires, and obstacles.Any contact between the Hoop Light and any of these lines willresult in immediate danger.WARNING: When mounting the Hoop Light to the basketballpole, be sure that no U-clamp either traps or squeezes theelectrical cord. Make sure the electrical cord is free and placedoutside of the U-clamps. Do not plug the Hoop Light into anyelectrical outlet or extension cord until the entire assemblyprocedure is complete.14. With the help of at least one other adult, lift hooplight assemblyup and insert Pole Section "C" (#10) on top of Pole Section"D" (#11). Secure with a self tapping screw (#12). See Figure 7.15. Attach Cable Hook (#25) to tab on pole "D".16. With hook attached to hoop light, crank actuator to raise goalto where bottom bolt can be inserted and then insert bolt(#22)into hoop light through two washers (#15), splitwasher(#20)and nut (#14) and tighten. STOP RAISING GOALWHEN BOLT CAN BE INSERTED! IF YOU CRANKACTUATOR TO RAISE GOAL AFTER CABLE IS TAUT, YOUCOULD DAMAGE YOUR SYSTEM.17. If goal is not at 10 , leave bolt in hoop light and crank actuatorto lower goal until hook can be removed and remove snaphook from hoop light bracket.18. With cable not attached to hoop light, adjust goal heightto 10 feet.19. Secure the remaining electrical cord to the pole with two plasticties (#13) in the locations shown in Figure 7. Cut off excessPlastic tie.HOW TO LOWER UNIT TO CHANGE BULB1.If cable is not attached to hoop light pole D , Crank actuator tolower goal until you can attach cable hook (#25) to tab on pole D .2.Crank Actuator to raise goal up as high as it will go. Cable (#24)on hoop light will be taut.Remove bottom bolt (#22) that holds hoop light to post. See Figure 7.3.4.5.Lower goal as low as it will go by turning actuator handle. Loweringgoal will also lower hoop light lamp.Change bulb. Note: Do not touch halogen bulb with yourHand as oil in your skin will cause damage to the bulb.6.Raise goal by turning actuator handle. Raise height until hole inhoop light bracket aligns with hole in tab on goal post. See Figure 7.Reinstall bolt (#63), washers (#62), lockwashers (#75), and nut(#76) you removed in step 3.Figure 72115 22161420 15252423DO NOT PLAY ON YOUR GOAL WITH BOLT REMOVED.BOTTOM BOLT MUST BE INSTALLED.4
CAUTION:!Lamp surface gets very hot. Unplug lamp and allow to cool before touching surface of lamp. Do not assemblewithout the guard.!Lamp should remain at least 20 inches from any sort of flammable material.!This is not an indoor lamp.!Do not look directly into lamp!Keep children away from this lamp.!Lamp should be unplugged and completely cool before you attempt to replace the bulb. Avoid direct contact offingers with the bulb. Oil from skin can damage the bulb.!Do not operate lamp with broken pieces or missing safety guard.!Never operate lamp around highly flammable liquids such as gasoline or paint thinner.!This lamp should never be in or near a wet surface. Never use near a swimming pool, hot tub or sauna, ornear a standing body of water.!Do not operate this lamp in the rain.!Always insert the plug into the outlet carefully.HOOPLIGHT CARE INFORMATIONReverse the mounting procedure carefully in order to reach the lamp for cleaning the safety glass, changing the bulb, or in therare occasion that you might need to redirect the beam of the light fixture.Use 500 watt or smaller, type T-3 bulb. (Available at most hardware and home stores)5
90 DAY LIMITED WARRANTYThis consumer warranty extends to the original consumer purchase of any ESCALADE SPORTS Product(hereinafter referred as the "Product").WARRANTY DURATION: This Product is warranted to the original consumer purchase of a period ofninety (90) days from the original purchase.WARRANTY COVERAGE: ESCALADE SPORTS warrants to the original Consumer Purchaser that anyProduct of its manufacture is free from defects in material and workmanship when used for the intendedpurpose under normal use and conditions. THIS WARRANTY IS VOID IF THE PRODUCT HAS BEEN DAMAGED BY ACCIDENT, UNREASONABLE USE, NEGLIGENCE, IMPROPER SERVICE, FAILURE TO FOLLOWINSTRUCTIONS PROVIDED WITH THE PRODUCT OR OTHER CAUSES NOT ARISING OUT OFDEFECTS IN MATERIAL AND WORKMANSHIP.WARRANTY PERFORMANCE: During the above ninety (90) day warranty period, ESCALADE SPORTSshall repair or replace with a comparable model, and Product, or component thereof, which may provedefective under normal use and proper care, and which our examination shall disclose to our satisfactionto be thus defective, please contact our Warranty Dept.1-888-USA-GOAL / Warranty Dept.Or Write us at:Escalade Sports, Inc. - P.O. Box 889, Evansville, IN 47706 - Attn: Warranty Dept.Or E-mail us at:basketball@escaladesports.comOther than shipping requirements no charge will be made for such repair or replacement of in-warrantyProducts. ESCALADE SPORTS strongly recommends that the Product is insured for value prior to mailing.WARRANTY DISCLAIMERS: ANY IMPLIED WARRANTIES ARISING OUT OF THIS SALE, INCLUDINGBUT NOT LIMITED TO THE IMPLIED WARRANTIES OF MERCHANTABILITY AND FITNESS FOR A PARTICULAR PURPOSE, ARE LIMITED IN DURATION TO THE ABOVE NINETY (90) DAY WARRANTY PERIOD. ESCALADE SPORTS SHALL NOT BE LIABLE FOR LOSS OF USE OF THE PRODUCT OR OTHERCONSEQUENTIAL OR INCIDENTAL COSTS, EXPENSES OR DAMAGES INCURRED BY THE CONSUMER OF ANY OTHER USE.Some states do not allow the exclusion or limitation of implied warranties or consequential or incidentaldamages, so the above limitations or exclusions may not apply to you.LEGAL REMEDIES: This warranty gives you specific legal rights and you may also have other rightswhich may vary from state to state.6
Key#12345678910111213141516171819202122232425Part 601-007B-6429-00DescriptionDual 500 watt Hal Lamp AssyLamp Mount BarLamp BaseM6 X 1.0 X 25 Hex Washer HeadM6 FlatwasherM6 X 1.0 Nylon LocknutWire Safety CagePole Section "A"Pole Section "BPole Section "CPole Section "DSelf Tapping ScrewPlastic Tie3/8"-16 Hex Nut3/8" Flatwasher3/8-16 Nylon LocknutMounting PlateU-Bolt for 4 X 4 PoleU-Bolt for 5 X 5 PoleU-Bolt for 6 X 6 PoleU-Bolt for 6 X 8 PoleM20 Serrated Lockwasher3/8" Split Lockwasher3/8" -16 X 3 HH Bolt3/8" -16 X 1 HH BoltCable StirrupCableSnap Hook13Qty.1116662111138165122221111111131817211315 221614 20 1515 162524232L-7142-00
If goal is not at 10 , leave bolt in hoop light and crank actuator to lower goal until hook can be removed and remove snap hook from hoop light bracket. With cable not attached to hoop light, adjust goal height to 10 feet. 4 If cable is not attached to hoop light pole D , Crank actuator to