Transcription
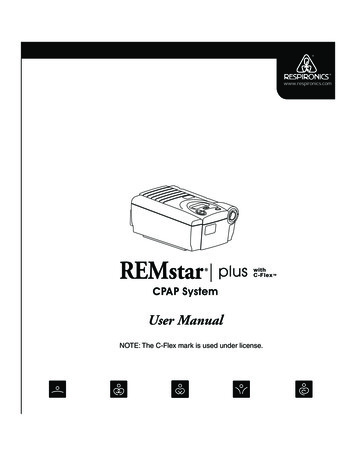
CPAP SystemUser ManualNOTE: The C-Flex mark is used under license.
Table of ContentsSymbol Key . 2Intended Use & Contraindications . 3Specifications . 4Warnings . 5Cautions . 6Unpacking the System . 6System Features . 7First Time Setup . 8 Installing the Filter . 9 Device Settings . 10 Assembling the Circuit . 15Accessories . Adding a Humidifier . Adding Oxygen to the System . Using DC Power with the System .16161616Routine Use . Connecting the Circuit . Adjusting the Circuit . Ramp Button . Turning the System Off . Helpful Hints .Routine Maintenance . Cleaning the Filter . Cleaning the System . Reordering . Service .1717171818181919192020Traveling with the System . 20Troubleshooting . 21EMC Requirements . 23Warranty . 26REMstar Plus with C-Flex User Manual 1
Symbols!0123REMstar Plus with C-Flex CPAP systems are the subject of the following U.S. patents: #5239995 and #6105575.Other patents pending.REMstar, Whisper Swivel and Encore are registered trademarks of Respironics, Inc. Respironics, Inc. 20032 REMstar Plus with C-Flex User Manual
Intended UseIntended UseThe Respironics REMstar Plus with C-Flex system is a CPAP (ContinuousPositive Airway Pressure) device designed for the treatment of adult Obstructive Sleep Apnea (OSA) only.The REMstar Plus with C-Flex is to be used only on the instruction of alicensed health care professional. Your home care provider will make thecorrect pressure settings according to your health care professional’sprescription.Several accessories are available to make your OSA treatment with theREMstar Plus with C-Flex CPAP system as convenient and comfortable aspossible. To ensure that you receive the safe, effective therapy prescribedfor you, use only Respironics accessories.IMPORTANT!Read and understand the entire user manual before operating this system.If you have any questions concerning the use of this system, contact yourhome care provider or health care professional.Contraindications Studies have shown that the following pre-existing conditions maycontraindicate the use of positive airway pressure therapy for some patients: Bullous Lung Disease Bypassed Upper Airway Pneumothorax Pathologically Low Blood Pressure Pneumocephalus has been reported in a patient using nasalContinuous Positive Airway Pressure. Caution should be used whenprescribing CPAP for susceptible patients such as those with: cerebralspinal fluid leaks, abnormalities of the cribriform plate, prior historyof head trauma, and/or pneumocephalus.(Chest 1989; 96:1425-1426) The use of positive airway pressure therapy may be temporarilycontraindicated if you exhibit signs of a sinus or middle ear infection.Contact your health care professional if you have any questions concerningyour therapy.REMstar Plus with C-Flex User Manual 3
SpecificationsDevice SizeDimensions:Weight:9 1/2” x 6 7/8” x 4 1/2” (24 x 17 x 12 cm) 4.0 lbs. ( 1.8 kg)Product Use,Transport, andStorageOperationTemperature:41 to 95 F (5 to 35 C)Humidity:15 to 95% Non-condensingAtmospheric Pressure: 76.7 to 102 kPascalsStandardsComplianceThis device is designed to conform to the following standards:Transport & Storage-4 to 140 F (-20 to 60 C)15 to 95% Non-condensingN/AIEC 60601-1 General Requirements for Safety of Medical Electrical EquipmentIEC/EN 60601-1-2:2001 (2nd Edition) Immunity for Medical Electrical EquipmentEN ISO 17510-1 Sleep Apnea Breathing Therapy DevicesMode of OperationContinuousAC Power Consumption 100 - 240 VAC, 50/60 Hz, 1.0 A max.DC Power Consumption 12 VDC, 3.0 A max.Type of ProtectionAgainst Electric ShockClass II EquipmentDegree of ProtectionAgainst Electric ShockType BF Applied PartIPX0 - Ordinary EquipmentDegree of ProtectionAgainst Ingress of WaterPressure Range4 to 20 cm H2O (in 1 cm H2O increments)Pressure Stability4 to 20 cm H2O ( 1.0 cm H2O)Measured in accordance with EN ISO 17510 @ 6.6, 13.2, & 20 cm H2O @ 500 ml with BPM set to 10, 15, & 20BPM performed at 23 C ( 2 C), 50% RH ( 5%), and an atmospheric pressure of 101.54 kPascals.Sound Pressure Level 30 dB(A)Measured in accordance with EN ISO 17510 @ 10 cm H2O at the patient circuit. This measurementapplies to the CPAP device with or without the optional REMstar Heated Humidifier.Maximum Flow35 LPMMeasured in accordance with EN ISO 17510 @ 6.6, 13.2, & 20 cm H2O @ 500 ml with BPM set to 10, 15, & 20BPM performed at 23 C ( 2 C), 50% RH ( 5%), and an atmospheric pressure of 101.54 kPascals.Pressure Display Accy. (0.15 4% of actual reading)4 REMstar Plus with C-Flex User Manual
Warnings & CautionsCAUTION! U.S. federal law restricts this device to sale by or on the order of a physician.WARNING! The instructions in this manual are not intended to supersede establishedmedical protocols.Indicates thepossibility forinjury to the useror the operator. This device is intended for adult use only. This device is not intended for life support. CPAP devices have the potential to allow rebreathing of exhaled air.To reduce this potential, observe the following:- Use Respironics circuit accessories.- Do not wear the mask and headgear for more than a few minuteswhile the device is not operating.- Do not block or try to seal the vent holes in the exhalation port.As with most CPAP devices: At low CPAP pressures, some exhaled gas(CO2) may remain in the mask and be rebreathed. Do not use this device if the room temperature is warmer than 95 F (35 C).If this device is used at room temperatures warmer than 95 F (35 C), thetemperature of the airflow may exceed 106 F (41 C). This could causeirritation to your airway. This equipment is not suitable for use in the presence of a flammableanaesthetic mixture in combination with oxygen or air, or in the presence ofnitrous oxide. If you notice any unexplained changes in the performance of the REMstarPlus with C-Flex, if it is making unusual or harsh sounds, if it has beendropped or mishandled, if the enclosure is broken, or if water has enteredthe enclosure, disconnect the power cord and discontinue use. Contact yourhome care provider. To avoid electrical shock, disconnect the power cord before cleaning. DO NOTimmerse the device in any fluids. Contact your health care professional if symptoms of sleep apnea recur. Using the REMstar Plus with C-Flex at an incorrect elevation setting couldresult in airflow pressures higher than the prescribed setting. Always verifythe elevation setting when traveling or relocating.REMstar Plus with C-Flex User Manual 5
Warnings & Cautions/Unpacking the SystemCAUTION!Indicates thepossibility of damageto the device. Tobacco smoke may cause tar build-up within the REMstar Plus with C-Flexthat may result in the REMstar Plus with C-Flex malfunctioning. The use of accessories other than those specified, with the exception ofcables sold by the manufacturer of the equipment or system as replacementparts for internal components, may result in increased emissions or decreased immunity of the equipment or system.Additional warnings and cautions are located throughout this manual asthey apply.After unpacking the system, make sure you have everything shown here:IMPORTANT!If any of the above parts are missing, contact your home care provider.6 REMstar Plus with C-Flex User Manual
System sConnectorPressureStart/Stop ButtonRampMedicalButtonEquipmentNote (on bottom)DC InletFilter andFilter CapUser ButtonsAC InletAir OutletAC Inlet . Connect/disconnect the AC power cord here.Air Outlet . Connect the flexible tubing here.CommunicationsConnector . For clinical use with the Encore Pro Data Management Software or anIEC 950 approved device. Connect the communications cable here.DC Inlet . Connect the optional DC power cord here.Display Screen . All system settings, total operating time, and therapy hours will appearhere. Displays the pressure and elevation settings.Filter Cap & Filters . The foam filter screens out normal household dust and pollens. Theoptional, ultra-fine filter is also included for more complete filtration ofvery fine particles. The filter cap is designed to reduce the noise fromthe REMstar Plus with C-Flex.Humidifier Button . This button turns the REMstar heated humidifier on/off and allows theheat setting to be adjusted. The humidifier is an optional accessory thatmay be purchased separately.Medical Product Note . For ease at airport security stations, there is a note on the bottom of theREMstar Plus with C-Flex stating that it is medical equipment. It mayhelp if you also take this manual with you when you travel.Pressure Start / StopButton . This button starts/stops the airflow.Ramp Button . This button starts the ramp cycle or accesses the REMstar Plus withC-Flex settings.User Buttons . These buttons can be used to change some of the system settings.REMstar Plus with C-Flex User Manual 7
First Time SetupWARNING!Do not use the REMstar Plus with C-Flex system until an appropriateprofessional adjusts the settings! To order any accessories not includedwith this system, contact your home care provider.Note to home care provider: Before beginning setup, be sure that youhave available the REMstar Plus with C-Flex Home Care ProviderSetup Instructions. Setup instructions are not provided in this manual.WARNING!DO NOT connect any equipment to the REMstar Plus with C-Flexunless recommended by Respironics or your health care provider.CAUTION!If the REMstar Plus with C-Flex has been exposed to either very hotor very cold temperatures, allow it to adjust to room temperature(approximately 2 hours) before beginning setup.8 REMstar Plus with C-Flex User Manual
First Time Setup (cont.)Installing the Filter 1. Install the filters and filter cap.CAUTION!The foam filter must be in place at all times when theREMstar Plus with C-Flex is operating. The whiteultra-fine filter is optional and can be used inaddition to the foam filter. The ultra-fine filter isrecommended for people who are sensitive to tobaccosmoke or other small particles.a. Place one of the foam filters over the ultra-finefilter. If you are not using the ultra-fine filter,simply place the foam filter into the filter area onthe back of the REMstar Plus with C-Flex.An extra filter is included for your convenience.b. Attach the filter cap. Position the cap so that the small opening on thecap is facing down. Insert the cap’s tabs into the filter area opening.Power Cord2. Connect the power cord. Plug the socket end ofthe power cord into the AC inlet on the back ofthe REMstar Plus with C-Flex. Plug the prongedend of the power cord into an electrical outlet.!!IMPORTANT!To remove AC power, disconnect the power cordfrom the electrical outlet.WARNING!Inspect the power cord often for any signs ofdamage. Replace a damaged cord immediately.WARNING!The REMstar Plus with C-Flex is activated and ready for use when thepower cord is connected. The pressure start/stop button turns theblower on/off.3. Place the REMstar Plus with C-Flex on a firm,flat surface.CAUTION!Make sure the REMstar Plus with C-Flex is awayfrom any heating or cooling equipment (e.g., forcedair vents, radiators, air conditioners). Also make sure that bedding,curtains, or other items are not blocking the filter or vents of the device.Air must flow freely around the device for the system to work properly.REMstar Plus with C-Flex User Manual 9
First Time Setup (cont.)DeviceSettingsOnce the power cord is plugged in, REMstar Plus with C-Flex’s systemversion number, the total hours of use, and then the total therapy hourswill appear.Display Screen: All device settings will appear here.Pressure Start/Stop Button: Use this button to start/stop theairflow. DO NOT start the airflow until the circuit tubing is connected.Heated Humidifier Button: Use this button when the optionalREMstar Heated Humidifier has been prescribed. This button willcontrol the optional heated humidifier’s output. Follow the instructionsincluded with the humidifier.Ramp Button: When the airflow is turned on, use this button to startthe ramp cycle (which lowers the airflow pressure and then graduallyincreases it). This will allow you to fall asleep more comfortably.When the airflow is turned off, use this button to access the patientmenu. Note: The ramp feature is not prescribed for all users.User Buttons: These buttons can be used when entering variousmenus to change some of the REMstar Plus with C-Flex settings.IMPORTANT!In the Setup Menu, the humidifier andramp buttons operate as up and downkeys to change the settings, the left/rightuser buttons are used to go to theprevious/next question or setting, and thestart/stop button will allow you to exit theSettings Menu.10 REMstar Plus with C-Flex User ManualPrevious NextExitSettings
First Time Setup (cont.)DeviceSettings4. Verify/Change the REMstar Plus with C-Flex settings. To start thesetup menu, press and hold the ramp button until the device beeps(The airflow must be turned off.)IMPORTANT!Pressing the ramp button (when the airflow is turned on) will lower theairflow pressure, if prescribed, and then will gradually increase it.WARNING!DO NOT use the REMstar Plus with C-Flex if the display is erratic.Contact your home care provider for further instructions.IMPORTANT!If at any time you wish to exit the setup menu, press the pressure on/offbutton and the display will go back to the main screen.TherapyHoursa. The number of nights the REMstar Pluswith C-Flex was used for therapy formore than 4 hours will appear. Thisscreen is only for reference. Your homecare provider may periodically ask youfor this information.Press the right user button to access the next setting.REMstar Plus with C-Flex User Manual 11
First Time Setup (cont.)Turning theAlert ToneOn or Offb. The patient disconnect alert setting willappear. This setting has two functions.When a large, continuous air leak (suchas mask removal) has been detected inthe circuit, this setting enables/disablesthe audible alert (a beeping sound) andthe Auto-off feature. The latter allows the REMstar Pluswith C-Flex to automatically turn the airflow OFF. You have theoption of turning the alert tone on or off.01 on0 offTo change the setting, press the ramp or humidifier button untilthe correct setting appears.Press the right user button to access the next setting.Setting theButtonLightsc. The button lights setting will appear. Thissetting allows you to have the lightsbehind the buttons turned on or off whilethe airflow is turned on. (The lights willalways be on when the airflow is off.)1 on00 offTo change the setting, press the ramp or humidifier button untilthe correct setting appears.Press the right user button to access the next setting.12 REMstar Plus with C-Flex User Manual
First Time Setup (cont.)Setting theC-Flex Leveld. The C-Flex level setting displays theC-Flex level set by your home careprovider. Note: This setting will onlyappear if C-Flex was prescribedfor you.This setting allows you to adjust the level of air pressure reliefthat you feel when you exhale during therapy.Your home care provider will have already set a C-Flex level. Ifthis is not comfortable for you, you can increase or decrease thesetting. The setting of “1” provides a small amount of pressurerelief. To increase the pressure relief, change the setting to “2”or “3.”To change the setting, press the ramp or humidifier button.Press the right user button to access the next setting.Setting theElevatione. The elevation symbol and setting willappear.1 less than 2,500 ft. ( 762 m)2 2,500 to 5,000 ft. (762 m to 1524 m)3 5,001 to 7,500 ft. (1525 m to2286 m)*over 7,500 ft. The airflow pressuremay not be accurate. Contact your homecare provider to have your pressure settingadjusted.3To change the elevation setting, press theramp or humidifier buttons.Press the right user button to access thenext setting.WARNING!Using the REMstar Plus with C-Flex at an incorrect elevation settingcould result in airflow pressures higher than the prescribed setting.Always verify the elevation setting when traveling or relocating.REMstar Plus with C-Flex User Manual 13
First Time Setup (cont.)Setting theMinimumRampPressuref. The ramp starting pressure will appear.Note: This setting will only appear if rampwas prescribed for you.The ramp feature will reduce the pressureand then gradually increase (ramp) thepressure to the prescription pressure settingso that you can fall asleep more comfortably.Your home care provider will have already set a ramp startingpressure. If you feel the ramp starting pressure is set too low or toohigh, you can change the setting.(Range: 4 cm H2O - Prescription Pressure)To change the setting, press the ramp or humidifier button. (You canhold the button down to make the setting change faster.)Exit the SettingsThe settings are complete. Press the left user button to access theprevious setting, or press the pressure start/stop button to exit thesettings menu. Or, if you want to return to step a, press the right userbutton.14 REMstar Plus with C-Flex User Manual
First Time Setup (cont.)Assemblingthe Circuit5. Assemble the circuit. To use the system, you will need the followingaccessories in order to assemble the recommended circuit. Respironics Nasal Mask with integrated exhalation port(or Respironics mask with separate exhalation port such as the Whisper Swivel II) Respironics 6 ft. (1.83 m) Flexible Tubing Respironics Headgear (for the mask)WARNING!If multiple persons are going to use the REMstar Plus with C-Flex(e.g., rental devices), a low-resistance, main flow bacteria filter shouldbe installed in-line between the REMstar Plus with C-Flex and thecircuit tubing. Pressures must be verified by your home care providerwhen alternate or optional accessories arein place.a. Connect the flexible tubing to the airoutlet on the front of the REMstar Pluswith C-Flex.b. If you are using a maskwith a built-in exhalationport, connect the mask’sconnector to the flexibletubing.Mask'sConnectorFlexibleTubingIf you are using a mask with a separate exhalation port, connect the flexible tubing to theexhalation port. Position the exhalation port sothat the vented air is blowing away from yourface. Connect the mask’s connector to theexhalation port.WARNING!RotatingConnectorWhisperSwivel IIVent HolesFlexibleTubingDo not block or otherwise try to seal the air openings (vent holes) onthe exhalation port. Explanation of the warning: The REMstar Plus with C-Flexis intended to be used with masks and circuits that have an exhalation port designed toexhaust CO2 from the circuit. When the REMstar Plus with C-Flex is turned on andfunctioning properly, new air from the REMstar Plus with C-Flex flushes the exhaledair out through the exhalation port. When the REMstar Plus with C-Flex is turned off,enough fresh air will not be provided through the mask, and exhaled air may berebreathed. Rebreathing of exhaled air for longer than several minutes can, in somecircumstances, lead to suffocation. This warning applies to most CPAP devices.WARNING!If you are using a full face mask (i.e., a mask covering both yourmouth and your nose), the mask must be equipped with a safety(entrainment) valve.REMstar Plus with C-Flex User Manual 15
AccessoriesContact your home care provider for additional information on theaccessories available for the REMstar Plus with C-Flex system. Whenusing optional accessories, always follow the instructions enclosed withthe accessories.Adding aHumidifierWARNING!Adding OxygenThe REMstar Heated Humidifier and REMstarIntegrated Humidifier are available from yourhome care provider. The humidifiers mayreduce nasal dryness and irritation by addingmoisture (and heat if applicable) to the airflow.Always place the humidifier at the same levelor lower than the REMstar Plus with C-Flex device and themask so that any excess condensation in the tubing drains back into thewater chamber. The humidifier must be level for proper operation.Oxygen may be added at the mask connection. Please note the warningslisted below when using oxygen with the REMstar Plus with C-Flex.WARNING!The oxygen supply must comply with the local regulations for medicaloxygen.WARNING!A Respironics Pressure Valve (part number 302418) must be placedin-line with the patient circuit.WARNING!Turn the REMstar Plus with C-Flex on before turning the oxygen on.Turn the oxygen off before turning the REMstar Plus with C-Flex off.Explanation of Warning: When the REMstar Plus with C-Flex is turned off, but the oxygenflow is still turned on, oxygen may accumulate within the REMstar Plus with C-Flexenclosure and create a fire risk. Turning the oxygen off before turning the REMstar Pluswith C-Flex off will prevent oxygen accumulation in the REMstar Plus with C-Flex and willreduce the risk of fire. This warning applies to most CPAP devices.WARNING!UsingDC PowerCAUTION!Oxygen accelerates fires. Keep the REMstar Plus with C-Flex and theoxygen container away from heat, open flames, any oily substance, orother sources of ignition. DO NOT smoke in the area near the REMstarPlus with C-Flex or the oxygen container.You can also use the REMstar Plus with C-Flex in astationary recreational vehicle, boat, or motor home with a 12volt DC power source. Do not operate the REMstar Plus withC-Flex while the vehicle is in motion. Contact your homecare provider for additional information.Use only the Respironics DC power system available from your home careprovider. Use of any other system may cause damage to the REMstarPlus with C-Flex or your vehicle.16 REMstar Plus with C-Flex User Manual
Routine UseConnectingthe CircuitIMPORTANT!1. Connect the circuit.Before each use, examine the flexible tubing for any damage ordebris. If necessary, clean the tubing to remove the debris.Replace any damaged tubing.a. Connect the mask to the headgear, following the instructionsincluded with the headgear.b. Put on the mask and headgear, and breathe normally throughyour nose. The airflow should automatically start when youbegin breathing through the circuit. If the airflow does not startwithin four breaths, press the pressure start/stop button on thetop of the REMstar Plus with C-Flex. When operating thesystem with some mask types or some circuit configurations, theairflow may NOT automatically start.PressureStart/StopButtonAdjustingthe Circuit2. Adjust the circuit. Lie down on your bed, and adjust the flexible tubingso it is free to move if you turn in your sleep. Adjust the mask andheadgear until you have a comfortable fit and there are no airflow leaksinto your eyes.REMstar Plus with C-Flex User Manual 17
Routine Use (cont.)Using theRamp ButtonPressing the ramp button will reduce the air pressure when you aretrying to fall asleep. The air pressure will gradually increase until yourprescription pressure is reached. If your physician prescribed ramp foryou, pressing the button will reduce the pressure and then graduallyincrease (ramp) the pressure to the therapeutic pressure setting so thatyou can fall asleep more comfortably. Note: The ramp feature is notprescribed for all users.3. Press the Ramp button on the top of theREMstar Plus with C-Flex. You can usethe Ramp button as often as you wishduring the night.RampButtonTurning theSystem OFF4. Remove the mask and headgear. Press thepressure start/stop button on the top of theREMstar Plus with C-Flex to start theairflow.Or, if the patient disconnect alert settinghas been turned on, the airflow willautomatically turn off. When you removethe mask, the airflow will decrease to alow pressure. After approximately 45seconds the alert tone will sound. Thenthe airflow will automatically turn off(in less than 2 minutes after you removethe mask).IMPORTANT!Helpful HintsPressureStart/StopButtonThe humidifier button is active only when a REMstar HeatedHumidifier is connected or when the REMstar Plus withC-Flex is in the Setup Menu. Refer to the REMstar HeatedHumidifier’s instructions for additional information. If the alert tone sounds, press any button on the REMstar Plus withC-Flex to silence the alert tone. Refer to the “Troubleshooting” sectionof the manual for further instructions. Make sure that bedding, curtains, or other items are not blocking thefilter or vents of the REMstar Plus with C-Flex. Air must flow freelyaround the REMstar Plus with C-Flex for the system to work properly. If the airflow from the REMstar Plus with C-Flex feels cold, repositionthe circuit tubing so that it runs under your bed covers to reduce heat losswhile you sleep.18 REMstar Plus with C-Flex User Manual
Routine MaintenanceCleaningthe FilterCAUTION!The gray foam filter should be cleaned at least once every two weeks undernormal usage and replaced with a new one every six months. The white ultrafine filter is disposable and should be replaced after 30 nights of use or soonerif it appears dirty. DO NOT clean the ultra-fine filter.Operating the REMstar Plus with C-Flex with a dirty filter may keep thesystem from working properly and may cause damage to the device.1. Remove the filter cap by gently pressing on its sides.2. Change the filter.a. Remove the foam filter by gently pulling around the edges of the filter.Rinse the filter in a steady stream of running water. Squeeze out thewater and repeat. Air dry the filter on a rack for 8 to 12 hours or in aclothes dryer for 15 to 20 minutes. If you are using the white ultra-finefilter and it appears dirty, discard the filter and replace it with a newone.b. Place the white ultra-fine filter under the clean foam filter. Insert thefilter(s) into the filter area on the back of the REMstar Plus withC-Flex. Replace the filter cap.CAUTION!Cleaningthe SystemWARNING!Never install a wet filter into the REMstar Plus with C-Flex. We recommend that you clean the filter in the morning and alternate using the twofilters provided with the system to ensure enough drying time for thecleaned filter.Clean the mask and tubing daily.To avoid electrical shock, unplug the REMstar Plus with C-Flex beforecleaning. Do not immerse the REMstar Plus with C-Flex in any fluids.1. Disconnect the flexible tubing from the REMstar Plus with C-Flex.Gently wash the flexible tubing in a solution of warm water and a milddetergent. Rinse the tubing thoroughly and air dry.2. Wipe the outside of the REMstar Plus with C-Flex with a cloth slightlydampened with water and a mild detergent. Let the REMstar Plus withC-Flex dry before plugging in the power cord.3. Inspect the REMstar Plus with C-Flex and all circuit parts for any damageafter cleaning. Replace any damaged parts.4. For details on cleaning your mask and accessories, refer to the cleaninginstructions packaged with the accessories.REMstar Plus with C-Flex User Manual 19
Reordering/Service/Traveling with the SystemReorderingContact your home care provider to order accessories or replacement filters.ServiceThe REMstar Plus with C-Flex system does not require routineservicing.When necessary, dispose of the REMstar Plus with C-Flex andaccessories in accordance with local regulations.WARNING!If you notice any unexplained changes in the performance of theREMstar Plus with C-Flex, if it is making unusual or harshsounds, if it has been dropped or mishandled, if the enclosure isbroken, or if water has entered the enclosure, discontinue use.Contact your home care provider.WARNING!If the REMstar Plus with C-Flex malfunctions, contact your homecare provider immediately. Never attempt to open the REMstarPlus with C-Flex’s enclosure. Repairs and adjustments must beperformed by Respironics authorized service personnel only.Unauthorized service could cause injury, invalidate the warranty,or result in costly damage.Tr
REMstar Plus with C-Flex User Manual 3 The Respironics REMstar Plus with C-Flex system is a CPAP (Continuous Positive Airway Pressure) device designed for the treatment of adult Obstruc-tive Sleep Apnea (OSA) only. The REMstar Plus with C-Flex is to be used only on the instruction of a licensed health care professional.