Transcription
REMstar ProM Series1050656JR 1/22/08EN-DOM
Important!Fill in the information below when you receive the REMstarPro M Series system.Serial No.: (located on the bottom of the device)System Prescribed for:Date of Purchase or Rental:Pressure Setting: cm H2OMask Type:Mask Size:If you have any questions concerning the system, contact: Home Care Company:Telephone Number: Health Care Professional:Telephone Number: Respironics, Inc.1001 Murry Ridge LaneMurrysville, Pennsylvania15668-8550 USACustomer ServiceTelephone Number: 1-800-345-6443 (US and Canada) or 1-724-387-4000The REMstar Pro M Series with C-Flex system is covered by one or more of the following patents:5,148,802; 5,313,937; 5,433,193; 5,632,269; 5,803,065; 6,029,664; 6,305,374; 6,539,940, 5,535,738;5,794,615; 6,105,575; 6,609,517; 6,629,527; 6,622,724; 6,564,797; 6,427,689, and 6,932,084. Otherpatents pending. REMstar, Whisper Swivel, Encore Pro, and Encore Pro SmartCard are trademarks ofRespironics, Inc. NOTE: The C-Flex trademark is used under license. 2008 Respironics, Inc. and its affiliates. All rights reserved.
Table of ContentsChapter 1: Introduction.1-11.1 System Contents.1-11.2 Intended Use.1-21.3 Warnings, Cautions, and Contraindications.1-21.3.1 Warnings.1-21.3.2 Cautions.1-41.3.3 Contraindications.1-41.4 System Overview.1-51.4.1 Breathing Circuit Overview.1-61.5 Glossary.1-71.6 Symbol Key.1-81.7 How to Contact Respironics.1-8Chapter 2: Device Controls and Displays.2-12.1 Controls and Displays.2-12.1.1 Control Panel Inactivity.2-22.2 Rear Panel.2-2Chapter 3: Setup.3-13.1 Installing the Air Filters.3-13.2 Where to Place the Device.3-23.3 Connecting the Breathing Circuit . .3-23.4 Supplying Power to the Device.3-43.4.1 Using AC Power . .3-43.4.2 Using DC Power.3-53.5 Complete Assembly Example.3-6Chapter 4: Device Operation.4-14.2 Using the Ramp and C-Flex Features.4-34.2.1 Ramp Feature.4-34.2.2 C-Flex Comfort Feature.4-34.2.2.1 C-Flex Enabled.4-34.2.2.2 C-Flex Disabled.4-4REMstar Pro M Series User Manuali
4.3 Changing the Device Settings. 4-44.3.1 Navigating the Display Screens. 4-44.3.1.1 Viewing Data on the Patient Data Screens. 4-54.3.1.2 Viewing and Modifying Patient Setup Screens. 4-74.4 Completing the FOSQ Questionnaire. 4-94.5 Patient Reminder Screen.4-10Chapter 5: Device Alerts and Troubleshooting. 5-15.1 Device Alerts. 5-15.2 Troubleshooting. 5-4Chapter 6: Accessories. 6-16.1 Adding a Humidifier. 6-16.2 Using the SmartCard . 6-26.3 Adding Supplemental Oxygen. 6-2Chapter 7: Cleaning and Maintenance. 7-17.1 Cleaning the Device. 7-17.2 Cleaning or Replacing the Filters. 7-17.3 Cleaning the Tubing. 7-27.4 Service. 7-27.5 Traveling with the System. 7-27.5.1 International Travel. 7-2Chapter 8: Specifications. 8-1Appendix A: EMC Information.A-1iiREMstar Pro M Series User Manual
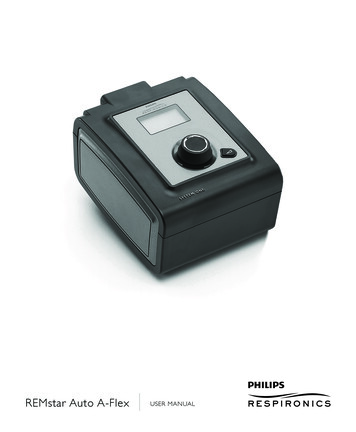
Chapter 1: IntroductionThis chapter provides information on: REMstar Pro M Series system contents Intended Use Warnings, cautions, and contraindications System overview Glossary and symbol key How to contact Respironics1.1 System ContentsYour REMstar Pro M Series system includes the following items:Carrying CaseUser ManualFlexible TubingPower SupplyReusable Gray FoamFilterxFleDisposable Ultra-fineFilterAC Power CordDeviceFigure 1–1 System ContentsNote:If your system includes a humidifier, you will receive additional items with yourpackage. See the instructions included with your humidifier for more information.Note:If any of the above items are missing, contact your home care provider.REMstar Pro M Series User Manual1-1
1.2Intended UseThe Respironics REMstar Pro M Series system is a CPAP (Continuous Positive Airway Pressure)device designed for the treatment of Obstructive Sleep Apnea only in spontaneously breathingpatients weighing 66 lbs (30 kg).The device is to be used only on the instruction of a licensed physician. Your home care providerwill make the correct pressure settings according to your health care professional’s prescription.Several accessories are available to make your OSA treatment with the REMstar Pro M Seriessystem as convenient and comfortable as possible. To ensure that you receive the safe,effective therapy prescribed for you, use only Respironics accessories.1.3Warnings, Cautions, and ContraindicationsCaution: U.S. federal law restricts this device to sale by or on the order of a physician.1.3.1 WarningsA warning indicates the possibility of injury to the user or the operator.1-2 This manual serves as a reference. The instructions in this manual are not intended to supersede the health care professional’s instructions regarding the use of the device. The operator should read and understand this entire manual before using the device. This device is not intended for life support. The device should be used only with masks and connectors recommended by Respironicsor with those recommended by the health care professional or respiratory therapist. A maskshould not be used unless the device is turned on and operating properly. The exhalationport(s) associated with the mask should never be blocked.Explanation of the Warning: The device is intended to be used with special masks or connectors that have exhalation ports to allow continuous flow of air out of the mask. When thedevice is turned on and functioning properly, new air from the device flushes the exhaled airout through the mask exhalation port. However, when the device is not operating, enoughfresh air will not be provided through the mask, and exhaled air may be rebreathed. Rebreathing of exhaled air for longer than several minutes can in some circumstances lead tosuffocation. If oxygen is used with the device, the oxygen flow must be turned off when the device is notin use.Explanation of the Warning: When the device is not in operation and the oxygen flow isleft on, oxygen delivered into the tubing may accumulate within the device’s enclosure. Oxygen accumulated in the device enclosure will create a risk of fire.REMstar Pro M Series User Manual
Oxygen supports combustion. Oxygen should not be used while smoking or in the presenceof an open flame. When using oxygen with this system, a Respironics Pressure Valve must be placed in-linewith the patient circuit. Failure to use the pressure valve could result in a fire hazard. Do not use the device in the presence of a flammable anaesthetic mixture in combinationwith oxygen or air, or in the presence of nitrous oxide. Do not use this device if the room temperature is warmer than 95 F (35 C). If the device isused at room temperatures warmer than 95 F (35 C), the temperature of the airflow mayexceed 106 F (41 C). This could cause irritation or injury to your airway. Do not operate the device in direct sunlight or near a heating appliance because these conditions can increase the temperature of the air coming out of the device. Contact your health care professional if symptoms of sleep apnea recur. If you notice any unexplained changes in the performance of this device, if it is making unusual or harsh sounds, if the device or the power supply are dropped or mishandled, if wateris spilled into the enclosure, or if the enclosure is broken, discontinue use and contact yourhome care provider. Repairs and adjustments must be performed by Respironics-authorized service personnelonly. Unauthorized service could cause injury, invalidate the warranty, or result in costlydamage. Periodically inspect electrical cords, cables, and the power supply for damage or signs of wear.Discontinue use and replace if damaged. To avoid electric shock, unplug the device before cleaning it. DO NOT immerse the devicein any fluids. Pins of connectors identified with the ESD warning symbol ( )should not be touched.Connections should not be made to these connectors unless ESD precautionary proceduresare used. Precautionary procedures include methods to prevent build-up of electrostaticdischarge (e.g., air conditioning, humidification, conductive floor coverings, non-syntheticclothing), discharging one’s body to the frame of the equipment or system or to earth or alarge metal object, and bonding oneself by means of a wrist strap to the equipment or systemor to earth.REMstar Pro M Series User Manual1-3
1.3.2 CautionsA Caution indicates the possibility of damage to the device. The device may only be operated at temperatures between 41 F (5 C) and 95 F (35 C). If this device has been exposed to either very hot or very cold temperatures, allow it to adjustto room temperature before starting therapy. Condensation may damage the device. Do not immerse the device or allow any liquid to enter the enclosure or the inlet filter. A properly installed, undamaged reusable foam inlet filter is required for proper operation. Tobacco smoke may cause tar build-up within the device, which may result in the devicemalfunctioning.Note:Additional warnings, cautions, and notes are located throughout this manual.1.3.3 ContraindicationsWhen assessing the relative risks and benefits of using this equipment, the clinician shouldunderstand that this device can deliver pressures up to 20 cm H2O. In the event of certain faultconditions, a maximum pressure of 30 cm H2O is possible. Studies have shown that the followingpre-existing conditions may contraindicate the use of CPAP therapy for some patients: Bullous Lung Disease Pathologically Low Blood Pressure Bypassed Upper Airway Pneumothorax Pneumocephalus has been reported in a patient using nasal Continuous Positive Airway Pressure. Caution should be used when prescribing CPAP for susceptible patients such as thosewith: cerebral spinal fluid (CSF) leaks, abnormalities of the cribriform plate, prior history ofhead trauma, and/or pneumocephalus. (Chest 1989; 96:1425-1426)The use of positive airway pressure therapy may be temporarily contraindicated if you exhibitsigns of a sinus or middle ear infection. Not for use with patients whose upper airways are bypassed. Contact your physician if you have any questions concerning your therapy.1-4REMstar Pro M Series User Manual
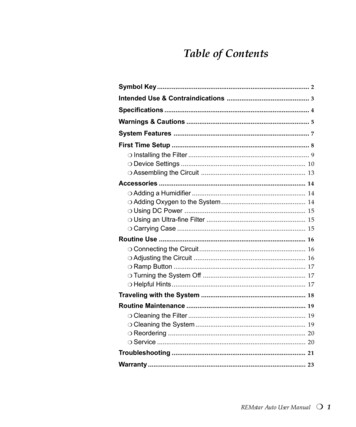
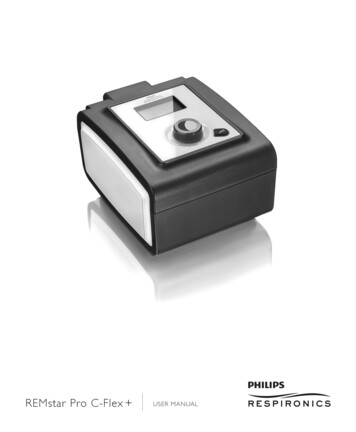
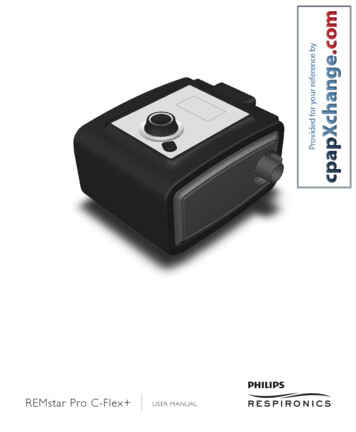
1.4 System OverviewThe REMstar Pro M Series device, shown in Figure 1–2, is a sleep apnea system thatdelivers Continuous Positive Airway Pressure (CPAP). CPAP maintains a constant level of pressure throughout the breathing cycle.When prescribed for you, the device provides several special features to help make your therapymore comfortable. The ramp function allows you to lower the pressure when you are trying to fallasleep. The air pressure will gradually increase until your prescription pressure is reached. You alsohave the option of not using the ramp feature at all.Additionally, the C-Flex comfort feature provides you with pressure relief during the expiratoryphase of breathing.Several accessories are also available for use with your REMstar Pro M Series device. Contact yourhome care provider to purchase any accessories not included with your system.Figure 1–2 REMstar Pro M Series DeviceFigure 1–3 illustrates many of the device features, described in the table below.Ramp ButtonStart/StopButtonC-FlexButtonPower InletDisplay Screen(under door)MedicalEquipment Note(on bottom)Air OutletFilter AreaAccessoryModuleFigure 1–3 REMstar Pro M Series System OverviewREMstar Pro M Series User Manual1-5
Device FeatureAccessory ModuleDescriptionIf applicable, insert the optional accessory card here.Air OutletConnect the flexible tubing here.C-Flex ButtonThis button allows you to change the C-Flex comfort setting, ifC-Flex is prescribed for you. See Chapter 4 for more informationabout C-Flex.Display ScreenShows therapy settings, patient data, instructions, and error messages.Filter AreaA reusable, gray foam filter must be placed in the filter area toscreen out normal household dust and pollens. An optional, whiteultra-fine filter can also be used for more complete filtration ofvery fine particles.Medical Equipment Note For ease at airport security stations, there is a note on the bottomof the device stating that it is medical equipment. It may help ifyou also take this manual with you when you travel.Power InletConnect the power cord here.Ramp ButtonThis button starts or restarts the ramp cycle.Start/Stop ButtonThis button starts or stops the airflow.1.4.1 Breathing Circuit OverviewThe patient breathing circuit, shown in Figure 1–4, consists of the following: Circuit tubing to deliver air from the device to your interface (e.g., mask) A mask or other patient interface device to deliver the prescribed pressure to your nose ornose and mouth, depending on which interface has been prescribed for you An exhalation device to vent exhaled air from the circuitPatient rcuitTubingCircuit with SeparateExhalation t with Mask withIntegrated Exhalation PortFigure 1–4 Typical Breathing Circuits1-6REMstar Pro M Series User Manual
Note:The exhalation port may be part of the interface or may be part of a separateexhalation device, but is required to minimize the potential for CO2 rebreathing.1.5 GlossaryThe following terms and acronyms appear throughout this manual:Term/AcronymDefinitionActive StateThe state of the device when power is applied, the airflow is on, and thedevice is providing therapy.ApneaA condition marked by the cessation of spontaneous breathing.Auto-OffWhen this feature is enabled, the device automatically discontinuestherapy whenever the mask is removed.Auto-OnWith this feature, the device automatically initiates therapy when youbegin breathing on the device. This feature is always enabled.BPMBreaths Per MinuteC-FlexA therapy feature that provides pressure relief during exhalation, ifenabled by your home care provider.Compliance CheckValueRepresents a code used by the home care provider to determine theaccuracy of reported data.CPAPContinuous Positive Airway PressureFOSQFunctional Outcomes of Sleep Questionnaire – A “quality of life” questionnaire designed specifically for people with sleep disorders. Theresults allow health care professionals to assess how CPAP therapy hasimproved the quality of their patients’ lives.LPMLiters Per MinuteOSAObstructive Sleep ApneaPatient Data MenuThe display mode in which you can view certain stored information,such as therapy usage hours.Patient Setup Menu The display mode in which you can change patient-adjustable devicesettings, such as the ramp starting pressure.RampA feature that may increase patient comfort when therapy is started. Theramp feature reduces pressure and then gradually increases the pressure to the prescription setting so you can fall asleep more comfortably.Safe StateThe state in which the device does not provide therapy. The deviceenters this state if an error is detected.Standby StateThe state of the device when power is applied but the airflow is turnedoff.REMstar Pro M Series User Manual1-7
1.6 Symbol KeyThe following symbols appear on the device and power supply:SymbolDefinitionConsult accompanying instructions for use.DC PowerType BF Applied PartClass II (Double Insulated)IPX1Drip Proof EquipmentElectrostatic DischargeCanadian/US Safety CertificationTUV Safety Standard ComplianceUL Recognized for Canada and the United StatesNo User Serviceable Parts1.7 How to Contact RespironicsTo have your device serviced, contact your home care provider. If you need to contact Respironicsdirectly, call the Respironics Customer Service department at 1-800-345-6443 or1-724-387-4000. You can also use the following address:Respironics1001 Murry Ridge LaneMurrysville, Pennsylvania15668-8550 USAVisit Respironics web site at: www.respironics.com1-8REMstar Pro M Series User Manual
Chapter 2: Device Controls and DisplaysThis chapter describes the device’s control buttons and displays, patient circuit connections, andrear panel connections.2.1Controls and DisplaysFigure 2–1 shows the three primary control buttons on the REMstar Pro M Series device.Figure 2–1 Primary Control ButtonsThese buttons are described below.ButtonDescriptionRamp – When the airflow is on, this button allows you to activate or restart the ramp function. Ramplowers the airflow pressure and then gradually increases it, allowing you to fall asleep more easily.Start/Stop – This button starts the device’s airflow and places the device in the Active state, or stops theairflow, and places the device in Standby. You can also press this button to exit any setting screen.C-FlexC-Flex – This button adjusts the C-Flex comfort setting.If you do not want to modify the settings that your home care provider has set for you, you onlyneed these three buttons to start and stop therapy and do not need to use the display buttons locatedunder the device cover door.Figure 2–2 shows the device display and navigation buttons that are under the cover door.– FOSQSetup Figure 2–2 Display ButtonsThe display buttons are described below:ButtonDescriptionAllows you to access the Data screens. Also allows you to navigate to the previous screen when inthe Data or Setup menu.Allows you to access the Data screens. Also allows you to navigate to the next screen when in theData or Setup menu.Allows you to enter the FOSQ screens, and also allows you to decrease the settings on the setup screens.Allows you to enter the Setup screens. Also allows you to increase the settings on the setup screens.REMstar Pro M Series User Manual2-1
The device’s display screen shows the set pressure, patient data, instructions, and error messages.See Chapter 4 for instructions on navigating the display screens.Figure 2–3 provides a view of the entire device control panel, with the cover door open.Placement Areafor Optional QuickReference LabelCover ButtonFigure 2–3 Device Control Panel2.1.1 Control Panel InactivitySome screens have time-out periods. The screen’s timer starts when the screen is initially displayedand is restarted whenever a button is pressed. The screen times out after one minute if there is noactivity and returns to the Standby screen.2.2 Rear PanelFigure 2–4 shows the REMstar Pro M Series device’s rear panel (without a humidifier).DC Power InletAir Outlet PortAccessory SlotFilter AreaFigure 2–4 REMstar Pro M Series Rear PanelThe rear panel contains the following: An accessory slot for optional accessories such as the SmartCard or modem (see Chapter 6,Accessories, for more information). A filter area where the filter(s) supplied with your device should be inserted. A DC power inlet where the power cord is connected (see Chapter 3, Setup, for completeinformation on supplying power to the device). The air outlet port where the breathing circuit’s flexible tubing is attached.2-2REMstar Pro M Series User Manual
Chapter 3: SetupThis chapter provides instructions on how to: Install the air filters Position the device Connect the breathing circuit Supply power to the device3.1Installing the Air FiltersCaution: A properly installed, undamaged foam filter is required for proper operation.The device uses a gray foam filter that is washable and reusable, and an optional white ultra-finefilter that is disposable. The reusable filter screens out normal household dust and pollens, whilethe optional ultra-fine filter provides more complete filtration of very fine particles. The gray reusable filter must be in place at all times when the device is operating. The ultra-fine filter is recommended for people who are sensitive to tobacco smoke or other small particles.Two reusable gray foam filters and one disposable ultra-fine filter are supplied with the device.If your filters are not already installed when you receive your device, you must at least install thereusable gray foam filter before using the device.To install the filter(s):1.If you are using the white disposable ultra-fine filter, insert it into the filter area first, meshside facing in, towards the device.2.Insert the gray foam filter into the filter area as shown in Figure 3–1.Note:If you are not using the white disposable filter, simply insert the gray foam filterinto the filter area.Filter AreaDisposable Ultra-Fine Reusable GrayFoam FilterFilter (optional)(required)Figure 3–1 Installing the Air FilterREMstar Pro M Series User Manual3-1
Note:3.2See Chapter 7, Cleaning and Maintenance, for information on how to clean orreplace the air filters.Where to Place the DevicePlace the device on a firm, flat surface somewhere within easy reach of where you will use it. Makesure the filter area on the back of the device is not blocked by bedding, curtains, or other items.Air must flow freely around the device for the system to work properly. Make sure the device isaway from any heating or cooling equipment (e.g., forced air vents, radiators, air conditioners).3.3Connecting the Breathing CircuitTo use the system, you will need the following accessories in order to assemble the recommendedcircuit: Respironics interface (e.g, nasal mask) with integrated exhalation port (or Respironics interface with a separate exhalation device such as the Whisper Swivel II) Respironics 6 ft. (1.83 m) flexible tubing Respironics headgear (for the patient interface)Warning:If the device is used by multiple persons (e.g., rental devices), a lowresistance, main flow bacteria filter should be installed in-line betweenthe device and the circuit tubing to prevent contamination.To connect your breathing circuit to the device, complete the following steps:1.Connect the flexible tubing to the air outlet on the back of the device, as shown in Figure3–2.Figure 3–2 Connecting the Flexible TubingNote:3-2If required, connect a bacteria filter to the device air outlet, and then connectthe flexible tubing to the outlet of the bacteria filter.REMstar Pro M Series User Manual
2.Connect the tubing to the mask:a.If you are using a mask with a built-in exhalation port, connect the mask’s connector tothe flexible tubing, as shown in Figure 3–3.Exhalation PortMask'sConnectorFlexibleTubingConnectorFigure 3–3 Connecting a Mask with Built-in Exhalation Portb.If you are using a mask with a separate exhalation device, connect the open end of theflexible tubing to the exhalation device as shown in Figure 3–4. Position the exhalationdevice so that the vented air is blowing away from your face. Connect the mask’s connector to the exhalation re 3–4 Connecting a Mask with a Separate Exhalation DeviceWarning:The exhalation device (e.g., Whisper Swivel II) or exhalation port (onmasks with an integrated exhalation port) is designed to exhaust CO2from the patient circuit. Do not block or seal the ports on the exhalation device.Warning:If you are using a full face mask (i.e., a mask covering both your mouthand your nose), the mask must be equipped with a safety (entrainment) valve.3.Attach the headgear to the mask. See the instructions that came with your headgear.REMstar Pro M Series User Manual3-3
3.4 Supplying Power to the DeviceYou can power the device using AC or DC power.Caution:If this device has been exposed to either very hot or very cold temperatures, allow it to adjust to room temperature before beginning thefollowing setup procedures.Warning:Route the wires to avoid tripping.Warning:This device is activated when the power cord is connected. Pressingbutton turns the airflow on or off.theImportant!If you are using your device with a humidifier, refer to the instructionsincluded with your humidifier for details on how to power the deviceand humidifier.3.4.1 Using AC PowerComplete the following steps to operate the device using AC power.1.Plug the socket end of the AC power cord into the power supply, as shown in Figure 3–5.Figure 3–5 Connecting the Power Cord to the Power Supply2.Plug the pronged end of the AC power cord into an electrical outlet that is not controlled bya wall switch.3.Plug the power supply cord’s connector into the power inlet on the back of the device, asshown in Figure 3–6.Figure 3–6 Connecting the Power Supply Cord to the Device3-4REMstar Pro M Series User Manual
4.Ensure that all connections are secure.Important!To remove AC power, disconnect the power supply cord from the electrical outlet.Warning:Inspect the power cord often for any signs of damage. Replace a damaged power cord immediately.3.4.2 Using DC PowerThe Respironics DC Power Cord can be used to operate this device in a stationary recreationalvehicle, boat, or motor home. The Respironics DC Battery Adapter Cable when used with theDC Power Cord, enables the device to be operated from a 12 VDC free-standing battery.Caution: When DC power is obtained from a vehicle battery, the device should notbe used while the vehicle’s engine is running. Damage to the vehicle or thedevice may occur.Caution: Only use a Respironics DC Power Cord and Battery Adapter Cable. Use ofany other system may cause damage to the device or vehicle.Refer to the instructions supplied with the DC Power Cord and adapter cable for information onhow to operate the device using DC power.REMstar Pro M Series User Manual3-5
3.5Complete Assembly ExampleFigure 3–7 shows an example of how a complete assembly will look, with breathing circuit connected and power applied to the de
The Respironics REMstar Pro M Series system is a CPAP (Continuous Positive Airway Pressure) device designed for the treatment of Obstructive Sleep Apnea only in spontaneously breathing patients weighing 66 lbs (30 kg). The device is to be used only on the instruction of a licensed physician. Your home care provider