Transcription
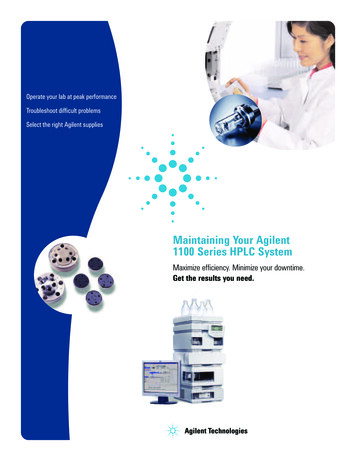
Operate your lab at peak performanceTroubleshoot difficult problemsSelect the right Agilent suppliesMaintaining Your Agilent1100 Series HPLC SystemMaximize efficiency. Minimize your downtime.Get the results you need.
We’re committed to bringing you the world’s best HPLC systems.Plus the critical information you need to keep them running properly.As an Agilent customer, you have complete access to over 40 yearsof industry knowledge and experience. With a wide range of technicalknow-how and a never-ending supply of ideas, our goal is to help yousolve your most challenging application problems.That’s why we created Maintaining Your Agilent 1100 Series HPLC System.0sys temss o ld 5 0, 0 0 0 sInside you’ll find ystsem s o ldsystems sold 50,00It’s designed to help you keep your HPLC system running at optimalperformance, and to ensure that your manual injection valves, autosampler,pump, and detectors always work at peak efficiency.0,0050ss 50 , 0 0 0 s y s t e m Essential facts about Agilent’s 1100 Series HPLC consumablesand accessories. Vital maintenance procedures and troubleshooting tips. All the Agilent part numbers you’ll need in one easy-to-use guide.So you’ll expand your system’s hours of continuous operation, decreasedowntime, and get the reproducible results that your lab demands.old 50,000 systems s oldMaintaining Your Agilent 1100 Series HPLC SystemEnsuring optimal performance and results.1 Section 1: ManualInjection Valves35 Section 5: DetectorMaintenance5 Sample Loops36 Variable Wavelength Detector7 Section 2: AutosamplerMaintenance8 Injection Valve Maintenance9 Exchanging theNeedle/Needle Seat12 Autosampler Partsand Supplies41 Diode Array Detector (DAD),Multiple WavelengthDetector (MWD)48 LC/MS Supplies49 Section 6: General Supplies50 Ready-to-Use EconofilterMembrane Syringe Filters51 LC Tubing and Fittings15 Section 3: Fraction Collectors16 Analytical and PreparativeFraction Collector Maintenance53 Universal ConnectingCapillaries60 Electronic Crimper19 Needle Assembly Description20 Maintaining The Micro FractionCollector/Spotter61 Section 7: Servicesand Support66 Education & Training Services23 Section 4: Pump Maintenance68 Support24 Purge Valve25 Cleaning or Exchangingthe Outlet Ball Valve26 Replacing the ActiveInlet Valve cartridge26 Pistons and SealsTIPS AND TOOLS29 Parts and Supplies31 Solvent Filtration33 HPLC In-line FiltersThis icon denotes a helpful hint that provides useful information youcan find throughout this guide and online at www.agilent.com/chem.34 Vacuum DegasserParts and Supplieswww.agilent.com/chem
Manual Injection ValvesMeticulously engineered to ensuretrouble-free operation.You can count on Agilent injection valves, just like you dependon your HPLC System.That’s because our valves are built to Agilent’s industry-leadingstandards to ensure consistent results and optimum performancefrom your analytical instruments.In this section, you’ll find the latest in LC injection valve technology,along with part numbers and important maintenance information.“With more than 50,000 systems, the Agilent 1100Series has become the industry's best-selling LCsystem. Agilent has earned its reputation forsuperior technology by designing and developinganalytical instruments which produce consistent,first class LC results. Our wide range of columns,consumables and supplies are designed to thesame level of quality to ensure day-in-day-outhassle free operation, keeping your productivityhigh and your operating cost low.”Erich WagnerProduct ManagerCATALOGFor a complete selection of Injection Valves, seeAgilent’s 2005-2006 Essential Chromatography Catalog.Or visit our online catalog at m1
MANUAL INJECTION VALVESAgilent injection valves from Rheodyne are backed by 40 years of innovationand experience. They feature Patented Make-Before-Break (MBB)technology that provides uninterruptedflow when switching between LOADand INJECT positions. Additionally,MBB greatly reduces transient pressureshocks, which benefits flow-sensitivedetectors, and extends column life.Dual-mode (or front-loading) injection,which enables either the partial-filling orthe complete-filling of the sample loop. An injection port built right into thehandle. This unique design allows thetip of the needle to connect directly tothe sample loop. So you don’t have toworry about sample loss during loading.The reproducibility of manual sampleinjectors depends on operator skill, syringeprecision, and loading method. The partialfilling method is typically reproducible to1.0% relative standard deviation (RSD).The complete-filling method is reproducibleto 0.1% RSD for 5 µl loops.Series 7725i and 9725i Analytical Injection ValvesStainless steel (SS) 7725i and PEEK 9725ivalves are the most popular injectionvalves for analytical HPLC.Features include: 2A 20 µl loop (installed). Loops are alsoavailable in stainless steel or PEEK from5 µl to 5 ml (10 ml for PEEK). Make-Before-Break (MBB)technology allows switchingwithout flow interruption.Wide 30 port angles offereasier access to fittings.Built-in position sensing switchprovides the chromatograph witha reproducible start signal.www.agilent.com/chem
MANUAL INJECTION VALVESSeries 3725i-038 and 3725i Preparative Injection ValvesThe series 3725i-038 (stainless steel) and3725i (PEEK) are the most suitable manualvalves for large sample volumes, high flowrates, and preparative columns sized1.0-10 cm in diameter. Versatile ports accommodate 1/8″(3.2 mm) and 1/16″ (1.6 mm) OD tubing.(Note: 1/16″ OD tubing requires anadapter, PN 5067-1503.) High reproducibility for both partialfilling and complete-filling methods.Sample range is 100 µl to 20 ml(10 ml loop is installed).Flow range is 10 to 800 ml/min.Built-in position sensing switchgives the chromatograph areproducible start signal.1.0 mm diameter passages allow flowrates up to 800 ml/min with virtuallyno pressure drop.Make-Before-Break technology allowsswitching without flow interruption.Manual Injection Valves with Position Sensing SwitchesRheBuild KitsRheBuild kits include all individual parts(rotor seal, stator face assembly, isolationseal), tools, and instructions to completelyrefurbish specific valves to ensure highperformance and long lifetime.www.agilent.com/chemDescriptionPart No.7725i, SS5063-65029725i, PEEK0101-12533725i, SS, prep valve0101-12323725i, PEEK, prep valve0101-1231Manual prep injection valve kit, SS (3725i-038) withposition sensing, 10ml loop, 25ml syringe, ring mountingbracket, start cable, SS connecting capillaries, 0.5mm id,40cm and 60cm5065-9922RheBuild Kits Used with Rheodyne SeriesDescriptionPart No.7725 Injection valve0101-12547750-020 Injection valve(2-groove rotor seal)0101-12577750-030 Switching valve(3-groove rotor seal)0101-12583
MANUAL INJECTION VALVESMaintenance and Replacement Parts for Manual Injection ValvesPart No.DescriptionRotor SealsVespel: operating pH 0 to 10 (7125, 7725)0101-0623Tefzel: operating pH 0 to 14 (7125, 7725)0101-0620PEEK: operating pH 0 to 14 (7125, 7725, 9725)0101-1255PEEK: operating pH 0 to 14 (3725)0101-1233Stator Face AssemblyRheodyne Series 71250101-0624Rheodyne Series 77250100-1859StatorsRheodyne Series 77250100-1860AccessoriesIsolation Seal, Rheodyne Series 7725, 9725, 37251535-4046Rheotool socket wrench 1/4 inch8710-2391Hex Key 9/64″ 15cm long, T-handle8710-2394Ring stand mounting bracket1400-3166PEEK adapter, 1/8″ to 1/16″ (4/pk)5067-1503Position sensor switch for manual valves0490-1849Tips & ToolsPeak doubling can be a symptom that it is timeto replace the injector rotor seal.4www.agilent.com/chem
MANUAL INJECTION VALVESSample LoopsStainless steel loop ends are square cutand burr-free for a flush connection tothe valve. They are also supplied withunswaged fittings. Flexible PEEK loop endsfeature a clean, straight cut for low deadvolume connection. Both types of sampleloops are factory-cut and finished to thehighest quality.Stainless Steel Sample LoopsRemember size designations for loopsare nominal. The actual volumes can differfrom their theoretical designations becauseof the 0.025 mm (0.001″) tolerance of themetal tubing bore.Generally, accuracy rates are about 5%for large metal loops (1.0 mm, 0.040″), 10%for intermediate loops (0.5 mm, 0.020″),and 30% for small loops (0.2 mm, 0.007″).However, since both standards andunknowns are typically analyzed using thesame sample loop, knowledge of the actualvolume is rarely needed. If you do need toknow the sample volume, it is best tocalibrate the loop while it is on the valve,so the valve’s flow passage is alsotaken into account.Important: Sample loops for the7725 Series and 7125 Series are notinterchangeable. That’s becausethe port angle is 30 for the 7725,and 20 for the 7125.www.agilent.com/chemStainless Steel Loops for 7125 and 7010 InjectorsDescriptionID (mm)Part No.5 µl0.181535-486010 µl0.300101-037620 µl0.510101-037750 µl0.510101-0378100 µl0.510101-0379200 µl0.760101-1252500 µl0.760101-12511 ml0.760101-12192 ml1.000101-12505 ml1.000101-1249Stainless Steel Loops for 7725 InjectorsDescriptionID (mm)Part No.5 µl0.180101-124810 µl0.300100-192320 µl0.300100-192250 µl0.510100-1924200 µl0.760101-1247500 µl0.760101-12461 ml0.760101-12452 ml1.000101-12445 ml1.000101-12435
MANUAL INJECTION VALVESPEEK Sample Loops for 9725 InjectorsDescriptionPEEK Sample LoopsPEEK is inert to almost all organic solventsand is biocompatible. Like metal loops, theactual volumes of PEEK loops can differfrom their nominal designations becauseof the 0.05 mm (0.002″) tolerance of thetubing bore. Generally, accuracy rates areabout 14% for large PEEK loops (0.8 mm,0.030″), 21% for intermediate loops(0.5 mm, 0.020″), and 65% for smallloops (0.2 mm, 0.007″).Although PEEK is compatible with virtuallyall solvents, many factors can affect theburst pressure of PEEK tubing. For example,wall thickness, temperature, exposure timeand concentration of organic solvents canall impact durability. Additionally, solventssuch as THF, methylene chloride and DMSOcause PEEK to swell – while concentratednitric acid and sulfuric acid can weakenPEEK tubing.6ID (mm)Part No.5 µl0.180101-124110 µl0.250101-124020 µl0.250101-123950 µl0.510101-1238100 µl0.510101-1242200 µl0.510101-1237500 µl0.760101-12361 ml0.760101-12352 ml0.760101-12345 ml0.760101-1230PEEK Sample Loops for 3725 InjectorsDescriptionID (mm)Part No.2 ml1.60101-12295 ml1.60101-122810 ml2.00101-122720 ml2.00101-1226www.agilent.com/chem
Autosampler MaintenanceEnsuring peak performance andincreasing your lab’s uptime.Routine maintenance of your Autosamplershould include the following tasks: Replacing the rotor sealChecking the statorReplacing the needle and needle seatChecking the finger capsReplacing the metering unit sealCleaning the pistonCleaning the solvent waste pathChecking the leak sensorPerforming a pressure testThis section will give you step-by-step instructions on howto perform many of these procedures.You’ll also find the top-quality Agilent consumables and accessoriesyou need to keep your Autosampler running at top efficiency.“First we ask customers what they would like toaccomplish. Then we recommend the best productsfor their needs, and explain how to use them.“People come to Agilent because they knowthey’ll get intelligent information that will helpthem be more productive. How do I know? I wasonce an Agilent customer.”Maureen JosephAnalytical Chemistry Applications ChemistCATALOGFor a complete selection of Injection Valves, seeAgilent’s 2005-2006 Essential Chromatography Catalog.Or visit our online catalog at m7
AUTOSAMPLER MAINTENANCEInjection Valve MaintenanceRotor seal replacement is the most common injection valvemaintenance procedure. Indications include rotor seal blockagesand cross-port leaks. You should suspect a cross-port leak if younotice a drop of mobile phase coming out of the needle when itrises to draw sample from a vial. Or, if you experience poorinjection volume precision. Cross-port leaks can also be found byperforming a pressure test.Tools9/64″ Allen wrench (to remove the stator face anddisassemble the valve)Metric hexagonal keys (for the rest of the Autosampler screws)1/4″ Wrench (to remove the capillaries)Replacing the Rotor SealFor Standard and Well Plate AutosamplersG1313A, G1327A, G1367A1. Remove the capillariesfrom the stator face.Remove the statorscrews with a 9/64 Allen wrench.4. Install the stator head,then the stator face.Replace the statorscrews, tightening themevenly and carefully.2. Remove the stator head,stator face, andstator ring.5. Connect all capillariesaccording to thediagram below.A - PumpB - Metering deviceC - PlugD - WasteE - Needle seatF - ColumnBACFDE3. Remove and replacethe rotor seal (andthe isolation seal,if necessary).8www.agilent.com/chem
AUTOSAMPLER MAINTENANCEInjection Valve MaintenanceUsed In(instrument)DescriptionRheBuildKit PartNo.Part No.G1313A,G1329A,G1367A2 Pos/6 PortInjection Valve0101-0921G1377A2 Position/6 Portµ Injection Valve0101-1050G2258A10 Port, DualLoop Valve0101-1385G2260A2 Position/6 PortMBB Injection Valve0101-12670101-12570101-1257Rotor SealPart K)Stator Part No.0100-1850Stator head0100-1851Stator 01-1268Exchanging the Needle/Needle Seat for the G1313A,G1329A, G1389A and G2260A(See manual for G1367A and G1377A)The needle should be replaced when it becomes bent, burred orblunt. The needle seat should be replaced when it is leaking orplugged. You should suspect a leak if you notice a trail of buffercrystals on the needle seat. The needle seat can become blockedif the sample contains particulates, as this is the first restrictionthat the sample experiences. If this occurs, try backflushing theneedle seat capillary.Exchanging the Needle1. Select “Needle Down”button until the needlescrew shows up in thehole of the safety cover.Before beginning this procedure: Select “Change Needle” under “Maintenance Function.” Remove the front cover when the needle is positionedapproximately 15 mm over the needle seat.Tools1/4″ Wrench2.5 mm Hexagonal key2. Remove the sample loop.Loosen and remove theneedle’s set screw.When installing the new needle, take care not to strip thesetscrew. You may have to bend the needle slightly to ensureneedle seat alignment.www.agilent.com/chem9
AUTOSAMPLER MAINTENANCE3. Move the needle arm tothe lowest point usingthe “Needle Down“function.Install the new needle.4. Situate the needleapproximately 2 mmabove the seat using the“Needle Up” function.Ensure the needle isaligned with the seat.Align the needle abovethe needle seat.Reconnect thesample loop.Exchanging the Needle Seat(See manual for well-plate Autosampler)Before beginning this procedure: Select “Change Needle” under “Maintenance Function.” Remove the front cover when the needle is positionedapproximately 15 mm over the needle seat.1. Disconnect the seatcapillary from theinjection valve (port 5).3. Insert the new needleseat assembly.Press the seat firmlyinto position.Connect the seatcapillary fitting to port 5of the injection valve.2. Use a small, flatscrewdriver to easeout the needle seat.4. Use the “Needle Down”button to position theneedle above the seat,making sure the needleand seat areproperly aligned.Install the front coverand select “END” under“Maintenance Function.”10www.agilent.com/chem
AUTOSAMPLER eedle Assembly DescriptionPart No.Compatible with Needle SeatPart No.Needle assembly,standard autosamplerG1313-87201Standard needle seat0.17mm ID capillary, 2.3µlG1313-87101Standard needle seat0.12 mm ID capillary, 1.2 µlG1313-87103G1313A,G1327A,G1329ANeedle assembly, foruse with PEEK seatG1313-87203Standard needle seat,PEEK 0.17 mm ID capillary, 2.3 µlG1313-87102G1313A,G1327A,G1329ANeedle assembly,900µl upgradeG1313-87202Standard needle seat0.17mm ID capillary, 2.3µlG1313-87101G1387A,G1389ANeedle assembly,µ-LC autosamplerG1329-80001µ-LC Needle seat100 µm ID capillary, 1.2 µlG1329-87101µ-LC Needle seat50 µm ID capillary, 0.3 µlG1329-87103G1367AG1377ANeedle assembly, well plateautosampler (green)G1367-87200Needle seat,well plate autosampler0.17 mm ID capillary, 2.3 µlG1367-87101Needle assembly, well plateautosampler (new, blue)G1367-87201Needle seat,well plate autosampler0.12 mm ID capillary, 1.2 µlG1367-87102Needle assembly,µ-well plate samplerG1377-87201Needle seat,µ-well plate autosampler(without seat capillary)G1377-87101Seat Capillary 100µm,150mm Fused silica/PEEKwith fittingsG1375-87317Seat Capillary 75µm,150mm Fused silica/PEEKwith fittingsG1375-87316Seat Capillary 50µm,150mmG1375-87300G2258ANeedle assembly,dual loop autosamplerG2258-68710Twin needle seat,dual loop autosamplerG2258-87102G2260ANeedle assembly,prep autosamplerG2260-87201Needle seat, prep autosampler0.5 mm ID, 20 µlG2260-87101www.agilent.com/chem11
AUTOSAMPLER MAINTENANCEAutosampler Parts and SuppliesAgilent offers a variety of supplies thatincrease the flexibility of your 1100 System.Trays for 1100 Series AutosamplersDescriptionUsed In(instrument)Part No.Tray for 100 2ml vialsG1313AG1367AG1377AG1313-44500Tray for 40 2ml vialsG1313AG1313-44502Tray for 15 6ml vialsG1313AG1329AG1389AG2260AG1313-44503Tray for 100 2ml vials, -60001Tray for 2 well plates, 10 2ml vialsG1367AG1377AG1367-60001G1313/27A 1100 Series Autosampler Kits12DescriptionPart No.Maintenance kitIncludes 1 rotor seal (Vespel), 1 needle, 1 needle seat,2 metering seals, 15 fingercapsG1313-68709Accessory kitIncludes 3 hex keys, 2 wrenches, tubing, 1 label halftray, wriststrap, 15 fingercaps, 0.17id x 180mm capillary, 100 screw top 2mlvials and caps, tray for 40 2ml vials, tray for 15 6ml vialsG1313-68705Preventative maintenance kitIncludes 1 each: rotor seal, isolation seal,stator face, needle, needle seat5065-4498www.agilent.com/chem
AUTOSAMPLER MAINTENANCEG1313/27/29A 1100 Series Autosampler SuppliesDescriptionPart No.External Vial Tray for 17 vials(disposal position)G1313-60004Disposal Tube for external vial trayG1313-27302Waste tubing, 5 m, 6.5 mm ID,corrugated polypropylene5062-2463Needle seat PEEK, 0.17 mm ID capillary,for standard autosampler, 2.3µlG1313-87102Needle assembly for use with PEEK seatG1313-87203Needle arm kitG1313-68713Finger Caps, 15/pk5063-6506G1387A 1100 Series Micro AutosamplerDescriptionPart No.Capillary sampler accessories kitG1329-68715Injection valve for 1100 µ-LC System0101-1050Rotor seal, Vespel, 2-grooves for µ-LC0100-2088Stator for µ-LC valves, special hardened0100-20896 fittings, 2 plugs, PEEK for µ-valves5065-4410Piston seal, 2mm5022-2175Seal support assemblyG1377-60002Seat assembly, 100µm ID, 1.2µlG1329-87101Seat assembly, 50µm ID, 0.3 µlG1329-87103Needle assembly for µ-LC autosamplerG1329-80001Waste tube, FEP, 1.6mm OD, 0.8mm IDG1375-87326Tips & ToolsKeep an extra needle seat capillary assembly on hand. This uniquepart may be ordered through your Agilent representative.www.agilent.com/chem13
AUTOSAMPLER MAINTENANCEG1367A 1100 Series Well Plate AutosamplerDescriptionPart No.Well plate sampler accessories kitStandard ship kit, includes 100/pk 2ml screw top vials & caps,10/pk 0.5ml 96 well plates, tools, 380mm 0.17mm capillary,CAN cableG1367-68705Needle assembly, well plateautosampler (green)G1367-87200Needle assembly, well plate autosampler(new, for SN greater than DE21001534)G1367-87201Seat assembly, 0.17 mm ID, 2.3 µlG1367-87101Seat assembly, 0.12 mm ID, 1.2 µlG1367-87102Loop capillary,100µlG1367-87300Peristaltic pump5065-4445Tray for 2 well plates, 10 2ml vialsG1367-60001G1377A 1100 Series Micro Well Plate AutosamplerDescriptionPart No.Micro well plate sampler accessories kitStandard ship kit, includes 100/pk 2ml screw top vials & caps,10/pk 0.5ml 96 well plates, tools, 40µl loop, 50cm 50µm fusedsilica/PEEK capillary, 75µm seat capillary, CAN cableG1377-68705Seat Capillary, 50µm,150mm, Fused silica/PEEK with fittingsG1375-87300Seat Capillary, 100µm, 150mm, Fused silica/PEEK with fittingsG1375-87317Seat Capillary, 75µm, 150mm, Fused silica/PEEK with fittingsG1375-87316Loop capillary, 8µlG1375-87315Loop capillary, 40µlG1377-87300SS capillary, 0.25mm ID, 12cmG1377-87301Tool for Micro seal capillary mountingG1377-44900Product FinderFor information on Agilent’s well plates and supplies see page 18.14www.agilent.com/chem
Fraction CollectorsReliable, rugged and easy to use.Agilent 1100 Series fraction collectors are designed to meetstringent standards for collection capability. So you never haveto compromise on recovery and purity.In this section, you’ll find essential facts about our analytical scale(AS) and preparative scale (PS) fraction collectors – including: Fraction collector maintenance – plus simple repairs you canperform without a service call. Agilent-engineered parts – such as trays, collecting tubes, platesand needle assemblies. Guidelines for maintaining the micro fraction collector/spotter. MALDI spotting accessories. Part numbers, ordering information and much more.You can also visit www.agilent.com/chem for more detailsabout fraction collection performance, software solutions andapplication guidelines.“We manufacture our HPLC systems from theground up – and provide our customers with awide variety of columns, consumables, andsupplies built to Agilent’s precise specifications.“We’re also a great resource for all types ofapplications in fact, we’re developing new onesevery day. You might say that we’re your partnerin chromatography.”Ron MajorsProduct Marketing SpecialistCATALOGFor a complete selection of Injection Valves, seeAgilent’s 2005-2006 Essential Chromatography Catalog.Or visit our online catalog at m15
FRACTION COLLECTORSAnalytical and Preparative Fraction Collector MaintenanceFraction collectors/spotters are veryuser friendly, and do not require muchmaintenance. However, you shouldperform the following routine procedures: Exchange the tubingat least once per year. Replace the capillaries. Replace the flap septum.Simple RepairsTubing ReplacementThere are two types of tubing availableto connect the valve with the needle:preparative scale PTFE tubing (0.8 mm id)and analytical scale tubing (0.25 mm id).Both types should be replaced when theybecome contaminated, worn or damaged.Before replacing the tubing, be sure to ProcedureWhen to PerformReplace the inlet/waste tubingOnce per year -- or when younotice signs of damage or wearReplace the valve-to-needle tubingOnce per year -- or when younotice signs of damage or wearExchange the preparativeneedle assemblyWhen the needle shows signsof damage or blockageExchange the analyticalneedle assemblyWhen the needle shows signs ofdamage or blockage -or- when usingthe short needle assembly with hightest tubes ( 45mm)Exchange the diverter valveWhen the valve is leakingor not switching properlyExchange the internal trayWhen the flow delay sensorno longer worksRepair or exchange a funnel withinthe internal tray or funnel trayWhen defective, leaky,blocked or contaminated1. Position the fraction collector’s transportunit in the “Home” position.2. Remove all installed traysfrom the tray base.3. Position the transport unit inthe “Change Parts” position.4. Turn off the instrument.Consult your user’s manual for detailedreplacement instructions.16www.agilent.com/chem
FRACTION COLLECTORSTrays, collecting tubes and plates for1100 Series Fraction CollectorsAgilent offers a broad range of trays, glasscollecting tubes and well plates. Whendeciding what’s best for your application,consider the size and number of thefractions you want to collect.Trays and Collecting TubesHole Diameter (mm)No. of TubesDimensionsTray Part No.Tube Part No.Unit304030 x 100 mmG1364-845035042-6458100/pk5042-6470100/pk30 x 48 mm256025 x 100 mmG1364-845045042-6459100/pk1612616 x 100 31250/pk5022-6534100/pk16 x 48 mm1221512 x 100 mmG1364-8450612 x 48 mmWell plate traysDescriptionPart No.Tray for 4 well plates, cooledG1364-84501Tray for 2 well plates, 10 funnels, cooledG1364-84502Tray for 2 well plates, 10 2ml vialsG1367-60001www.agilent.com/chem17
FRACTION COLLECTORSWell platesDescriptionUnitPart No.96 Well plates, 0.5ml,Polypropylene120/pk5042-138596 Well plates, 0.5ml,Polypropylene10/pk5042-138696 Deep well plates, 1.0ml,Polypropylene50/pk5042-6454Closing mats for 96 well plates,silicone50/pk5042-138996 Well Plates,150µl, conical25/pk5042-8502384 well plates,Polypropylene30/pk5042-1388G2255-6870096 Deep well plate withglass inserts, caps/septa5022-6538Glass inserts, 350µl1000/pk5188-5321Caps/septa forglass inserts1000/pk5188-5322Vial plate for54 x 2 ml vials5022-6539185065-44026/pkG2255-68700Tray for 27 Eppendorfsafe lock tubes, 0.5/1.5/2 ml5022-6538Vial plate for15 x 6 ml vials5022-6539www.agilent.com/chem
FRACTION COLLECTORSNeedle Assembly DescriptionItemDescriptionPart No.1Needle assembly preparative scaleG1364-872012Needle assembly analytical scale (20 mm)G1364-872023Needle assembly analytical scale (50 mm)G1367-872004Capillary guiding assembly micro scaleG1364-873031www.agilent.com/chem23419
FRACTION COLLECTORSMaintaining The Micro Fraction Collector/SpotterAgilent offers three types of connectingcapillaries – each with different internaldiameters. We recommend replacing thecapillaries and flap septum every sixmonths – or when contaminated,blocked, worn, or visibly damaged.Before replacing the capillary, be sure to 1. Place the transport unit of the microfraction collector/spotter in the“Home” position.2. Remove all installed trays fromthe tray base.3. Place the transport unit in the“Change Parts” position.4. Turn off the instrument.5. Unscrew the micro fraction/spottercapillary from the flow cellof the detector.Simple Repairs20ProcedureWhen to PerformReplace fraction collector capillaryAt least every six monthsor when worn, blocked or damagedExchange the capillaryguiding assemblyWhen bent or damagedExchange the internal trayWhen the flow delay sensorno longer works properlyExchange the flap septumand waste tubingAt least every six monthsOr when defective or contaminatedwww.agilent.com/chem
FRACTION COLLECTORSG1364D Micro Fraction CollectorDescriptionPart No.MALDI spotting adapter for G1364DG1364-83205Pushing adapter assembly for G1364DG1364-60021Flap septum, PEEK, for internal trayG1364-27107Fused silica/PEEK capillary, 25 µm, 50 cmG1364-87304Fused silica/PEEK capillary, 50 µm, 50 cmG1364-87305Fused silica/PEEK capillary, 100 µm, 50 cmG1364-87306G1364-83205Waste tube, PTFE, 20cm 1.4mm ID 2.0mm odG1364-86711MALDI plate carrier Bruker5022-6541MALDI plate carrier ABI5022-6542MALDI plate carrier Agilent5022-6543MALDI plate carrier Micromass5022-6544Target Plate for AP-MALDI LC/MSG1972-60025Calibration Plate Bruker5023-0208Calibration Plate ABI 10x10 & 20x205023-0213Calibration Plate Agilent5023-0214Calibration Plate Micromass5023-0215On-line matrix Kit for MALDI spottingIncludes BCD board/cable, syringe,needles, adapters, connector, ww.agilent.com/chem21
Now there’s a cleaner, smarter wayto maintain your LC/MS rough pump.Introducing the Agilent Quiet Cover!Nobody likes changing the oil in an LC/MS rough pump. It’s a heavy,dirty job – from lifting the pump out of its pan, to holding the pumpsteady while the oil drains.But with the Agilent Quiet Cover, there’s no sweating, straining or spilling.Need to check the oil? Just open the Quiet Cover’s door.Need to add oil? Simply lift the Quiet Cover’s top to access the fill cap.Need to change the oil? Just slide out the drainage tray.What’s more, the Quiet Cover fits over your rough pump in seconds,and features A sound-absorbing cabinet with mounting grommetsto reduce noise and vibration. Two internal fans to prevent overheating. A built-in alarm system that warns you if the temperatureexceeds 35 C.So order your Quiet Cover today – and discover a cleaner, smarter wayto keep your pump running at peak efficiency. (Part # G3199A).Call 1-800-227-9770, option 1 (U.S. and Canada), orVisit www.agilent.com/chem/1quietcover
Pump MaintenanceAchieve maximum uptime by followingour recommended procedures.The Agilent 1100 Series HPLC system has several different pumpunits to choose from: isocratic, binary, quaternary, capillary andpreparative. Additionally, you can access all pump parts by simplyremoving the front cover.In this section, you’ll find step-by-step instructions for the followingroutine maintenance procedures – along with part numbers andordering information to help you save time: Replacing the PTFE fritCleaning the outlet ball valveReplacing the AIV cartridgeReplacing the seals and pistonsCleaning or replacing the solvent inlet filtersYou may perform these procedures all at once, or as needed. Keep inmind, though, that some parts may need replacing more often than others,depending upon your application and solvent preparation procedures.“Helping our customers meet their challengesrequires an understanding of their needs – as wellas the technical aspects of their work. Ultimately,I know that my answers and suggestions willdirectly affect our customers’ success.”John R. PalmerChromatography SpecialistCATALOGFor a complete selection of Injection Valves, seeAgilent’s 2005-2006 Essential Chromatography Catalog.Or visit our online catalog at m23
PUMP MAINTENANCEPurge Valve – Exchanging the PTFE Frit 1100 standard pump modulesPurge valves feature a gold seal held inplace with a plastic cap. Small leaks canoccur here, so you will need to replace thegold seal after the valves have beenremoved more than once or twice.When replacing the frit, make sure thatthe cutout side faces up, which providesmore surface area on the side faci
It's designed to help you keep your HPLC system running at optimal performance, and to ensure that your manual injection valves, autosampler, pump, and detectors always work at peak efficiency. Inside you'll find Essential facts about Agilent's 1100 Series HPLC consumables and accessories.