Transcription
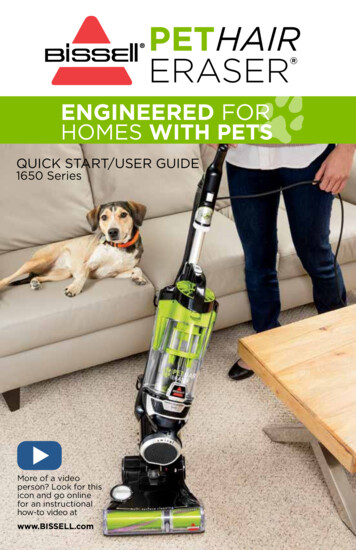
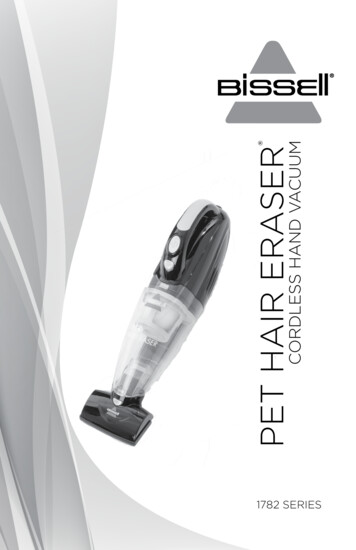
1782 SERIESCORDLESS HAND VACUUMPET HAIR ERASER
IMPORTANT SAFETY INSTRUCTIONSREAD ALL INSTRUCTIONS BEFORE USING YOUR HAND VACUUM.Always connect to outlet for charging. Unplug from outlet when not in use and before conducting maintenance. When using anelectrical appliance, basic precautions should be observed, including the following:WARNINGTO REDUCE THE RISK OF FIRE,ELECTRIC SHOCK, OR INJURY:» Do not use outdoors or on wetsurfaces.» Do not allow to be used as a toy.Close attention is necessary whenused by or near children.» Do not use for any purpose otherthan described in this User’sGuide. Use only manufacturer’srecommended attachments.» Do not use with damaged cord orplug. If appliance is not workingas it should, has been dropped,damaged, left outdoors, ordropped into water, have it repairedat an authorized service center.» Do not put any object intoopening.» Do not use with any openingblocked.» Do not unplug by pulling oncord. To unplug, grasp the plug,not the cord.» Do not handle charger, includingcharger plug and charger terminalwith wet hands.» Do not charge the unit outdoors.» Use only the charger supplied bythe manufacturer to recharge.» Do not incinerate the applianceeven if it severely damaged. Thebatteries can explode in a fire.» Keep openings free of dust, lint,hair and anything that mayreduce airflow.» Keep hair, loose clothing, fingers,and all parts of body away fromopenings and moving parts.» Use extra care when cleaningstairs.» Do not use to pick up flammableor combustible materials (lighterfluid, gasoline, kerosene, etc.)or use in areas where they maybe present.» Do not pick up toxic material(chlorine bleach, ammonia, draincleaner, etc.).» Do not use vacuum cleaner in anenclosed space filled with vaporsgiven off by oil base paint, paintthinner, some moth proofingsubstances, flammable dust, orother explosive or toxic vapors.» Do not pick up hard or sharpobjects such as glass, nails, screws,coins, etc.» Do not pick up anything thatis burning or smoking, such ascigarettes, matches, or hot ashes.» Do not use without dust cup orfilters in place.» Use only on dry, indoor surfaces.» Always turn off this appliancebefore connecting or disconnect-ing the motorized nozzle.SAVE THESE INSTRUCTIONSFOR FUTURE USEThis model is for household use only.2www.BISSELL.com
Thanks for buying a BISSELL vacuumWe’re glad you purchased a BISSELLhand vacuum. Everything we knowabout floor care went into the designand construction of this complete,high-tech home cleaning system.Your BISSELL hand vacuum is wellmade, and we back it with a limitedone-year warranty. We also standbehind it with a knowledgeable,dedicated Consumer Caredepartment, so, should you everhave a problem, you’ll receive fast,considerate assistance.My great-grandfather invented thefloor sweeper in 1876. Today, BISSELLis a global leader in the design,manufacture, and service of highquality homecare products like yourBISSELL hard floor cleaner.Safety Instructions . . . . . . . . . . 2Product View . . . . . . . . . . . . . . . 4Assembly . . . . . . . . . . . . . . . . . . . 5Operations . . . . . . . . . . . . . . . . 5-6Maintenance & Care . . . . . . . 7-9Troubleshooting . . . . . . . . . . . 10Warranty . . . . . . . . . . . . . . . . . . . 11Service . . . . . . . . . . . . . . . . . . . . . 11Consumer Care . . . . . . . . . . . . . 12Product Registration . . . . . . . . 12Thanks again, from all of usat BISSELL.Mark J. BissellChairman & CEOwww.BISSELL.com3
Product View1234567891011Dirt CupFilterWashable Filter CupCharging LightDirt Cup ReleasePower ButtonCharging Adapter PlugCrevice ToolMotorized brushUpholstery Tool2-in-1 Dusting Brush*6521738104911*varies by modelWARNINGPlastic film can be dangerous. To avoiddanger of suffocation, keep away frombabies and children.4www.BISSELL.comWARNINGDo not plug in your hard floor cleaneruntil you are familiar with all instructionsand operating procedures.WARNINGTo reduce the risk of electric shock, turnpower switch off and disconnect plugfrom electrical outlet before performingmaintenance or troubleshooting checks.
AssemblyWARNINGDo not plug in your hand vacuum untilyou are familiar with all instructions andoperating procedures.Your hand vacuum comes fully assembled.Charging***IMPORTANT*** ALWAYS TURN UNITOFF PRIOR TO CHARGING**failing to do so may result in battery not fullycharging11. Insert charging adapter plug into the chargingport on the back of the unit.2. Plug the adapter into the wall outlet. Thepower LED lights will illuminate when charging.Charge the unit completely for 5 hours prior tofirst use.NOTE: The charge light will turn RED duringcharging and turn OFF once it is fully charged.The adaptor may become warm duringcharging – this is normal.3. When the unit is fully discharged,approximately 5 hours of charging time isrequired for the battery to regain full capacity.OperationsUsing your hand vacuum1. Unplug the machine from the charging adapter.Power Switch2. The power button is located on the topof the handle.3. Push power button ON.Using the motorized brush1. To attach the motorized brush, make surethe unit is in the OFF position.2. Firmly insert the motorized brush into thenozzle of the hand vac until it snaps into place.233. To detach, press the button on top of themotorized brush and pull out.4. The motorized brush can be used tovacuum stairs, upholstery and other hard toreach areas.www.BISSELL.com5
OperationsUsing hand vacuum accessories1. To use hand vacuum accessories, removethe motorized brush as directed in “Using themotorized brush” section on page 5, and theninsert the end of the tool into the end of thehand vacuum prior to turning hand vacuumON.12. If your hand vacuum came with the 2-in-1dusting brush, simply slide the dusting brushtool on top of the upholstery tool until youhear a click.3. Accessories can be combined togetheror used individually based on your cleaningneeds.NOTE: The upholstery tool can be rotatedeither clockwise or counterclockwise forcleaning convenience.236www.BISSELL.com
Maintenance & CareTo maintain maximum cleaning performance, thefollowing maintenance steps must be performed:Emptying the dirt cupWARNINGDirt cup should be emptied before debrisreaches the FULL line on cup.To reduce the risk of electric shock, turn power switchoff and disconnect plug from electrical outlet beforeperforming maintenance or troubleshooting checks.1. Turn power OFF.2. Push Release Button.3. Hold the hand vacuum vertically and depressrelease button on the front to release dirt cup.4. Grasp filter tabs and pull vertically to removefilter cup and empty dirt into waste container.5. Replace filter back into the dirt cup andattach dirt cup to hand vacuum until it snapssecurely into place.34Cleaning or replacing the filterWARNINGThe key to maximum performance is having aclean filter. Cleaning the filter after each use willhelp your vacuum operate at peak efficiency.Use only genuine BISSELL replacement filters inyour BISSELL hand vacuum. To purchase visitWWW.BISSELL.COM or call 1-800-237-7691.To clean filter:Do not operate appliance with damp or wetfilters or without all filters in place.21. Turn power OFF.2. Remove the dirt cup as directed in “Emptyingthe dirt cup” in previous section.3a. To remove filter cup from the dirt cup, graspfilter tabs and lift up to remove the washablefilter cup from the dirt cup. Grip the filter cupand turn counterclockwise and lift down toremove filter from filter cup.b. Tap firmly against the inside of a wastecontainer, removing any visible dirt.354. Replace filter back into the filter cup thenturn clockwise to lock into place.5. Attach filter cup back into the dirt cup andattach to hand vacuum until it snaps securelyin place.NOTE: After heavy usage, you may clean thefilter and filter cup by washing it gently byhand in warm water and mild dish detergent.Rinse thoroughly and make certain it iscompletely dry before replacing it.www.BISSELL.com7
Maintenance & CareNozzle and Motorized Brush MaintenanceKeep nozzle clean and free of debris by wipingwith clean, damp cloth.Brush Roll MaintenanceThe brush roll may accumulate debris such asstrings, hair and fibers. This type of debris canwrap around the brush and diminish its ability toclean effectively.To remove brush roll for cleaning:1. Turn power OFF.2. Detach motorized brush if attached OR turnunit over to access the brush roll.3. To remove brush roll, use a coin to turnclockwise to unlock the brush roll.4. Then simply lift the brush out of the foot andclean off hair or other debris from brush roll.5. Place the cleaned brush roll back intothe foot of unit and use coin to turn lockcounterclockwise to lock into place.82334www.BISSELL.com
Maintenance & CareDisposal of batteriesIf your Pet Hair Eraser Cordless Hand Vacuumis to be disposed of, the batteries should beremoved and disposed of properly.1. IMPORTANT: Unplug charger.2. Remove dirt cup from handle.3. Remove (8) Phillips head screws and removethe lens from the hand vacuum.4. Lift off the hand vacuum cover.5. Remove the entire battery assembly fromthe cover.6. Cut wires from the PCB and wrap the wireends with insulation tape.7. Keep Battery Pack together – DO NOTseparate individual batteries. For specificdisposal instructions of batteries, pleasecontact RBRC (Rechargeable BatteryRecycling Corporation) 1-800-822-8837 orvisit www.rbrc.com.8. Discard remainder of productCAUTION: Disconnecting the battery willdestroy the appliance and void the warranty.8 screwsWARNINGThis product contains NickelMetal Hydride (Ni-MH)rechargeable batteries.According to Federal andState regulations, removaland proper disposal ofNi-MH batteries is required.For removal of the batteriesin your Pet Hair Eraser Cordless Hand Vacuum seeinstructions on this page.TMwww.BISSELL.com9
TroubleshootingProblemPossible causesRemediesVacuum won’tturn onBattery is fully dischargedCharge battery. Follow chargingbattery instructions on page 5Vacuumcleaner haslow suctionVisible dirtescaping fromvacuumHand vacuumwon’t chargeDirt container is fullEmpty dirt containerDirt container is not installedproperlyPosition container correctly andsnap firmly into placeFilters need cleaningFollow filter instructions on page 7Filters need replacingVisit www.bissell.com or call 1-800237-7691 to order replacement filtersBattery needs chargingCharge battery. Follow chargingbattery instructions on page 5Dirt container is full of debrisEmpty dirt containerFilter is missing or installedincorrectlyCheck filter for correct installationMachine is in the ON positionSet the hand vacuum in the OFFpositionNot the correct chargerUse only the charger that comes withthe machinePlease donot returnthis productto the store.10WARNINGTo reduce the risk of electric shock, turn power switchoff and disconnect plug from electrical outlet beforeperforming maintenance or troubleshooting checks.Other maintenance or service not included in the manual should beperformed by an authorized service representative.Thank you for selecting a BISSELL product.For any questions or concerns, BISSELL is happy tobe of service. Contact us directly at 1-800-237-7691.www.BISSELL.com
WarrantyThis warranty gives you specific legal rights, and you may alsohave other rights which may vary from state to state. If you needadditional instruction regarding this warranty or have questionsregarding what it may cover, please contact BISSELL Consumer Careby E-mail, telephone, or regular mail as described below.Limited One-Year WarrantySubject to the *EXCEPTIONS AND EXCLUSIONS identified below, uponreceipt of the product BISSELL will repair or replace (with new orremanufactured components or products), at BISSELL’s option, free ofcharge from the date of purchase by the original purchaser, for oneyear any defective or malfunctioning part.See information below on "If your BISSELL product should require service".This warranty applies to product used for personal, and notcommercial or rental service. This warranty does not apply to fansor routine maintenance components such as filters, belts, or brushes.Damage or malfunction caused by negligence, abuse, neglect,unauthorized repair, or any other use not in accordance with theUser's Guide is not covered.BISSELL IS NOT LIABLE FOR INCIDENTAL OR CONSEQUENTIAL DAMAGESOF ANY NATURE ASSOCIATED WITH THE USE OF THIS PRODUCT. BISSELL’SLIABILITY WILL NOT EXCEED THE PURCHASE PRICE OF THE PRODUCT.ServiceIf your BISSELL product shouldrequire service:Visit BISSELL.com or contact BISSELL Consumer Care to locate aBISSELL Authorized Service Center in your area.If you need information about repairs or replacement parts, or if youhave questions about your warranty, contact BISSELL Consumer Care.Website or E-mail:www.BISSELL.comOr Call:BISSELL Consumer Care1-800-237-7691Monday – Friday 8am - 10pm ETSaturday 9am - 8pm ETSunday 10am - 7pm ETSome states do not allow the exclusion or limitation of incidental or consequential damages, so theabove limitation or exclusion may not apply to you.*EXCEPTIONS AND EXCLUSIONS FROMTHE TERMS OF THE LIMITED WARRANTYTHIS WARRANTY IS EXCLUSIVE AND IN LIEU OF ANY OTHERWARRANTIES EITHER ORAL OR WRITTEN. ANY IMPLIED WARRANTIESWHICH MAY ARISE BY OPERATION OF LAW, INCLUDING THE IMPLIEDWARRANTIES OF MERCHANTABILITY AND FITNESS FOR A PARTICULARPURPOSE, ARE LIMITED TO THE ONE YEAR DURATION FROM THE DATEOF PURCHASE AS DESCRIBED ABOVE.Some states do not allow limitations on how long an impliedwarranty lasts so the above limitation may not apply to you.NOTE: Please keep your original salesreceipt. It provides proof of date ofpurchase in the event of a warranty claim.www.BISSELL.com11
Register your product!Registering is quick, easy and offers you benefits over the lifetime of your product.You’ll receive:BISSELL Rewards PointsProduct Support Remindersand AlertsAutomatically earn points fordiscounts and free shipping onfuture purchases.Faster ServiceWe’ll contact you with anyimportant product maintenancereminders and alerts.Supplying your information nowsaves you time should you need tocontact us with questions regardingyour product.Special PromotionsOptional: Register your emailto receive notice of offers,contests, cleaning tips and more!Visit www.BISSELL.com/registration!Visit us online at: BISSELL.comWhen contacting BISSELL, have model number ofcleaner available.Please record yourModel Number:Please record yourPurchase Date:NOTE: Please keep your original sales receipt.It provides proof of purchase date in the eventof a warranty claim. See Warranty on page 11for details.Parts & SuppliesFor Parts and Supplies, go to BISSELL.com andenter your model number in the search field.We can’t waitto hear from you!We really do readyour comments, tweets,and posts.Rate this product onBISSELL.comor any of our retailer sitesand let us (and millions ofyour closest friends)know what you think!For cleaning tips and more visit www.BISSELL.com or find us at:BISSELLBISSELLCleanBISSELLCleanBISSELL 2016 BISSELL Homecare, IncGrand Rapids, MichiganAll rights reserved. Printed in ChinaPart Number 160-9358 Rev 02/16Visit our website at: www.BISSELL.com12BISSELL
To remove brush roll for cleaning: 1. Turn power OFF. 2. Detach motorized brush if attached OR turn unit over to access the brush roll. 3. To remove brush roll, use a coin to turn clockwise to unlock the brush roll. 4. Then simply lift the brush out of the foot and clean off hair or other debris from brush roll. 5. Place the cleaned brush roll .