Transcription
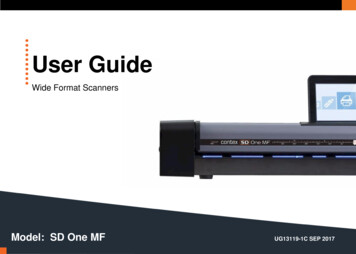
User GuideWide Format ScannersModel: SD One MFUG13119-1C SEP 2017
About This GuideContents2Sleep mode .25Document Positioning .26Contents . 2Scanning one or a set of documents .26About this Guide . 4The basic steps of scanning to file .27Overview of the Scanner . 5Scan destinations .28Scanner front view . 5USB and email (independent) scan destinations .28Scanner rear view. 6User and Personal scan destinations – PC and Cloud services .29Touch screen interface (scroll menu) . 7Scan to file settings .30Installation. 8Getting to know your scanner . 8Cleaning the scanner. 8Opening the scanner lid. 9Checking and cleaning the scan glass . 10Closing the lid . 10Color Validation (draw line) .31Color Validation (add text) .32Color Validation (change brightness) .33Gray Validation (change brightness) .34Black and White Validation (darken lines) .35The Contex LINK scan client software .36Connecting power to the scanner . 11rainforest365 . 38Preparing the screen and network connection . 12About rainforest365 .38Turning the scanner ON during installation . 13rainforest365 is a web application (app) .38Installation Wizard . 14Copying . 39Scanner Activation. 21The basic steps of copying .39. 24Copy settings.40Scanning . 25Color Validation (add line) .41Turning the scanner ON and OFF . 25Wi-Fi Setting Up the Wireless Router .42
About This GuideSettings and preferences . 43WIDEsystem. 44Nextimage . 44Administrator console . 45Scanner Maintenance . 46Maintenance tasks. 46Cleaning the scan area. 46Overview - Key maintenance points - Cleaning . 47Scanner Calibration . 56Replacing the glass plate . 60Updating your scanner software . 69Updating the Contex LINK client software . 70Troubleshooting your scanner . 71Technical Service . 71Problems related to scanner operation . 73Problems related to the scanning results. 76Appendices . 78Important safety instructions . 78Regulations . 79FCC Regulations . 79Toxic or Hazardous Substances or Elements . 793
About This Guide4About this GuideThis guide explains how to operate and maintain your wide format scanner.The guide assumes basic knowledge of your computer and operatingsystem and does not repeat information that would be covered in their ownuser documentation.Be sure to refer to:1.The Installation and Setup sections – describe how to correctly installand activate your scanner.2.The Scanning and Copying sections – describe how to operate yourscanner.3.The Scanner Maintenance section – describes how to get the bestresults from your scanner.This user guide applies to the following models:Scanner ModelDescriptionSD One MF 4444” color scannerSD One MF 3636” color scannerSD One MF 2424” color scannerAll models are ENERGY STAR compliant.
Scanner Setup5Overview of the ScannerBelow: The parts, buttons and areas you need to recognize in order to use the scanner.Scanner front viewRelease button for opening scanner lid (for maintenance)Scanner lidUSB Key slotTouch screenScanner bed – paper feed areaInsertion slot for document feeding
Scanner Setup6Scanner rear viewPower and connectionsMain power ON / OFF switchMain power connection socketWi-Fi network adapter (do not remove)USB port for 3rd party software and test purposes.Ethernet LAN port connection - for copying, emailing and scanning to PC and cloud.PC and Cloud destinations require use of the Contex LINK client (supplied).
Scanner Setup7Touch screen interface (scroll menu)Paper feed forwardUse to remove paper manuallyPaper feed backUse to remove paper manuallyResetTo reset from any state and go back to startGo buttonTo start a scan or copy after making any settingschanges (if required)Scroll menuScroll on the touch screen in both directions toview and select actions
Scanner Setup8InstallationGetting to know your scannerFollow the steps below for quick and easy installation of your scanner.Positioning the scanner1Positioning the scannerYour scanner should be placed either on the specially designed stand-alonefloor stand or on a sturdy table. Make sure there is enough space behind thescanner to allow the media to pass through and out the back of the scanner.Cleaning the scannerCleaning the scanner2Clean the scanner feed trayLightly clean the scanner exterior surfaces to remove any dust thatmight have accumulated during transportation. Start with the feedtray.The feed tray is the flat surface in front of the insertion slot. Wipe thefeed tray thoroughly. A clean feed tray prevents dirt and dust beingdragged into the scan area with the original when you start to usethe scanner.IMPORTANT: DO NOT CONNECT THE SCANNER TO POWEROR THE NETWORK (LAN) AT THIS STAGE!See also the Safety Instructions at the end of this user guide
Scanner SetupOpening the scanner lidCleaning the scanner3Release the lid by pressing thelid release buttonsThe internal scan area should now be wiped clean of any dust that mayhave settled on it during packaging and shipping. Start by opening thescanner lid using the release buttons at the back of the scanner sidecovers.1.2.Stand at the front of the scanner.Pull back on both of the release buttons with your fingers until youfeel each of them unlock.Cleaning the scanner4Open the scanner lidRetaining your grip on the edge of the lid pull it upwards andbackwards towards your body. Open it all the way back until itstops.9
Scanner SetupChecking and cleaning the scan glassCleaning the scanner5Clean the internal scan areaUsing a clean, dry, lint-free cloth wipe the internal scan area free ofdust.If you see smudges on the glass that cannot be wiped clean with thedry cloth refer to the section Cleaning the scan area later in this guidefor further instructions on how to clean the scan glass andsurrounding areas.Closing the lidCleaning the scanner6Close the scanner lidClose the lid after cleaning the internal scan area.1.2.Push the scanner lid all the way down until you hear bothrelease buttons click back into position.Now move your fingers away from the release buttonsslightly and try to gently pull the lid open again to ensurethat it is properly closed.10
Scanner SetupConnecting power to the scannerConnect power cable7Connecting the power cord to the scannerConnect the power cord to the scanner power connection socket.With the flat side of the cord facing upwards gently push the plug into thesocket on the rear of the scanner. Take care not to force the plug into thesocket.Connect power cable8Connecting the power cord to the electricity outletConnect the power plug end of the scanner power cord to a suitable power outlet.CAUTION: The scanner is equipped with a three-wire (pin) earth grounded plug. If youare unable to use the plug with your outlet contact a qualified electrician to replace the plug oroutlet to ensure a grounded power connection. For your own electrical safety do not try todefeat or ignore the purpose of the grounding-type plug.11
Scanner SetupPreparing the screen and network connectionCleaning the scanner9Fold up the touch screenGrasp the top edge of the screen and fold it into the upright position.Connect LAN cable10Connect to the LANConnect the scanner to the LAN (local area network). The LAN socket is atthe back of the scanner.Connecting the scanner to a network using the LAN socket will automaticallydisable wireless networking and switch the scanner into wired LAN(networking) mode.12
Scanner SetupTurning the scanner ON during installationScanner power ON11Turning the scanner ON for the first timeTurn on the main power switch at the back of the scanner.NOTE: When the scanner is switched on for the first time the SD One MFWizard will take the user through a series of configuration pages on the touchscreen.The Wizard sets up:Network Connection (for communication to printer(s), cloud and networkcomputers)Languages (keyboard and screen can be different)Date and TimeEmail Server settings (for sending scans to recipients via email)Printer (for copying)Activation of the scannerAny of these settings can be skipped and returned to at a later time by touchingthe Settings icon on the front screen.13
Scanner SetupInstallation WizardScanner installation12The Installation Wizard startsThe SD One MF Welcome screen signals that the scanner installationprocess has begun.The following screens contain the various installation steps required to setup the scanner. Follow the screens shown in [path] below to return to thisarea after the wizard has completed.Press the Next button to proceed.Use the Back button to go back a step (where displayed).Scanner installation13LAN network settings (DHCP)By default the scanner will automatically try to obtain an IP address usingDHCP if cable connected to a local area network (LAN). Connecting via WiFi is not possible when the scanner is connected to a working LAN.[settings system network]14
Scanner SetupScanner installation14LAN network settings (static)To manually set a static network IP address follow the screens shown in[path] below to uncheck ‘Automatically obtain IP address’. A static addressand subnet mask can now be set. Consult your IT person if necessary.[settings system network]Press the Next button Scanner installation15Using Wi-FiIf a Wi-Fi network is in range and the physical LAN is disconnected, thescanner will automatically display a highlighted ‘Select Wi-Fi Network’button. Touch the highlighted button to connect using Wi-Fi. See Using theWi-Fi Connection later in this manual for more information.[settings system network]15
Scanner SetupScanner installation16Select your languageSelect the preferred language for the screen and keyboard. Differentlanguages can be combined as the screen and keyboard languages do nothave to be the same. Selecting a new language updates the current setting.[settings system language]Press the Next button 16
Scanner SetupScanner Installation171.Set your region date and timeSet the date.Touch the Date area onscreen to bring up the numerical touch keypad thenenter today’s date in dd.MM.yyyy (day.short-month.year) format. PressEnter to store the value.[settings system regional]2.Set the time.Touch the Time area onscreen then using the numerical touch keypadenter the time in 24-hour format. Press Enter to store the value.[settings system regional]Press the Next button 17
Scanner SetupScanner Installation18Entering the email server settingsEnter your email server details to have scans sent directly via email:1.Host (server name), Port (port number) and Connection (securitytype).2.Account and Password - for the target email account.3.Name – email account name of the person to receive the scans.4.Max MB - the maximum size of email the server should allow(including the attachment)5.Test - checks the email account settings entered above.6.Address Book - if set to yes all email addresses sent to will becollected in an address book for easy re-selection.[settings system email]Contact your IT administrator if you don’t know the exact settings.You can skip this step during installation and complete it later if youwant to.Press the Next button 18
Scanner SetupScanner Installation19aSetting up the printer1.Press Setup to select and set up your printer for making copies.2.Enter the printer IP address (preceding zeros can be ignored, forexample 050 can be entered as 50) and allow the scanner tolocate it. Contact your IT administrator if you don’t know the IPaddress settings for your printer.3.Enable Compensate for the printer margin to have the scannerallow for the outer paper edges that cannot be reached or printedon by the printer. This ensures the unused margins in the printedoriginal are not reproduced in the copy.4.Press the Media Profiles button to start the media profile wizard.You will need to create media profiles for every type of media thatwill be used with the printer. Media profiles ensure optimal colorcopy results.Press the Next button [settings system printer]NOTE: For Epson printers please select the media type loaded in theprinter through the printer’s control panel then choose the same media typefrom the choice of medias displayed in the scanner media list. For optimalcopying performance the profile media-type chosen at the scanner shouldmatch the media-type loaded in the printer.19
Scanner SetupScanner Installation19bCreate printer media profilesStep 1On the Printer screen (previous page) press Media Profiles then selectthe current media type loaded in the printer (Plain Paper in thisexample).Step 2Now press the Print button to print the color calibration page. It isimportant that the printer is working properly for this operation.Step 3Load the printed color calibration page into the scanner taking care toalign the black arrow with the scanner center load point. Now press theScan button to scan the printed color calibration page.Step 4Press OK when you see the Media Profile Created message.Make a new profile for each different type of paper used in the printeryou wish to copy to.NOTE: If the scanner reports that it cannot find the calibration pagereload it and press the Scan button again to repeat the process.20
Scanner SetupScanner ActivationScanner Installation20Join the Product Improvement ProgramHelp us make your system even better through future updates. Selecting the ProductImprovement Program option will let us collect data about scanner performance. Nopersonal user information is collected.Press the Next button Scanner Activation21aActivate your scannerYou must activate your scanner with its license key before it can be used. Theeasiest way is through your scanner network connection.1. Make sure your scanner is connected to the network.2. Locate your activation sheet. The license key is in the QR code and will beread by the scanner.3. Load the sheet in the scanner and press the scan buttonto activate thescanner4. If the activation sheet fails to activate the scanner use the offline optioninstead and manually type in the license key.21
Scanner Setup22Scanner Activation - Manual21bOffline scanner activationYou can still activate your scanner manually if it is not directlyconnected to the internet via your network. You will need aseparate device or computer with an internet connection.1.Have your License Key ready before proceeding. If you don’t have one,contact you dealer.2.Manual activation uses an online web interface to generate theActivation Code using the License Key from your dealer and theHardware ID from the scanner.3.#1#2Using the browser of your internet device follow the instructions below:(On your internet device)go to www.licenseactivate.com#1 Enter the Serial Number or Hardware ID key for the scanner.#2 Enter the License Key#3 Press the Activate button to generate the Activation Code and writeit down#3(At the scanner)#4 Enter the Activation Code into the white area at the bottom of theblue Manual Activation screen where the wording ‘Enter activationcode’ is displayed.THE SCANNER SYSTEM WILL NOW ACTIVATE#4
Scanner SetupScanner Installation & Activation22Installation and Activation completedWhen the scanner has been correctly installed the screen will briefly show the “Scanner isactivated” message and then switch to the normal start screen where the full range ofscanner options will be displayed.23
User interface24GeneralSettingsUser / wsCloudComputer/ User(ContexLINK)USBmemoryEmailCopy
Scanning25ScanningSleep modeTurning the scanner ON and OFFSleep mode is an energy saving mode. The scanner cannot scan when inthe Sleep mode. When first powered on the scanner is set to automaticallygo into Sleep mode after a preset period of inactivity (idle time). This periodof inactivity can be extended or shortened to match your normal workflow.Main power switchThe main power switch is at the back of the scanner. .Press the top side of the switch (marked “I”) to turn the main power toON.Press the bottom side of the switch (marked “0”) to turn the main powerto OFF.Scroll to select the Settings button1. Select System, then Timers.2. Press the Sleep button to set the idle time.3. A setting of 0 means that the scanner does not go to sleep.NOTE: When the scanner main power is ON but in Sleep mode, thescanner can be woken by inserting a document.NOTE: Timeout is not a power save feature. Timeout is a configurabletime limit after which the scanner resets back to the default settings forquality, file format, color mode and scan area ready for the next user.
Scanning26Document PositioningScanning one or a set of documentsPosition the document face up in the center of the scannerUsing the ‘Set-Ready’ scanning system1.If you have several similar documents that all require the same scansettings you can load them into the scanner one after the other withoutneeding to touch the green button.1.Load your document with the image side facingupwards.2.Align the center of the document with thetriangular arrow above the scanner feed tray.2.Insert your next document before the counter reaches zero to keep thescanner working in ‘Set-Ready’ mode.3.Push the original into the insertion slot until youfeel it touch the rollers.The scanner will take the original and automatically move it intoposition ready to begin scanning.3.Touch the green button when: you get to end of the set4.5.Load the paper, face up. Hold it with both hands and align the center ofthe document with the mark on the center of the scanner4. you only want one scan you wish to change the scan settingsThe scanner will return to the top menu if: you touch the green button earlyyou wait for the countdown to reach zero
Scanning27The basic steps of scanning to fileScanning with SD One MF is easy. Scan to USB memory sticks, email accounts, to your own PC and even to personal cloud services.12345Load thedocumentSelect a ScandestinationSelect user and enterPIN*Choose your scansettingsPress thebuttonPosition the documentface up in the center ofthe scannerScan to USB memorysticks, email accounts, toyour own PC and even topersonal cloud services.This step is only required when scanningto your PC or to a cloud service. The listshows all users that have the scan clientinstalled on their PC.Select document type, scan quality, fileformat or press the green button andsimply use the default settings.Press the greenbutton to startscanning*PIN will only be required if setup by theuser in Contex LINKSee the section LoadingDocumentsSee the section ScanDestinationsSee the section Contex LINK scan clientSee this section for details
ScanningScan destinationsScan destinations can be independent or they can be related to a specific user that you select on the scanner screen. The following scan destinations areavailable:USB and email (independent) scan destinationsScan to USBSave the scan file to a USB memory stick.1.2.3.4.Insert the USB stick into the USB slot on the top of the scanner.Select the USB memory stick option in the scroll menu.Choose your settings then press the scan button. The DCIM folder is thealways the default location for scans to memory stick.After scanning be sure to touch the USB safe-ejection button if displayedonscreen before removing the memory stick.Scan to EmailSend the scan to an email address.1.2.3.Press the email option.Enter the target email address using the onscreen keyboard.Choose your settings then press the scan button.NOTE: Set up the scanner outgoing email parameters before using thisoption. See section Installation - Enter your email server settings.28
Scanning29User and Personal scan destinations – PC and Cloud servicesIn order to use the following destinations the Contex LINKbe on the same network (LAN) as the scanner.client software must be installed and configured correctly on your PC. The PC mustWhen you have installed and configured the Contex LINK client software on your PC, the scanner will detect your PC on the LAN, and add you to the user list onthe scanner. The Contex LINK client facilitates scanning to the PC and to the cloud services that you have connected to through the client. You can also scan toother user’s PCs or their cloud services if you know their PIN codes. This is especially useful for sharing scans during projects.NOTE: See details about setting up Contex LINK and the cloud service connections in the section The Contex-LINK scan-client.Scan to your PC1.2.3.4.On the scanner, select the User iconand select yourself or another user from the list.Enter your PIN code if prompted (NOTE: *PIN will only be required if setup by the user in Contex LINK).Configure your scan settings then scan.To locate the scan on your PC: On your PC, press the Contex LINK icon on your system tray to open the Contex LINK scan clientSelect the folder icon at the top of the Contex LINK scan client interface to find the scans sent to your PC / UserScan to a cloud service – Box, Dropbox, Google Drive, OneDrive1.2.3.4.5.On the scanner screen, scroll and select the relevant cloud service option.Select the relevant user from the list.Enter your PIN code if prompted (NOTE: *PIN will only be required if setup by the user in Contex LINK).Configure your scan settings then scan.Locate your scan in the local or online folders for the cloud service you selected.The scans default to a folder named “Contex Solutions”. In Dropbox this folder will be in the “Apps” folder and in all otherclouds it will be in the root folder.
Scanning30Scan to file settingsSettingWhat does it mean?DocumentThe type of document you are scanningFull ColorGrayscaleColor CAD/MapGrayscale CAD/MapBlack & WhiteColor photos, posters etc.Photo or image with gray shadesColor line drawing or mapLine drawing or map gray shadesLine drawing or map solid black linesQualityDetermines the scan resolutionLow150 dpi resolution where speed counts mostNormal300 dpi resolution for most common tasksHigh600 dpi resolution for optimal quality. SlowerSizeDetermines the scanner capture areaAutoScanner detects the size automatically.AllScan the full width of the scannerManualUser input of scan width and scan lengthFormatThe file type of the output file: TIF, JPG, PDF, PDF/A withpercentage quality (default is 80).ValidateOpen a scan preview for validation and to add small editsbefore saving to file.YESNOA.B.C.D.E.(Above) Menu to change Document Color, Scan Area, ScanQuality, File Format and Validate (annotate) scan.Opens the previewBypasses the previewSELECT– select validation entityCROP – drag green border, press green button to saveDRAW – add freehand lines and mark-upsTEXT – add text to the imageADJUST – change brightness to improve copyFull Color (selected), Grayscale, Color CAD/Map, GrayscaleCAD/Map and Black & White options for scanning to file.
Scanning31Color Validation (draw line)Preview, Adjust, Crop and AnnotateValidate opens a preview of the document before it is sent to file. Use thisscreen to clean up the scanned image by cropping or adjusting the brightness.Also add freehand lines and text annotations to the scanned image if required.Proceed or Save validation changesZoom the onscreen imageRemove image data outside of the crop linesAdjust scanned image using white and black levels (improve brightness)(Above) Validation Screen with Cancel, Crop, Adjust and AnnotatecontrolsGo to annotation screen to add text and/or freehand linesReturn to validation screen from annotation screenSelect text for change or deletion. See note belowCancel validation changesActive Edit Controls (appear when annotation selected)Increase linethicknessdecreaselinethicknessincreasetext sizedecreasefont sizechange textor colordeleteNOTE: Pressing the green button stores any validation edits permanently into thescan file. Changes cannot be reversed after leaving the validate screen.Adjust Screen with Return, Freehand Line (selected) and Textcontrols
Scanning32Color Validation (add text)Preview, Adjust, Crop and AnnotateValidate opens a preview of the document before it is sent to file. Use this screen toclean up the scanned image by cropping or adjusting the brightness. Also addfreehand lines and text annotations to the scanned image if required.Annotations and changes are temporary until the green button is pressed.(Above) Annotation Screen showing Return, Freehand Line andText (selected) controlsAnnotations can be selected by touching them. Once selected annotation objectscan be moved, re-sized, re-colored or deleted.NOTE: Pressing the green button stores any validation editspermanently into the scan file. Changes cannot be reversed afterleaving the validate screen.Validation Screen showing Cancel, Crop, Adjust and Annotatecontrols with added text annotation
Scanning33Color Validation (change brightness)Preview, Adjust, Crop and AnnotateValidate opens a preview of the document before it is sent to file. Use this screento clean up the scanned image by cropping or adjusting the brightness. Also addfreehand lines and text annotations to the scanned image if required.Color of annotations is not affected.CANCEL brightness adjustment(Above) Validation Screen with annotated image before adjustmentMoving top slider down CHANGES NEAR-WHITE COLORS TOWHITEMoving lower slider up CHANGES NEAR-BLACK COLORS TOBLACKACCEPT BRIGHTNESS CHANGES and return to Validation screenNOTE: Pressing the green button stores any validation edits permanently into thescan file. Changes cannot be reversed after leaving the validate screen.Adjust Screen adjusted for bightness
Scanning34Gray Validation (change brightness)Preview, Adjust, Crop and AnnotateGray level of annotations is not affected.CANCEL brightness adjustment(Above) Adjust Screen showing default brightness settingMoving top slider down CHANGE
Connect the scanner to the LAN (local area network). The LAN socket is at the back of the scanner. Connecting the scanner to a network using the LAN socket will automatically disable wireless networking and switch the scanner into wired LAN (networking) mode. 9 10. Scanner Setup 13