Transcription
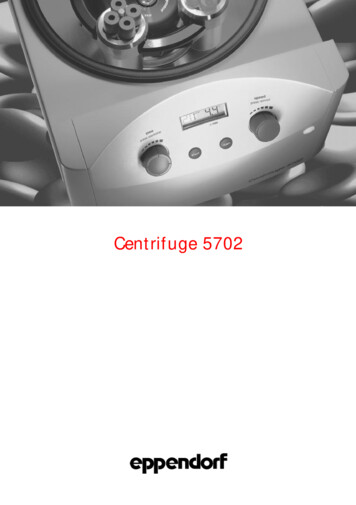
Centrifuge 5702
Inhalt / ContentsCentrifuge 5702Inhalt / ContentsBedienungsanleitung . . . . . . . . . . . . . . . . . . . . . . . . . . . . . . . . . . . . . . . . . . . . . . . . . . . . 5Instruction Manual . . . . . . . . . . . . . . . . . . . . . . . . . . . . . . . . . . . . . . . . . . . . . . . . . . . . . 15Mode d'emploi succinct . . . . . . . . . . . . . . . . . . . . . . . . . . . . . . . . . . . . . . . . . . . . . . . . 25Istruzioni brevi . . . . . . . . . . . . . . . . . . . . . . . . . . . . . . . . . . . . . . . . . . . . . . . . . . . . . . . . 29Instrucciones de trabajo abreviadas . . . . . . . . . . . . . . . . . . . . . . . . . . . . . . . . . . . . . . . 33Korte handleiding . . . . . . . . . . . . . . . . . . . . . . . . . . . . . . . . . . . . . . . . . . . . . . . . . . . . . 37Kortfatted brugsanvisning . . . . . . . . . . . . . . . . . . . . . . . . . . . . . . . . . . . . . . . . . . . . . . . 41Kort bruksanvisning. . . . . . . . . . . . . . . . . . . . . . . . . . . . . . . . . . . . . . . . . . . . . . . . . . . . 45Lyhennetyt käyttöohjeet . . . . . . . . . . . . . . . . . . . . . . . . . . . . . . . . . . . . . . . . . . . . . . . . 49Manual abreviado . . . . . . . . . . . . . . . . . . . . . . . . . . . . . . . . . . . . . . . . . . . . . . . . . . . . . 53 ÓÔ ÙÈÎ Ô‰ËÁ› ËÁ›Â . . . . . . . . . . . . . . . . . . . . . . . . . . . . . . . . . . . . . 572
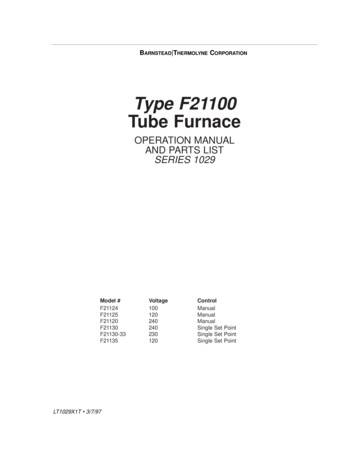
Centrifuge 5702Abbildung 1 / Figur 1Abb. 1 / Fig. 1123SPEEDTIMESTANDBYSHORTESTANDBY123E3Netzschalter und -steckerRotormutterRotorNotentriegelung123EMains switch and plugRotor nutRotorEmergency lid release
No part of this publication may be reproduced without the prior permission of the copyrightowner.Copyright 2001 Eppendorf AG, Hamburg4
ContentsIntroduction . . . . . . . . . . . . . . . . . . . . . . . . . . . . . . . . . . . . . . . . . . . . . . . . . . . . . . . . 22Delivery package . . . . . . . . . . . . . . . . . . . . . . . . . . . . . . . . . . . . . . . . . . . . . . . . . . . . . 22Installing the device . . . . . . . . . . . . . . . . . . . . . . . . . . . . . . . . . . . . . . . . . . . . . . . . . . . 222Safety precautions and applicational limitations. . . . . . . . . . . . . . . . . . . . . . . . . . . ation . . . . . . . . . . . . . . . . . . . . . . . . . . . . . . . . . . . . . . . . . . . . . . . . . . . . . . . . . . .Functional and operator control elements . . . . . . . . . . . . . . . . . . . . . . . . . . . . . . . . . .Fitting and removing the rotors. . . . . . . . . . . . . . . . . . . . . . . . . . . . . . . . . . . . . . . . . . .Loading the rotor . . . . . . . . . . . . . . . . . . . . . . . . . . . . . . . . . . . . . . . . . . . . . . . . . . . . .Fixed-angle rotor . . . . . . . . . . . . . . . . . . . . . . . . . . . . . . . . . . . . . . . . . . . . . . . . . . . . .Swing-bucket rotor . . . . . . . . . . . . . . . . . . . . . . . . . . . . . . . . . . . . . . . . . . . . . . . . . . . .Centrifugation with timer setting. . . . . . . . . . . . . . . . . . . . . . . . . . . . . . . . . . . . . . . . . .Short centrifugation . . . . . . . . . . . . . . . . . . . . . . . . . . . . . . . . . . . . . . . . . . . . . . . . . . .Continuous running . . . . . . . . . . . . . . . . . . . . . . . . . . . . . . . . . . . . . . . . . . . . . . . . . . .Rcf display and calculation. . . . . . . . . . . . . . . . . . . . . . . . . . . . . . . . . . . . . . . . . . . . . .Activating and deactivating the signal tone . . . . . . . . . . . . . . . . . . . . . . . . . . . . . . . . .Parameter lock . . . . . . . . . . . . . . . . . . . . . . . . . . . . . . . . . . . . . . . . . . . . . . . . . . . . . . .Opening the centrifuge in case of power failure . . . . . . . . . . . . . . . . . . . . . . . . . . . . . .Device fuses . . . . . . . . . . . . . . . . . . . . . . . . . . . . . . . . . . . . . . . . . . . . . . . . . . . . . . . . .252525252627282929293030313144.14.24.3Maintenance and cleaning. . . . . . . . . . . . . . . . . . . . . . . . . . . . . . . . . . . . . . . . . . . . .Device . . . . . . . . . . . . . . . . . . . . . . . . . . . . . . . . . . . . . . . . . . . . . . . . . . . . . . . . . . . . . .Rotors . . . . . . . . . . . . . . . . . . . . . . . . . . . . . . . . . . . . . . . . . . . . . . . . . . . . . . . . . . . . . .Glass breakage . . . . . . . . . . . . . . . . . . . . . . . . . . . . . . . . . . . . . . . . . . . . . . . . . . . . . . .323232325Troubleshooting guide . . . . . . . . . . . . . . . . . . . . . . . . . . . . . . . . . . . . . . . . . . . . . . . . 336Technical data . . . . . . . . . . . . . . . . . . . . . . . . . . . . . . . . . . . . . . . . . . . . . . . . . . . . . . 347Ordering information . . . . . . . . . . . . . . . . . . . . . . . . . . . . . . . . . . . . . . . . . . . . . . . . . 35Contents11.11.221
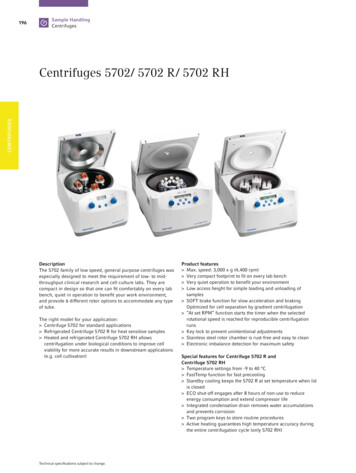
1 IntroductionThe centrifuge 5702 is a floor centrifuge for use by trained professionals in routine, training andresearch laboratory work in the biosciences, industry, hospitals, and the chemistry field. Itsvarying rectangular buckets, round buckets and adapters make it specially well suited tocentrifugation of blood sampling systems, Falcons and centrifuge tubes. The fixed-angle rotorF-35-30-17 has a capacity of 30 x 15 ml DIN centrifuge tubes.1Before using the centrifuge 5702 for the first time, please read the operating manual.IntroductionYou will see this symbol on your centrifuge and at a number of points throughout thismanual. The texts it highlights are relevant to safety. Use the centrifuge only afterhaving read the safety notices.1.1 Delivery package1 centrifuge 5702 without rotor1 power cable1 operating manual1 rotor key1 set of fuses1 pivot grease1.2 Installing the device– Place the centrifuge on a solid, flat, non-resonant lab bench.– The surrounding area must be well ventilated and protected against direct sunlight.– During centrifugation, according to the recommendations set out in EN 61010-2-020a safety clearance of 30 cm should be maintained around the centrifuge within whichthere are no objects which may be destroyed and so cause further damage.– Please remove the transport safety device and keep it for possible use if the device issubsequently moved again.– Make sure the line voltage and frequency match the specifications on the deviceidentification plate.– Now connect the centrifuge to the supply system and switch it on at the main powerswitch. The Standby button lights up red. Press the button and the centrifuge isready for operation. The Standby button lights up green and the display is active.– Before starting, check that the rotor is firmly seated.22
2 Safety precautions and applicational limitationsFor your personal safety, please be sure to comply withthe following:–The centrifuge 5702 must only be use for the specified applications (see Introduction). Itmust not be operated in explosive atmospheres. Explosive or highly reactive substancesmust not be centrifuged.When being moved from the cool room to a normal lab environment, the centrifuge musteither warm up for half an hour in the cool room first or it must warm up for at least 3 hoursin the lab before being connected to the supply system, in order to prevent damage bycondensation.–The centrifuge must not be moved or knocked while in operation.–Improperly installed or serviced centrifuges must not be operated. Repairs may only becarried out by Service personnel authorized by Eppendorf. Use only original Eppendorfspare parts and rotors.–When handling toxic, radioactive liquids or pathogenic bacteria of risk group II (see WorldHealth Organization: Laboratory Biosafety Manual) comply with the relevant nationalregulations. If such liquids are spilled in the rotor or rotor chamber, the centrifuge must bethoroughly and professionally cleaned. Before using any cleaning or decontaminationmethod other than that set out in section 4, "Maintenance and cleaning", please consultEppendorf to ensure the intended method will not damage the device.–Rotors must always be properly secured. The centrifuge may only be operated with therotor firmly tightened. For mechanical stability, all the places on the rotor must be fitted withidentical buckets.–The rotor may only be loaded symmetrically. Opposing tubes should be of the same typeand be filled equally.–Rotors showing clear signs of corrosion or mechanical damage must not be used. Checkthe accessories regularly.–Rotors are high-grade components which have to withstand extreme stresses and strains.Aluminum rotors are largely protected from corrosion by the most common laboratorychemicals by means of an anodized coating, though the protection is not unlimited. Protectthe rotors from mechanical damage. Even minor scratches or cracks can result in seriousinternal material damage. Avoid weakening the rotors by the use of aggressive chemicals,such as: strong and weak alkalis, strong acids, solutions of mercury, copper and otherheavy metal ions, chlorinated hydrocarbons, concentrated salt solutions and phenol. If therotor is contaminated by aggressive substances, clean it immediately with a neutral rinsingsolution.–The material being centrifuged must not exceed a density of 1.2 g/ml at maximum rotationspeed. If the rotor is run for a lengthy period of time the sample tubes will become hot. Keepwithin the limits specified by the tube manufacturers.Safety precautions and applicational limitations–223
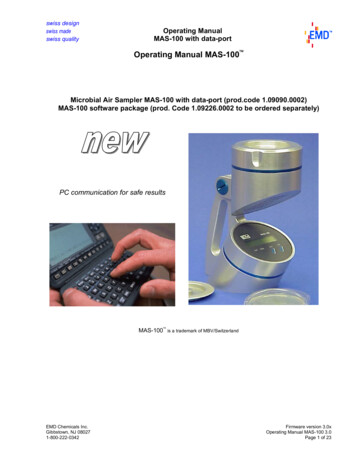
2 Safety precautions and applicational limitations2–Seal the tube lid down tight before centrifuging. Open tube lids may rip off duringcentrifugation and damage the centrifuge.–When using organic solvents (e.g. phenol, chloroform) the durabilityof plastic tubes may be impaired.–When closing down the centrifuge lid do not place your fingers underneath the lid,otherwise they may be trapped.Safety precautions and applicational limitationsThe following rotors and accessory buckets have a maximum service life of 7 years:F-35-30-17 (30 places)5702 704.008F-35-30-17 (10 places)5702 705.004A-4-385702 720.003A-8-175702 700.002The date of manufacture is engraved on them in the format 10/01 (October 2001).12 10111562 3 48 9 10Transparent hermetic caps made of polycarbonate have a maximum service life of3 years. The date of manufacture is embossed on them in the form of a clock.7Aerosol tight caps may lose their sealing strength when exposed to organic solvents (e.g.phenol, chloroform). Check the hermetic caps regularly for changes or minor cracking. Hermeticcaps showing cracks or other changes must be replaced immediately.Rotors, caps or buckets which have been damaged by chemical or mechanicalfactors or which have passed their maximum service life must no longer be used!24
3 Operation3.1 Functional and operator control elementsRefer to the frontal view on the first inside cover page of this manual.–Time dial and Start/Stop buttonSHORT–Short run buttonSPEED–Speed selector dial and rpm/rcf button–Standby button–Lid releaseOPEN3OperationTIMELine socket with fuse set and main power switch (rear)Identification plate with system ratings (rear)E – Emergency lid release on underside with pull cord3.2 Fitting and removing the rotors When mounting the rotor on the motor shaft, the temperature of the rotor and the motor shaftmust be in the range 10 C to 30 C. When fitting the rotor, follow the marking triangleson each side of the rotor nut. They indicate the direction of the groove on the undersideof the rotor, and are needed to position the rotor safely.Fit the rotor onto the motor shaft so the marking triangles point in the same direction as themotor shaft driver pin. Tighten the rotor nut by turning them clockwise using the rotor keysupplied. If the rotor nut does not tighten easily, check whether the rotor has caught on themotor shaft driver pin.To release the rotor turn the rotor nut clockwise using the rotor key.3.3 Loading the rotorsThe rotors and buckets (round and rectangular) must be loaded symmetrically. The adaptersmust be loaded only with the specified tubes. Minimize the difference in weight between thefilled sample tubes. This will reduce wear on the drive and cut running noise. The centrifuge5702 has an automatic imbalance detector, which shuts down the centrifuge if the weightdifferences are excessive.The maximum weight for a fully loaded bucket is indicated on each rotor.25
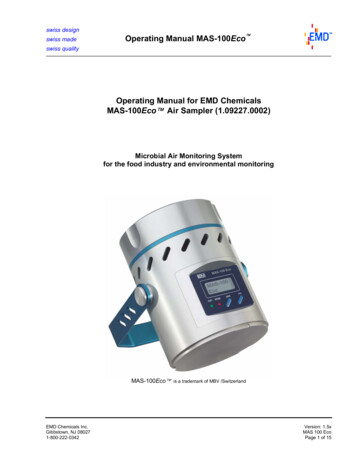
3 Operation.3.4 Fixed-angle rotorThe fixed-angle rotor F-35-30-17 can be loaded with 15 ml Falcons and 15 ml round bottomcentrifuge tubes.3OperationBefore centrifuging the Falcons , place their plastic adapters in the tube holders. The adaptersprevent the Falcons from being destroyed. For the centrifugation of round bottom tubes madeof glass, round rubber pads are required to prevent the tubes from cracking. Make sure a rubberpad is placed under each glass tube before centrifuging.The maximum load capacity for Falcons is 20 x 15 ml; for 15 ml round bottom centrifuge tubes30 x 15 ml. The rotor can be loaded with a combination of 15 ml Falcons and 15 ml roundbottom centrifuge tubes. The maximum capacity is then 20 x 15 ml Falcons and10 x 15 ml round bottom centrifuge tubes.15 ml DIN vessel15 ml Falcon Fig. 1:Loading of rotor F-35-30-17 with 15 ml Falcons and 15 ml round bottom centrifuge tubesThe specified weight imprinted on the rotor is the gross weight ratingincluding the tube holder, adapter, tubes and contents.Always weigh the tube holder and the load together.26
3 Operation3.5 Swing-bucket rotorsUse only the rotor / bucket (round or rectangular) / adapter combinations approved byEppendorf. Check that all buckets are fully attached and are able to swing out freely. Ifyou use overlength tubes, it is essential to carry out a manual swing test with emptytubes!3OperationFor mechanical stability, all the places must be fitted with identical buckets. The buckets aresorted by weight. The weight class is embossed on the side of the bucke
The centrifuge 5702 is a floor centrifuge for use by trained professionals in routine, training and research laboratory work in the biosciences, industry, hospitals, and the chemistry field. Its varying rectangular buckets, round buckets and adapters make it specially well suited to centrifugation of blood sampling systems, Falcons and centrifuge tubes. The fixed-angle rotor F-35-30-17 .File Size: 375KBPage Count: 21