Transcription
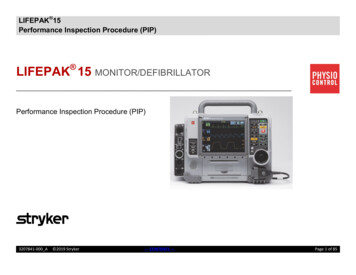
LIFEPAK 15Performance Inspection Procedure (PIP) LIFEPAK 15 MONITOR/DEFIBRILLATORPerformance Inspection Procedure (PIP)3207841-000 A 2019 Stryker--- CONTENTS ---Page 1 of 85
LIFEPAK 15Performance Inspection Procedure (PIP)This Performance Inspection Procedure (PIP) is a set of manual test procedures which are used as an operational closed-caseevaluation of the LIFEPAK 15 defibrillator. This section describes contents of the test procedures you will perform to determine if thedevice is operating within the required specifications.Perform the PIP as part of a regularly scheduled preventive maintenance routine. Also, perform the PIP after any repair, replacement,or calibration procedure. The Performance Inspection Procedure Checklist is provided as a tool for the recording of PIP test results.Contents:Scope and ApplicabilityResource RequirementsTest EquipmentTest Equipment VerificationWorkstation PowerTest Equipment RequirementsTest InstructionsPIP - General InstructionPIP - Manual Mode AccessPIP - Device PreparationPIP - Exterior Physical InspectionPIP - Device SetupPIP - Power ManagementPIP - Power On/Self-TestPIP - Auxiliary Power Switching TestPIP - Power Source Management TestPIP - User Test and Date/Time Verification TestPIP - Miscellaneous FunctionPIP - Temperature Calibration CheckPIP - CO2 TestsPIP - CO2 Leakage Test3207841-000 A 2019 Stryker--- CONTENTS ---Page 2 of 85
LIFEPAK 15Performance Inspection Procedure (PIP)PIP - CO2 Calibration CheckPIP - NIBP TestsPIP-NIBP Leakage TestPIP-NIBP Calibration CheckPIP - Printer TestsPIP- Printer Speed Test at 25 mm/sec.PIP- Printer Speed Test at 12.5 mm/secPIP - Keypad TestsPIP - Audio TestPIP - Invasive Pressure Verification - P1, P2 TestingPIP - SpO2/SpCO/SpMet TestsPIP - Recording Operating Data TestingPIP - ECG Performance TestingPIP-12-Lead ECG TestsPIP-12-Lead ECG Leads Off Detection TestPIP-12-Lead ECG Gain TestPIP-5-Lead ECG TestsPIP-5-Lead ECG Leads Off Detection TestPIP-5-Lead ECG Gain TestPIP- 3-Lead ECG TestsPIP-3-Lead ECG Leads Off Detection TestPIP-3-Lead ECG Gain TestPIP-Analog ECG Output Test (Optional)PIP- Defibrillator/Pacing TestingPIP - QUIK-COMBO Defibrillator Delivered Energy TestPIP - QUIK-COMBO Defibrillator Charge Time Test and Sync TestsPIP- QUIK-COMBO Defibrillator Charge Time TestPIP- QUIK-COMBO Defibrillator Sync TestPIP - QUIK-COMBO Defibrillator ECG Characteristic TestsPIP - QUIK-COMBO Defibrillator ECG Gain TestPIP - QUIK-COMBO Defibrillator ECG Restore Test3207841-000 A 2019 Stryker--- CONTENTS ---Page 3 of 85
LIFEPAK 15Performance Inspection Procedure (PIP)PIP - QUIK-COMBO Defibrillator a Positive R-wave TestPIP – Standard Paddles User TestPIP – Standard Paddles Defibrillator Delivered Energy TestPIP - Standard Paddles Defibrillator Charge Time Test and Sync TestsPIP- Standard Paddles Defibrillator Charge Time TestPIP- Standard Paddles Defibrillator Sync TestPIP - Standard Paddles Defibrillator ECG Characteristic TestsPIP - Standard Paddles Defibrillator ECG Gain TestPIP - Standard Paddles Defibrillator ECG Restore TestPIP - Standard Paddles Defibrillator a Positive R-wave TestPIP – Pacer Characteristic TestsPIP- Pacer Leads-Off Detection TestPIP- Pacer Output Current TestPIP- Pacer Pulse Width TestPIP – Patient Impedance TestPIP – Data ManagementPIP - Bluetooth Wireless TechnologyPIP- Leakage Current TestsPIP - Leakage Current Test SetupPIP-Leakage Current Battery Powered Test SetupPIP-Leakage Current ACPA Powered Test SetupPIP - Direct Equipment Leakage and Direct Applied Part Leakage Test SetupPIP - Direct Equipment Leakage Test - Single Fault Condition (SFC)PIP - Direct Applied Part Leakage Test SetupPIP - Direct Applied Part Leakage Test – ECGPIP - Direct Applied Part Leakage Test - TherapyPIP - Direct Applied Part Leakage Test - SpO2PIP- Leakage Current Test LimitsPIP - Disabling/Resetting Maintenance Prompt3207841-000 A 2019 Stryker--- CONTENTS ---Page 4 of 85
LIFEPAK 15Performance Inspection Procedure (PIP)Scope and ApplicabilityThis PIP applies to the LIFEPAK 15 Defibrillator exclusively. To complete the PIP, you must perform the tests outlined in the PIP Instructions below. All PIP tests must be performed from start to finish in the order presented.Refer to the PIP - Resource Requirements for a listing of the necessary qualifications for PIP equipment, test equipment verificationand workstation power.Refer to the PIP - Test Equipment Requirements for a listing of test equipment, including specifications, required to complete the PIP.Use the PIP - Checklist to record your results.Resource RequirementsThis section describes the requirements for PIP equipment, PIP test equipment verification and PIP workstation power requirements.Test EquipmentTo perform the PIP, you must use the equipment listed in the PIP - Test Equipment Requirements table. Although the table listsspecific test equipment by manufacturer, test equipment with equivalent specifications may be substituted.Test Equipment VerificationAll test equipment used to perform the PIP must have a current calibration label. The calibration label must be issued by a certifiedcalibration facility.Workstation PowerThe AC line power to the workstation must be connected to a grounded power source.3207841-000 A 2019 Stryker--- CONTENTS ---Page 5 of 85
LIFEPAK 15Performance Inspection Procedure (PIP)Test Equipment RequirementsEquipmentSpecification or DescriptionDefibrillator analyzer with externalEnergy range: 0 to 450 JLoad resistance: 50 1%Accuracy: /- 2%, noninductiveWaveforms: Simultaneous 12-lead outputRates: 30 bpm, 120 bpm, with rateaccuracy of 1% Amplitude: 1 mV 5%,based on Lead IIECG performance: Amplitudes of Lead II andLeads V1-V6 are equivalent. Lead I 70%amplitude of Lead II.Sine wave: 10 Hz @ 1 mV 2%, based on LeadIInoninvasive pacer measurements**Manufacturer or Part number/ Catalognumber (REF)Fluke BiomedicalImpulse 7000DP withQUIK-COMBO adapteraccessory 16/7 D/PADPT104*Patient simulator(for Blood Pressure measurement)Blood pressure accuracy: 1% full scale, 1mmHgFluke Biomedical DNI 215A/217A orFogg BP-28*Safety Analyzer90 V ac rms to 264 V ac rms mains voltageCurrent range: 0-1999 ACurrent accuracy: 5% of reading or 1 digit(whichever is greater)Provides addition ECG snap connectionsFluke Biomedical ESA612*0 to 9 MΩ resistance boxResolution: 1; accuracy: 1%1% accuracy for pressure and vacuumIET RS-200 Resistance Substitute*ESA612 adapter boxDecade resistance boxDigital pressure meterQUIK-COMBO therapy cable3207841-000 A 2019 Stryker--- CONTENTS ---Fluke Biomedical model 1210Fluke Biomedical DPM2Plus*11113-000004Page 6 of 85
LIFEPAK 15Performance Inspection Procedure (PIP)EquipmentSpecification or DescriptionFAST-PATCH cable assemblyConnects QUIK-COMBO to test postsElectrode test posts (2 ea.)Stop watch3-lead ECG cable5-wire ECG cable12-lead ECG cable4-wire limb lead cable, 12-lead ECG6-wire precordial cable, 12-lead ECGGeneral purpose oscilloscopeSpO2/SpCO/SpMet sensorLithium-ion battery pakNIBP calibration kit with syringe3207841-000 A 2019 StrykerManufacturer or Part number/ Catalognumber (REF)11110-000052or Physio-Control P/N332309521330-001372Elapsed timer (minutes, seconds) Timeaccuracy: 0.5 SecStandard accessory with the 3-lead LP15monitor/defibrillatorOptional 5-wire cable for LP15monitor/defibrillatorStandard accessory with the 12-lead LP15monitor/defibrillatorStandard accessory with the 12-lead LP15monitor/defibrillatorStandard accessory with the 12-lead LP15monitor/defibrillator(Optional) Bandwidth: DC to 2 MHzVertical accuracy: 3% (5 mv – 5 v/div.)Horizontal time base accuracy: 5%ACCUSPLIT AX725*Masimo Rainbow adult reusable sensorLi-ion battery with fuel gauge, battery age is lessthan 2 years old.11171-00000721330-001176--- CONTENTS 711110-000102, 11110-00010311110-000104, 11110-000105111111-000018 or 11111-00002011111-000022Fluke 190*40998-000153Page 7 of 85
LIFEPAK 15Performance Inspection Procedure (PIP)EquipmentSpecification or DescriptionNIBP hoseInvasive pressure cable12ft straight hoseTubing assembly - CO2 leak testTubing assembly - CO2 calibrationCalibration gasFilter Line H set, adult/pediatricAnalog ECG output cableQUIK-COMBO to ECG snap terminatorcableECG Snap to Banana Plug cableSpO2 Connector to ECG snap cableStandard paddleStandard paddle leakage adapterStandard paddle QC leakage cableLaptop computerCODE-STAT Reviewer softwareBattery leakage test adapterTemperature probe simulatorCable Assembly, Temperature AdapterFogg TP400 Interface cable3207841-000 A 2019 Stryker5% CO2, balance N2Connects to the System ConnectorFor use in testing electrical safetyFor use in testing SpO2 electrical safetyOptional therapy delivery accessoryOptional - for use in testing Standard Paddleelectrical safetyOptional - for use in testing Standard Paddleelectrical safetyBluetooth wireless technology option installedQuantity 2, connection to exposed metal inbattery wellAccuracy 0.05 degrees C for all settings--- CONTENTS ---Manufacturer or Part number/ Catalognumber (REF)21300-007298, 21300-0081463010-0116 (use with 217A) or Fogg0365-2178 (use with 0006811110-000044Physio-Control P/N 3009139Physio-Control P/N 3305684Physio-Control P/N 330568511130-000061Physio-Control P/N 3206631Physio-Control P/N 3207066Dell 630*Physio-Control P/N 3011520Version 8.0 (minimum versionrequired)Physio-Control P/N 3305682Fogg TP 40011140-000078Physio-Control P/N 3308413Page 8 of 85
LIFEPAK 15Performance Inspection Procedure (PIP)EquipmentManufacturer or Part number/ Catalognumber (REF)AC to DC Power Adapter11140-000072External Power Extension Cable11140-000080DC to DC Power Adapter, LP1511140-000074**Some energy meters are not accurate for biphasic waveforms; contact your defibrillator analyzer’s manufacturer for moreinformation.*Equivalent equipment is required to meet the specifications listed in the specification column3207841-000 ASpecification or Description 2019 Stryker--- CONTENTS ---Page 9 of 85
LIFEPAK 15Performance Inspection Procedure (PIP)Test InstructionsPIP – General Instruction This section lists the general instructions for performing the Performance Inspection Procedure (PIP). Perform the PIP in the order presented. Use the Performance Inspection Procedure Checklist to record your results.Warning: Only use accessories approved by Physio-Control.3207841-000 A 2019 Stryker--- CONTENTS ---Page 10 of 85
LIFEPAK 15Performance Inspection Procedure (PIP)PIP - Manual Mode AccessIt is recommended that the device be set up for Manual mode whenperforming the PIP.NOTE: If you do not wish to change the setup for a device configuredwith manual access restrictions, it may be necessary to use the reservedtechnician passcode of 5433 to gain access to Manual mode.NOTE: Be sure to make note of the customer settings to restore thedevice to the user-selected MANUAL ACCESS configuration at thecompletion of this PIP.Figure 1.1—Manual mode passcodeTo perform the device for Manual mode access:1.2.Access the Setup mode as follows:a.Press and hold OPTIONS and EVENT, and then turn thedevice ON.b.When the Setup mode passcode prompt appears enter 5433.Select MANUAL MODE in the Setup menu.Figure 1.2—Manual mode menu selection3207841-000 A 2019 Stryker--- CONTENTS ---Page 11 of 85
LIFEPAK 15Performance Inspection Procedure (PIP)3.In the Setup/Manual Mode submenu, set the Manual Accessselection to Manual/Direct.4.Turn the device OFF by pressing ON for two seconds, and thencontinue with the next test.Figure 1.3—Manual mode submenu3207841-000 A 2019 Stryker--- CONTENTS ---Page 12 of 85
LIFEPAK 15Performance Inspection Procedure (PIP)PIP - Device PreparationThis section describes the inspection and setup procedures to prepare the devicefor the PIP. All required PIP tests applicable to the device configuration under test mustbe performed.The Performance Procedure Checklist is provided as a tool for the recordingof test results.To correct failures, see Troubleshooting, and then repeat the PIP.3207841-000 A 2019 Stryker--- CONTENTS ---Page 13 of 85
LIFEPAK 15Performance Inspection Procedure (PIP)PIP - Exterior Physical InspectionTo perform an exterior physical inspection:1. Inspect the device exterior for the following: Damage Excessive wear Improper mechanical function Damaged connectors2. Pick up and turn over the device and listen for loose or rattling hardware. Locateany loose or rattling hardware, and then tighten or replace it.3. Inspect the rubber feet on the underside of the lower enclosure. Reinstall orreplace rubber feet as necessary.4. Inspect the battery pins. Tighten loose battery pins (see Battery Pin Replacement section of theLIFEPAK15 Service Manual). Examine each leaf on the connector pins to make sure it is not cracked orbroken. Replace pins in accordance to the Scheduled Replacement Items sectionof the LIFEPAK15 Service Manual.5. Inspect the pins and connector housings of all QUIK-COMBO, standard paddles,and other therapy cables for damage6. Verify the spring button on the therapy connector is functional prior to engaging atherapy cable into the therapy connector7. Inspect the ECG, SpO2*, CO2*, NIBP*, IP*, Temp* and system connectors fordamage, cracks, or contamination (*if equipped).8. Inspect the keypads and overlays for damage, cracks and separations.9. Check all other accessory cables, ECG, SpO2 sensors, CO2 tubing, NIBPtubing, Temperature sensors and related items for expiration dates, generalcondition, and suitability for use.10. Inspect carrying strap and mounts (if the device is equipped with them).3207841-000 A 2019 Stryker--- CONTENTS ---Page 14 of 85
LIFEPAK 15Performance Inspection Procedure (PIP)PIP - Device SetupWARNING:SHOCK HAZARD The device discharges up to 360 joules of electrical energy through the defibrillator cable. You must safelydischarge this electrical energy as described in this PIP. Do not attempt to perform this procedure unless you arethoroughly familiar with the operation of the device.1. Verify two, fully functional, charged, Lithium-ion batteries are showing morethan two charge barsNote: A functional charged battery is one that does not return a LOWBATTERY message after turning on the device2. Insert the two Li-ion batteries into the device.3. Verify that each battery clicks into position in the battery wells.4. Install a roll of printer paper into the printer.5. Connect the QUIK-COMBO therapy cable (or optional standard paddles) tothe therapy connector.Note: If the device is outfitted with standard paddles, perform the PIP testsspecific to standard paddles instead of the tests specific to QUIK-COMBO.3207841-000 A 2019 Stryker--- CONTENTS ---Page 15 of 85
LIFEPAK 15Performance Inspection Procedure (PIP)PIP - Power ManagementPerform the following Power Management tests:PIP - Power On/Self-TestPIP - Auxiliary Power Switching TestPIP - Power Source Management Test3207841-000 A 2019 Stryker--- CONTENTS ---Page 16 of 85
LIFEPAK 15Performance Inspection Procedure (PIP)PIP - Power On/Self-Test:To perform Power On/Self-Test:1. Turn the device ON.2. Verify the entire self-test completes in 10 seconds or lessNote: The startup screen appears while the device is startingup and performing its self-test. The copyright is formatted as“Physio-Control Inc. (year).” The year shown will vary withsoftware versions. The system software part number is alsodisplayed at the bottom of screen.3. Verify that the power ON LED remains illuminated after theself-test.4. Verify that all front panel LEDs flash (except the ON LED,which glows steadily) for approximately 0.5 seconds duringthe self-test.5. Verify that the speaker emits a clear, single-beep test tone.6. Verify that the Service LED is OFF.7. Verify that the display screen appears similar to figure 1.8 .8. Turn the device OFF, and continue with the next test.Figure 1.8—Display screen3207841-000 A 2019 Stryker--- CONTENTS ---Page 17 of 85
LIFEPAK 15Performance Inspection Procedure (PIP)PIP - Auxiliary Power Switching TestTo perform Auxiliary Power Switching Test:1. Connect the power adapter to the power source and the outputcable to the Auxiliary Connector at the rear of the device. See theOperating Instructions - AC and DC Power Adapters for moreinformation.2. Turn on the device and verify that the battery icons appear butneither is highlighted.Note: Battery indications may look slightly different.3. Unplug the Power Adapter cable from the device AuxiliaryConnector. Verify that one of the device battery icons is highlighted.3207841-000 A 2019 Stryker--- CONTENTS ---Page 18 of 85
LIFEPAK 15Performance Inspection Procedure (PIP)PIP - Power Source Management TestTo perform Power Source Management Test:1. Turn the device ON.2. Verify the device displays the battery status indicators showing thefollowing information: The presence of batteries in Battery Wells 1 and 2. Which battery is being used (the battery in use is indicated by awhite battery number in a black box). The state of charge on each battery. When two batteries are installed prior to turn ON, the device willuse the battery with the lowest charge first.3. Remove Battery 1. Verify the device indicates no battery is in Well 1and the device is being powered by Battery 2.4. Reinsert Battery 1 and remove Battery 2. Verify the device indicatesno battery is in Well 2 and the device is being powered by Battery 1.5. Reinsert Battery 2.6. Turn the device OFF, and continue with the next test.3207841-000 A 2019 Stryker--- CONTENTS ---Page 19 of 85
LIFEPAK 15Performance Inspection Procedure (PIP)PIP - User Test and Date/Time Verification TestsTo perform User Test and Date/Time Verification Tests:1. Turn the device ON.2. Press OPTIONS to access the Options menu3. Select USER TEST. The device automatically performs the followingtasks: Performs self-tests. Charges to 10 joules and discharges internally (thisenergy is not accessible at the therapy connector). Prints a Pass/Fail report.4. Verify on the printout that the device passes the user test and that thecorrect date and time values are also displayed on the printout.Note: If the date and time are incorrect, reset using theOptions/Date/Time menu.5. Turn the device OFF, and continue with the next test.3207841-000 A 2019 Stryker--- CONTENTS ---Page 20 of 85
LIFEPAK 15Performance Inspection Procedure (PIP)PIP - Miscellaneous FunctionsMiscellaneous function tests include:PIP - Temperature Calibration CheckPIP - CO2 TestsPIP - NIBP Tests3207841-000 A 2019 Stryker--- CONTENTS ---Page 21 of 85
LIFEPAK 15Performance Inspection Procedure (PIP)PIP - Temperature Calibration CheckTest SetupTo perform the Temperature Calibration Check Test:Test Setup: This procedure requires the following equipment andtest cables noted in Figure 1.12Figure 1.12—Temperature calibration check test setupTemp Calibration Check Test1. Turn the device ON.2. Access the Service mode.3. Select Calibration from the Service menu.Figure 1.13—Calibration selection4. Select the Temperature Cal from the Service /Calibration menu asshown in Figure 1.13.Figure 1.14—Temperature calibration selection3207841-000 A 2019 Stryker--- CONTENTS ---Page 22 of 85
LIFEPAK 15Performance Inspection Procedure (PIP)5. To initiate Temperature Calibration Check, select Cal Check fromthe Service / Calibration / Temperature Cal menu.Figure 1.15—Starting calibration check6. Connect the temperature sensor to the device and select the Startbutton as shown in Figure 1.15Figure 1.16—Calibration checking7. When the calibration check is complete as shown in Figure 1.17.NOTE: Perform TCP - Temperature Calibration Test whenthe Temperature Calibration Check test fails.Figure 1.17—Cal check completion3207841-000 A 2019 Stryker--- CONTENTS ---Page 23 of 85
LIFEPAK 15Performance Inspection Procedure (PIP)PIP - CO2 TestsNOTE: Perform the CO2 tests if the device is equipped with the CO2 option. Otherwise, skip to PIP- NIBP Tests.CO2 tests consist of:PIP - CO2 Leakage TestPIP - CO2 Calibration Check3207841-000 A 2019 Stryker--- CONTENTS ---Page 24 of 85
LIFEPAK 15Performance Inspection Procedure (PIP)PIP – CO2 Leakage TestTo perform the CO2 monitoring system for leaks:1. Set up the test equipment as shown in Figure 1.18.Note: Make sure the device is turned OFF and no tubing isconnected to the device.2. Open the hose clamp and depress the syringe fully.3. Connect the tubing to the front panel CO2 connector and to theback panel CO2 gas outlet. Important: Press the fittings thatconnect to the device firmly to avoid leakage. All tubing endsshould now be connected as shown in Figure 1.18.4. Pull the syringe plunger out to induce a vacuum into the system.When the vacuum manometer indicates approximately -230mmHg(-300 mBars), close the tubing clamp firmly.5. Begin timing as the clamp is closed. Verify that after 30 seconds,the change in vacuum reading is less than 15 mmHg (20 mBars).6. Open the tubing connection to the front panel CO2 connector torelease the vacuum.7. Continue to next test3207841-000 A 2019 Stryker--- CONTENTS ---Figure 1.18—CO2 monitoring test setupPage 25 of 85
LIFEPAK 15Performance Inspection Procedure (PIP)PIP – CO2 Calibration CheckTo perform CO2 Calibration Check:1.2.3.4.Turn the device ON.Access the Service mode.Select CALIBRATION from the Service menu.Select CO2 CAL.Figure 1.19—CO2 service calibration menus5. Select CALCHECK.Figure 1.20—Service calibration Cal Check3207841-000 A 2019 Stryker--- CONTENTS ---Page 26 of 85
LIFEPAK 15Performance Inspection Procedure (PIP)6. Connect the calibration gas canister to the front panel CO2 connectorusing a standard CO2 Filter Line and the CO2 calibration kit as shownin Figure 1.21.7. Press and hold the spray nozzle to apply the calibration gas. Releasethe spray nozzle when the device displays a stable value for themeasured CO2 content of the calibration gas.Figure 1.21—CO2 calibration connection8. Verify that the measured gas concentration reads 5.0% 0.5% asshown in Figure 1.22. NOTE: If the measured value is incorrect,perform TCP - CO2 Calibration.9. Select PREVIOUS PAGE twice to return to the Service/Calibrationsubmenu.10. Continue with the next test.Figure 1.22—Service/Calibration submenu3207841-000 A 2019 Stryker--- CONTENTS ---Page 27 of 85
LIFEPAK 15Performance Inspection Procedure (PIP)PIP - NIBP TestsNOTE: Perform the NIBP tests if the device is equipped with the NIBP option. Otherwise, skip to PIP - Invasive Pressure Verification P1, P2NIBP tests consist of:PIP-NIBP Leakage TestPIP-NIBP Calibration Check3207841-000 A 2019 Stryker--- CONTENTS ---Page 28 of 85
LIFEPAK 15Performance Inspection Procedure (PIP)PIP-NIBP Leakage TestTo perform the NIBP Leakage Test:1. Access the Service mode.2. Select NIBP CAL in the Service/Calibration submenu asshown in Figure 1.23.3. Select LEAKAGE from the Service/Calibration/NIBP Calsubmenu as shown.4. Connect the 12 ft. straight NIBP hose to the NIBP connector.5. Occlude the distal end of the NIBP tube by plugging it orfolding it double and pinching it.Note: The pinch point is 6 inches from the open hose end (it isnot the end of connected to NIBP connector).6. Select START. The device pressurizes the tubing toapproximately 200 mmHg. Verify that the message LEAKAGETEST OK appears7. Continue with the PIP – NIBP Calibration Check.Figure 1.23—NIBP leakage menus3207841-000 A 2019 Stryker--- CONTENTS ---Page 29 of 85
LIFEPAK 15Performance Inspection Procedure (PIP)PIP – NIBP Calibration CheckTo perform the NIBP static pressure calibration:1.2.3.4.5.6.7.8.9.Select PRESSURE to test the static pressure as shown.Set up the NIBP calibration kit as shown in Figure 1.24.Adjust the pressure meter, if necessary, to a zero initial pressure toensure that the device and the pressure meter agree.Using the syringe, inflate the system to each of the followingpressures (as indicated on the manometer or pressure meter) :Verify that the information displayed on the device screen and theexternal pressure meter agrees within 20 mmHg.Using the syringe, slowly inflate the system until the overpressureswitch activates at 290 20 mmHg as displayed on the pressuremeter.Verify that the system depressurizes, and that the NIBP LED turnsOFF. NOTE: This test fails if the system pressure reaches greaterthan 310 mmHg, as displayed by the pressure meter, prior toactivating the overpressure switch.Select PREVIOUS PAGE to return to the Service/ Calibration/NIBPCal submenu.Continue with the next test.3207841-000 A 2019 Stryker--- CONTENTS ---Figure 1.24—NIBP calibration setupPage 30 of 85
LIFEPAK 15Performance Inspection Procedure (PIP)PIP – Printer TestsPrinter tests consist of:PIP- Printer Speed Test at 25 mm/sec.PIP- Printer Speed Test at 12.5 mm/sec3207841-000 A 2019 Stryker--- CONTENTS ---Page 31 of 85
LIFEPAK 15Performance Inspection Procedure (PIP)PIP- Printer Speed Test at 25 mm/sec.To perform Printer Speed Test at 25 mm/sec Test:1. Select PRINTER in the Service/Tests submenu.2. Select START to print a test strip.3. Inspect the test strip for the following attributes: The large “X” form prints without missing dots. Seven horizontal lines print (one very close to the lowerpaper margin). The character set prints clearly without broken characters. Vertical lines spaced 25 mm 1 mm (approx. 24 to 26 mm)a part print correctly.NOTE: Perform the TCP - Printer Calibration at 25 mm if thetest results are unacceptable.4. Open the printer door and verify the CHECK PRINTER messageappears at the bottom of the screen.5. Remove the printer paper, and then close the printer door.6. Verify the CHECK PRINTER message appears at the bottom ofthe screen.7. Select PREVIOUS PAGE twice to return to the Service menu.8. Install the printer paper and continue with the next test while still inService mode.3207841-000 A 2019 Stryker--- CONTENTS ---Page 32 of 85
LIFEPAK 15Performance Inspection Procedure (PIP)PIP - Printer Speed Test at 12.5 mm/sec.To perform Printer Speed Test at 12.5 mm/sec Test:1.2.3.4.5.Select CALIBRATION in the Service menu.Select PRINTER CAL in the Service/Calibration submenu.Select 12.5 mm/sec for the speedSelect START and press the SPEEDDIAL to print a test strip.Verify the interval between tick marks is spaced at 12.5 mm/sec.Note: Perform the TCP- Printer Calibration at 12.5 mm/sec if thetest results fall outside of the acceptable range.6. Press the SPEED DIAL to turn the printer off.7. Continue with the next test while still in Service mode.3207841-000 A 2019 Stryker--- CONTENTS ---Page 33 of 85
LIFEPAK 15Performance Inspection Procedure (PIP)PIP - Keypad TestsTo perform Keypad Tests:1. Access the Service mode.2. Select TESTS in the Service menu.3. Select BUTTONS in the Service/Tests submenu as shown in Figure 1.28.4. Press each front panel button when prompted by the flashing buttonlegend (although you may press the buttons in any order).5. Verify with each button pressed that its associated text box is highlighted.NOTE: A failure is indicated by a text box that is not highlighted. It is normalfor the buttons with up/down arrows to highlight only the arrows.6. Verify the TEST COMPLETE message appears on the bottom of thescreen and the Service LED is not on.7. Press SPEED DIAL to exit at the end of the test.8. Continue with the next test while still in Service mode.3207841-000 A 2019 Stryker--- CONTENTS ---Page 34 of 85
LIFEPAK 15Performance Inspection Procedure (PIP)PIP - Audio TestTo perform Audio Test:1. Select VOICE/TONE from the Service/Tests submenu.2. Select START to produce voice prompts from the speaker.3. Confirm that the voice prompts are clearly audible andreproduced without distortion.NOTE: You can listen to a complete replay of all voiceprompts and tones, but it is not required for verification ofthis function.4. Continue with the next test while still in Service mode.3207841-000 A 2019 Stryker--- CONTENTS ---Page 35 of 85
LIFEPAK 15Performance Inspection Procedure (PIP)PIP - Invasive Pressure Verification -P1, P2 TestingNOTE: Perform this test if the device is equipped with the invasive pressure option. Otherwise, skip to PIP - SpO2/SpCO/SpMet Test.To perform the invasive pressure tests:1. Turn the device ON.2. Use the invasive pressure cable to connect the patient simulator to theP1 connector on the device parameter bezel.3. Turn the patient simulator ON, and set the simulator pressure output toZERO.4. Use the SPEED DIAL on the device to select P1 in the Mean ArterialPressure (MAP) display area to display the pressure waveform.5. On the P1 menu, verify that the scale is set to AUTOSCALE. SelectZERO to zero the P1 pressure channel.6. Set the patient simulator to produce Static blood pressures.7. Select 250 mmHg. Verify that the Mean Arterial Pressure (MAP)displays and the pressure waveform reads 250 8 mmHg within a fewseconds.8. Repeat step 7, using the following simulated pressures. 100 mmHg ( 5 mmHg) 20 mmHg ( 3 mmHg)9. With a simulated pressure input of 20 mmHg, use the SPEED DIAL toselect P1 in the Mean Arterial Pressure (MAP) display area, and thenselect ZERO to zero the P1 pressure channel again.10. Verify that the pressure waveform and the MAP display return to zero.11. Set the simulator pressure output to ZERO.12. Verify that the device displays -20 3 mmHg within a few seconds.13. Disconnect the invasive pressure cable from the P1 connector andconnect it to P2.3207841-000 A 2019 Stryker--- CONTENTS ---Page 36 of 85
LIFEPAK 15Performance Inspection Procedure (PIP)14. Select CHANNEL 2, and assign P2 to the display.15. Repeat steps 4 through 12 above for the P2 pressure channel.16. Disconnect the invasive pressure cable from the P2 connector.17. Turn the device OFF, and continue with the next test.3207841-000 A 2019 Stryker--- CONTENTS ---Page 37 of 85
LIFEPAK 15Performance Inspection Procedure (PIP)PIP
LIFEPAK 15 Performance Inspection Procedure (PIP) 3207841-000_A 2019 Stryker --- CONTENTS --- Page 2 of 85 This Performance Inspection Procedure (PIP) is a set of manual test procedures which are used as an operational closed- case evaluation of the LIFEPAK 15 defibrillator. This section describes contents of the test procedures you will .