Transcription
TD RemoteDeposit CaptureCustomer UserGuide
Table of ContentsInitial Computer Configuration (One Time Set-Up) . 4Install Prerequisites.4Computer Activation .5Install CAS Security Policy.7Install Scanner Drivers.9Install ScanLite2 (only applicable to scanners manufactured by Digital Check) .11User Configuration (Only for the Remote Deposit Capture Customer TD System Administratorand Remote Deposit Capture Customer Administrator) . 13Add New User .13Assign-User Roles / Set Access Rights to Scanning Locations and Accounts.14Day-to-Day Remote Deposit Service Tasks . 16Messages .16Capture Deposit .17Keying Mode.19Final Balance.25Deferring a Transaction .25Complete Deferred Transaction .26Close and Release Transaction.26Transmit Transaction.26Delete.28Generate Reports.29Research Items.31CSV Export* .33Image Export*.34Unable to Activate a Computer. 34Delete Activation Code from a Computer. 35Appendix A. 36Minimum PC Requirements .36Appendix B. 37Remote Deposit Capture Installation Checklist.37Appendix C. 38Remote Deposit Capture Daily Processing Schedule .38
TD Remote Deposit CaptureCustomer User GuideThe following company specific information is required to access Remote Deposit Capture.Login NameIdentifies user as authorized user for company.PasswordConfirms identity of user as authorized user for company.Access CodeDirects user to authorized scanning location and accounts.ComputerActivation CodeConfirms computer is authorized to access Remote DepositCapture site.If you are the Remote Deposit Capture Customer TD System Administrator this information was includedin your welcome e-mail.If you are a Remote Deposit Capture user this information is available from your Remote Deposit CaptureCustomer TD System Administrator.Please do not plug-in your scanner before the scanner drivers are installed on your computer.Please do not attempt to login to the Remote Deposit Capture site before running the systemrequirements test, available on the main login page. Running this test ensures your system has thenecessary components to run Remote Deposit Capture.System administrator rights for the computer are required to activate and configure each computerrunning Remote Deposit Capture. As such, please ensure your system administrator is present during firsttime activation and configuration of Remote Deposit Capture.With Windows 8.1 & Windows 10 operating system, you will need to use Internet Explorer and run in“Administrator” mode. To do so, right click on the Internet Explorer application icon in the taskbar and select "Runas Administrator". Please note: this is only required the first time you install Remote Deposit Capture. Windows 10users should use Internet Explorer and not MS Edge.Quick Links:A. Initial Computer Configuration (One time set-up)a. Install pre-requisitesb. Computer activationc. Install scanner driversd. Install ScanLite2 (only applicable for scanners manufactured by DigitalCheck)B. User Setup (only available to the Remote Deposit Capture Customer TD System Administrator)a. Add New Userb. Assign User Role / Set-Up User Access to Scanning Locations and Deposit AccountsC. Day-to-Day Remote Deposit Service Tasksa. Messagesb. Capture Depositc. Reportingd. Research Itemse. Export Data (CSV file Images)D. Delete Activation Code from a ComputerAppendix A Minimum PC RequirementsAppendix B Remote Deposit Capture User Installation ChecklistTD Remote Deposit Capture Customer User Guide3
Initial Computer Configuration (One Time Set-Up)Install PrerequisitesNOTE: A system administrator with administrative rights to the computer should assist all userswith the first-time log-in and first time scan.One way to check and see if you have administrative rights to the computer is to Right Click on“Computer” which is located in the start menu and then select Manage. If you are prompted toenter credentials, you do not have the administrative rights needed to complete the installationprocess:1. Open Remote Deposit Capture application .aspx?language CanadianEnglish&key NOTE: With Windows 8.1 & Windows 10 Operating System , you will need to use InternetExplorer and run in “Administrator” mode. To do so, right click on the Internet Explorerapplication icon in the taskbar and select "Run as Administrator". Please note: this is onlyrequired the first time you install Remote Deposit Capture. Windows 10 users should useInternet Explorer and not MS Edge.2. Click System Requirements Test. Depending on your local Windows configuration you might beprompted with Security Warnings. Please click on Run.Please refer to the Minimum PC Requirements (Appendix A) for a list of 3rd PartySoftware components required by Remote Deposit Capture. If you need technicalsupport on how to install these components, please contact your company’s technicalsupport.A series of tests are run on the workstation and a detailed list of results is displayed.TD Remote Deposit Capture Customer User Guide4
PassConfiguration meets minimum standards.WarnConfiguration is below minimum standards and system may not perform optimally.FailConfiguration will not support application; system should be upgraded beforecontinuing with the installation.3. Click Close.4. Once all required components are installed (i.e. System Requirements Test is Passed), enter yourLogin Name, Password and Access Code and click on Login.If computer authentication has not been set-up for your computer, the followingmessage will be displayedFrom the login screen, click Help with Security Setup. Please follow the instructions (Step 1 to Step 3) toensure correct trusted site settings. When following the instructions you will have to enter the RemoteDeposit Capture URL as a trusted n.aspx?language CanadianEnglish&key Computer ActivationNOTE: Network or system administrator with administrative rights to the computer shouldassist all users with the first-time login and first time scan.1. Enter your Login Name, Password and Access Code. Select “Always use this access code” andclick on Login.If computer authentication has not been set-up for your computer the followingmessage will be displayedTD Remote Deposit Capture Customer User Guide5
2. Click Activate Computer and enter Computer Activation Code.In the event you are replacing an existing computer with a new computer, ask your RemoteDeposit Capture Customer TD System Administrator to contact your TD account representativefor a new Computer Activation Code.3. Click Submit. After activation is complete, click Close.4. Enter Login information, click LOGON5. Enter New Password. Between 8 and 20 characters that includes:i. At least 1 alpha character.ii. At least 1 non-alphanumeric character (symbol).iii. At least 1 numeric character.6. Enter New Password again for confirmation and click Submit.7. Click Login. Click Continue.NOTE: If you receive the error “Computer Authentication Error: Insufficient permissionsgranted” during the login process, you will need the assistance of a system administrator whohas administrative rights to the computer.TD Remote Deposit Capture Customer User Guide6
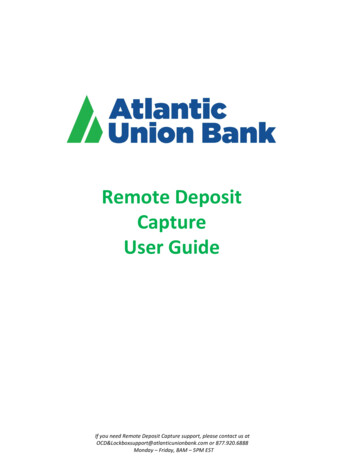
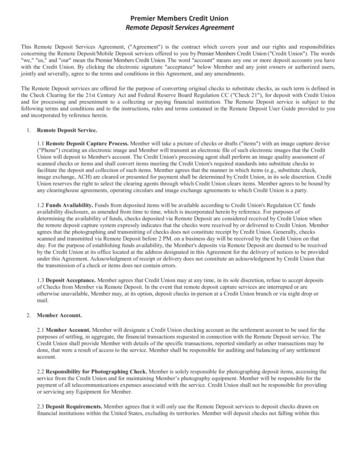
Install CAS Security PolicyNOTE: This step can be skipped if you have already installed CAS Security Policy (also known asthe .NET Security Policy).1. From the menu on the left navigation bar, Click Installation.2. Under Scanner Setup, select CAS Security Policy (also known as the .NET Security Policy).3. Click Install, Run and Run again. If your computer is running Windows 7, click Yes to allow. TheInstallShield Wizard will come up and you will wait for the installation to begin. After the DOSwindow appears and closes, the CAS Security Policy is installed though you will need to restartInternet Explorer to fully install successfully.TD Remote Deposit Capture Customer User Guide7
TD Remote Deposit Capture Customer User Guide8
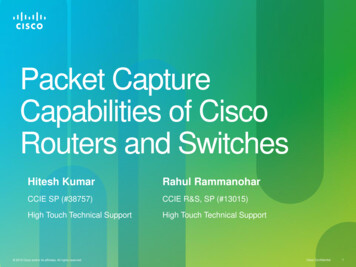
4. Click on the Close Internet Explorer button. If you are running Internet Explorer with tabs ormultiple windows be sure to close all tabs and windows before re-opening Internet Explorer sothat the CAS Security Policy can load successfully.5. Re-open Internet Explorer and then re-open the Remote Deposit Capture application .aspx?language CanadianEnglish&key 6. Enter Login information, click LOGONInstall Scanner DriversEnsure your scanner is NOT connected to the PC until Step 7.1. From the menu on the left navigation bar, Click Installation.2. Follow the steps under Scanner Set-up and select your scanner model. For scanners ordered through TD, please select ‘Digital Check’ from the Drop-down list.3. Click on Install4. When prompted with the file download message(s) below, Click on Run.TD Remote Deposit Capture Customer User Guide9
5. When prompted with the message below, click on Yes to install the scanner driver.6. After the scanner driver is successfully installed, close all Internet Explorer Windows/Tabs andrestart your Internet Explorer.7. Plug-in your scanner.TD Remote Deposit Capture Customer User Guide10
Install ScanLite2 (only applicable to scanners manufactured by Digital Check)ScanLite 2 can be used to help Cash Management Support perform simple diagnostics on these scannersfor troubleshooting purposes. It is also used to initiate the cleaning function of the Digital Check TS240Scanner.1. Select the Training Tab in the Remote Deposit Capture webpage and then select Digital Checkfrom the Scanner Documentation dropdown as follows:2. Select View Documentation and then select Install the ScanLite application:TD Remote Deposit Capture Customer User Guide11
3. When asked to Run or Save the file, select Save and choose desktop.4. Select ScanLite2 from the desktop and double click to install the program. Select Yes.5. Proceed through the ScanLite2 Setup Wizard.TD Remote Deposit Capture Customer User Guide12
User Configuration (Only for the Remote Deposit Capture Customer TD SystemAdministrator and Remote Deposit Capture Customer Administrator)Other Users please skip to Page 16 of this GuideAdd New User1. From the menu on the left navigation bar, Click Configuration.2. Click New User.3. In the User Management screen, enter User Name (this is the user's Full Name).4. Enter a Description of the new user (optional).5. Enter Login Name (Minimum 6 characters).6. Enter user Initials.7. Enter New Password. Between 8 and 20 characters that includes:i. At least 1 alpha character.ii. At least 1 non-alphanumeric character (symbol).iii. At least 1 numeric character.8. Re-Enter Password.TD Remote Deposit Capture Customer User Guide13
9. Click OK.Assign-User Roles / Set Access Rights to Scanning Locations and Accounts10. Select the user in the User list.11. Select the Role(s) for the user.Rolea.b.c.DescriptionCUSTOMER AdministratorCUSTOMER CaptureCUSTOMER CSV ExportAdd, delete, and modify user access and logins.Capture deposits, review work and close transactions.Exports transaction information via CSV Export (not part ofbasic service).Exports transaction images (not part of basic service).d. CUSTOMER Image Exporte. CUSTOMER Reports & ResearchRun reports and research transactions.f. CUSTOMER TD System Administrator Completes all tasks within Remote Deposit Capture includingset-up of company users, capture and transmission ofdeposits, running reports, and researching transactions. Thisuser will be assigned by TD.g. CUSTOMER TransmitTransmits completed transactions to TD.* if a user account becomes "Locked" the Customer Administrator can "Unlock" the account from theUser Management Menu. If the Customer Administrator account becomes "Locked" please contact yourRemote Deposit Capture TD System Administrator to have it "Unlocked".12. Select the User Task level Remote Deposit Capture to assign location/account access for thisuser.NOTE: Alternatively, if you wish to assign location/account access for a particular taskonly, select the task under “User Tasks” (Capture, Transmit, or Reports, etc.) andselect/deselect the desired locations/accounts that can be accessed for that task.TD Remote Deposit Capture Customer User Guide14
13. Click Edit Access Rights.14. Select each Location and Account that this user will access.15. Once all desired locations and accounts are selected, click OK.16. Review and confirm the selected Role(s) and User Access Rights for the new user.TD Remote Deposit Capture Customer User Guide15
17. Provide the user with their Login Name, and unique Password.18. Provide the user with a Computer Authentication Key (as emailed to the Remote DepositCapture Customer TD System Administrator) to be entered into their computer during theRemote Deposit Capture Installation.19. Provide the user with the Access Code that they will need to enter along with their Login Nameand Password. If the user has been given rights to multiple locations, only one Access Codeneeds to be provided to the user (the Location Access Code is provided to the Remote DepositCapture Customer TD System Administrator).NOTE: You can use the Remote Deposit Capture Customer Installation checklist toensure that you provide all the required information to the users which you have set up.Please refer to Appendix B.Day-to-Day Remote Deposit Service TasksMessagesAvailable messages will appear when you log into the application or by selecting Messages on the leftmenu bar.TD Remote Deposit Capture Customer User Guide16
Capture DepositNOTE: The first deposit capture must be completed by a person with System Administratorrights to the computer, as the system places settings into the computer’s registry.1. From the main menu, select Capture Deposits.Selections will vary based on access. Users with access to multiple locations or accounts willselect items from the appropriate dropdown box. Users with access to one location or oneaccount will see their designated information.2. Select the Location.3. Select the Account where this transaction is to be deposited.4. Under the Location Code select the appropriate CTS/IDAPS number. Note: this is only necessaryif your company uses the TD Corporate Transfer Service (CTS) or IDAPS Reference numbers formaking deposits. If your company uses a CTS/IDAPS variable reference number, additionalnumbers will need to be added to the CTS/IDAPS number during this keying process.5. Verify the Processing Date is selected.6. Enter the deposit Amount. This will be the Control Total that must equal to the Remote DepositCapture System Total when the items have been scanned.7. Place item(s) in scanner.8. Select Create Deposit.TD Remote Deposit Capture Customer User Guide17
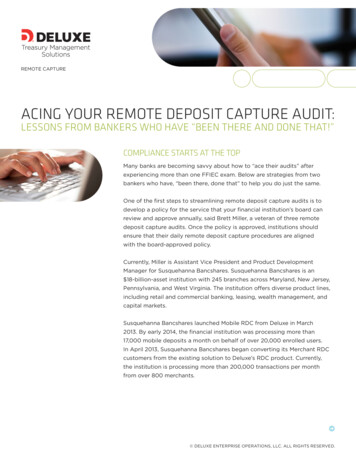
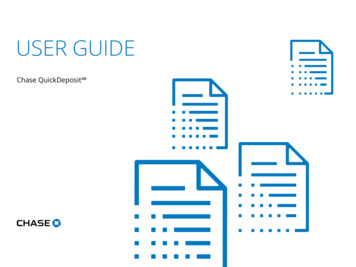
The capture screen displays the deposit ticket information, including account, location and capture user.First time Capture Note: The steps below only need to be completed the first time the scanneris used.a. Click Scanner Info.b. Select scanner model from Scanner Type dropdown.c. Confirm settings as shown. For single feed scanners (including the Digital Check CX30), de-select Switch tokeying mode automatically.TD Remote Deposit Capture Customer User Guide18
Please note that no ink cartridge is required. Please ensure you have deselectedSpray Tracer on rear of document to avoid the following error message:d. Click OK.e. Place items in the scanner.f. Click Scanning.The system will automatically switch to keying mode after last cheque is scanned. If needed, clickScanning to scan additional cheques.NOTE: If you get the message "Error Initializing scanner" then you can try using alternate USBport and ensure correct Scanner Type is selected in the Scanner Information window.Keying ModeWhen the capture is complete, any items that need attention will be highlighted in yellow. Refer to thecenter message bar for completion instructions.Navigation1. Press Enter on the keyboard to view each item.2. Use on-screen Flip feature to view the back of the image and to return to the front ofthe image.3. Use the tool bar, top right, to adjust your view of the image.4. Continue to press Enter on the keyboard until all item(s) have been reviewed.As needed, make the necessary adjustments to the transaction:Record CTS/IDAPS NumberFor customers using CTS or IDAPS Reference Numbers for TD deposits, Line 1 will display theDeposit Ticket and your CTS/IDAPS Reference Numbers. On this line enter the applicableCTS/IDAPS variable numbers if applicable in the designated field.CTS Example with variable numbers “56” to be added to CTS Field 2 during deposit capture:TD Remote Deposit Capture Customer User Guide19
IDAPS Example with variable numbers “4567” added to IDAPS Field during deposit capture:Correct NumbersThis deposit transaction contains 2 items. Lines 2 and 3 display the information for the 2items being deposited.Enter the correct value for the highlighted fields, using the image displayed, if theamount has not been read correctly. Include the cents value; the decimal point is notneeded. The system automatically marks the last two values as cents.Enter Optional DataTD Remote Deposit Capture Customer User Guide20
Cells located under the Custom Field columns may be populated with optional information suchas Building Number, Sales Rep Number, etc. These Custom Fields will be displayed in yourReports – Custom Fields have a 40 character limit and can contain special symbols.Delete itemsItems may need to be deleted from the transaction. This could include items with incompleteinformation or that are not appropriate for this account (such as different currency).1. Highlight appropriate item.2. Click Delete.3. Click Yes to confirm deletion.Image Quality and UsabilityIf an item fails an Image Quality test, a message displays in the capture screen indicating thefailed test. The options available for modifying the image depend on the type of error.1. Review the message for recommended action.The captured images display in a preview window with a list of detected errors.2. To rescan the image, first place the physical item back in the scanner.3. Click Rescan.NOTE: Once the rescanned image displays and quality errors are updated, the brightness mayalso be adjusted with the image brightness slides. This can only be done after an item isrescanned.4. Click Apply to update the error messages and recaptured images.5. Click OK to return to the capture screen.In some cases, rescanning the item is not an option and it must be removed from thetransaction. Some examples of where this will occur include instances where there is no RoutingTransit number, or MICR ink has not been detected on a scanned item. It will also occur if anitem exceeds 25 Million and was drawn on a financial institution other than TD.1. With the item selected, click Delete.2. Click Yes to confirm the item should be deleted from the transaction.3. Remove the physical item from the transaction.If you are unable to capture a good image, and the option is provided, you can click Ignore tobypass the image quality warning and continue processing. Please note that the clearingFinancial Institution of the drawer/payor is permitted to return the item for poor image qualityafter the cheque has been cleared.Duplicate DetectionTD Remote Deposit Capture Customer User Guide21
If an item is scanned and the Remote Deposit Capture system detects that you have alreadydeposited this item to one of your accounts through the service, you will be provided with animage of the previously deposited item to compare to the new item. You will then have theopportunity to:1. Compare the two images to determine if the new item is a duplicate.2. If you determine that the new item is not a duplicate, the item will remain in thetransaction, but will be flagged for central processing to review further once the deposithas been transmitted.3. If you determine that the item is a duplicate, click Yes, and the item will be removedfrom the transaction.4. Click Yes to confirm deletion.Important: The image data will be permanently removed from the transaction. This willimpact your Control Total which will require a final review (Refer to Final Balancesection).5. Physically remove the item from the scanner.Depositing Travelers' ChequesTravelers' Cheques have the numeric dollar amount in a different area than regular cheques andas such it is difficult for the system to find the amount. If the system does not find the amountwhere it should be you will be prompted to enter an amount as follows:When an amount is entered, the deposit will be in balance:TD Remote Deposit Capture Customer User Guide22
TD Remote Deposit Capture Customer User Guide23
Depositing Canada Post Money OrdersThere is no legal written amount or signature on a Canada Post Money Order, so the system willprovide warning messages that can be ignored.For example:Select Rescan (top left) and the following warnings will be displayed because there is no legalamount and no signature:TD Remote Deposit Capture Customer User Guide24
Select Ignore to clear the warning message:Final BalanceWhen all the deposit items have been captured and corrected, the transaction may need to be balancedif the Control Total does not match the Remote Deposit Capture System Total. The message "Deposit isout of balance" is presented in the message bar. Upon presentation of this message, you can either:a. identify the source of the error in the cheque item(s), orb. defer to the system calculated total.Once the transaction is balanced, the message bar will turn to green.NOTE: In order to defer to the system calculated total, click on the deposit line and press Enter. Amessage will appear asking you to either select the system calculated total or re-input the deposit total.Select the action that is appropriate.Deferring a TransactionUse Defer if you need to exit the Remote Deposit Capture system prior to closing the transaction.1. From the capture screen, click Close.2. Select Defer the transaction.3. Click OK.The transaction will be listed in the main capture screen as an Existing Deposit.If you are in the middle of capturing a deposit and you lose power or internet connectivity, the systemwill automatically defer the deposit.TD Remote Deposit Capture Customer User Guide25
Complete Deferred Transaction1. In the main capture screen, highlight the transaction you wish to complete.2. Click Edit Deposit.3. Complete the transaction in the capture screen. Please note that the deposit date willremain the original date on which the transaction was created and deferred.4. Release the transaction for transmission.Close and Release TransactionWhen the transaction is ready to be closed and released for transmission:1. Click Close.2. Select Release to release the transaction for transmission.The Transmit screen will appear if you have been assigned the rights for transmission.Transmit Transaction1. Select the transaction.2. Click Transmit.TD Remote Deposit Capture Customer User Guide26
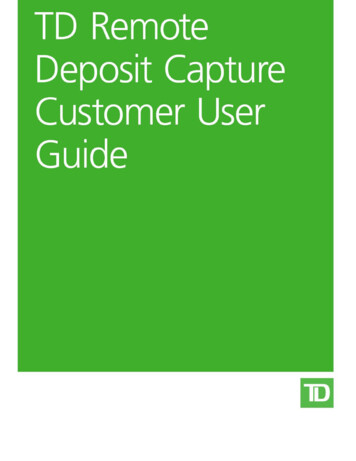
3. Transmission Review:a.Acknowledgement of final confirmation and posting information – theAcknowledgement box will advise if the transaction is successful or not. Ifunsuccessful, it will advise you of the reason (e.g. your Deposit Limit has beenexceeded). If the transmission is unsuccessful the Status will show Released andyou will need to recapture the deposit.b.View Report.c.View Images.d.Daily Deposit Limit – you can click here to locate the Daily Deposit Limit for eachaccount to which you have access and what has already been transmitted for thatday. This will help you determine whether you can process any furthertransactions on that account. You may then decide to wait until the next businessday to transmit or delete the transaction and create a new one that is within yourDaily Deposit Limit.cbaddTD Remote Deposit Capture Customer User Guide27
NOTES: The Transaction is transmitted and acknowledged by the application.The date the transaction was Processed (Captured) and Acknowledged (Transmitted), aswell as the Posting date (Processed by TD) can be viewed.If a transaction is transmitted and acknowledged after the cutoff time or on a non-businessday, it will be processed and posted on the next business day.To view the detail report or images report for the current transmission, the work must betransmitted and acknowledged by the Remote Deposit Capture System.Only users with system administrator rights can see the Daily Deposit limit.DeleteDelete Entire TransactionDelete a transaction from the Capture Screen.1. From within the capture screen, click Close.2. Click Delete.3. Click Yes to confirm.If a transaction has already been released from Capture, it may also be deleted from the Transmitscreen.Delete Entire Transaction from Transmit Screen1. From the Transmit screen, select the transaction.2. Click Delete.3. Click Yes to confirm.NOTE: A transaction can only be deleted if it has not yet been transmitted to TD.TD Remote Deposit Capture Customer User Guide28
Generate Reports1. From the menu on the left navigation bar, click Reports.2. Select a report from the dropdown list of available reports.3. Select the range of dates to include in the report.Note: Maximum date range is 90 calendar days.4. Some reports require additional parameters to be selected. If this information is required oravailable, select from the displayed options.a. We suggest that each day prior to cut-off, you run the Transaction Status LocationReport to ensure that all transactions created have been transmitted. The statuses inthis report are:In ProgressShows transactions which are in deferred status.ReleasedShows transactions which are in released status (transactions will be available inthe Transmit screen).TD Remote Deposit Capture Customer User Guide29
Acknowledged Shows transactions successfully transmitted to TD.b. For the Workflow Audit Report, select the Action and User to run the report.TD Remote Deposit Capture Customer User Guide30
c. For the Login Audit Report select the user to run the report.NOTE: Use the Double Right arrow to select all items for the parameter or use the Double Left arrowto deselect parameters.5. Once all the reporting criteria are selected, click Generate Report.6. Once the report displays, click View PDF to view the PDF version (optional).NOTE: Adobe Reader is required to view the PDF version. The PDF report may be saved or printed to alocal printer. Hover over the bottom center of the document to display the PDF options.Research Items1. From the menu on the left navigation bar, click Research.2. Select the range of dates to include in the query.Select the same start and end date to search on a single date.3. Select the Locations to include in the transaction query. The list will include all locations forwhich th
System administrator rights for the computer are required to activate and configure each computer running Remote Deposit Capture. As such, please ensure your system administrator is present during first time activation and configuration of Remote Deposit Capture. With Windows 8.1 & Windows 10 operating system