Transcription
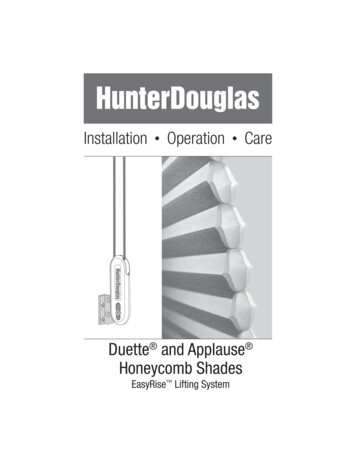
Installation Operation CareDuette and Applause Honeycomb ShadesEasyRise Lifting System
CONTENTSGetting Started:Mounting Types And Window Terminology . 1Installation Components Needed . 1Tools And Fasteners Needed . 2Product View . 3Installation:Mount The Installation Brackets For Inside Mount . 4Mount The Installation Brackets For Outside Mount . 5Mount The Installation Brackets For End Mount . 6Install The Shade . 7Attach The Hold-Down Brackets (Optional) . 7Attach The Universal Cord Tensioner (UCT) . 7Operation:Operate The Shade . 11Troubleshooting . 12Care:Cleaning Procedures . 15Remove The Shade . 16Child Safety:Warning . 17Cord Loop Shades. 17Questions?Call the Hunter Douglas Customer Information Center at1-888-501-8364. 2009 Hunter Douglas Inc. Registered trademark of Hunter Douglas Inc. Trademark of Hunter Douglas Inc.
GETTING STARTEDThank you for purchasing Hunter Douglas Duette or Applause honeycomb shades. Withproper installation, operation, and care, your new shades will provide years of beauty andperformance. Please thoroughly review this instruction booklet before beginning the installation.Mounting Types And Window TerminologyIf the installation brackets are mounted correctly, the rest of the installation process will followeasily. To prepare for this important first step, review the mounting types and basic windowterminology illustrated below.MoldingTop SillJambJambCollectively, the sills andjambs are called the“window casement.”Bottom SillInside MountShade fits withinwindow opening.Installation Components NeededCheck the packaging to be sure you have all the componentsneeded to install your shade. Keep the packaging until theshades perform to your satisfaction. If your shade has aprotective plastic cover on the fabric covered headrail, keepthe plastic in place until the shade is installed.Required Components Installation Brackets.The number of installationbrackets required varies withshade width, as shown in thetable. Your order will includeone of the following types ofinstallation brackets.3/8" Pleat SizeInstallation BracketOutside MountShade mounts outsidewindow opening.ShadeWidthBracketsRequired12" - 36"2361/8" - 72"3721/8" - 108"41081/8" - 144"51441/8" - 174"63/4" And 11/4"Pleat SizeInstallation BracketIMPORTANT: For illustration purposes, the 3/4" and 11/4" installation brackets are shownthroughout the following instructions. The 3/8" brackets follow these same installationprocedures.1
GETTING STARTED Universal Cord Tensioner (UCT) Installation Kit. The UCTfunctions as a safety device that makes the cords less accessibleto children and pets. The cord control will not functionproperly without the UCT installed correctly.tionsOptional Components Extension Brackets. Extension brackets can add up to3 1/2" of clearance for outside and end mounts. If requested,there should be the same number of extension brackets asinstallation brackets. Spacer Blocks. Spacer blocks provide additional clearanceto accomodate various molding widths. If ordered,Hunter Douglas provides both 1/2" and 1/8" width spacerblocks designed to work separately, or fit together, if desired.There should be a maximum of 11/2" of spacer blocks perinstallation bracket. Separate spacer blocks prior to use.Extension Bracket(Optional)1/2"Spacer Block(Optional)1/8"Spacer Block(Optional) Hold-Down Brackets. Hold-down brackets provide stabilityand prevent swaying by securing the bottom rail (i.e. oftenused in French door applications).Tools And Fasteners NeededHold-Down Bracket(Optional) Flat blade and Phillips screwdriver Level Measuring tape and pencil Needlenose pliers Power drill, 3 32" drill bit, and a1 4" hex driver In addition, you will need fasteners designed to work with your specific mounting surface(s). #6 Hex Head Screws (Provided). Two 11 2" screws are provided per installation bracket. Longer #6 Hex Head Screws (Not Provided). If using spacer blocks, use a #6 mountingscrew long enough for a secure attachment. Wall Anchors (Not Provided). If mounting into drywall, you will need wall anchors toensure a secure installation. Speed Nuts and Screws (Provided). Extension brackets come with screws and speed nuts.#6 x 1½"Hex Head Screw(Provided)2Longer #6 Hex Head ScrewFor Use With Spacer Blocks(Not Provided)Wall Anchor OrExpansion Bolt(Not Provided)Speed NutAnd Screw(Provided With EachExtension Bracket)
GETTING STARTEDProduct ViewInstallation BracketsFabric-CoveredHeadrailEnd CapUniversal CordTensioner AndBracketOptionalHold-DownBracket iseasyR dee E Up ShatteDu ttomBo CenterRailUniversal Cord TensionerAnd BracketNot Shown: Duette And ApplauseTwo-On-One shade.-UpBottomRailasyRtte EDuedeSha/ownop-Dise TomBott3
INSTALLATIONMount The Installation Brackets For Inside Mount Measure in 2" from each jamb for bracket location. If more than two installation brackets came with your order, space additional bracket(s) onstuds, evenly between the two end brackets.2"Space Evenly2"Space EvenlyInstallation BracketsJambs Mark the location of the screw holes. The depth required for a minimummounting or a fully recessed mounting willvary depending on the fabric pleat size. Forfully recessed mounting, the fabric will beflush with the front of the sill, when raised.Refer to the chart for depth requirements.Depth Chart For Bracket PlacementFabric PleatSizeFullyMinimum Recessed31/2"2 1/4"3/4 "1/2"2 7/8"11/4"1/2"3 5/8"/8 " Fully recessed inside mounting is best forenergy efficiency. If mounting to a heavily textured surface, use the1/8" spacer block as a shim between the installationbracket and the mounting surface. Use a 3 32" drill bit to drill holes for the mountingscrews.IMPORTANT: If you are fastening the installationbrackets to drywall, be sure to use wall anchorsand follow the instructions provided with theanchors. (Anchors not provided.) Use a level to check that the mounting surface islevel. Shim the brackets if necessary. (Shims notprovided.) Use the hex head screws provided to fasten theinstallation brackets to the mounting surface.IMPORTANT: The front edges of the installationbrackets must be level and aligned to each other.4Inside MountFullyRecessedDepth(See Chart)
INSTALLATIONMount The Installation Brackets For Outside Mount With the shade lowered, center it over the window opening at the desired height. Use apencil to lightly mark each end of the headrail.Headrail End Marks2"Space EvenlySpace Evenly2"Window Opening Alternatively, measure the width of the headrail to determine its centerpoint. Measure thewidth of the window and determine its centerpoint. Lower the shade and align these centerpoints, then mark each end of the headrail at thedesired height. Measure and mark 2" in from each end of the headrail.Outside Mount If more than two installation brackets came withyour order, space additional bracket(s) evenly onstuds, between the two end brackets and marktheir location. Center each installation bracket on the marksand locate where to drill the screw holes. A minimum of 11/4" flat vertical height isrequired from the top of the window sill.11/4" MinimumFlat VerticalSurface Height The top of the installation brackets should beat the desired height. The brackets should be leveland aligned.CAUTION: The rear of the blocks/brackets must be flush againsta flat mounting surface. Do not mount brackets on curved molding. Using a 3 32" drill bit, drill holes for the mounting screws.IMPORTANT: If you are fastening the installation brackets to drywall, be sure to usewall anchors and follow the instructions provided with the anchors. (Anchors not provided.) Fasten installation brackets to the mounting surface using the hex head screws provided.5
INSTALLATION If using spacer blocks, first attach theinstallation bracket to the spacer block beforestacking additional spacer blocks together.InstallationBracket Insert the legs of the installation bracketinto the tabs on the spacer block.Spacerblocks maybe stacked. Then rotate the bracket back.TabsInstallationBracket Attach the spacer block/installation bracketto a flat vertical mounting surface with a#6 mounting screw long enough fora secure installation (screws not provided).SpacerBlock When using extension brackets, attach an installationbracket to the underside of each extension bracketusing the provided screws and speed nuts.SpeedNutExtensionBracketMount The Installation Brackets For End MountEnd mount the headrail when conventional mounting techniqueswill not work, for example, in an arched window.SpeedNut Mount the extension brackets on a surface at least11 4" wide. Attach the installation brackets to the extension bracketsusing the provided screws and speed nuts.IMPORTANT: This feature is not available for Two-On-One shades.611/4"Minimum
INSTALLATIONInstall The Shade Position the shade sothat the cords face you. Slip the headrail into theinstallation brackets sothe front of the bracketslides under the frontgroove on the top of theheadrail.Front of bracketfits under groove.BracketHeadrailBack of headrailsnaps into the bracket. Gently roll the back of the headrail up and push back to snap into place.Attach The Hold-Down Brackets (Optional)Hold-down brackets are only used on outside mounted shades. Lower the shade and place the pins from the hold-down bracketsinto the bottom rail end caps. On the mounting surface, mark the bracket hole locations. Check that the brackets are level and aligned, andattach them to the mounting surface using two screws.IMPORTANT: Disconnect the bottom rail from the hold-down brackets to raise the shade.Attach The Universal Cord Tensioner (UCT)Before doing anything, you must first slide the cord tensioner to the bottom ofthe cord loop. Insert a small screwdriver, punch, or awl through thescrew hole at the bottom of the cord tensioner.UniversalCordTensioner Move the screw hole down to the indicator line to releasethe safety mechanism. Slide the cord tensioner down to the bottom of the cordloop.IndicatorLineIMPORTANT: It is imperative that the cord tensioner be properly secured to the wallor window frame to reduce children’s access to the cord loop. Young children canstrangle in cord loops. They can also wrap cords around their necks and strangle.Furthermore, the shade will not operate properly unless the cord tensioner issecured. A cord tensioner installation kit has been included with your shade.7
INSTALLATION Choose A Mounting OptionsInside MountWithout MountBracket(1 screw)Inside MountWith MountBracket(3 screws)Outside Mount(3 screws)Inside Mount (Without Bracket) Mark Screw Location: Insert an awl, punch, or small tip screwdriver into the screw holeon the cord tensioner. Pull the screw hole down so that its center aligns with theindicator lines on the cord tensioner.Pull the screwhole on thecord tensionerdown to theindicator line.IndicatorLineIMPORTANT: Hold the cord tensioner firmly in place and checkthat the cord can move freely through it. If the cord does not move freely through the cord tensioner, it is too tight and the cordtensioner and/or mount bracket should be moved up. If the cord tensioner locks onto the cord, it is too loose and thecord tensioner and/or mount bracket should be moved down. Mark and pre-drill the screw hole. Mount The Cord Tensioner Use a Phillips screwdriver and one of the longer screws provided toattach the cord tensioner directly to the wall. Final Check Ensure the cord can move freely through the cordtensioner without engaging the lock. The center of thescrew hole should be aligned with the indicator line onthe cord tensioner.CAUTION: Do not pull the screw hole down to the bottom of the slot. This may causethe cord to become too tight, affecting the window covering function and increasingcord wear.8
INSTALLATIONInside Mount With Bracket: Break Off The Inside Mount BracketOutsideMount BracketInsideMount Bracket Mark Screw Locations Attach the inside mount bracket to the cord tensioner. The nub on the inside mount bracket fits into the back of thescrew hole in the cord tensioner.ScrewHoleNub Insert the small screw into the front of the screw hole to securethe cord tensioner to the bracket. Pull down on the bracket, aligning the center of the screwhole with the indicator line on the cord tensioner.IMPORTANT: Hold the cord tensioner firmly in placeand check that the cord can move freely through it. If the cord does not move freely through the cordtensioner, it is too tight and the cord tensioner and/or mount bracket should be moved up.Pull the screwhole on thecord tensionerdown to theindicator line.IndicatorLine If the cord tensioner locks onto the cord, it is too loose and the cordtensioner and/or mount bracket should be moved down. Mark and pre-drill the screw holes.IndicatorLine Mount The Cord Tensioner Pull down on the mounting bracket and alignit to the drilled holes. Insert one of the two longer screws andloosely attach the bracket to the wall.IndicatorLine Pivot the bracket to align it with the secondscrew and attach the second screw. Tighten both screws. Final Check Ensure the cord can move freely through the cord tensioner without engaging thelock. The center of the screw hole should be aligned with the indicator line on the cordtensioner.CAUTION: Do not pull the screw hole down to the bottom of the slot. This may cause the cordto become too tight, affecting the window covering function and increasing cord wear.9
INSTALLATIONOutside Mount: Break Off The Outside Mount BracketOutsideMount BracketInsideMount Bracket Mark Screw Locations Attach the outside mount bracket to the cord tensioner. The nub on the outside mount bracket fits into the back of the screwhole in the cord tensioner.ScrewHoleNub Insert the small screw into the front of the screw hole to secure thecord tensioner to the bracket. Pull down on the bracket, aligning the center of the screwhole with the indicator line on the cord tensioner.IMPORTANT: Hold the cord tensioner firmly in placeand check that the cord can move freely through it. If the cord does not move freely through the cordtensioner, it is too tight and the cord tensioner and/ormount bracket should be moved up.Pull the screwhole on thecord tensionerdown to theindicator line.IndicatorLine If the cord tensioner locks onto the cord, it is too loose andthe cord tensioner and/or mount bracket should be moved down.IndicatorLine Mark and pre-drill the screw holes. Mount The Cord Tensioner Detach the cord tensioner from the bracket byremoving the small screw.IndicatorLine Use a Phillips screw-driver and the two longer screwsprovided to attach the outside mount bracket to the wall. Reattach the cord tensioner to the outside mountbracket using the smaller screw provided.OptionC Final Check Ensure the cord can move freely through the cord tensioner withoutengaging the lock. The center of the screw hole should be aligned withthe indicator line on the cord tensioner.CAUTION: Do not pull the screw hole down to the bottom ofthe slot. This may cause the cord to become too tight,affecting the window covering function and increasingcord wear.10
OPERATIONOperate The Shade Pull down slowly on the rear cord of thecord loop to lower the shade.To Lower:Pull downon rear cord.To Raise:Pull downon front cord. Pull down slowly on the front cord of thecord loop to raise the shade. To operate Top-Down/Bottom-Up shades,the right cord operates the center rail andthe left cord operates the bottom rail.IMPORTANT: You must first lower thebottom rail before lowering the center rail.Likewise, you must first raise the center railbefore raising the bottom rail.HunterDouglas HunterDouglas IMPORTANT: If the cord tensionermoves up the cord, you have not securedit to the wall or window frame. You mustdo so for the shade to operate properly.See Attach The Universal Cord Tensioner (UCT) on page 7.These cordsoperate thecenter rail.These cordsoperate thebottom rail.CenterRailBottomRail11
OPERATIONTroubleshootingProblemSolutionThe shade is hardto raise or lower,or will not raiseor lower. Check that the cord tensioner is mounted correctly. See Attach TheUniversal Cord Tensioner (UCT) on page 7. Make sure that the shade fabric is not caught between theinstallation bracket and the headrail. Check that the headrail and installation brackets are level andaligned in the window. The window may be out of square. To checkif the window is square, measure the diagonals. Level the headrailby shimming the installation brackets, if necessary. Check that cord loops are not pinched or tangled. If hold-down brackets are used, make sure they have beenreleased before operating the shade.The universal cordtensioner hasclimbed to theheadrail. Pull down on the spring to relieve tension and pull the universalcord tensioner to the bottom of the cord loop. Properly mount thecord tensioner. See Attach The Universal Cord Tensioner (UCT) onpage 7.The universal cordtensioner grabsonto the cord uponoperation. Check that the universal cord tensioner is mounted properly.Reinstall, if necessary. See Attach The Universal Cord Tensioner(UCT) on page 7.The shade willnot fit into theinstallationbrackets. Check that the installation brackets are level and aligned. Adjustand/or shim to level, if necessary. Be sure the heads of the mounting screws are flush against theinstallation bracket. Check that the headrail is completely inserted into the installationbrackets. See Install The Shade on page 7.12
OPERATIONProblemSolutionThe shade raisesor lowers unevenlyor the bottom railis uneven whenfully raised. Lower the shade completely, to allow it to “self-correct” skewing.Pull the cord loop slowly to prevent the shade from skewing. For Top-Down/Bottom-Up shades both the center rail and thebottom rail may skew if the cord loop is pulled too quickly. Lowereach rail completely, to allow them to “self-correct”. Check that the headrail and installation brackets are level andaligned in the window. The window may be out of square. To checkif the window is square, measure the diagonals. Level the headrailby shimming the installation brackets, if necessary.The bottom rail isnot level, or theshade height isincorrect.Shade Height AdjustmentBottom RailShade height and adjustments to level thebottom rail can be made by adjusting thecord on the underside of the bottom rail. Locate the ferrule, seated in a pocket inthe bottom rail.PocketFerruleCordPull cordto removeferrule. Remove the ferrule by pulling onthe excess cord. If the cord hasbeen trimmed, you will need to useneedlenose pliers to access it.To ShortenSlide theferrule upto shortenthe cord. To shorten the cord, hold the cord tightunder the ferrule. Then slide the ferruleup toward the pocket. To lengthen the cord, hold the cord tightbetween the pocket and the ferrule.Then slide the ferrule down. After adjusting, place the ferrule fullyback into the pocket. Once you are certain of the finaladjustments, tape the extra cord lengthto the bottom rail, or into the groove onthe bottom rail (for future adjustments).ToLengthenSlide theferrule downto lengthenthe cord.13
OPERATIONProblemThe ferrule hascome off the cord.How do I rethreadthe ferrule?14Solution Thread the end of the cord into the taperedend of the ferrule. Loop the end around theferrule and back through the tapered end.Make sure the loop fits into the groove on theside of the ferrule.e sure the cordloop fits intothe ferrulegroove.CordLoop
CARECleaning ProceduresHunter Douglas honeycomb shades are made of an anti-static, dust-resistant fabric which repelsdirt and dust. For most honeycomb fabrics, the following options are available if your shadeneeds cleaning.Dusting Regular light dusting with a feather duster is all the cleaning that is needed inmost circumstances.Vacuuming For deeper cleaning, vacuum gently with a brush attachment.CAUTION: Do not vacuum Architella Elan or Architella Elan Eclipse fabrics.Compressed Air/Hair Dryer (Cool Setting) Use compressed air or a hair-dryer on a cool setting, to blow dust and dirt off of shades.Spot-Cleaning Prepare a solution of warm water and a mild detergent. Dampen a clean cloth in the solution and wring it out. Dab the spot with the dampened cloth until it is gone. Do not rub the fabric. Allow the shade to dry in the completely lowered position.CAUTION: Do not spot-clean Batiste, Opalessence , Puressence , or Royale fabrics.Bathtub Cleaning/Water Immersion Immerse the shade in a basin or bathtub filled with a mild detergent. Never immerse theheadrail into the solution. Rinse with clean water. Before removing from the rinse water, fully raise the shade and tilt it to allow excess waterto drain off. Reinstall the damp shade, lower it, and let it dry completely.CAUTION: Do not immerse Commercial, Puressence, Royale, all opaque fabrics, and anyfabric-covered valances.15
CAREUltrasonic Cleaning Some honeycomb fabrics can be ultrasonically cleaned by a professional. Specify that a mild detergent solution be used. Never immerse the headrail into the solution. Dry the shade completely in the lowered position.CAUTION: Do not ultrasonically clean Casuelle , Commercial, fabric-covered valances,Opalessence , Puressence , all opaque fabrics, and any fabric-covered valances.On Site Injection/Extraction Cleaning This type of professional cleaning injects a cleaning solution into the fabric and extracts thedirty solution in the same motion. A dry method of injection/extraction is required for Architella, Casuelle, Commercial,Opalessence, Panache , Sunterra , and any opaque fabrics. If using injection/extraction for Batiste fabrics, specify that no chemicals are used(water only). Never immerse the headrail into the solution.CAUTION: Do not use injection/extraction cleaning on Puressence fabrics, and any fabriccovered valances.Remove The Shade While holding the headrail, lowerthe shade approximately 4".Back Of ShadeHeadrail Push back on the bottom tab ofthe installation bracket to releasethe bottom edge of the headrail. After releasing the bottom edge,roll the back of the headraildownward and out from thebracket.BracketBottomTabIMPORTANT: If the bracket is stiff, the headrail may be difficult to remove. Use a small flatblade screwdriver and push the blade against the bottom tab of the mounting bracket.16
CHILD SAFETYWarningWARNINGFor more safety information call 1-888-501-8364in the U.S. or 1-866-662-0666 in Canada.Young children can STRANGLE in cord loops. They can also wrap cords around theirnecks and STRANGLE. Always keep cords out of the reach of children. Move cribs, playpens and other furniture away from cords. Children can climbfurniture to get to cords.Cord Loop Shades Attach the cord tensioner on the cord loop to the wall or windowcasement. See Attach The Universal Cord Tensioner (UCT) on page 7.This can prevent children from pulling cord loops around their necks. Hunter Douglas provides a cord tensioner installation kit withinstructions for attaching the cord tensioner. For the shade to operateproperly, the cord tensioner must be correctly mounted and secured. Only Hunter Douglas supplied cord tensioners and hardware shouldbe used. Replacement parts may be obtained bycontacting the Hunter Douglas Customer Information Center at1-888-501-8364.17
Hunter Douglas provides both 1/ 2" and 1/ 8" width spacer blocks designed to work separately, or fi t together, if desired. There should be a maximum of 11/ 2" of spacer blocks per installation bracket. Separate spacer blocks prior to use. Hold-Down Brackets. Hold-down brackets provide stability